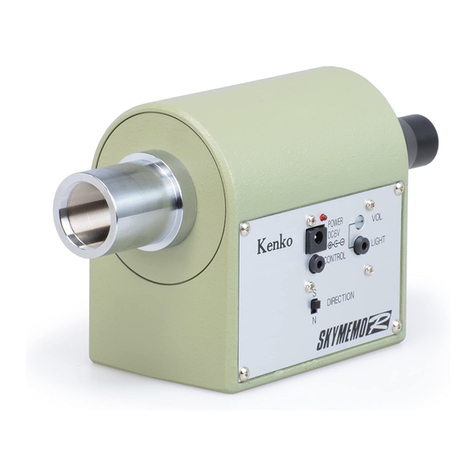
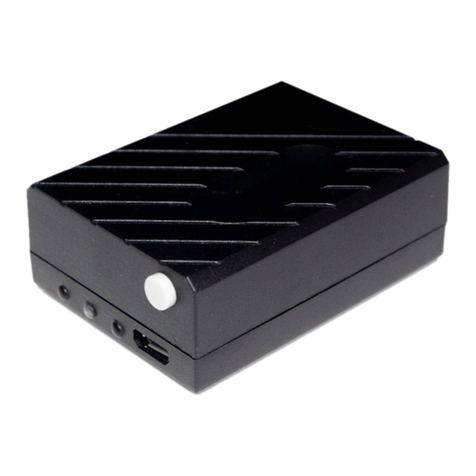
Kenko Skymemo RS User manual

Single-Axis Tracking Mount
Instruction Manual
* Camera, ball-head and tripod are sold separately.

Power socket
Polar scope (Polar axis shaft)
Hand controller socket
SUN/MOON/FIXED STAR
mode selector switch
Half-Speed operation selector switch
Power indicator
Polar finder (reticle rotation)
Polar finder (focus adjustment)
Reticle illuminator screw socket
Reticle illuminator intensity control
Reticle illuminator power socket
North-South operation selector switch
SKYMEMO RS (Tracker)
Camera mount Camera rotation clamp
Camera tracker arm
RA attachment clamp
Hand controller
Stop
Double
speed
Reticle illuminator
M8 thumbscrew Metal washer
Battery case
Check if the Skymemo RS works normally by taking a test shot in advance.
No Compensation for Photographing
Name of Each Part
Other necessities
2 sets of camera and lens
1 set is applicable if the Skymemo Balance Weight (sold separately) and Skymemo Weight Shaft
(sold separately) are used together.
Ball head or similar
Tripod
Power C-cell x 4pcs.
Remote switch
<Precaution>
Test photographing
2

Camera and Lens
Supported Cameras
1. The camera with a bulb setting or having a function to make an adjustment for setting a desired exposure time
2. The camera that can be mounted using a 1/4 tripod screws (conforming to the JIS standard)
Any camera that meets the above two conditions can be used. Generally, a digital single-lens reflex camera,
film-type single-lens reflex camera or lens-shutter camera with a mechanical bulb function is used.
A new digital camera with a power-operated bulb and other recent models (digital cameras) can also be used, but a
majority of such cameras are subject to significant battery consumption in the bulb mode or require dedicated cables
(electromagnetic release, cable switch, etc.). Read your camera's manual and check the applicability beforehand.
This product is a portable equatorial telescope for observing stars, so the use of a super-telephoto lens may not be
suitable. As a rough guide, telephoto lenses of up to 300 mm (35 mm in full size) are usable. If a telephoto lens is to be
used, use the tripod mount ring on the lens side to mount the lens. Do not combine a camera or lens that would result
in an extreme front-rear balance. (The use of a zoom lens or a telephoto lens without a tripod mount ring is not
recommended.)
Tripod
For the tripod, our Skymemo Tripod II WH is recommended. It can be installed easily using two finger screws, and
adjustment of the polar alignment is simple. If a photographic tripod is to be used, use a sturdy one of medium size
or larger. A tripod with a ball-head is not suitable.
Power source
The Skymemo RS uses four C batteries. For normal conditions, alkali manganese dry batteries or manganese dry
batteries are recommended. Nickel cadmium (NiCd) batteries and nickel hydrogen batteries are also usable, but such
batteries only provide low voltage (1.2 V x 4 = 4.8 V), which may not be enough to illuminate the pilot lamp. Either way,
the battery capacity will drop significantly when the outside air temperature is low, especially when it drops to below 0°C.
Therefore, take proper measures to keep the batteries at appropriate temperatures.
Do not use with any other power (e.g. AC adapter or lead battery). Otherwise, electronic circuit might be
damaged by reverse voltage or overvoltage.
3

Setup
First, confirm that the DIRECTION switch on the main panel is set to the correct position.
S indicates the Southern Hemisphere, while N represents the Northern Hemisphere.
Next, confirm that the SUN/MOON/FIXED STAR mode selector switch is set to the
correct position.
1.Securing the Skymemo RS on a tripod
When the Skymemo Tripod II WH is used, use two of the
supplied M8 finger screws and fix the mount through the
two screw holes provided at the front and rear on the
bottom face of the Skymemo RS. Fig.1
If a normal photographic tripod is used, use the 1/4 tripod
screw hole provided at the center of the bottom face of the
tracker. Fig.2
Fig.1
Fig.2
Fig.3
2.Placing the camera tracker arm
Loosen the RA attachment clamp on the camera tracker
arm, insert the camera tracker arm into the polar axis
shaft on the tracker, and tighten the RA attachment clamp
to secure the camera tracker arm.
Install the camera tracker arm in such a way that the camera
rotation clamps come to the front side, as shown in the figure 3.
New Functions on the main panel
Tracking mode
The Skymemo RS offers a new function whereby you can select the FIXED STAR
mode, SUN mode or MOON mode using a switch on the main panel. Check the
tracking mode before shooting.
Half-speed mode
In this mode the tracking speed is half that of the FIXED STAR mode.
4

3.Placing a camera
Loosen the camera rotation clamps slightly and turn
the camera mount to install the camera.
The flexibility of layout adjustment increases when a
ball-head, etc., is used. Fig. 4
If a lens with a tripod mount ring is used, remember to
use the tripod mount ring of the lens unless there is a
reason to do otherwise. As the tripod mount ring
rotates, you can flexibly adjust the layout and optimize
the front/rear balance. Fig.5
If a single camera is used with the Skymemo Balance
Weight (sold separately) installed, remove one camera
rotation clamp and take out the camera mount. Screw
the Skymemo Weight Shaft (sold separately) into the
screw hole, which is now accessible. Fig.6
CAUTION : Due to balance weight is so heavy,
please pay attention to handle it not to injury
yourself and damage equipments.
4.Balancing the camera tracker arm
Loosen the RA attachment clamp and balance the
polar axis shaft. If two cameras are used, adjust the
balance by using the different lengths of the arms. If
one camera is used, the balance should be adjusted
using the Skymemo Balance Weight (sold separately).
When balancing the polar axis shaft, be sure the east
side of the shaft is slightly heavier. This will prevent
negative impact from a backlash of the gears. Fig.7
Fig. 4
Fig. 5
Fig. 6
Fig. 7
5

5.Adjusting the polar axis
Follow the instructions on the battery case to install the batteries
correctly, and insert the plug on the cable into the power socket
on the Skymemo RS. The LED on the tracker should turn on and
the motor should actuate.
Screw the reticle illuminator into the polar scope and insert the
plug on the cable into the reticle illuminator power socket on the
tracker. Fig.8
Turn the polar finder (focus adjustment) part of the polar scope
until the reticle pattern is clearly visible. The brightness of reticle
illumination can be adjusted by inserting a precision screwdriver
into the reticle illuminator intensity control in the tracker.
Move the tracker up/down and to the left/right to adjust the polar
axis. Fig.9 After the adjustment, tighten the clamps.
For details on how to adjust the polar axis, refer to the detailed
explanation on the page 8 and 9.
Remember to look into the polar scope before and after shooting
to confirm that the accurate polar alignment has been maintained.
The failure to do so may result in undesirable results.
You can use the above method to check the operation of the
tracker, but another way to check its operation is to put your ear to
the tracker and see if you can hear the motor sound.
6.Framing and Shooting
Hand controller
Normally with the Skymemo RS, it isn't necessary to touch the
unit upon shooting. However, if a guide telescope is used, insert a
hand controller plug into the hand controller socket on the tracker.
Stop and speed control is performed using the hand controller, but
half-speed is set with the half-speed operation selector switch on
the main panel.
Fig. 8
Fig. 9
Fig. 10
Before
exposure
After
exposure
Loosen the RA attachment clamp and camera rotation clamps,
point to the target, and lock the clamps. To turn the view field, use
the rotation of a ball-head or the tripod mount ring attached to the
lens.
Also, remember not to use any setting that will change the
balance of the polar axis before and after the exposure, as shown
in the figure 10. Otherwise, shooting problems are likely to occur.
AF camera lenses and telephoto lenses using ED or fluoric are
not adjusted for infinity ( ). If any such lens is used, make
adjustments in advance using a fixed star, etc., found near the
shooting field.
Also note that, with an AF camera lens, even a very small force
can operate the focus ring. Accordingly, secure the ring using
tape, etc., before use.
6

Polar alignment
1.What the polar alignment is
Polar finder reticle for both the Northern and
Southern Hemispheres
Stars rise from the east and set in the west
every day. This is due to a phenomenon called
“diurnal motion,” which results from the rotation
of the earth. The center of this motion is located
around the North Star, as viewed from the
earth. Therefore, stars appear to rotate around
the North Star. The equatorial telescope can
track this diurnal motion with ease because it
has a polar axis that simulates the same motion
as the rotational axis of the earth. For proper
tracking, however, the polar axis must be set so
that it's parallel with the rotational axis.
2.Placing the reticle illuminator
Screw the reticle illuminator into the polar scope
and insert the plug into the reticle illuminator
power socket on the Skymemo RS. The
brightness of illumination can be adjusted
through the reticle illuminator intensity control
using a precision screwdriver. Next, turn the
polar finder (focus adjustment) part of the polar
scope until the reticle pattern is clearly visible.
Strictly speaking, the earth is a rotating ellipsoid
that bulges slightly in the direction of the
equator. As the gravitational pull of the sun,
moon, etc., acts upon the mass of this bulged
part of the earth, the earth moves like a pivoting
top by changing its direction periodically. As a
result, we the star watchers see the north and
south poles of the skies move along a large arc
of 23.4° in radius around the pole of the ecliptic
(precessional circle) in periods of approximately
25,800 years. This translates into 50.27” per
year. From the viewpoint of observation of star
positions--essentially nutation, polar motion,
aberration of light, annual inequality,
atmospheric refraction, etc.--should also be
considered. However, because these deviations
are minor, correcting a general change of
precession is considered enough for the
amateur sky watcher. The Skymemo lets you
make this correction simply by shifting the
positions of reference stars.
the Big
Dipper the
Southern
Cross
Actual starry sky
The Northern Hemisphere The Southern Hemisphere
Cassiopeia Achernar
7

3.Polar alignment in the Northern Hemisphere
Position of Equatorial Telescope
Introduction of Reference Stars
First, install the tripod so that one of its legs faces the North
Star, and install the Skymemo RS with its polar axis oriented
roughly toward the North Star. Next, adjust the orientation of
the tracker accurately so that it faces the North Star directly
when viewed either from the top or the side.
4.Polar alignment in the Southern Hemisphere
Position of Equatorial Telescope
There is no bright star near the South Pole of the sky, so use a
compass and celestial map as a reference to set the polar axis.
Correction Method
Introduction of Reference Stars
The reticle pattern has auxiliary graduations for use in
correcting the change of precession for reference stars D
and E. Use these graduations to introduce the stars into
their respective positions as shown in the figure. For any
other year, introduce the reference stars into their
appropriate positions, which are determined by prorating
the intervals among the auxiliary graduations.
Correction Method
The reticle pattern has auxiliary graduations for use in correcting the change
of precession for reference stars B and C. Use these graduations to introduce
the stars into their respective positions as shown in the figure. For any other
year, introduce the reference stars into their appropriate positions, which are
determined by prorating the intervals among the auxiliary graduations.
Correction Method –
the Northern Hemisphere
The North Star is always introduced into gap A in the line
on the reticle pattern, but it will be introduced closer
toward center with the passage of years.
Correction Method –
the Southern Hemisphere
The Sigma Octantis is always introduced into gap G in the
line on the reticle pattern, but it will be introduced gradually
outward with the passage of years.
Find the “Southern Cross” and “Achernar” in the southern sky.
Next, look into the polar scope and turn the polar finder (reticle
rotation) until the actual directions of the Southern Cross and
Achernar match the corresponding directions on the reticle
pattern. (One can't actually see both the Southern Cross and
Achernar in the view field of the polar scope. Depending on the
location and time of observation, only one of them can be seen).
Unfortunately, there is no star as bright as the North Star near the
South Pole of the sky, so the “Octans 7 G, 10G, and σ” are used
as reference stars. Introduce the 7G in position D, 10G in position
E, in position F and σin position G. All are dark, inconspicuous
stars of the fifth or sixth magnitude, so use their mutual positional
relationships and reference a celestial map, etc., to introduce each
star in the correct position. As a tip, confirm that the positions in
which the stars have been introduced do not change after
operating the Skymemo for a while. Once the reference stars have
been identified, simply repeat the adjustments until each of them
enters its respective introduction position.
Find the actual “North Star,” “Big Dipper” and “Cassiopeia”
in the northern sky.
Next, look into the polar scope and turn the polar finder (reticle
rotation) until the actual directions of the Big Dipper and
Cassiopeia match the corresponding directions on the reticle
pattern. (One can't actually see both the Big Dipper and
Cassiopeia in the view field of the polar scope. Depending on
the location and time of observation, only one of them can be
seen). By adjusting the polar finder (reticle rotation) as
mentioned above, you should see the reference stars in the view
field of the polar scope. The brightest star in the view field is the
North Star, so move the North Star up/down and to the left/right
by a small amount at a time until it enters gap A in the line on the
reticle pattern. This way the two remaining reference stars are
automatically adjusted in such a way that they're near B and C.
The North Star ( “Little Dipper ” ) at position A is abundantly bright.
However, the “Little Dipper δ” at position C is a type of double star in
that it's a star of the 4.4th magnitude having another star of about the
sixth magnitude moving with it at a distance of 24'. Therefore, one
shouldn't have any trouble finding the “Little Dipper δ” The Cepheus 51”
at position B is a dark star that isn't otherwise easy to spot, but it can be
found effortlessly based on its positional relationship with other stars.
Once these two stars have been identified, simply repeat the
adjustments until both enter their respective introduction positions.
2005
2010
2020
2030
2005
2010
2020
2030
8

Troubleshooting
Condition
The polar axis shaft has play.
The reticle pattern isn't visible
(not very clear).
Starts appear blurry.
Image is out of focus.
This isn't a problem because a slight amount
play is needed for the gears to operate.
Be sure to check the clamps before shooting.
The view field isn't properly adjusted. Turn the polar finder (focus adjustment) to
adjust the view field.
The focus ring has moved. Secure the focus ring with tape beforehand.
One of the clamps is loose.
Cause Remedial action
The reticle illuminator is too dark (bright). Adjust the brightness (VOL: reticle
illuminator intensity control).
Check the polar scope before and after
shooting.
The polar alignment is off.
If a telephoto lens is used, pay attention to
the front-rear balance.
If the altitude is low, use guided shooting.
The lens is deflected.
Confirm after shooting that the Skymemo
RS is operating.
This is a negative effect of atmospheric
refraction.
If the temperature is low, keep the
batteries at the proper temperature.
The Skymemo RS stopped operating due
to the drop in battery voltage.
Check before shooting whether contact
would occur after exposure.
The arm moves by 15° per hour.
The camera or lens has contacted the
fixing part.
In the case of IF focusing, a significant
change in Skymemo RS position may bring
the image out of focus.
Adjust the focus with the Skymemo RS
positioned close to the shooting position.
In conditions of high temperature or
humidity, or when the Brownie size is
used, the film will float/move.
Shorten the exposure time.
Try using a different film.
9
Operation Northern or Southern Hemisphere (switchable)
Approx. 3 kg – tracker plus camera arm
240mm x 90mm x 130 mm
Approx. 2.5kg at each end
Total 5kg
1/4 tripod screws (conforming to the JIS standard)
Stepper
6VDC (C-cells x 4pcs.)
2X or stopped
FIXED STAR, SUN or MOON
1:500, 1:2, Worm: 1:144
>24 hours (manganese batteries @ 20 degrees C in internal test)
Weight
Dimensions - LxWxH
Load capacity
Camera mount
Gears
Polar scope
Motor type
Tracking mode
Hand controller
Power source
Battery life
Specifications
Magnification: 4X
Actual field of view: 10 degrees
Reticle illuminator and reticle pattern
Accuracy: better than 5’
Filter thread: M30.5 P:0.5

Exposure times for unguided tracking
Focal length
(35mm full size equivalent)
Max. exposure
(minutes)
50
100
135
200
300
70
* Measured values in our internal tracking test.
(These are not guaranteed values.)
* APSC size: If you are using a micro four-thirds
camera, etc., the corresponding focus distances
should be calculated.
The maximum exposure time for unguided tracking varies depending on the shooting
environment (strength of the legs, accuracy of adjustment of the polar axis, atmospheric
refraction, lens deflection, etc.). Use the values in the table above only as rough guidelines.
When a long-focus lens is used or when the exposure time is long, perform guided shooting
by linking a guiding scope.
Specifications and appearance are subject to change without notice.
40
35
30
15
Kenko Tokina Co., Ltd.
Kenko International Division
3-9-19 Nishi-Ochiai, Shinjuku-ku, Tokyo
161-8570 JAPAN
Tel: 81-3-5982-3206 Fax: 81-3-5982-3229
www.kenkoglobal.com
Table of contents
Other Kenko GPS manuals
