manuals.online logo
Brands
  1. Home
  2. •
  3. Brands
  4. •
  5. Kenmore
  6. •
  7. Vacuum Cleaner
  8. •
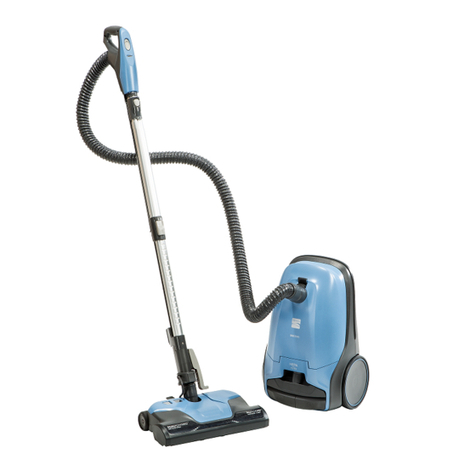
  9. Kenmore 721.21295 User manual

Kenmore 721.21295 User manual

Other Kenmore Vacuum Cleaner manuals

Kenmore 2029219 - Canister Vacuum User manual

Kenmore

Kenmore 2029219 - Canister Vacuum User manual

Kenmore 116.36724 User manual

Kenmore

Kenmore 116.36724 User manual

Kenmore 116.23110C User manual

Kenmore

Kenmore 116.23110C User manual

Kenmore 116.31200 User manual

Kenmore

Kenmore 116.31200 User manual

Kenmore 116.23103C User manual

Kenmore

Kenmore 116.23103C User manual

Kenmore ELITE CROSSOVER ULTRA 125.10335610 User manual

Kenmore

Kenmore ELITE CROSSOVER ULTRA 125.10335610 User manual

Kenmore BC4002 User manual

Kenmore

Kenmore BC4002 User manual

Kenmore ASPIRADORA 116.36722 User manual

Kenmore

Kenmore ASPIRADORA 116.36722 User manual

Kenmore Elite 116.21814 User manual

Kenmore

Kenmore Elite 116.21814 User manual

Kenmore DU4099 User manual

Kenmore

Kenmore DU4099 User manual

Kenmore 16.23195C User manual

Kenmore

Kenmore 16.23195C User manual

Kenmore 116.30412 User manual

Kenmore

Kenmore 116.30412 User manual

Kenmore 116.30608C User manual

Kenmore

Kenmore 116.30608C User manual

Kenmore 116.30412 User manual

Kenmore

Kenmore 116.30412 User manual

Kenmore 11659512993 User manual

Kenmore

Kenmore 11659512993 User manual

Kenmore SPOTLITE KW2005 User manual

Kenmore

Kenmore SPOTLITE KW2005 User manual

Kenmore 116.22614 User manual

Kenmore

Kenmore 116.22614 User manual

Kenmore 116.36822 User manual

Kenmore

Kenmore 116.36822 User manual

Kenmore 11631150313 User manual

Kenmore

Kenmore 11631150313 User manual

Kenmore 116.23108C User manual

Kenmore

Kenmore 116.23108C User manual

Kenmore 116.22612 User manual

Kenmore

Kenmore 116.22612 User manual

Kenmore 116.23203C User manual

Kenmore

Kenmore 116.23203C User manual

Kenmore 116.20812 User manual

Kenmore

Kenmore 116.20812 User manual

Kenmore CSV Go DS4020 User manual

Kenmore

Kenmore CSV Go DS4020 User manual

Popular Vacuum Cleaner manuals by other brands

Shark KD400WM owner's guide

Shark

Shark KD400WM owner's guide

Shark CORDLESS SV780_N 14 user manual

Shark CORDLESS

Shark CORDLESS SV780_N 14 user manual

Philips FC9176/08 manual

Philips

Philips FC9176/08 manual

AMiO YF-101 user manual

AMiO

AMiO YF-101 user manual

Beko VRT 94929 VI user manual

Beko

Beko VRT 94929 VI user manual

Shark CORDLESS SV780 Series quick start guide

Shark CORDLESS

Shark CORDLESS SV780 Series quick start guide

Lumme LU-3203 instruction manual

Lumme

Lumme LU-3203 instruction manual

Melissa 640-040/051 instruction manual

Melissa

Melissa 640-040/051 instruction manual

Makita DVC152L instruction manual

Makita

Makita DVC152L instruction manual

Bosch BSN1 instruction manual

Bosch

Bosch BSN1 instruction manual

King Canada 8560LST Service manual & parts list

King Canada

King Canada 8560LST Service manual & parts list

EUFY RoboVac 11c+ owner's manual

EUFY

EUFY RoboVac 11c+ owner's manual

Panasonic MC-E4101 Service manual

Panasonic

Panasonic MC-E4101 Service manual

Panasonic MC-V9658 operating instructions

Panasonic

Panasonic MC-V9658 operating instructions

Bosch BGB 2 Series instruction manual

Bosch

Bosch BGB 2 Series instruction manual

Hoover dog & cat TURBO manual

Hoover

Hoover dog & cat TURBO manual

FGE Far Tools NET UP 20 manual

FGE

FGE Far Tools NET UP 20 manual

MARIMEX SPA VAC user manual

MARIMEX

MARIMEX SPA VAC user manual

manuals.online logo
manuals.online logoBrands
  • About & Mission
  • Contact us
  • Privacy Policy
  • Terms and Conditions

Copyright 2025 Manuals.Online. All Rights Reserved.

Owner's Manual
Manual del Propietario
®
Canister Vacuum Cleaner
Aspiradora
Model, Modelo 721.21295
Sears, Roebuck and Co., Hoffman Estates,IL 60179 U.S.A
www.sears.com
PART No. 3828FI3763K Printed in KOREA
Before Using Your New Vacuum ................... 2
Kenmore Vacuum Cleaner Warranty ............ 2
important Safety Instructions ....................... 3
Parts and Features 4
Assembly 5_6
Use and Care 6
How Your Vacuum Works ................................ 6
How to Start Your Vacuum ............................... 7
Attachments 8o-,9
Attachments Use Chart ................................. 9
Vacuuming Tips.............................................. 10
Performance Features .................................... 10
Changing The Dust Bag ............................ 11
Cleaning Motor Satety Filter ........................... 11
Cleaning Exterior and Attachments ................ 12
Stonng Your Vacuum ............................ 12
Cleaning Sani-Punch Nozzte .......................... 13
Power-Mate _Care .......................................... 14
Belt Changing and Brush C_eaning .......... 14_ 15
Brush Servicing 16
Brush Assembly ....................................... 16
Trouble Shooting ...............................................17
Parts List ................................................. 18,421
EspaRol ......................................................... 22
Service ............................................ Back Cover
Please read this guide, tt will help you assemble and operate your new Kenmore vacuum in the
safest and most effective way.
For more informalion about the care and o_ratJon, call your nearest Sears store.
Your will need the complete model and serial numbers when requiting information,
Your vacuum's model and serial numbers are I_ated on the Model and Serial Number Plate,
Use the space betow to reco_ the model number and serial number ot your new Kenmore vacuum.
Serial No
Date of Purchase
K_p this book and your sales check (receipt) in a safe place for fulure reference.
FULL ONE-YEAR WARRANTY
When used for private household pur_ses, if this vacuum cleaner fails due _oa defect in material
or workmanship within one year from the date of purchase, Sears will repair it free of charge.
For warranty service, return this vacuum cleaner to the nearest Sears Service Center in The
United States,
This warranty gives you s_cific legal rights, and you may atso have other rights which vary from
state to state.
Sears, Roebuck and Co., D/817 WA, Hoffman Estates, IL 60179
-2-
Your safety is important to us. To reduce the risk of fire, electrical sh_k, injury to
persons or damage when using your vacuum cleaner, follow basic safety precautions
including the following:
Readthis manualbefore assemblingor using your
vacuum deaner.
Use your cleaner ontyas described in this manual
Useonly wiUisuppliedattachments.
To reducethe risk ofe_clrieal shock -Donot use
outdoors or onwet surfaces.
Disconnect electricalsupply beforeservicing or
cleaning outbrush area. Failure todo so couki
result in eJectricaJshock or brush suddenly
starting,
Always turncleaner off beforeconnectingor
disconnectingthe hose.
Always turncleaner off beforeueplugging.
Do not unplugby puliing oncord. To unplug,
gra_ the plug, notthe cord.
Hold plug when rewindingontocord reel.
Do not aibw plugtowhip when rewinding.
Do not use with damagedcordor p_ug.If cteaner
is not wod,,ingas it sbould, h_ been drepped,
damaged, left outdoors,or dropped intowater,
return it to a Sears Sewice Center,
Do not pall or carry by cord, use cord as a
handle, close dooron cord,or pull cordaround
sharp edges or come_. Do not run cleanerover
cord, Keep cordaway fromheated surfaces,
Do not leave cleaner whenp_uggedin, Ueplug
from outlet when notin use and beforeservicing.
Do not albw to be usedas atoy. Close attention
is necesca_ when usedby or nearchildren.
Do not handleplug er cleaner w_hwet hands.
Do notoperatethe cleanerwith a punctured hose.
R_lace if cut or worn. Avoid vacuuming sharp
objects.
Do not use with any opening blocked;keep freeol
dust,lint, hair andanything that may reduce air
flow.
Keep hair, loose clothing,fingers,andall parts of
body away Irom epenings andmoving paris.
Do not use cleanerwi_lout dust bag andJorfilters
in plac&
Alwayschangethe dust bagafter vacuuming
carpet cleaners or froshener, powders and fine
dust. Theseproductscbg thebag, reduce airflow
and can cause thebag toburst, Failureto change
bog could causepermanent damage to the
cleaner.
Do not use the cleanerto pick@ sharphard
objects, small toys, pins, paper,etc. They may
damage the cleaneror dust bag.
Donot pickup ar_ythingthats burningor smoking,
such asciigaret[es,,matches,or he1ashes.
Do notuse vacuum cleaner to pick upflammable
or combustibleliquids (gasoline,cfeaning fluids,
perfumes, etc.), or use in areas where they may
be present, The fumesfromthesesubstances can
create a fire hazardor explosion_
Use extra care when cleaningon stairs. Do not
put on chairs, tables,etc. Keepon floor.
You are responsiblefor making surethat your
vacuum cleanerisnotused by anyone unableto
eperate it proper_y.
SAVE THESE INSTRUCTIONS,
Proper aeaembly and safe use dyour vacuum cleaner are your responsibilities. Your cleaner is
intended only for household use. Read this Owner's Manual carefully for impertant use and safety
information, This guide contains safety statements under warning and caution symbols Please
pay special attention to these boxes and follow any instrudions given. WARNING statements
alert you to such dangers as fire, electrical shock, burns and personal injury. CAUTION
statements alert you to such dangers as personal injury and/or property damage
It is important to know your vacuum cleaner's parts and features to assure its proper and
safe use, Review these before using your clea_r,
Sli_ Switch
Power=Mate _
ONJOFF Switch
Holder
Cord
C_rd Holder
Wand Storage Clip
Telescopic Wand 3ord Reel
Wand B_Jtton Button
Performance indicator
Plug
H_k
(Not Shown)
Suction
ATTACHMENTS
Sani-PunchNozzle Brush/CreviceTool
-4 -
UpholsteryNozzle AccessoryHolder
Before assembling your vacuum cleaner,
_re you have all the parts shown in PARTS
AND FEATURES.
TELESCOPIC WAND
HoEdspring latch and pull out or _sh inw_d
to required length,
Spnng La_i_
Power-Mate ®
1. insert wand into Power-Mate_until the wand
button snaps into ptace_
Button
2. Connect Power=Mate eplug to Power Cord as
shown. DO NOT force. Raised side of plug
must face out.
3. Connect Power Cord Plug to top of wand as
shown, DO NOT force. Raised side of plug
must face out
4, Insert handle intowand until handle button
snaps into place,
To remove handle: Press handle button and
pull up on handle,
T_l_optc
W_nd
Cord
g
To Remove Power-Mate _
1.Steady Power-Mate_with foot.
2, Disconr_ct Power-Mate_'Plug from Power Cord
& Press Wand Button and pult upon war_,
ATTACHMENTS
Clamp Accessory Holder around Telescopic
Wand as shown
°!
iiio
Accessories can be stored inthe holder.
CANISTER
1, Open the canister hood,
2, Cheek to see that the dust bag is properly
instalte& See CHANGING THE DUST BAG
for instructions.
3. Check to see that the motor safety filter is
propady installed. See CLEANING MOTOR
SAFETY FILTER for instructions,
Motor Safe_y _
HOSE
1. Insert hose into canister un_l it snaps into
place, Be sure hose is not twisted,
To removehose: Pushfitting hookdown and
pull out,
USE AND CARE
The vacuum cleaner creates suction '[ha_picks up dirt. Rapidly moving _r_
air carries the dirt to the dust bag through the air flow passages_ z-_,_,-/__
The dust bag lets the air pass through_ while it traps the dirt, E _'-_,V
For best cleaning r_uEts, keep the airflowpassage open. _
Check the starred areas occasionally for clogs. _o_7
Unplug from outlet before checking, _//_ .._
-6-
PersonalInjuryandProductDamageHazardl
, DO NOTpluginif switchisinON position,
Personalinjuryorproductdarn_e couldresu_.
•Thecordmovesr_idly whenrewinding,
Keepchi_renawaya_ provideaclearpathwhen
rewindingthecordtopreventpersonalinjury,
•DO NOTuseou_etsabovecounters_Damageto
itemsinsurroundingareacouldoccur,
1. Pull out the power cord to the desired [en£th.
NOTE: To reducethe riskel electricshock, this
vacuum eles_erhas e poafized plug; oneblade is
wider thanthe other,This piugwiti Iit in s polarized
outletonlyoneway. Ifthepug does not fit fully in the
outlet,reversethe plug.tf itstill _es not fit contacta
quaified etectricisn to instellthe proper outlet,Do not
changethepiug in s_yway
2. P_ugthe polarized power cord into a 120 Volt
outletlocated near the floor
To r_ind: Unplug the cleaner, Hotd the plug
while rewinding to prevent damage or injury
from the moving cord. Press on the cord ree_
button to rewind the _rd.
3. To lower Telescopic wand,
hold Power-Mate _down
w_h foot and pull back
on upper part of
Telescopic wand.
4. Push slide switch forward toward MAX for
max suction, backward loward MIN for Iess
suction,
5 To turnon Power-Mate_ press the Power-Mate*
ON/OFF switch downward.
: PoweroMate_'ON/OFF switch
Attention: Turn on Power-Mate _on_ywhen
vacuuming. Refer to your carpet
manufacturers cleaning recommendations,
Some more delicate carpets may require
that they be vacuumed with the Power°Mate _
agitator tur_d off, to prevent carpet
damage,
_7_
DO NOT attach or remove handle or
wands while cleaner is ON, This could
cause sparking and damage the electrical
contacts,
ATTACHMENTS ON HANDLE
NOTE: Ifthe Power-Mate _is attached, turn
cteaner off before removing handle from
Telescopic wand.
1. Press handle button, then pull to remove
handle from Telesco#c wand.
2. Push new attachment tool onto handle.
ATTACHMENTS ON TELESCOPIC
WANDS
The Power-Mate _and Sani-Punch Nozzle have
locking holes. The b_sh/crevice tool and
upholstery nozzle do not have locking holes+
1+Steady Power-Mate _
with foot,
To prevent tip-over, never leave Power-Mate_
ON in the upright position,
2, Remove Power-Mate s plug from holder
Press Wand button, then pull to remove
wand from Power-Mate _.
3, Put on attachments as needed
See chart on next page,
-8-
SANI-PUNCH NOZZLE
This Sani_Punch nozzle is for effective cleaning
of mattresses, light blankets, sheets and drapes
to remove mites and dust,
Features
The bottom part of the nozzle can b.eseparated
to be cteaned.
Since the bosom does not stick to the surface,
vacuuming is easy.
Use
Set the suction power slide switch to MAX
POWER before vacuuming. According to the
type of mattresses, handling may be awkward
or it may cause a lot of noise Ifthis is the case,
adjust the suction power slide switch to a lower
setting.
Effective Cleaning
Ma[tresses and Blankets
AppUySani Punch nozzle directly to mattress
surface.
Forblanket layout )
on bedand vacuum.J
Blankets and Sheets
t iseasierte
Drapes
NOTE: If the vibration plate does not move, lift
the nozzle siightly off the surface, If it does not
move even after doing so check ifthe suction
power is too low or ifthe nozzle base is dogged
with a foreign object,
CLEANING AREA
ATTACHMENT FurnHure* [Between Drapes* Ma_'es_s_ Bare Carpeted
Cushions* 81[ankets* Floors Fl®rs/Rugs Watls
BRUSNi
CREV,CETOOL X X X X
UPHOLSTERY
NOZZLE X X
Power-Mate®
SANI-PUNCH
NOZZLE
X
X X
Alwaysc_eanattachmentsbeforeusingonfabrics. ** Power-Ma_e_OF#OFFswitchshould_ inOFF_si5oa
"9"
Suggested sweeping pa_ern
For best cleaning action, tile Power-Mate _
should be pushed straight away from you and
pulled straight back.
This pattern should be continued across the rug
with slow, gliding motions.
NOTE: Fast, jerky strokes do not provide
complete cleaning.
Carpeted stairs need to be vacuumed
regularly. For best cleaning results, put the sflde
switch on MAX
For best cleaning results, keep the airflow
passage open. Check _sionally for dogs.
See HOW YOUR VACUUM WORKS section,
Unplug from outlet before checki_.
ONE-TOUCH CONTROL
The lengthof Telescopic wand can be changed
by one touch quickly and easily,
Adiust the length of Telescopic wand as shown.
Spr_ng[
SUCTION CONTROL
The handle slide switch aflows you to change
the vacuum suction Ior different fabric and
carpet weights,
Adiust the suction power with slide switch in the
handle.
Handie
OVERLOAD PROTECTOR
The Power-Mate _ has buiit4n protectionagainst
motor and belt _mage should the brush iam.
If the brush slews down or stops, the overload
protector shuts off _e Power-Mate _.
The canister motor will continue to run
To correct p_oblem:See TROUBLE SlitTING
To reset: Unplug cord from wall outlet and wait
5,qO minutes for motor to cool. Plug
cord into wall cutter,
Personal injury Hazard
Always unplug the vacuum cleaner before
cleaning the brush area as brush may
suddenly restart, Failure to do so can
result in personal injury,
PERFORMANCE INDICATOR
When the unit is running_ the indicator windows
will be green if there are no clogs.
When the indicator window turns completely
red, check if the dust bag is full or ifother areas
are clogged, See HOW YOUR VACUUM
WORKS.
Indicator Window
Note: indicator window may turn rod when
using attachments or when cleaning new
carpet. This is due to reduced airflow caused by
the va_um seal between attachment and
surface, or new carpet fuzz filling the bag
quickly, Restore airflow by raising attachment
slightly from surface you are cleaning, or
replace bag if it is full.
o10_