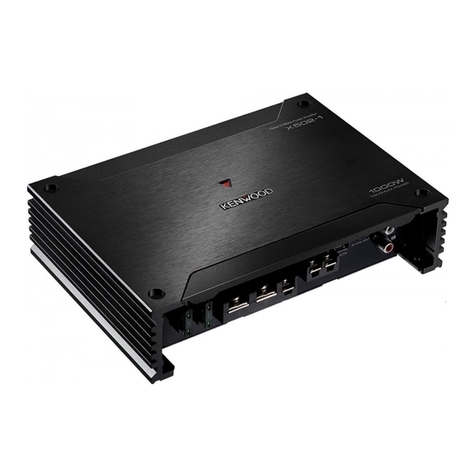
Kenwood XR600-6DSP User manual

Accessories / Accessoires / Accesorios
❶ø 4 x 16 mm
Self-tapping screws / Vis taraudeuses / Tornillo
autorroscantes 4
❷2.5 mm Hexagon wrench / Clé polygonale / Llave hexagonal 1
❸4.0 mm Hexagon wrench / Clé polygonale / Llave hexagonal 1
❹Extend cable / Extension de câble / Cable alargador 1
Take the time to read through this instruction manual.
Familiarity with installation and operation procedures will help you obtain the best performance from your new
power amplifier.
For your records
Record the serial number, found on the back of the unit, in the spaces designated on the warranty card, and in the space provided
below. Refer to the model and serial numbers whenever you call upon your KENWOOD dealer for information or service on the
product.
Model XR600-6DSP Serial number
US Residence Only
Register Online
Register your KENWOOD product at www.Kenwoodusa.com
B5A-2053-00/00 (KV)© 2017 JVC KENWOOD Corporation
XR600-6DSP
ADVANCED INTEGRATION AMPLIFIER WITH 192kHz/32Bit DSP
INSTRUCTION MANUAL
AMPLIFICATEUR D'INTÉGRATION AVANCÉE AVEC DSP 192kHz/32Bit
MODE D’EMPLOI
AMPLIFICADOR DE INTEGRACIÓN AVANZADA CON DSP 192kHz/32Bit
MANUAL DE INSTRUCCIONES
• Apple and Apple logo are trademark of Apple Inc., registered in the U.S. and other countries.
• App Store is a trademark of Apple Inc.
• Google Play and the Google Play logo are trademarks of Google Inc.
• The Bluetooth®word mark and logos are registered trademarks owned by Bluetooth SIG, Inc. and any use of
such marks by JVC KENWOOD Corporation is under license. Other trademarks and trade names are those of their
respective owners.
XR600-6DSP.indd1 2017/01/1313:19
KENWOOD
JVCKENWOOD Corporation
0
Bluetooth®

Safety precautions
WARNING
To prevent injury or fire, take the following
precautions:
• Mounting and wiring this product requires skills and
experience. For safety’s sake, leave the mounting and
wiring work to professionals.
• When extending the ignition, battery, or ground wires,
make sure to use automotive-grade wires or other wires
with the range of 14 mm (AWG 6) to 21 mm (AWG 4)
to prevent wire deterioration and damage to the wire
coating.
• To prevent a short circuit, never put or leave any
metallic objects (such as coins or metal tools) inside the
unit.
• If the unit starts to emit smoke or strange smells, turn
off the power immediately and consult your KENWOOD
dealer.
• Do not touch the unit during use because the surface of
the unit becomes hot and may cause burns if touched.
CAUTION
To prevent damage to the machine, take the
following precautions:
• Be sure the unit is connected to a 12V DC power supply
with a negative ground connection.
• Do not open the top or bottom covers of the unit.
• Do not install the unit in a spot exposed to direct
sunlight or excessive heat or humidity. Also avoid places
with too much dust or the possibility of water splashing.
• When replacing a fuse, only use a new one with the
prescribed rating. Using a fuse with the wrong rating
may cause your unit to malfunction.
• To prevent a short circuit when replacing a fuse, first
disconnect the wiring harness.
NOTE
• If you experience problems during installation, consult
your KENWOOD dealer.
• If the unit does not seem to be working right, consult
your KENWOOD dealer.
Cleaning the unit
If the front panel gets dirty, turn off the power and wipe
the panel with a dry silicon cloth or soft cloth.
CAUTION
Do not wipe the panel with a hard cloth or a cloth
dampened by volatile solvents such as paint thinner and
alcohol. They can scratch the surface of the panel and/or
cause the indicator letters to peel off.
To prevent battery rise
When the unit is used in the ACC ON position without
turning the engine ON, it depletes the battery. Use it after
starting the engine.
Protection function
The protection function is activated in the following
situations:
This unit is equipped with a protection function for
protecting this unit and your speakers from various
accidents or problems that can occur.
When the protection function is triggered, the power
indicator goes off and the amplifier stops operating.
• When a speaker wire may be short-circuited.
• When a speaker output contacts ground.
• When the unit malfunctions and a DC signal is sent to
the speaker output.
• When the internal temperature is high and unit won’t
operate.
Wiring
• Take the battery wire for this unit directly from the
battery. If it's connected to the vehicle’s wiring harness,
it can cause blown fuses etc.
• If a buzzing noise is heard from the speakers when the
engine is running, connect a line noise filter (optional)
to each of the battery wire.
• Do not allow the wire to directly contact the edge of
the iron plate by using Grommets.
• Connect the ground wire to a metal part of the car
chassis that acts as an electrical ground passing
electricity to the battery‘s negative ⊖terminal. Do not
turn the power on if the ground wire is not connected.
• Be sure to install a protective fuse in the power cord
near the battery. The protective fuse should be the
same capacity as the unit’s fuse capacity or somewhat
larger.
• For the power cord and ground, use a vehicle type
(fireproof) power wring cord. (Use a power wiring cord
with the range of 14 mm (AWG 6) to 21 mm (AWG 4).
• When more than one power amplifier are going to be
used, use a power supply wiring wire and protective
fuse of greater current-handling capacity than the total
maximum current drawn by each amplifier.
Speaker selection
• Using speakers with smaller input ratings than the
amplifier’s output power would result in smoke
generation or equipment failure.
• The impedance of the speakers that are going
to be connected should be 2 or greater (for
stereo connections), or 4 or greater (for bridged
connections). When more than one set of speakers are
going to be used, calculate the combined impedance
of the speakers and then connect suitable speakers to
the amplifier.
<Example>
Combined impedance
XR600-6DSP.indd1 2017/01/1313:19
IA
IA
A
----
---~
·-------------;
'[J@d
I
40
, C ,
I I I
I I
40
40
I
40
: e :
I I I
---·
·--------------
80
20
~

Installation board, etc. (thickness : 15 mm or more)
Tableau d’installation, etc. (épaisseur: 15 mm ou plus)
Tablero de instalación, etc. (grosor: 15 mm o más)
❷Parts included
Pièces comprises
Partes incluidas
(2.5 mm)
Dressing cover
Enjoliveur
Cubierta de adorno
Cooling fan
Ventilateur de refroidissement
Ventilador de refrigeración
❶Parts included
Pièces comprises
Partes incluidas
Installation / Installation / Instalación
Installation procedure
This unit needs a specialist install and setting. Read
the instruction manual well to select the proper
connection and setting.
1. Remove the ignition key and disconnect the
negative ⊖terminal of the battery to prevent
short circuits.
2. Remove the Dressing cover.
3. Connect the battery wire.
4. Connect the ground wire to chassis ground of
vehicle.
5. Connect the speakers.
6. Connect the ADS cables. Refer to "Connection
and Setting" on the back side.
7. Attach the unit.
8. Attach the Dressing cover.
9. Connect the negative ⊖terminal of the battery.
CAUTION
• Do not install in the below locations;
(Unstable location, In a location that interferes
with driving, In a location that gets wet, In a dusty
location, In a place that gets hot, In a place that
gets direct sunlight, In a location that gets hit by
hot air)
• Do not install the unit under the carpet.
Otherwise heat build-up occurs and the unit may
be damaged.
• Install this unit in a location which allows heat to
easily dissipate. Once installed, do not place any
object on top of the unit.
• The surface temperature of the amplifier will
become hot during use. Install the amplifier in a
place where people, resins, and other substances
that are sensitive to heat will not come into
contact with it.
• This unit has cooling fan to decrease the internal
temperature. Do not mount the unit in a place
where the cooling fan and ducts of the unit are
blocked. Blocking these openings will inhibit the
cooling of the internal temperature and result in
malfunction.
• When making a hole under a seat, inside the
trunk, or somewhere else in the vehicle, check
that there is nothing hazardous on the opposite
side such as a gasoline tank, brake pipe, or wiring
harness, and be careful not to cause scratches or
other damage.
• Do not install near the dashboard, rear tray, or air
bag safety parts.
• The installation to the vehicle should securely
fasten the unit to a place in which it will not
obstruct driving. If the unit comes off due to a
shock and hits a person or safety part, it may
cause injury or an accident.
• After installing the unit, check to make sure that
electrical equipment such as the brake lamps,
turn signal lamps and windshield wipers operate
normally.
About the Lead Terminals
1. Wire Thicknesses
You can use wires with the following
thicknesses:
Battery wire and
ground wire AWG 4 – AWG 6
Speaker wire AWG 8 – AWG 16
2.Strip the wire
Make a cut in the wire sheath (insulator
made from vinyl, etc.) at the position 10–13
mm (3/8”–1/2”) away from the end of the
wire, and then remove the unnecessary
portion of the sheath by twisting it.
3.Install the wire
Loosen the screw using the supplied
hexagon wrench. Insert the conductor
of the wire in the terminal hole, and then
tighten the screw.
À propos des bornes de câble
1. Épaisseurs des câbles
Vous pouvez utiliser des câbles aux
épaisseurs suivantes.
Câble de batterie et
câble de masse
AWG 4 – AWG 6
Câble d'enceinte AWG 8 – AWG 16
2.Dénuder le câble
Coupez la gaine du câble (isolant en
vinyle, etc.) à environ 10–13 mm (3/8”–1/2”)
de l'extrémité du câble, puis enlevez
la portion de gaine inutile en la faisant
tourner dans vos doigts.
3.Installer le câble
Desserrez la vis à l'aide de la clé
hexagonale fournie. Insérez le fil
conducteur du câble dans l'orifice de la
borne, puis serrez la vis.
Acerca de los terminales con-
ductores
1. Grosores de cables.
Puede utilizar cables con los siguientes
grosores:
Cable de batería y cable
de tierra AWG 4 – AWG 6
Cable de altavoz AWG 8 – AWG 16
2.Pele el cable.
Realice un corte en el revestimiento del
cable (aislante de vinilo, etc.) a 10–13 mm
(3/8”–1/2”) del extremo del cable y, a con-
tinuación, retire la parte innecesaria del
revestimiento torciéndola.
3. Instale el cable.
Afloje el tornillo con la llave hexagonal
suministrada. Inserte el conductor del
cable en el orificio del terminal y apriete el
tornillo.
10–13 mm
(3/8”‒1/2”)
Hexagon wrench
Clé polygonale
Llave hexagonal
❸Parts included
Pièces comprises
Partes incluidas
(4.0 mm)
320 mm (12-5/8”)
169 mm (6-5/8”)
51 mm (2”)
Power indicator
When the power is turned on, the Power
indicator lights.
Indicateur d’alimentation
Lorsque l’alimentation est activée, l’indicateur
d’alimentation s’illumine.
Indicador de potencia
Cuando la alimentación se activa, el indicador
de potencia se ilumina.
XR600-6DSP.indd1 2017/01/1313:19
I1
0

Troubleshooting Guide
Symptom Remedy
Sound cannot be heard. • Check the cords and connections.
• Protection circuit may be activated. Check connections. (➡<Protection
function>)
• Blown fuse. Replace the fuse.
• The speaker cord is shorted. After check the speaker cord and fixing the
cause of the short, replace the fuse.
The sound quality is bad.
(The sound is distorted.) • Connect the speaker cord properly checking the ⊕/⊖of the terminals
and wires well.
• Connect the speaker cord again so that it is not pinched by anything.
The unit fails to operate properly. • Reset the unit. (➡<How to reset>)
KENWOOD DSP CONTROL APP doesn't
work. • Check the OPERATION MODE switch. User Mode works in
position
only.
Guide de dépannage
Symptôme Remède
Le son ne peut pas être entendu. • Vérifiez les cordons et les connexions.
• Le circuit de protection peut être actionné. Vérifier les raccordements.
(➡<Fonction de protection>)
• Fusible grillé. Remplacez le fusible.
• Les fils de raccordement d’enceinte sont en court-circuit. Après avoir
vérifié le câble d’enceinte et réparé la cause du court-circuit, remplacez le
fusible.
La qualité sonore est manuvaise.
(Le son est distordu.) • Raccorder correctement en respectant les indications ⊕et ⊖des
bornes et des câbles.
• Rebrancher le câble de haut-parleur en évitant tout pincement
L'appareil ne fonctionne pas
normalement. • Réinitialisez l’appareil. (➡<Comment réinitialiser>)
KENWOOD DSP CONTROL APP ne
fonctionne pas. • Vérifiez le commutateur OPERATION MODE. Le mode utilisateur
fonctionne en position
uniquement.
Guía sobre localización de averías
Síntoma Solución
El sonido no se escucha. • Inspeccione los cables y las conexiones.
• El circuito de protección puede estar activado. Compruebe las
conexiones. (➡<Función de protección>)
• Fusible fundido. Reemplace el fusible.
• El cable del altavoz está cortocircuitado. Después de revisar el cable del
altavoz y arreglar la causa del cortocircuito, reemplace el fusible.
La calidad del sonido es mala.
(El sonido está distorsionado.) • Conéctelos correctamente asegurándose bien de cuáles son los
terminales ⊕y ⊖.
• Vuelva a conectar los cables de los altavoces de forma que no queden
pellizcados.
La unidad no funcionan correctamente. • Reinicialice la unidad. (➡<Cómo reinicializar>)
KENWOOD DSP CONTROL APP no
funciona. • Compruebe el conmutador OPERATION MODE. El modo de usuario
funciona solamente en la posición
.
FCC WARNING
This equipment may generate or use radio frequency energy. Changes or modifications to this
equipment may cause harmful interference unless the modifications are expressly approved in the
instruction manual. The user could lose the authority to operate this equipment if an unauthorized
change or modification is made.
FCC NOTE
This equipment has been tested and found to comply with the limits for a Class B digital device, pur-
suant to Part 15 of the FCC Rules. These limits are designed to provide reasonable protection against
harmful interference in a residential installation. This equipment may cause harmful interference to
radio communications, if it is not installed and used in accordance with the instructions. However,
there is no guarantee that interference will not occur in a particular installation. If this equipment
does cause harmful interference to radio or television reception, which can be determined by turn-
ing the equipment off and on, the user is encouraged to try to correct the interference by one or
more of the following measures:
• Reorient or relocate the receiving antenna.
• Increase the separation between the equipment and receiver.
• Connect the equipment into an outlet on a circuit different from that to which the receiver is con-
nected.
• Consult the dealer or an experienced radio/TV technician for help.
CAUTION
This equipment complies with FCC/IC radiation exposure limits set forth for an uncontrolled environment and
meets the FCC radio frequency (RF) Exposure Guidelines and RSS-102 of the IC radio frequency (RF) Exposure
rules. This equipment has very low levels of RF energy that is deemed to comply without maximum permissive
exposure evaluation (MPE). But it is desirable that it should be installed and operated keeping the radiator at
least 20cm or more away from person’s body.
ATTENTION
Cet équipement est conforme aux limites d’exposition aux rayonnements énoncées pour un environnement
non contrôlé et respecte les règles les radioélectriques (RF) de la FCC lignes directrices d’exposition et d’exposi-
tion aux fréquences radioélectriques (RF) CNR-102 de l’IC. Cet équipement émet une énergie RF très faible qui
est considérée comme conforme sans évaluation de l’exposition maximale autorisée (MPE). Cependant, il est
souhaitable qu’il devrait être installé et utilisé en gardant une distance de 20 cm ou plus entre le radiateur et
le corps humain.
IC (Industry Canada) Notice
This device complies with Industry Canada’s licence-exempt RSSs. Operation is subject to the following two
conditions:
(1) This device may not cause interference, and
(2) this device must accept any interference, including interference that may cause undesired operation of the
device.
Note de IC (Industrie Canada)
Le présent appareil est conforme aux CNR d’Industrie Canada applicables aux appareils radio exempts de
licence. L’exploitation est autorisée aux deux conditions suivantes:
(1) l’appareil ne doit pas produire de brouillage;
(2) l’utilisateur de l’appareil doit accepter tout brouillage radioélectrique subi, même si le brouillage est
susceptible d’en compromettre le fonctionnement.
Contains Transmitter Module FCC ID: 2AB7S-CW8761
IC: 11888A-CW8761
This transmitter must not be co-located or operated in conjunction with any other antenna or transmitter.
XR600-6DSP.indd1 2017/01/1313:19

Connection
and
SettingI Raccordements
et
Reg/ageI Conexiones yAjuste
This
unit
needs
a specialistinstall
and
setting.
For
switches
and
terminals
not
describedbelow, consultyour
KENWOOD
dealer.
Cetappareilnecessite
un
specialistepour/'installation
et
le
reg/age. Pour/es
commutateurs
et
bornes
qui
ne
sont
pas
decrits
ci
-dessous,
consu/tez
votre
revendeur
KENWOOD.
Esta unidadnecesita
una
instalaci6ny
un
ajusteespecializados. Para /os conmutadoresy terminales
no
descritos a continuaci6n,
consu/te
con
su
distribuidor
KENWOOD.
A
WARNING
Particular
attention
must
be
given
to
making
good
electrical
contact
at
the
amplifier-output
and
speaker
terminals.
~
~
A
AVERTISSEMENT
Retirer la cle
de
contact et debrancher la borne negative 8 de la
batterie
pour eviter les court-circuits.
~
~
£
A WARNING Remove the ignition key and disconnect
the
negative 8 terminal
of
the
battery
to prevent short circuits.
----c:
ADVERTENCIA Retire la llave de encendido y desconecte el terminal negativo 8 de la bateria para evitar cortocircuitos.
Poor
or
loose
connections
can cause
sparking
or
burning
at
the
terminals
because
of
the
very
high
power
that
the
amplifier
can deliver.
I
ACAUTION
I
~
r:::C"""'·'
~
Pieces ~omprise
~
Partes m
cl
uidas s
~
(4.
0mm)
l~
*1
* 1
Use
the
attached Hexagon Wrench.
Utilisez
la
cle polygonale rattachee.
Utilice
la
llave hexagonal suministrada.
® @ : J
~CH1
~CH6
8 P
~_
rts
include?
'r"
Pieces comprises
Partes incluidas
(2
.
5mm)
*1
® ®
!
~
~ ~ ~ ~
~ : :
~
[!IIG]
!J)
,~
-
-~
-----
---
----
-•a=~
----
---
----
--
,-,-••<
GN
□
, o e e o o e e o o e e o , : o
~ ~
TIT <:!<::IOOO:::OCHHJOOOO [. O "5' ....f.
..
.
~Jj
w i :~:<®~ -
• ,
8l'IIOGEO
L
eADGeo
_J
BADGEO
,
iOateinl<
, ~
l!!llI!]
:::ri1:·~:::1.,uoo
_ .
...
,...
...
.
....
1.
..
..1
....
....
.
.....
...
....
..
...
_,
---·
--·-
Fusible
de
proteccion
--
J
r
,
■
How
to
reset
■
Comment reinitialiser
■
Como reinicializar
Settings
(Pro
Mode
and User
Mode)
are
retained.
Les
Para
metres (Mode professionnel
et
Mode
utilisateur) sont conserves.
Los
Ajustes
(Modo
profesional y
Modo
de
usuario)
se
mantienen.
-
OPE
R AT I
ON
MOOE
~@
a
1.e1
~-
□,~
~~
T~
:,
ATS
Press
the
RST
key.
Appuyez
sur
la
touche
RST.
Pulse
la
tecla
RST
.
m
sw,
te. It
or
play
0Bluetooth
mise
as
@@@
0
"'
0
T @
[@J@
m
m'f
=A~_ *4
==
m I
® ®
@)
lire des
ctuali-
de
car-
gar
un
dispositivo
USB
ci
reproducir
archivos
de
audio.
• Ifsound
is
not
output
normally,
immediately turn power
off
and
checkconnections.
•
Be
sure
to
turn
the
power
off
before
changing the setting
of
any switch.
• Ifthe fuse blows, check wires for
shorts, then replace the fuse
with
one
of
the
same rating.
• Check that no unconnected wires
or
connectors
are
touching the car
body. Do
not
remove caps from
unconnected wires
or
connectors
to
prevent short circuits.
• Connect the speaker wires
to
appropriate speaker connectors
separately. Sharing the negative wire
of
the
speaker
or
grounding speaker
wires
to
the
metal body
of
the
car
can cause this
unit
to
fail.
• After installation, check that the
brake lamps, turn signal lamps and
windshield wipers work properly.
r
~
;-::-
Cable de la
batterie
: : Partes mclu,das (Util1ce el cable alargador
s1
es
necesario)
t
o.df
0'-"-J
Puenteada , • ,
~
.. . .
r+i
'f"
+ !IDataLJPk~ !
;··-------------------------------,
Th; ;oa,ac;ok
Maes>ro
,,
acd
ChWCM
'"'"'
u>
na@Hok
Ma~<,o
,,
e<
le
ham,;,
d'eo<,e,>
""'
'i'
Cable de la bateria
:------------------------------J
i *i *l
Battery
wire
:l:
Pieces
~om~rises
(Util1sez
l'extens1on
de
cable
s1
necessaire)
Battery
Batterie
Baterfa
Ground wire : M~ estro Ar by
ADS
*2
:: UN/VERSALINPU~ :
H.
AR
NESS
are
sold sepa.rately by
Automotive
Data versel
(UNIVERSA.L
INPUT
HARNESS)
sont vend
us
Cable de masse :
"'-..
,
~
::
HARNESS
by
ADS
*3 : Solutions. Available features may vary
depend-
separement par
Automotive
Data Solutions.
Les
Cable de masa :
~
~~
+---i]
!! :
1ng
on
the vehicle.
To
find an authrorized dealer fonctions dispon1bles
peuvent
varier selon
le
:
~
--
©-'
Lil...
ffi1---------
DJ-i-+vehicle
please visit httpJ/maestro.idatalink.com/ vehicule. Pour trouver
un
revendeur agree, veuil-
:----------------------------------::---------------------------------:
vehicule
lez vous rend
re
sur
I
AWARNING
To
prevent
fire caused by a
short
in
the
wiring,
connect
a fusible
link
or
breaker nearby
the
battery's positive terminal.
IA
AVERTISSEMENT
I
Pour
eviler
tout
incendie
du
a
un
court-
circuit, inserer
un
fusible
ou
un
coupecircuit
a
proximite
de
la
borne
de
la
batterie.
IA AOVERTENCIAI
Para
evitar incendios
producidos
par
cortocircuitos
en
el cableado,
conecte
un
fusible o
cortacircuito
entre
la
bateria y las
terminales
de
la
bateria.
CD
Fuse
(40
Ax
2)
I NOTE I
If
you can't find
the
specified capaci
ty
fuse at your
store etc., consult your KENWOOD dealer.
0 Battery terminal (BATT.)
®Ground
term
inal (GND)
@
SPEAKER
OUTPUT terminals
• Stereo connections:
The speakers
to
be connected should have an
impedance
of
20
or
greater. When multiple speakers
are
to be connected, ensure
that
the
combined
impedance
is
20
or greaterfor each channel.
• Bridged connections:
Make connections
to
the
LEFT
channel (!) and the
RIGHT
channel 8
SPEAKER
OUTPUT
terminals.The
speakers
to
be connected should have an impedance
of
40
or
greater. When multiple speakers
are
to
be
connected, ensure that the combined impedance
is
40
or greater.
®
iDatalink
DATA
CABLE
connector
@LINE OUT
(Z)
UNIVERSAL INPUT HARNESS connector
@
RST
(reset) key
Press
this key when
the
unit
fails
to
operate properly.
@OPERATION MODE switch
@Bluetooth indicator
Indicator will
light
up
in
blue when
the
Bluetooth
connection
is
established.
Vehiculo httpJ/maestro.idatalink.com/
CD
Fusible (40
Ax
2)
IREMARQUE I
Si
vous ne trouvez
pas
de
fusible
de
calibre ade-
quat
dans
le
commerce, etc., contacter votre agent
KENWOOD.
@Borne
BATT.
(alimentation)
0 Borne GND(masse)
@Bornes
SPEAKER
OUTPUT
•
Connexions
stereo:
Les
haut-parleurs a
connecter
doivent
avoir
une
impedance
de
2
ohms
ou
superieure. Lorsque
plusieurs haut-parleurs
doivent
etre connectes,
s'assurer
que
!'impedance
com
binee
soit
de
2
ohms
ou
superieure
pour
chaque canal.
•
Connexions
en
pont:
Faire
les
connexions aux bornes
SPEAKER
OUTPUT
du
canal gauche
(LEFT)
(!)
et
du
canal
droit
(RIGHT)
0.
Les
haut-parleurs a
connecter
doivent
avoir
une
impedance
de
4
ohms
ou
superieure. Lorsque
plusieurs haut-parleurs
doivent
etre connectes,
s'assurer
que
!'impedance
com
binee soit
de
4
ohms
ou
superieure.
®Connecteur
iDatalink
DATA
CABLE
(cable de
donnees iDatalink)
@LINE OUT (sortie deligne)
(Z)
Connecteur UNIVERSAL INPUT HARNESS
(harnais d'entree universel)
@Touche
RST
(reinitialisation)
Appuyez sur cette touche
si
l'appareil ne fonctionne
pas
correctement.
@
Commutateur
OPERATION MODE
(mode
de
fonctionnement)
@lndicateur
de
Bluetooth
~indicateur s'allume en bleu quand
la
connexion
Bluetooth est etablie.

Specifications
Specifications subject to change without notice.
Audio section
Rated power output (+B = 14.4V)
Stereo (4 Ω) (20 Hz – 20 kHz, ≤ 1.0 % THD).................75 W × 6
Stereo (2 Ω) (1 kHz, ≤ 1.0 % THD)...................................100 W × 6
Bridged (4 Ω) (1 kHz, ≤ 1.0 % THD)
.......................................................200 W (CH1&2, CH3&4, CH5&6)
Speaker impedance...............................4 Ω (2 Ω to 8 Ω allowable)
(Bridged connection: 4 Ω to 8 Ω allowable)
Frequency response (+0, –3 dB)............................20 Hz – 50 kHz
Input sensitivity ........................................................................ 2.0 V – 8.0 V
Signal to noise ratio..............................................................................95 dB
Input impedance...................................................................................10 kΩ
DSP
Graphic EQ (13 Band)............................................62.5/100/160/250/
400/630/1k/1.6k/2.5k/4k/6.3k/10k/16k Hz
Parametric EQ ..............................................f0:1/6 oct. step
....................................................................Q: 0.4/0.8/1.4/2.0/4.0/8.0
X'over.............................................................................................1/6 oct. step
Digital Time Alignment.................................0-20.01 ft, 1/30 ft step
Bluetooth
Version.................................................................................Bluetooth Ver.4.0
General
Operating voltage................................ 14.4 V (11 – 16 V allowable)
Current consumption............................................................................60 A
Dimensions (W × H × D)...................................320 × 51 × 169 mm
12-5/8 × 2 × 6-5/8 inch
Weight.......................................................................................3.1 kg (6.8 lbs)
CTA-2006
RMS Watts per channel @ 4 ohms, ≤ 1% THD+N
.....................................................................................75 W × 6
Signal to noise ratio
(Reference: 1Watt into 4 ohms)..................81 dBA
Spécifications
Les spécifications sont sujettes à changements sans
notification.
Section audio
Puissance de sortie norminale (+B = 14,4V)
Stéréo (4 Ω) (20 Hz – 20 kHz, ≤ 1,0 % THD).................75 W × 6
Stéréo (2 Ω) (1 kHz, ≤ 1,0 % THD)...................................100 W × 6
Pont (4 Ω) (1 kHz, ≤ 1,0 % THD)
.......................................................200 W (CH1&2, CH3&4, CH5&6)
Impédance d'enceinte.........................4 Ω (2 Ω à 8 Ω admissible)
(Connexions en pont: 4 Ω à 8 Ω admissible)
Réponse en fréquence (+0, –3 dB)........................ 20 Hz – 50 kHz
Sensibilité d'entrée (RCA) .................................................. 2,0 V – 8,0 V
Taux de signal/bruit .............................................................................95 dB
Impédance d’entrée.............................................................................10 kΩ
DSP
EQ graphique (13 bande)................................... 62,5/100/160/250/
400/630/1k/1,6k/2,5k/4k/6,3k/10k/16k Hz
EQ paramétrique........................................f0: par pas de 1/6 oct.
....................................................................Q: 0,4/0,8/1,4/2,0/4,0/8,0
X'over...............................................................................par pas de 1/6 oct.
Alignement temporel numérique
.............................................0-20,01 pieds, par pas de 1/30 pied
Bluetooth
Version.................................................................................Bluetooth Ver.4,0
Général
Tension de fonctionnement........14,4 V (11 – 16 V admissible)
Courant absorbé.......................................................................................60 A
Taille d’installation (L × H × P)........................320 × 51 × 169 mm
12-5/8 × 2 × 6-5/8 pouce
Masse .........................................................................................3,1 kg (6,8 lbs)
CTA-2006
RMS Watts par channel @ 4 ohms, ≤ 1%
THD+N......................................................................75 W × 6
Taux signal/bruit
(référence : 1 Watt/4 ohms) ........................81 dBA
Especificaciones
Las especificaciones se encuentran sujetas a cambios sin
previo aviso.
Sección de audio
Salida de potencia nominal (+B = 14,4V)
Estereofónicas (4 Ω) (20 Hz – 20 kHz, ≤ 1,0 % de distorsión
armónica total).................................................................................. 75 W × 6
Estereofónicas (2 Ω) (1 kHz, ≤ 1,0 % de distorsión armónica
total)....................................................................................................... 100 W × 6
Puenteada (4 Ω) (1 kHz, ≤ 1,0 % THD)
.......................................................200 W (CH1&2, CH3&4, CH5&6)
Impedancia de altavoz............................4 Ω (2 Ω a 8 Ω permitido)
(Conexiones en puente: 4 Ω a 8 Ω permitido)
Respuesta de frecuencia (+0, –3 dB)....................... 20 Hz – 50 kHz
Sensibilidad de entrada (RCA) ........................................ 2,0 V – 8,0 V
Relación señal a ruido...............................................................................95 dB
Impedancia de entrada ...........................................................................10 kΩ
DSP
EQ gráfico (13 bandas).........................................62,5/100/160/250/
400/630/1k/1,6k/2,5k/4k/6,3k/10k/16k Hz
EQ paramétrico..................................................f0: paso de 1/6 octava
.....................................................................Q: 0,4/0,8/1,4/2,0/4,0/8,0
X'over............................................................................. paso de 1/6 octava
Alineación de tiempo digital
.......................................................0-20,01 pies, paso de 1/30 pies
Bluetooth
Versión.................................................................................Bluetooth Ver.4,0
General
Tensión de funcionamiento
......................................... 14,4 V (margen de 11 – 16 V permitido)
Consumo........................................................................................................60 A
Tamaño de instalación (Anch × Alt × Prof)...
320 × 51 × 169 mm
12-5/8 × 2 × 6-5/8 pulgada
Peso........................................................................................3,1 kg (6,8 libras)
CTA-2006
Vatios RMS por canal @ 4 ohms, ≤ 1 % de
distorsión armónica total + N......................75 W × 6
Relación señal a ruido
(referencia: 1 vatio en 4 ohmios)..................... 81 dBA
XR600-6DSP.indd2 2017/01/1313:19
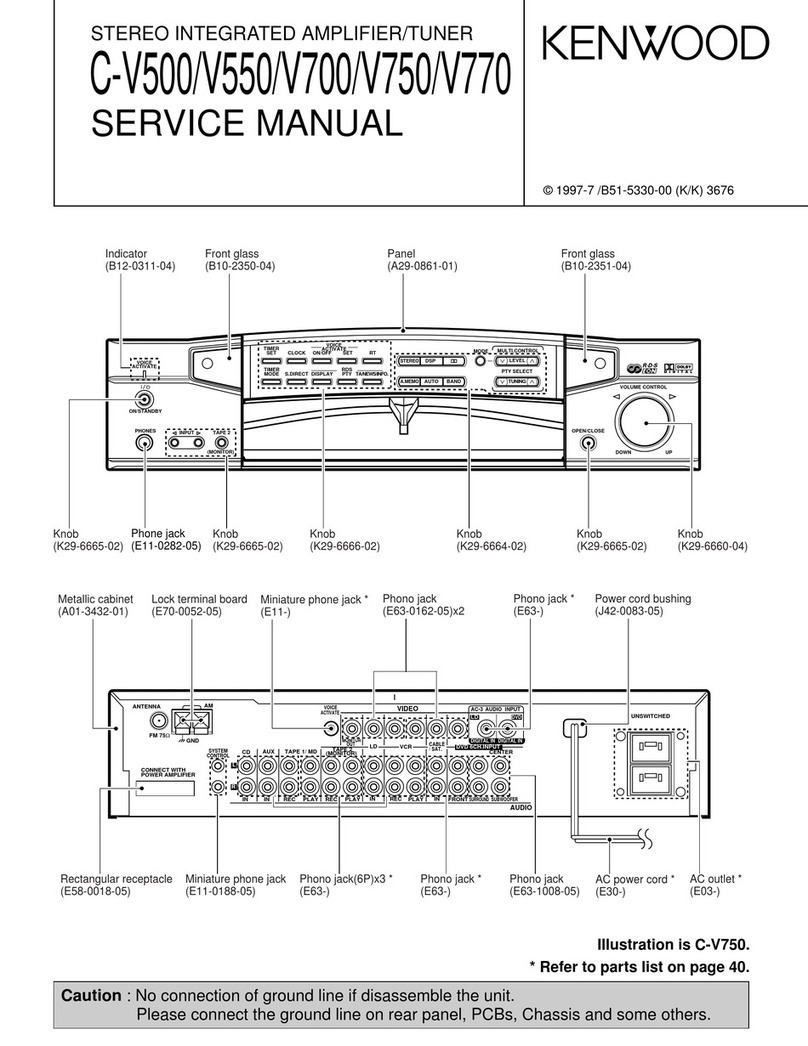
KENWOOD DSP CONTROL APP
This unit can be controlled using "KENWOOD
DSP CONTROL APP".
NOTE
• The system requirement information is not a
guarantee that the application will work on all
Bluetooth compatible devices.
• Appearance or contents are subject to change
without prior notice for improvement.
• Signal conditions vary, depending on the
surroundings.
• For more information about Bluetooth, visit the
following website: www.kenwood.com/cs/ce/
Cet appareil peut être commandé à l'aide de
l'application "KENWOOD DSP CONTROL APP".
REMARQUE
• Les informations relatives aux exigences du
système ne constituent pas une garantie de
fonctionnement de l'application avec tous les
périphériques Bluetooth compatibles.
• L'apparence ou les contenus sont sujets
à modification sans préavis à des fins
d'amélioration.
• La condition du signal varie en fonction de
l’environnement.
• Pour plus d’informations sur Bluetooth, consulter
le site Web suivant: www.kenwood.com/cs/ce/
Esta unidad puede controlarse utilizando
"KENWOOD DSP CONTROL APP".
NOTA
• La información sobre los requisitos del sistema
no es una garantía de que la aplicación
funcionará en todos los dispositivos compatibles
con Bluetooth.
• El aspecto o el contenido están sujetos a
cambios sin previo aviso para la mejora.
• Las condiciones de la señal varían dependiendo
del entorno.
• Si desea más información acerca de Bluetooth,
visite el siguiente sitio web: www.kenwood.com/
cs/ce/
User Mode / Mode utilisateur / Modo de usuario
KENWOOD
DSP CONTROL
<
KENWOOD DSP CONTROL
Information
Installer
Powerful
XR600-6DSP.indd2 2017/01/1313:19
.......
GET
ITON
,.,..
Google
Play
------------

Setting Data 1
F: XR-1700P, R: XR-1700P
SW: XR-W1004
AMP: XR1000-1
s
/
Pro Mode / Mode professionnel / Modo profesional
This unit needs a specialist install and setting. Leave the setting on Pro Mode to professionals.
Cet appareil nécessite un spécialiste pour l'installation et le réglage. Laissez le réglage sur mode professionnel pour un usage professionnel.
Esta unidad necesita una instalación y un ajuste especializados. Deje el ajuste del modo profesional a los profesionales.
Pro Mode top screen
will appear only when
OPERATION MODE switch
is
position.
L'écran d'accueil du mode
professionnel apparaît
uniquement lorsque le
commutateur OPERATION
MODE est en position
.
La pantalla inicial del modo
profesional aparecerá
solamente cuando el
conmutador OPERATION
MODE esté en la posición
.
Setting Data 1
F: XR-1700P, R: XR-1700P
SW: XR-W1004
AMP: XR1000-1
Setting Data 1
Setting Data 1
Setting Data 1
Setting Data 1 Setting Data 1 Setting Data 1 Setting Data 1
KENWOOD DSP CONTROL
Information < <
<
< <
<
Setting Name
Setting Name
XR600-6DSP.indd2 2017/01/1313:19
i!l
§!
H B
~
~
-=
<
~
iii
,r
ii

N
0
;:::
0
N
.
QUICK
START
GUIDE
THIS
PRODUCT
REQUIRES
WEB-PROGRAMMING.
BEFORE
INSTALLATION.
FOLLOW
STEPS
INSIDE.
C
TECHNICA
L
SUPPO
RT
877
.212.6169
WEB-PROGRAMMING
STEPS
G)
INSTALL
THE
WEBLINK
PLUGIN
(FOR
PC
ONLY!
Go
to
idatalinkmaestro.com/plugin and follow
the installation steps. Review the System Re-
quirements before installing. Macintosh not
supported.
r,j\
REGISTER
A
WEB
LINK
ACCOUNT
\.!:._}
Go
to
idatalinkmaestro.com/registerand
com-
plete the registration process. A confirmation
email
will
be
sent to you requiring validation.
fJ\
CONNECT
THE
MODULE
TO
YOUR
PC
\V
Use the included mini USB cable
to
connect
your iDatalink Maestro
AR
module to your
PC.
ri;\
WEBLINK
PROGRAMMING
~
Go
to idatalinkmaestro.com/login. Enter your
username and password, then
click
OK.
Fol-
low the installation steps in Weblink until your
module is flashed, then download your
install
guide.
~
COMPLETE
VEHICLE
-
SPECIFIC
INS
T
ALLATION
~
Follow the steps in your
install
guide and
com-
plete the installation.
ADS
recommends having
your iDatalink Maestro
AR
installed
by
a cer-
tified technician. Vehicle-s
pe
ci
f
ic
T-harness
required
and
sold separat
el
y.
C
TECHNICAL
SUPPORT
877
.212.6169
LIMITED
1-YEAR
WARRANTY
Automotive Data Solutions Inc. ["ADS")
warrants
to
the
original
purchaser
that this product
shall
be free
of defects in
material
and
workmanship
under
nor-
mal
use and circumstances,
for
the period of one
[1
l
year as of the
original
date of purchase.
In the event of any product
malfunction
during the
Warranty period, the
original
purchaser
must
return
to
the Authorized Dealer where
it
was originally
pur-
chased
with
the
original
proof of purchase. If a
mal-
function is detected, the Authorized Dealer
will
elect
to
repair
or
replace the product at its discretion.
La-
bor
costs may
be
applicable and are at the discretion
of the Authorized Dealer.
ADS is not responsible for any damages whatsoever,
including but not
limited
to any consequential
dam-
ages,
incidental
damages
for
loss of time, loss of
earnings,
commercial
loss of economic opportunity
and the
like
that
may
or
may not have resulted
from
the installation
or
operation of
an
iDatalink Maestro
product.
i:31-1~

Important Information when Extension Harnesses are Required !
Kenwood has included two extension harnesses
with this amplier for use if the location of the
XR600-6DSP diers from the general location of
the factory amplier.
© 2017 JVCKENWOODUSA Corporation B5H-0177-00
Factory Amplier Location
Install Location in Rear of Vehicle
Vehicle Specic
Universal input harness
Supplied by ADS
Maestro-Ar
Supplied by ADS
iDatalink Data Cable
Included with Maestro-Ar.
12-Wire Harness
(Large Plug)
13-Wire Braided Harness
(Small Plug)
XR600-6DSP
B5H-0177-0000.pdf12017/05/2210:09

. .
I
rri
p_orta
rit
In·formation-·
XR600-6DS.P
with
universa'J
co_nnection
!
Kenwoo
:d:ha·s
includ~d
a
·universal harness
with
this
·
amplifier
allowi~
_g·th·e ~
XR6o
·o-
6DSP
to
be
conne~ted
to
'any
.
afte
rm
a
rket
receiver
.
. .
·unparallel'ed
sound
tuf1ing and
performance
is
no~~J'~Chievable
·
from
this
reference
level
. .
··
·.
amplifier
.in
-.
an.v
syste·m !
Stereo
RCA
Power
. .
Note
·:
There
is
r-10
fading
capability
with
Input
Control
.·
this
type
of
system,
however
you
can
Turn-On
adjust
Front
.
and
Rear Leve
is
within
the
Wire
.s_
etup
applicatio'n.
-----~:---~=:-:-:
:::-+-l-J~-----_J
. .
XR6
.00-6DSP:
..
·: ; ~;.:
e"f:
~o
~~
~o
a~
~Jo
"~
-.~~
··•·
·.
::
..
·.•·
'!:·'.
;
r:b
•{I
[±c
• ;
---
r -t ~
4-PIN.
Connect:on
Maestro-Ar
S
up
plied
by
ADS
C
'.')
JVCKENWOODUSA
Corporation
2018

MILITARY
Units
purchased
through
the
U.SA
military
exchange
service
overseas
m.1y
be
serviced
under
warranty
in
the
continental
U.S.
A.,
subject to
the
following
conditions
1)
The
original
warranty
is
in
ettect.
2)
Proor
of
purchase
is
provided
to
the
servicer.
WARRANTY FOR MILITARY MARKET
JVC
KENWOOD
corporation
is
proud
of
the
quality
and
workmanship
of
its
audio
equipment.
This
unit
has
been
propetly
designed,
tested
and
inspected
before
it
wasshipped
to
you
.
If
properly
installed
and
operated
in
accordance
with
instructions
furnished,
il
shoul
d
give
you
an
opt
i
mum
reliable
performance.
WARRANTY PERIOD
This
product
is
warranted
for
a
period
of
(1)
year
from
the
date
of
the
original
purchase
.
SCOPE OF WARRANTY
Excep
t
as
specif«!
below,
this
warranty
co,ers
all
defects
in
materials
and
workmanship
of
the
Kenwood
brand
products
.
During
the
warranty
perrod,
any
authorized
Kenwood
Service
Center
in
the
mi
litary
market
listed
in
the
back
of
this
warranty
card
will
provide
you
fr
ee-of-charge
both
parts
and
labor
required
to
correct
any
defect
in
materials
or
workmanship
.
The
following
are
not
cowred
by
this
warranty.
1.
Vo
l
tage
conversions
.
2.
Periodiccheck-upswhichdonotdiscloseanydelectco,ered
by
the
warranty.
3.
Cabinets,
grilles,
other
exterior
fin
i
shes,
belts,
tape
heads,
and
other
non-ourable
parts
and
accessories.
4.
Units
on
which
the
serial
number
has
been
ettaced,
modif
i
ed
or
removed
.
5.
Installation
and/or
remova
l
charges.
6.
Damaged
magnetic
tapes.
7.
H
ouse
call
charges
fo
r
any
repairs.
8.
Shipping
or
deli,ery
cha
r
ges
to
or
from
an
authorized
Kenwood
Service
Center.
9.
This
warranty
will
notco,eranyfailuretha
t
isduetoanyof
the
lollowi
ng
conditions
in
accordance
with
the
visual
inspection
of
the
authorized
Kenwood
Service
Center:
* I
mprope
r
maintenance
or
repair,
including
the
installation
of
parts
or
accessories
that
do
not
confonn
to
the
quality
and
specifica
ti
ons
of
the
original
parts.
•
Misuse,
abuse,
neglect,
unauthorized
product
modilicalion
or
failure
to
fo
l
low
instructions
contained
in
the
Owner's
Manual.
•
Accidental
or
intentional
damages.
•
Repairs
or
attempted
repairs
by
an
unauthorized
agency.
(All
repairs
must
be
perfo
r
med
at
an
authorized
Kenwood
Service
Center.)
•
Damages
or
deteriorations
caused
during
sh
i
pment
(Claims
must
be
presented
to
the
carrier).
•
Damages
or
deteriorations
resulting
from
removal
and/
or
replacement.
PURCHASER'S RESPONSIBILITIES
As
the
purchased
of
a
new
Kenwood
brand
product,
you
are
requested
to
do
the
follow
in
g
in
order
to
obtain
Kenwood
warranty
service.
1.
Retainyoursalessliporotherevidenceofpurchaseforproving
you
r
eligibility
for
reQuesling
Kenwood
warranty
service.
2.
Make
your
unit
available
to
an
authorized
Kenwood
Service
Center
in
lhe
military
market
for
inspection
and
approved
warranty
service,
or
ship
your
unit
in
its
original
carton
box
or
equivalent,
fully
insured
and
shipping
charges
prepaid,
to
the
authorized
Kenwood
Service
Center.
Dear
Customer,
LIMITATION OF IMPLIED
WARRANTIES
Any
and
all
implied
warranties,
including
warranties
of
merchantability
and
fitness
for
a
particular
purpose,
shall
be
limited
in
duration
to
the
length
ol
this
warranty
.
EXCLUSION OF CERTAIN
DAMAGES
KENWOODs
liability
for
any
defective
product
is
limited
to
the
repair
or
replacement
of
said
product,
at
our
potion
,
and
shall
not
include
damages
of
any
kind,
whether
incidental
,
consequential
or
otherwise,
expect
to
the
extent
prohibited
by
app
l
icable
law.
KENWOOD AUTHORIZED SERVICE
CENTERS IN MILITARY MARKET
JAPAN:
Yokota
Kenwood
R
ep,;
c/o
Yokota
BX
,
JAAX
AAFES
-PAC,
APO
San
Francisco
96328
Zama
Kenwood Rep,; c/o
Zama PX,
JAAX
AAFES-PAC,
APO San Francisco 96343
Misawa
Kenwood Rep,; c/o
Mi
sawa BX,
JAAX
AAFES-PAC,
APO San Francisco 96519
Yokosuka
Kenwood Rep,; c/o
A-33, Yokosuka NEX No. 260-010
FPO
Seattle 98760
Atsugi
Kenwood Rep,; c/o
Atsugi NEX No. 260-020
FPO
Seattle
98767
lwakuni
Kenwood Rep,; c/o
Marine Corps Exchange, Marine Corps
Air
Station,
FPO
Seattle 98764
Sasebo
Sasebo NEX;
Navy Exchange 260-040
F.A.
Box 115
FPO
Seattle 98766
Okinawa
Ke
nwo
od Rep,; c/o
OWAX, AAFES-
PAC
, APO San Francisco
96230
KOREA:
Kenwood Rep,; c/o
KOAX Re
pa
ir Shop, AAFES-PAC
DD-Camp Market, APO San Francisco
96488
GUAM:
Kenwood Rep,; c/o
Guam NEX No, 230-010,
FPO
San Francisco 96630
Kenwood Rep,; c/o
GUAX
, AAFES-
PAC,
APO San Francisco
96334
U.S.A.:
In
The
Continental U.S.A.
For Nearest Authorized Service Center;
Tel: 1-800-536-9663
www.us.jvckenwood.com
EUROPE:
Please inquire at the military resale
outlets
where
you
bought
your
Kenwood products,
or
JVCKENWOOD DEUTSCHLAND GMBH:
Konrad-Adenauer Allee
1-11
,
611
18 Bad
Vilbel, Germany
Th
ank
yo
u for purchasing this kenwood product. As mentioned
in
the pages of this booklet, ourwarranty
is
only
valid
in
the countries listed. If your country
is
not
li
sted please contact your retailer for information on warranty
procedure, or write t
o:
JVC KENWOOD Customer Information Center
3-12, Moriyacho, Kanagawa-ku, Yokohama-shi,
Kanagawa
22
1-0022,
Japan
Warranty Card
Attention:
ldenl
ifi
calion
du
produit
Modelo
do
aparelho
e
numero
de
serie
Model
number
&
seria
l
number
Revendeur
&
cachet
Nome
da
loja
e
car
i
mbo
Dealer
&
stamp
Dale
d'achtat
Data
da
compra
Purchase
dale
Norn
&
adresse
du
client
Nome
e
enderll(,o
do
cliente
Name
&
address
of
customer
This
card
and receipt (or invoice)
are
necessary
to
purchase a newpanel in c
ase
of
theft
ordamage.
Attention:
Vous
aurez
besoin de cette carte et du re,u (ou de
la
facture) pour acheter un nouveau
panneau
en
cas
de vol ou d'endommagement.
Aten~ao:
Em
caso
dedano ou perda
do
pa
i
nel
frontal,este Certificado
de
Garantia
ea
Nota
Fisca
l
decompra
serao
requisitados
para
aaquisi,ao de um novo
pa
i
nel
©
B46
-0824-
00
/
04
(Kl
(
15/
11
)

U.S.A.
JVCKENWOOD
USA
Corporation
Th,s
warranty
will
be
honored
only
in
the
U
.S.A
KENWOOD
LIMITED
WARRANTY
FOR CAR STEREO
COMPONENTS
HOW
LONG
IS
THE WARRANTY
JVCKENWOOO
USA
Corporation
("Kenwood")
warrants
this
product
for
a
period
of
one
(1)
year
from
the
date
of
original
purchase
.
WHAT
IS
COVERED
AND
WHAT
IS
NOT
COVERED
Except
as
specilied
below,
this
warranty
covers
all
detects
in
material
and
workmanship
in
Kenwood
car
stereo
components.
The
following
are
not
covered
by
the
warranty:
1.Any
product
which
is
not
distributed
in
the
USA
by
Kenwood
or
which
is
not
purchased
in
the
U.SA
from
an
authorized
Kenwood
car
stereo
dealer
or
an
automobile
dealer,
unless
the
product
is
purchased
lhroogh
lhe
U.S.A
Military
Exchange
Service
2.
Any
product
on
which
the
serial
number
has
been
defaced,
modified
or
removed.
3.
Damage,
deterioration
or
malfunction
resulting
from:
a.
Any
shipment
of
the
product
(claims
must
be
presented
lo
lhe
carrier).
b.
Installation
or
removal
of
the
product.
c.
Accident,
acts
of
nature,
misuse,
abuse,
neglect,
unauthorized
product
modification
or
failure
lo
follow
instruclions
supplied
with
the
product.
d.
Repair
or
attempted
repair
by
anyone
not
authorized
by
Kenwood
e.
Any
other
cause
which
does
not
relate
to
a
product
defect
.
WHO
IS
PROTECTED
This
warranty
is
enlorceable
only
by
the
original
purchaser.
WHAT
WE
WILL
PAY
FOR
We
will
pay
for
all
labor
and
malerial
expenses
for
covered
items.
Payment
of
shipping
charges
is
discussed
in
the
next
section
of
this
warranty_
HOW
TO
OBTAIN WARRANTY
SERVICE
If
your
KENWOOD
product
ever
needs
service
1.
Take
or
ship
rt
to
any
KENWOOD
Authorized
Se!vice
Center
rn
the
U.S.A.
along
with
&
complete
description
ol
the
problem
(ii
you
are
uncertain
as
to
whether
a
Service
Center
is
authorized,
pleasecall
1-800-KENWOOD
for
the
nearest
Service
Center.
1
·800-536-9663).
2.
Although
yoo
must
pay
any
shipping
charges
ii
it
is
necessary
toshiptheproductforwarrantyservice,
wewlll
pay
the
return
shipping
charges
if
the
repairs
are
covered
by
the
warranty
within
the
United
States
3.
Whenever
your
units
are
taken
or
sent
for
warranty
service.
yoo
must
include
a
copy
of
the
original
dated
sales
receipt
as
proof
of
warranty
coverage
LIMITATION OF IMPLIED
WARRANTIES
ALL
IMPLIED
WARRANTIES,
INCLUDING
WARRANTIES
OF
MERCHANTABILITY
AND
FITNESS
FOR
A
PARTICULAR
PURPOSE
,
ARE
LIMITED
IN
DURATION
TO
THE
LENGTH
OF
THIS
WARRANTY.
EXCLUSION
OF
DAMAGES
KENWOOO'S
LIABILITY
FOR
ANY
DEFECTIVE
PRODUCT
IS
LIMITEDTOTHEREPAIRORREPLACEMENTOFTHEPRODUCT
AT
OUR
OPTION.
KENWOOD
SHALL
NOT
BE
LIABLE
FOR:
1.
INSTALLATION
OR
REMOVAL
CHARGES,
DAMAGE
TO
OTHER
PROPERTY
CAUSED
BY
ANY
DEFECTS
IN
KENWOOD
CAR
STEREO
COMPONENTS,
DAMAGES
BASED
UPON
INCONVENIENCE,
LOSS
OF
USE
OF
THE
PRODUCT.
OR
2.
ANY
OTHER
DAMAGES
,
WHETHER
INCIDENTAL
,
CONSEQUENTIAL
OR
OTHERWISE
SOME
STATES
DO
NOT
ALLOW
LIMITATIONS
ON
HOW
LONG
AN
IMPLIED
WARRANTY
LASTS
AND/OR
DO
NOT
ALLOW
THE
EXCLUSION
OR
LIMITATION
OF
INCIDENTAL
OR
CONSEQUENTIAL
DAMAGES,
SO
THE
ABOVE
LIMITATIONS
AND
EXCLUSIONS
MAY
NOT
APPLY
TO
YOU.
This
warranty
gives
you
specific
legal
1ights
.
and
you
may
also
have
other
rrghts
which
vary
from
stale
lo
slate.
Ifa
problem
develops
during
or
alferthe
limited
Warranty
Period
,
or
ir
you
have
any
Questions
regarding
the
operation
of
the
product,
you
should
contact
your
KENWOOD
Authorized
Dealer
or
Authorized
Service
Center.
If
the
problem
or
yoor
question
is
not
handled
to
your
satisfaction,
please
contact
our
Customer
Relalrons
Department
at
lhe
address
lrsled
below:
JVCKENWOOD
USA
Corporation
PO Box 22745, 2201 E. Dominguez St.
Long Beach,
CA
90810-5745
Tel:
(8001
536
-9663
www
.us.jvckenwood.com
BRASIL
JVC
KENWOOD
DO BRASIL COMERCIO DE ELETRONICOS LTDA
0
labricante
garante
o
produto
identificado
na
Nola
Fiscal
de
venda
ao
consumidor
contra
qualquer
deleito
de
labrica,llo
ou
de
mal!ria-prima
duranle
o
perlodo
de
garanlia
Esta
garantia
6
~Iida
no
terril6rio
brasileiro
desde
que
o
produto
tenha
sido
adquirido
no
Brasil
e
distribuido
pela
JVC
KENWOOD
do
Brasil
Com!rcio
de
EletrOnicos
Lida.
PERiODO DE
GARANTIA
Este
produto
6
garantido
pelo
prazo
de
01
(um)
ano,
incluindo
o
perfodo
estabelecido
por
lei,
a
partir
da
data
de
aquisicao.
comprovada
mediante
a
apresentacao
da
respectiva
Nola
Fiscal
de
venda
ao
consumidor
final.
Eventuais
reparos
realizados
no
produto
durante
o
perfodo
de
garantia
Mo
implicam
na
dilatacao
do
seu
prazo.
EXCLUSAO
DA
GARANTIA
(a)
Produtos
com
o
nUmero
de
5erie
ou
certilicado
de
garantia
rasurados,
adu
lterados
ou
i
legfveis;
(b)
Defeitos
resullantes
de
acidenles
(quedas,
bahdas
e
etc),
uso
em
desacordo
com
o
manual
de
instruc;:Oes,
ma
ulilizacao,
ligayao
a
!ante
de
tensao
dilerente
da
especificada
no
Manual
de
ln~""°'5.
modifi~oes
nao
autorizadas:
(c)
Danos
causados
por
agenles
da
natureza
(Ex:
chuvas,
raios,
maresia,
enchentes
e
elc);
(d)
Defeitos
ou
danos
em
decorr@ncia
de
consertos
realizados
par
pessoas
nao
autorizadas;
(
e)
Defeitos
ou
danos
resuHanles
do
uso
de
pec;as
ou
disposilivos
rrao
con!
ormes
as
especih~
da
JVC
KENWOOD;
(f}
Danos
ou
deterioraf,Oes
aos
acabilmentos
externos,
partes
cosmeticas,
cabos,
chicotes,
paratusos
de
li~o.
luvas
,
alcas,
bo1sas,
estojos,
adaptadores,
antenas,
filas,
cabel,as
gravadoras,
CDs
oo
danos
causados
por
pilhas
defeiluosas
ou
com
vazamenlo;
(g)
Defeilos
ou
danos
devido
ao
lransporte
(rectamacoes
devem
ser
leitas
junlo
a
empresa
transportadora);
(h)
Oualquer
outra
causa
que
nilo
esteja
relacionada
a
defeitos
de
materia-prima
e
de
labrica,ao:
(i)
Danos
causados
por
tentativa
de
roubo
ou
furto;
(j)
Danos
causados
por
uso
de
CDs
de
ma
qualidade;
(k)
Oanos
decorrentes
do
desgaste
natural
do
produfo;
(I)
Danos
causados
por
mau
uso.
(
derramamento
de
Ir
quidos
e/ou
ahmeolos,
corrosao,
oxidai;ao,
exposil;ao
a
umidade
ou
situacnes
clim.titicas
extremas,
riscos
ou
quedas)
CONSERTO
EM
GARANTIA
t
indispensavel
a
apresentacao
deste
Certihcado
de
Garanlia
devidamente
preenchido.
acompanhado
da
respectrva
Nola
Fiscal
de
compra
do
produto,
desde
que
nilo
apresente
rasuras
OU
modificacoes.
0
consumidor
somente
tera
direito
a
estes
beneffcios,
quando
o
produto
for
entregue
diretamente
no
balrao
de
um
Servi~
Autorizado
da
JVC
KENWOOD
0
QUE
NAO
E COBERTO PELA GARANTIA
lnstalilc;lo
e
remocao
do
produto,
despesas
de
frete,
seguro
e
embalagem
sao
de
responsabrlidade
do
propriet.irio.
Este
produto
e
destmado
exclusivamente
ao
uso
dofOOStico.
IMPORTANTE:
Para
qualquer
informacao
sobre
seu
equipamento
JVC
KENWOOD,
ou
para
obter
oender~
do
Service
Autorizado
ma.is
pr6ximo,
acesse
o
site
www.kenwood.com
.
br,
ou
ligue
para
a
Central
de
Atendimento
JVC
KENWOOD
-
Tel:
+55
(11)
3777-f,771
com
os
dados
abaixo
preenchidos.
JVC
KENWOOD
DO
BRASIL
COMERCIO
DE
ELETRONICOS
LTDA
Tel:
(1
1) 3777-6771
www
.
kenwood
.
com
.
br
Nome
do
consumidor:
_____
_________
_
Endereyo:
__________
CEP:
______
_
Cidade:
__________
Estado:
______
_
Telefone
:
________
_
Data
da
compra:
__
/
__
/__
Nola
Fiscal:
____
_
CANADA
KENWOOD WARRANTY
JVCKENWOOD
Canada
Inc.
(hereinafter
called
'KENWOOD"),
gives
the
following
written
warranty
to
the
originat
customer
of
each
new
Kenwood
product
distributed
in
Ganada
by
KENWOOD
and
purchased
from
a
dealer
authorized
by
KENWOOD
.
KENWOOD
warranls
that
each
new
Kenwood
product,
under
normal
use,
is
free
from
any
defects,
subjed
to
the
te
rms
and
conditions
set
forth
below
Ifa
delect
should
occur
wi
thin
the
warranty
period,
repairs
will
be
made
free
of
charge
for
parts
and
labour
when
such
defects
are
determined
by
KENWOOD
or
its'
authorized
service
centres
to
be
anributable
to
faulty
materials
or
workmanship
at
lune
of
manufacture
.
Please
contact
KENWOOD
lo
confirm
iia
dealer
or
service
centre
is
authorized
by
KENWOOD
.
WARRANTY PERIOD
This
Kenwood
product
is
warranted
tor
parts
and
labou
r
for
a
period
of
one
(1)yearfrom
the
dale
of
original
purchase
,
lease
or
rental,
except
for
products
which
are
used
ina
professional
or
commercial
application,
which
are
warranted
for
a
period
of
ninety
(90)
days
for
parts
and
labour
and
are
subject
to
the
terms
and
conditions
of
the
warranty.
WARRANTY EXCLUSIONS
Thi
s
warranty
excludes
(a)
Products
purchased
in
a
foreign
country
or
purchased
in
Canada
and
taken
to
a
loreign
country
(b)
Products
purchased
from
a
dealer
not
authorized
by
KENWOOD.
(c)
Products
with
the
serial
number
defaced,
allered
or
missing.
(d)
Periodic
check-ups
which
do
not
disclose
any
defects
covered
by
this
warranty
GARANTIE KE
NWOOD
JVCKENWOOD
Canada
Inc.
(ci-apr!s
appel!e
"KENWOOD"),
donne
par
OCrit
la
garanlie
suivante
a
l'ache
teu
r
original
de
chaque
nouveau
produit
Kenwood
dislribLJe
au
Canada
par
KENWOOD
et
achet!
a
un
concessionnaire
autoris!
par
KENWOOD.
KENWOOD
garanlIt,
sous
reserve
des
termes
et
des
conditions
!nonces
ci-dessous,
que
chaque
nouveau
produil
Kenwood,
dans
des
conditions
d'emploi
normales,
est
exempt
de
tous
d<!fauts
Si
l'und!faut
se
produil
pendant
la
ptlriodedegarantie,
KENWOOD
s'
engage
a
assumer
le
coOt
des
pi!ces
d!fectueuses
et
de
la
main-d'oeuvre
necessaires
pour
effecluef
les
reparations
pourvu
que
de
leis
d!fauts
sont
attribuables
a
des
pi!ces
defectueuses
employees
lors
de
la
fabricalmn
du
produit
Kenwood
OU
a
la
main-d
'
oeuvre
tel
qu'!tabli
par
KENWOOD
00
par
l'un
de
ses
centres
de
service
autorises.
Appelez
KENWOOD
pour
verifier
si
un
concessionna1re
ou
un
centre
de
service
est
autoris!
par
KENWOOD
PERIODE
DE
GARANTIE
Les
pieces
et
la
main-d
'
oeuvre
netessaires
pour
la
r~ration
des
produits
Kenwood
sont
garanlres
pendant
la
ptlnoded
'
un
(1)
an
a
compler
de
la
date
d'
achat.
de
bail
ou
de
local
ion
originate,
sauf
dans
les
cas
oO
les
produits
Kenwood
sont
employes
dans
un
but
professionoel
ou
commercial,
oo
la
garantie
des
pikes
et
de
la
main-d'oeuvre
demeure
en
vigueur
pendant
une
periode
de
quatre-vingt-dix
(90)
jours
sous
reserve
des
termes
et
des
conditions
de
la
garanlie
EXCLUSIONS DE
GARANT
IE
Celte
garantie
ne
coLNre
pas
(a)
les
produits
achet!s
a
l'!lranger
ou
achet!s
au
Canada
el
lransportes
a
retranger;
(b)
les
produits
achetes
a
un
concessionnaire
non
autorise
par
KENWOOD
:
(c)
les
produits
dont
le
numt!ro
de
s!rie
manque,
a
!16
efface
OU
modifie;
{d)
les
services
d'entretien
periodiques
qui
n'indiquent
aucun
d8faut
couvert
par
cette
garantie:
JVCKENWOOD Canada Inc.
(e)
Defects
resulting
from
disaster,
accident,
abuse
,
misuse,
lightning,
power
surges,
neglect
or
lack
of
periodic
maintenance,
unauthorized
modilication
or
failure
to
I
ollow
instructions
in
the
owner's
manual
(f)
Defects
or
damage
as
a
resull
of
repairs
pertormed
by
a
person
or
party
not
authorized
by
KENWOOD.
(g)
Defects
resultrng
from
the
use
of
parts
or
devices
that
do
not
conform
to
KENWOOD
specifications
.
(h)
Damage
or
deterioration
occurring
to
any
exterior
finishes,
cosmetic
parts,
tape
heads,
adaptors,
antennas,
cables,
tapes,
discs
or
faulls
or
damage
caused
by
defective
or
leaking
batteries.
(i)
Defectsordamageoccurr
i
ngduringshrpping(claimsshou
ld
be
presented
to
the
shipping
company)
(j)
Product
voltage
and
/or
lrne
frequency
conversions.
(k)
Product
installation
or
removal
charges
.
TO
OBTAIN WARRANTY SERVICE
Should
your
Kenwood
product
require
warranty
service,
deliver
it
lo
any
authorized
KENWOOD
service
centre
and
present
the
original
copy
of
your
bi
ll
of
sale
and
this
warranty
card
as
proof
of
warranty,
or
send
your
product
fully
insured
and
freight
prepaid
to
the
nearest
authorized
KENWOOD
service
centre.
To
avoid
possible
shipping
damage
,
make
sure
the
product
is
properly
packed
.
Include
a
copy
of
your
original
bill
of
sale
and
this
warranty
card
as
prool
of
warranty
al
ong
wilt!
yoor
name,
home
and
/or
work
telephone
number(s).
a
complete
r
eturn
address
and
a
detailed
description
of
the
faull(s)
.
Products
reparred
with
in
warranty
will
be
returned
freight
prepaid
lo
destinations
within
Canada.
The
customer
is
responsible
!or
all
f
reight
and
related
costs
for
the
return
of
product(s)
to
destinations
outside
Canada
(e)
les
d<!fauts
causes par
les
d<!saslres.
les
accidents.
les
abus,
l
es
emplois
incorrects
,l
es
6Clairs,
les
surtens
ion
s
de
courant,
les
manques
de
so
ins
ou
d'entretiens
pModtques
,
les
modi
!
ical
ions
non
autorisee5
ou
les
manques
de
respect
du
mode
d'
emplo
i:
(f)
les
d!fauts
ou
le
s
dommages
causes
lors
de
r!paralions
effectuees
par
une
personne
ou
par
une
partie
nonautoriSOO
par
KENWOOD:
(g)
lesd<!fautscaus!sparl'emploidep
i
!cesoudedispositrlsqur
ne
se
conforment
pas
aux
exigences
de
KENWOOD:
(h)
les
finilrons
e~!rieures
.
les
pi!ces
cosmt!tiques,
les
l!les
de
bandes,
les
adaptateurs,
les
antennes
,
les
tables,
les
bandes,
l
es
disques
endomma~
oo
d!ptlris,
ni
les
d<!fauts
oo
dommages
causes
par
des
piles
d<!fectueuses
ou
qu
i
fuient
;
(i)
les
d!fauts
ou
dommages
qui
se
produisent
pendant
l'expedil
i
on
des
pr
odurts
Kenwood
(
On
devrail
d<!poser
de
telles
r!clamations
aupr!s
des
compagnies
de
transport);
(j)
les
conversions
de
tension
eVou
de
fr~uence
du
produil;
(k)
les
frais
d'installalion
oo
d'enlevement
du
produil.
COMMENT
OBTENIR
DU
SERVICE
SOUS
GARANTIE
Au
cas
oU
un
service
sous
garantie
de
votre
produit
Kenwood
s'avere
nbssa
ir
e,
veuillez
livrer
le
produit
a
n'importe
quel
centre
de
serv
i
ce
KENWOOD
et
presenter
la
copie
originale
du
contra!
de
vente
et
cette
carte
de
garantie
en
tan!
que
preuve
de
garantie
ou
veurllez
faire
parvenir
volre
produ
il
assur!
el
port
pay!
au
centre
de
service
KENWOOD
autoris!
le
plus
proche.
Pour
8Viter
toules
possibil
i
tes
de
dommages
pendanl
le
transport
,
veu
i
llez
bien
emballer
le
produit.
Veuillez
inclure
une
copie
du
contra!
de
vente
original
et
cette
carte
de
garantie
en
!ant
que
preuve
de
garantie
aussi
bien
que
votre
nom,
nurneros
de
telephone
au
poste
de
trava
il
eVou
au
domicile,
votre
adresse
et
une
description
detaillee
des
dffauls.
Les
produits
sous
garantie
repare:S
seront
retoumes
port
paye
aux
destinations
a
l'intBrieur
du
Canada.
Le
consommateur
se
ra
responsable
de
taus
lrais
de
transport
et
d'autres
frais
qui
s'y
rapportent
pour
faire
expedier
les
produils
a
destinations
a
l'ext!rieur
du
Canada.
ENTIRE WARRANTY
This
warranty
constitutes
the
entire
wr
i
tten
warranty
given
by
KENWOOD
.
No
person,
party,
dealer
or
service
cen
t
re
or
their
agents
or
employees
are
authorized
to
extend
or
enlarge
this
warranty
on
behalf
of
KENWOOD
by
any
wr
itten
or
verbal
statement
or
advertisement
or
promotion,
includmg
any
extended
warranty
program
or
plan
ltlal
may
be
offered
by
the
dealer
or
service
centre.
unless
approved
in
writing
by
KENWOOD.
DISCLAIMER
KENWOOD
disclaims
any
responsibility
for
loss
of
trme
or
use
of
the
product
or
any
othe
r
ind
i
rect
,
incidental
or
conseQuential
damage
to
other
products
or
goods.
i
nconvenience
or
commercial
loss.
NOTICE
TO
CONSUMER
The
provisions
conta
i
ned
in
this
written
wa
rran
ty
are
not
intended
to
limit,
modify
,
take
away,
d1scla1m
or
exclude
any
warranties
or
rights
you
may
have
which
are
set
forth
in
any
applicable
prov
inc
ial
or
federal
laws
or
leg
is
l
ation
.
IMPORTANT
This
warranty
card
by
itself
is
not
considered
by
KENWOOD
as
a
valid
proof
ol
purchase
.
When
apply
in
g
for
warranty
repairs,
you
mu~
present
the
original
copy
of
your
bi
ll
of
sale
and
this
warranty
card
as
proof
of
warranty
,
sowe
recomme
n~
that
lhey
be
kept
in
a
safe
place
,
should
they
be
required
in
the
future
JVCKENWOOD
Can
a
da
Inc.
6070 Kestrel Road, Mississauga,
Ontario, Canada L5T 1
S8
Tel.: (
905
) 670-7211
Fax: (
905
) 670-
7248
L'ENTIERE GARANTIE
Cette
garan
t
ie
repr!sente
l'enli!re
garanfie
donn!e
par
!crit
pa
r
KENWOOD.
KENWOOD
ne
se
lienl
aucunement
responsable
de
toutes
extensions
ni
de
toutes
augmen
ta
tions
de
cette
garant
ie
faites
ou
enlrepnses
par
toutes
personnes,
parties,
concessionnaires
ou
centres
de
service
ou
par
leurs
agents
ou
employ!$
au
nom
de
KENWOOD
au
moyen
d'
affirmations
ve
r
bales
ou
OCriles,
d'annonces
ou
de
promotions,
y
incl
us
taus
programmes
ou
plans
de
garantie
etendue
que
puissent
offrir
les
concessionnaires
ou
les
centres
de
service,
a
ma
ins
Que
KENWOOD
n'y
ait
consenli
par
etrit
d'
avance
RENONCIATION
KENWOOD
renonce
a
tout
es
responsabi
I
it!s
de
perte
de
temps
,
d'emploi
du
produit.
de
lous
dommages
indirects
ou
accessoires
causes
a
d'autres
produits
ou
biens
,
de
taus
iocon~nients
ou
de
toutes
pertes
commerciales
.
AVIS
AUX
CONSOMMATEURS
Les
stipulations
contenues
clans
la
presente
garanlle
OCrite
n'ont
pas
pour
but
de
lim
iter,
de
modifier,
de
diminuer.
de
rejete
rni
d'exclure
d'
autres
garant
ies
ni
dro
i
ts
enonces
dans
n'importe
que
lles
lois
oo
l!g
is
lation
s
provinciales
ou
f!d<!rales.
IMPORTANT
KENWOOD
ne
consid!re
pas
cette
garantie
tou
te
seu
le
comme
Mani
une
preuve
d'
achal
val
ide
.
Lorsqu·on
demande
du
service
sous
garantie
,ii
faudra
presenter
la
copie
origina1e
du
contral
de
vente
aussi
bien
que
cette
carte
de
garan
lie
en
lant
que
preuve
de
garantie.
On
recommande
de
les
conserver
clans
un
lieu
sOr
au
cas
oU
elles
s·averera
i
ent
necesa
i
res
a
l'avenir.
JVCKENWOOD
Canada
I
nc
.
6070 Kestrel Road, Mississauga,
Ontario
, Canada L5T 1
S8
Telephone: (
905
) 670-7211
Tel
ecopieur: (905) 670-7248
Other manuals for XR600-6DSP
2
Table of contents
Other Kenwood Amplifier manuals

Kenwood
Kenwood TL-120 User manual

Kenwood
Kenwood A-85 User manual

Kenwood
Kenwood KM-Z1 Guide

Kenwood
Kenwood KA-907 User manual

Kenwood
Kenwood XXV-03A User manual

Kenwood
Kenwood KAC-8200 User manual

Kenwood
Kenwood KA-727 User manual

Kenwood
Kenwood KAC-1023 User manual

Kenwood
Kenwood KA-3500 User manual

Kenwood
Kenwood KA-80 User manual

Kenwood
Kenwood KAC-827 User manual

Kenwood
Kenwood KAC-9020 User manual

Kenwood
Kenwood KA-3700 User manual

Kenwood
Kenwood KA-95 User manual

Kenwood
Kenwood KM-992 User manual

Kenwood
Kenwood KAC-5203 User manual

Kenwood
Kenwood KAC-6403 User manual

Kenwood
Kenwood KAF-S500 User manual

Kenwood
Kenwood D503BT User manual

Kenwood
Kenwood KAC-X541 User manual