manuals.online logo
Brands
  1. Home
  2. •
  3. Brands
  4. •
  5. Kenwood
  6. •
  7. Car Receiver
  8. •
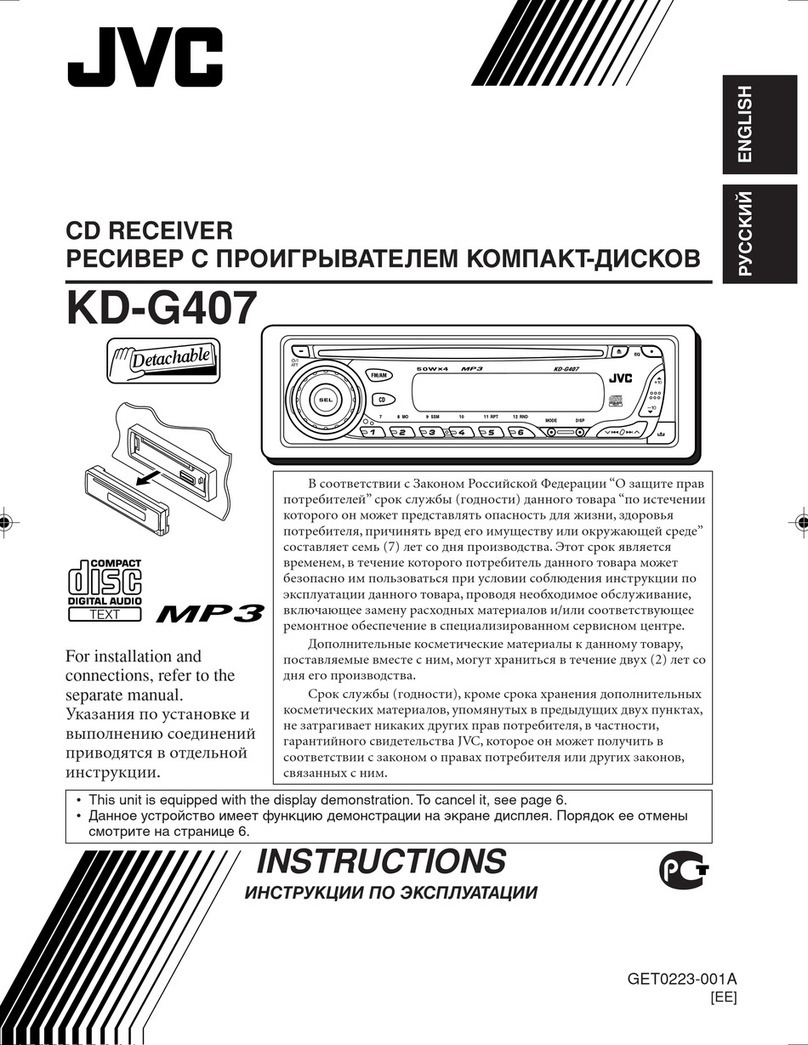
  9. Kenwood KRC-X957 User manual

Kenwood KRC-X957 User manual

Other manuals for KRC-X957

1

This manual suits for next models

1

Other Kenwood Car Receiver manuals

Kenwood KDC-152 User manual

Kenwood

Kenwood KDC-152 User manual

Kenwood KDC-153R User manual

Kenwood

Kenwood KDC-153R User manual

Kenwood KRC-108S User manual

Kenwood

Kenwood KRC-108S User manual

Kenwood KRC-265 User manual

Kenwood

Kenwood KRC-265 User manual

Kenwood KDC-V6017 User manual

Kenwood

Kenwood KDC-V6017 User manual

Kenwood KDC-135 User manual

Kenwood

Kenwood KDC-135 User manual

Kenwood KDV-5234 User manual

Kenwood

Kenwood KDV-5234 User manual

Kenwood DNR935WBT User manual

Kenwood

Kenwood DNR935WBT User manual

Kenwood DNR935WBT User manual

Kenwood

Kenwood DNR935WBT User manual

Kenwood KDC-3247 User manual

Kenwood

Kenwood KDC-3247 User manual

Kenwood KDC-U453 User manual

Kenwood

Kenwood KDC-U453 User manual

Kenwood KDC-W4544U User manual

Kenwood

Kenwood KDC-W4544U User manual

Kenwood KVT-514 - Wide In-Dash Monitor User manual

Kenwood

Kenwood KVT-514 - Wide In-Dash Monitor User manual

Kenwood KRC-2007 User manual

Kenwood

Kenwood KRC-2007 User manual

Kenwood KDV-MP7032 User manual

Kenwood

Kenwood KDV-MP7032 User manual

Kenwood KDV-7241 Guide

Kenwood

Kenwood KDV-7241 Guide

Kenwood KRC-278RA User manual

Kenwood

Kenwood KRC-278RA User manual

Kenwood KDC-5000 User manual

Kenwood

Kenwood KDC-5000 User manual

Kenwood KDC-X917 User manual

Kenwood

Kenwood KDC-X917 User manual

Kenwood KDC-X759 User manual

Kenwood

Kenwood KDC-X759 User manual

Kenwood KRC-535 User manual

Kenwood

Kenwood KRC-535 User manual

Kenwood KDC-W241AY User manual

Kenwood

Kenwood KDC-W241AY User manual

Kenwood KMM-BT408 User manual

Kenwood

Kenwood KMM-BT408 User manual

Kenwood KDC-BT740DAB User manual

Kenwood

Kenwood KDC-BT740DAB User manual

Popular Car Receiver manuals by other brands

Linear Series LS5050 Operation and installation manual

Linear Series

Linear Series LS5050 Operation and installation manual

Sony XR-CA430X Service manual

Sony

Sony XR-CA430X Service manual

T+A Elektroakustik K1 CD-RECEIVER operating instructions

T+A Elektroakustik

T+A Elektroakustik K1 CD-RECEIVER operating instructions

SoundMax SM-CDM1052 instruction manual

SoundMax

SoundMax SM-CDM1052 instruction manual

Xtrons HD107HD user manual

Xtrons

Xtrons HD107HD user manual

Mopar RB3 manual

Mopar

Mopar RB3 manual

Clarion ADDZEST DMZ615 owner's manual

Clarion

Clarion ADDZEST DMZ615 owner's manual

Sony XAV-601BT Specifications

Sony

Sony XAV-601BT Specifications

PIE GM12-POD/S Operation manual

PIE

PIE GM12-POD/S Operation manual

Hyundai H-910H instruction manual

Hyundai

Hyundai H-910H instruction manual

Sony XR-C6100 Service manual

Sony

Sony XR-C6100 Service manual

Sony CDX-L600X - Fm/am Compact Disc Player Installation/connections

Sony

Sony CDX-L600X - Fm/am Compact Disc Player Installation/connections

Motorola VWA63 Service manual

Motorola

Motorola VWA63 Service manual

Sound Storm STM93R user manual

Sound Storm

Sound Storm STM93R user manual

Nextar D3201 instruction manual

Nextar

Nextar D3201 instruction manual

Alpine CDE-163BT owner's manual

Alpine

Alpine CDE-163BT owner's manual

Axxera XDMA7600 Installation & owner's manual

Axxera

Axxera XDMA7600 Installation & owner's manual

XM OnyX quick start guide

XM

XM OnyX quick start guide

manuals.online logo
manuals.online logoBrands
  • About & Mission
  • Contact us
  • Privacy Policy
  • Terms and Conditions

Copyright 2025 Manuals.Online. All Rights Reserved.

KENWOOD
KRC-X95/
KRC-807
By
CASSETTE
RECEIVER
INSTRUCTION
MANUAL
AMPLI-TUNER-LECTEUR
DE
CASSETTE
MODE
D’EMPLOI
RADIO
CASETE
MANUAL
DE
INSTRUCCIONES
KENWOOD
CORPORATION
Take
the
time
to
read
through
this
instruction
manual.
Familiarity
with
installation
and
operation
procedures
will
help
you
obtain
the
best
performance
from
your
new
cassette-receiver.
For
your
records
Record
the
serial
number,
found
on
the
back
of
the
unit,
in
the
spaces
designated
on
the
warranty
card,
and
in
the
space
provided
below.
Refer
to
the
model
and
serial
numbers
whenever
you
call
upon
your
KENWOOD
dealer
for
information
or
service
on
the
product.
Model
KRC-X957/807
Serial
number
©
B64-1340-00
(KW)
Contents
‘Before
use
DP
UIA
selon
Ras
acs
pScecas
Nata
tong
tngeacsa
tne.
o
ce,
ie
clganatin
t
3
DOT
SLY:
PRECAUTIONS
5
sets
tune
asnaisise?
coy
debe
cst
saat
cheeomacaanesens
coco”
4
Basic
operations
Be
|
NW
OD
is
lint
Sea
cd
nea
od
Setecaenaa
die
sepa
tees
ey
esi
Achat
wiSiecwh
cele
te
act
Oeics
6
|
SUVIEC
IIIS
MAGA
S
rican
sy
seasyngitins
coiueeriduate
ROdaUATed
ectsitidausk
tolea
wreak
Fj
By,
ONIN
i
catch
Eat
Sate
baal
Sn
eRe
te
RCN
tere
tm
cee
hae
a
|
Attenuator...
Res
fsb
Ue
canned
aubenecapancnn
ili
nya’
oh
mate
Meota
tats
gente
AUCH
NS
Sates
eco
wees
el
caased
tunity
alee
edt
Aimvasseeeitneerreel:
cieetee
cdo.
Seica
tn.
IOS
AUN
ES
YS
TSI.
cen
Avs
cats
st
etee
cage
becuse
auyth
bee
uvpes
Sewn
en
than:
8
Tuner
features
GUM
gia
Pare
ae
etal
ata
aaa
oat
Side
Stee
ot
met
th
Mee
eae
Fons:
10
|
Station
Preset
MeMory
o.oo
cece
ccce
cet
cc
ceeececeeeee
veces
10
BPO
ORY
SEER
ons
cae
acts
once
She
esdooas
%Sosestece,
uacecacce
10
Clean
Pecan)
System
Circuit
(CRSC)..
ba
dahing
dyrtbadicie
ed
plvass
Il
Switching
Display
tor
Tuner...
Ream
han
niet
tect
aet
1
Station
Naie
Preset(SNPS)
1s
ari
cacpaa
eid
aol
oraiavitd
abecerencee
1?
Station
Name
Preset
Play
(SNPP)
ooo
occ
12
REDS
features
:
RBDS
(Radio
Broadcast
Data
System)...
ococccecceccoccccteeecceeee,
4
Ee
AINA
dee
decane
aie
dss
haan
ra
ncn!
ce
aviprinccomeue
Heh
te,
Lede
sed
carlin,
cake
coteh
14
|
Traffic
Information
FUunctione.c.ccccccccccccccccccccececeeeeccc
4
Bo
TRACI.
TORE
ohn.
Aevvatet
este
sao
Lindale
Haseena
cath
gudtde
Baise
vltonctinc=tittaa
tose
14
fe:
STRAT
OX
SCION
oi
acca
neirned
la
Ssincadinalen
ska.
Gy
2resepo.
ut
tascnedeea
de
15
|
Program
Type
(PTY)
FUnCtion
occ
oo
oo
cceccoccoooccececceece
16
i
i
i
i
Cassette
player
features
Playing
Cassette
Tapes.
ooo..o.cccccccccceccccccceseeseeeescceceseecesceeeeceeeeees
18
Fast
Forwarding
and
Rewinding
Cassette
Tapes...
18
Using
Dolby
B
Noise
Reduction...
coo
ore
cccceceeeeeveeee
ee
18
SWItChing
Tape
Types...
iccccccccecccescecscseteteccccseicescseeeeetc
18
Using
Direct
Program
Search
System
(DPSS)
occ.
8
PT
MS!
ersces
bes
ea
ratahai
55
ch,
ct
eh
Sess
Mie
in
hcnsralicgaaatiluty
taut
Gale
19
NUS
IGS
alliohccra's
rane
cite
cee
tae
Nig
acy
tly.
Pere
Th
sate
vacate
tet’
19
Tape
counter
display
nie
oa
gti
triode
a
icaat
hahaa
Saute
tats
ene
haley
Ae
eee
os
19
‘External
disc
control
features
cen
Disc
aes
sie
seal
na
ssneihs
Wes
gamma
Vines
atdis
plat
sean
ee
cacey
atysa
viedo
tae.
TGR
SG
AICHEN
<enadinccrs
thant
Se
atm
cA
Goo
eo
;
DSC
SUC
ano
ey
olan
caren
iteotits
Witiglaes
bul
Varstust
Wie
anak
aaa,
2?
MaGk:F
DISCIME
REAL
te.
the.
Assancethcg
tna
teedeceallen
daleih
be
uctten
se
Lgaconce:
2?
3%
TEC
SHAN
tic
aa
erereonseseet
satis
(Mn
vadicnns
eas
ehcw
ean
ate
has
Rh
eee
22
:
UV
SGA
alec
h
8
an
Gale
Altes
Aah
Nhe
a
Le
i
VGN
eTE
Te
NON.
23
ERE
CO
TUNG.
ISG
NENG
Sie
ct
mtn
atcantn
sa
Sacseseeibess
Gracie
Sins
iadetradic.
24
Disc
Name
Preset
Play
(DNPP}
ooo.
coc
ccceeec
cc
cceeecececeeeeeceee
2a:
Random
Play...
optraesdeie
ease
la
gh
Ceainaac
tani
fapins
canieonien
eo
es
Magazine
Randorn
Play
.
wil
acacia
ett
ac
usg
hits
'cn
eae
asantans
Sateen
SiphioseanLETOSe
Text
/
Tithe
Scroll.
ptacednseattetes
Seth
Reta
aa
Pan
Raa
es
CA
hgh
aE,
Other
features
i
Manual
Open
Switch
pening
spire
ahaa
geh
tend
rv
arud'sh
Re
Puce
ea
2k
20
A
Audio
Control
Setting...
hea
NeaMaaiised
Siuitoumbiaile
eta
nsen
tua
tL
SVE
EIS
OL
sec
sunita
itaesen
nesses
umtseatceatnie
ede
ce
taaaee-
29
4
IGEN
ISIC
ie
acca
si
rvaenatrtr
sce
Cot
ah
ythig
Se
hom
asmceaid
«heme
nes
29
:
Sete
Ciab
le
MMUMMNAUON.
1
c.deschormeesincecsusidncee
anal
soimiardoA
tak
arcane
EPMA
atishints.
Racine
Aas
ew
tc
con
ida
dae
eek
Nt
neh
ee
eg
ad
a
dee
30
|
Automatic
Dimmer
Function...
ce
cocccccccccceeeeeccccc
30:
TOUCH
SSIS
THON
E225
Fe
sett
8
Sec
yan
td
etibscevioeseonas
anion
Ee
Ae
OOS
SO
VVILGMING
PIG
OUNE
SA
5
ar
vicceec
Dcrenatrucdhnie
denis
totais
peck
oY
30:
COM
St
AGPUSTSN
esas,
esac
casavoonsale
tbiatelercances
oeeieeeWieae
ude,
sk:
31:
faceplate
Angle
AdjustMent.....0000.0cccccecccecseesteececcccseececcecee
ek.
31}
SOU
ACOOS
he
Suciauhintn
apne
eat
kT
evsatisetard
od
hota
mtg:
32
|
PROS
TVG)
LINE,
scPsiafies
he
ocearasn
ate
OCG
Miata
es
cd
neue
ed
a
ge
33
|
Peal,
AONE:
SYST
UT
Neath
ica
vies
ca
Aegis
nd
odes
Aevoaes
Casabnetdeiwbs
cobras
34
;
EX
POMal
ATP
COREIO
ls
eivsteerdeanns
mete
ac
dace
uceieier
aimtanveach
Oshece
ase
tces
34
|
Basic
operations
of
remote...........222c00cccccececeeneees
35
Installation
Accessories
.......
Wer
nenragonenae
ssa
was
deanna
eens
aacieraieecienia
Sf
Installation
Procedure
0s.
Ov
veasttieeeeienecersenantectenesaeeie
lS
of
Connecting
Wiras
to
Terminals
oo...
0c
cceeececcecceeee
ose.
39
4
Installation
(non-Japanese
Cars)...
ccc
eccccceeeeceee
40
i
PS
MIOM
NE
CHU
MM
os
tia
itere
cols
Meaning
fue
phevtabed
rs
PM
et
chen
4)
4
Installation
(Japan@Se-cars)
......cccc
cc
ccceseccesseccstesesteeessecc
ccc.
4?
5
Troubleshooting
guide...........
paced
ten
sietesataceosesmay
43
|
A
Warning
Selecting
fine
audio
equipment
such
as
the
unit
you've
Just
purchased
is
only
the
start
of
your
musical
enjoyment.
Now
it's
time
to
consider
how
you
can
maximize
the
fun
and
excitement
your
equipment
offers.
This
manufacturer
and
the
Electronic
Industries
Association's
Consumer
Electronics
Group
want
you
to
get
the
most
out
of
your
equipment
by
playing
it
at
a
safe
level.
One
that
lets
the
sound
come
through
loud
and
clear
without
annoying
blaring
or
distortion
—
and,
most
importantly,
without
affecting
your
sensitive
hearing.
Sound
can
be
deceiving.
Over
time
your
hearing
“comfort
level”
adapts
to
higher
volumes
of
sound.
So
what
sounds
“normal”
can
actually
be
loud
and
harmful
to
your
hearing.
Guard
against
this
by
setting
your
equipment
at
a
sale
level
BEFORE
your
hearing
adapts.
To
establish
a
safe
level:
*
Start
your
volume
control
at
a
low
setting.
*
Slowly
increase
the
sound
until
you
can
hear
it
comtortably
and
clearly,
and
without
distortion.
Once
you
have
established
a
comfortable
sound
level:
¢
Set
the
dial
and
leave
it
there.
Taking
a
minute
to
do
this
now
will
help
to
prevent
hearing
damage
or
loss
in
the
future.
After
all.
we
want
you
listening
fora
lifetime.
We
Want
You
Listening
For
A
Lifetime
Used
wisely.
your
new
sound
equipment
will
provide
a
lifetime
of
fun
and
enjoyment.
Since
hearing
damage
from
loud
noise
is
often
undetectable
until
it
is
too
fate.
this
manufacturer
and
the
Electronic
Industries
Association's
Consumer
Electronics
Group
recommend
you
avoid
prolonged
exposure
to
excessive
noise,
This
list
of
sound
levels
is
included
for
your
protection.
Decible
Level
Example
30
Quiet
library.
soft
whispers
40
Living
room,
refrigerator,
bedroom
away
from
traffic
50
Light
traffic.
normal
conversation,
quiet
office
60
Air
conditioner
at
20
feet,
sewing
machine
70
Vacuum
cleaner.
hair
dryer,
noisy
restaurant
80)
Average
city
traffic,
garbage
disposals,
alarm
clock
at
Iwo
feel.
THE
FOLLOWING
NOISES
CAN
BE
DANGEROUS
UNDER
CONSTANT
EXPOSURE
90
Subway.
motorcycle.
truck
traffic.
lawn
mower
100
Garbage
truck.
chain
saw,
pneumatic
drill
120
Rock
band
concert
in
front
of
speakers,
thunderclap
140)
Gunshot
blast.
jet
plane
180
Rocket
launching
pad
Information
courtesy
of
the
Deafness
Research
Foundation.
LISTENING
Safety
precautions
|AWARNING|
To
prevent
injury
or
fire,
take
the
following
precautions:
*
Insert
the
unit
all
the
way
in
until
it
is
fully
locked
In
place.
Otherwise
it
may
fall
out
of
place
when
jolted.
¢
When
extending
the
ignition,
battery,
o:
ground
wires,
make
sure
to
use
automotive-
grade
wires
or
other
wires
w'th
a
0.75mny
(AWG18}
or
more
to
prevent
wire
deterioration
and
damage
to
the
wire
coating.
¢
To
prevent
a
short
circuit,
never
put
or
leave
any
Metallic
objects
(Such
as
coms
or
metal
tools}
inside
the
unit
elf
the
unit
starts
to
emit
smoke
or
strange
smells,
turn
off
the
power
immediately
and
consult
your
Kenwood
dealer.
¢
Make
sure
not
to
get
your
fingers
caugnt
between
the
faceplate
and
the
unit.
*
Be
careful
not
to
drop
the
unit
or
subject
it
to
strong
shock.
The
unit
may
break
or
crack
because
It
contains
glass
parts.
*
Do
not
touch
the
liquid
crystal
fluid
if
the
LCD
is
damaged
or
broken
due
to
shock.
The
liquid
crystal
fluid
may
be
dangerous
to
your
health
or
even
fatal.
if
the
liquid
crystal
fluid
from
the
LCD
contacts
your
body
or
clothing,
wash
it
off
with
soap
immediately.
ACAUTION
To
prevent
damage
to
the
machine,
take
the
following
precautions:
e
Make
sure
to
ground
the
unit
to
a
negative
12V
DC
power
supply.
*
Do
not
open
the
top
or
botiom
covers
of
the
ant.
*
Do
“ot
install
the
unit
in
a
spot
exposed
to
direct
sunl
ght
or
excessive
heat
or
hunudity.
Also
avoid
places
with
too
much
aust
or
the
possibility
of
water
splashing.
Do
not
subject
the
faceplate
to
excessive
shock,
aS
iLis
a
piece
of
precision
equipment.
When
replacing
a
fuse,
only
use
a
new
one
with
the
prescribed
rating.
Using
a
fuse
with
the
wrong
rating
may
cause
your
unit
to
malfunction,
To
prevent
a
short
circuit
when
replacing
a
fuse,
first
disconnect
the
wiring
harness.
Do
not
place
any
object
between
the
faceplate
and
the
unit.
Do
not
use
your
own
screws.
Use
only
the
screws
provided.
If
you
use
the
wrong
screws,
you
could
damage
the
unit.
°
IMPORTANT
INFORMATION
You
cannot
connect
the
unit
directly
to
the
following
CD
automatic
changers.
If
you
wan!
to
use
older
changers
with
the
unit,
follow
the
directions
below
according
to
the
type
o!
changer
you
own:
KDC-C200
/
KDC-C300
/
KDC-C400
Use
the
extension
cable
and
the
control
box
attached
to
the
CD
changer,
and
the
optional
CA-DS100
converter
cord.
KDC-C301
/
KDC-C600
/
KDC-C800
/
KDC-
C601
/
KDC-C401
Use
the
extension
cable
attached
to
the
CD
changer,
and
the
optional
CA-DS100
converter
cord.
KDC-C100
/
KDC-C302
/
C205
/
C705
/
non-Kenwood
CD
changers
Cannot
be
used
with
this
model.
_ACAUTION
You
can
damage
both
your
unit
and
the
CD
changer
if
you
connect
them
incorrectly.
°
FCC
WARNING
This
equipment
may
generate
or
use
radio
frequency
energy.
Changes
or
modifications
to
this
equipment
may
cause
harmful
interference
unless
the
modifications
are
expressly
approved
in
the
instruction
manual.
The
user
could
lose
the
authority
to
operate
this
equipment
if
an
unauthorized
change
or
modification
is
made.
nn
nc
EE
UES
Cleaning
the
Unit
NOTE
Se
am
|
If
the
front
panel
gets
dirty,
turn
off
the
t
you
experience
problems
during
power
and
wipe
the
panel
with
a
dry
silicon
y\stallation,
consult
your
Kenwood
deaier.
cloth
or
soft
cloth.
e
if
the
unit
fails
to
operate
properly,
press
the
A
-
N
RESET
button.
When
the
faceplate
is
not
|
CAUTIO
|
visible,
slide
the
manual
open
switch
(as
Do
not
wipe
the
panei
with
a
hard
cloth
or
a
iliustrated
on
p.7)
for
as
many
times
as
you
cloth
dampened
by
volatile
solvents
such
as
have
preset
to
make
the
faceplate
control
paint
thinner
and
alcohol.
They
can
scraten
appear.
[he
unit
returns
to
factory
settings
the
surface
of
the
panel
and/or
cause
the
when
the
RESET
button
is
pressea.
If
the
indicator
letters
to
peel
off.
unit
still
fails
to
operate
properly
after
the
RESET
button
has
been
pressed,
cortact
your
focal
KENWOOD
dealer
for
assistance.
«Press
the
reset
button
if
the
disc
auto
changer
is
first
controlled
and
operates
neorrectly.
The
original
operating
condition
wil
return.
Reset
button
e
ve
recommend
the
use
of
the
Security
Code
junction
(see
p.32)
to
prevent
theft.
*
Cearacters
in
the
LCD
may
become
dficult
‘read
in
temperatures
below
41
F
(5
C).
Doiby
noise
reduction
manufactured
under
ncense
from
Dolby
Laboratories
Licensing
|
Corporation.
“DOLBY”
and
the
double
D
symbol
are
trademarks
of
Dolby
Laboratories
Licensing
Corporation.
XN
_
7
Cleaning
the
Tape
Head
After
you
have
listened
to
many
cassottes
over
a
long
period
of
time,
magnetic
powder
from
the
tapes
and
dust
accumulates
on
the
tape
head,
causing
noise
and
a
deterioration
in
sound
quality.
Clean
the
tape
head
using
a
clean'ng
tape
or
cleaning
kit
designed
for
use
in
car
audio
systems,
Handling
Cassette
Tapes
«Do
rot
play
a
cassette
whose
tape
has
gone
slack.
In
such
a
case,
wind
it
tight
using
a
pencil
or
the
iike
in
one
of
the
spools.
Playing
s'ack
cassette
tapes
can
result
in
the
tape
tangling
around
the
capstan
and/or
pinch
rollers,
causing
trouble.
¢
Do
not
play
a
deformed
cassette
or
one
whose
‘abel
‘s
starting
to
come
off,
as
it
can
cause
the
unit
to
malfunction.
Do
not
leave
tapes
in
hot
places,
such
as
on
dashboards
and
other
spots
exposed
to
airect
sunlight,
or
near
heater
outlets.
They
can
deform
the
cassette.
e
Avoid
using
extremely
jong
cassette
tapes,
sce
as
100-minute-long
tapes.
Such
tapes
are
very
thin,
and
can
tangle
easily
around
tre
pinch
sollers
or
other
parts
inside
the
un.t,
causerg
unit
falure.
e
Remove
a
cassette
tape
from
the
unit
when
“ot
listening
to
it
for
a
while.
If
you
ieave
a
tape
in
the
urit
too
‘ong,
it
may
stick
to
the
tape
head
and
cause
unit
malfunction
Basic
operations
You
can
help
prevent
theft
of
the
unit
by
reversing
the
faceplate
so
that
the
control
panel
cannot
be
seen,
hiding
the
unit,
and
shutting
off
the
audio.
Power
ON/OFF:
When
you
turn
your
vehicle's
ignition
on,
the
unit's
power
wil
also
turn
0,
with
the
faceplate reversing
to
show
the
contro!
pane'.
Wren
you
turn
your
vehicle's
ignition
off,
the
faceplate
will
fey)
|
a
7
reverse
to
hide
the
control
panel,
and
the
unit's
power
will
turn
Se
off.
art
Loup
(None
|
|
pe
¢
When
the
moving
faceplate
is
hit
by
an
object,
it
will
stop
and
return
to
its
original
state.
Remove
the
object
and
repeat
the
action
¢
The
status
of
the
Security
Code
Function
(P.32)
is
displayed
whenever
the
power
is
switched
on.
CODE
ON"
(Security
Code
has
been
registered)
"CODE
OFF"
(Security
Code
has
not
been
registered)
ACAUTION
|
Using
the
Unit
in
Vehicles
with
Covered
Consoles
ne
eee
as
“
~
¢
Make
sure
the
console
is
uncovered
while
the
faceplate
is
asae
5
r)
i
aa
oman
,
a
=>
reversed,
Dot
oe
“asa”
ue’
oasemn
orton
enh
¢
Do
not
exert
any
excess
force
on
the
movable
parts
of
the
unit.
including
the
faceplate,
as
it
can
cause
failure
in
the
unit's
——
—,
7
Sm.
AUTOL
1}
(eI
a
ac
ot
ATT
it)
{det
4
Hiding
the
unit
with
the
ignition
turned
on
(forced
closing):
-
Press
the
SRC
button
for
at
least
one
second.
The
faceplate
will
reverse,
hiding
the
unit.
The
unit
will
turn
oft.
NOTE
¢
When
the
closing
faceplate
is
hit
by
an
object,
the
unit
will
turn
off
without
the
faceplate
closing
all
the
way.
Remove
the
object
and
press
the
SRC
button
to
turn
the
unit
back
on,
then
turn
it
off
again
to
have
it
close
properly.
¢
While
the
contro!
panel
is
moving,
pressing
the
buttons
will
not
have
any
effect.
Do
not
try
to
press
the
buttons
on
the
control
panel
as
the
faceplate
ts
moving,
as
excessive
force
may
damage
the
unit
ePuring
the
forced
closing
of
the
unit
{ie.,
having
the
unit
left
a
;
ee
LOUD
indicator
—
ATT
indicator
aa
closed
while
ignition
is
turned
on),
the
faceplate
will
not
open
no
ae
matter
how
often
the
ignition
is
turned
on
or
off,
unless
"Manual
Open
Switch"
at
the
rear
of
the
faceplate
is
pressed
in
order
to
Tapes
mode
open
it.
You
can
prevent
tampering
of
the
unit
when
letting
Tape
mode
someone
else
drive
your
car
by
keeping
it
closed
this
way
al
To
cancel
the
forced
closing
of
unit
and
open
control
panel:
Lxtern
al
disc
Controi
mode
Slide
the
Manual
open
switch,
as
illustrated
below,
for
as
many
Auicvade
times
as
you
have
preset
in
the
“Manual
Open
Switch
Setting”
(Open
SWé#)
in
the
menu
|
NOTE
|
NOTE
|
When
you
set
the
Manual
Open
Switch
setting
to
2
or
3.
slide
the
¢
The
mode
switches
to
the
next
mode
from
any
mode
which
manual
open
switch
successively.
If
you
do
not
slide
the
switch
F
St
rere
Rhee
Crteae
a
coe
. :
ape
1;
.
tre
7
ter
P
ry
t
suecesaivel.
this
Cannot
be
vedned
correctly:
1e
external
disc
control
mode
will
differ
depending
on
the
uni
that
Is
conected.
°
The
AUX
moue
Is
availab:e
only
when
the
changer
/
AUX
switching
adapter
(KCA-S210A
or
CA-C1AX}
or
CD
changer
(KDC-CPS82
or
KDC-CX82)
is
connected
to
this
unit.
During
the
AUX
mode,
‘AUX"
will
show
:n
the
display.
|
When
the
CA
C1AX
15
being
used,
the
AUX
Made
wil!
replace
the
Fxternal
Disc
Control
Mode.
Manual
open
switch
Increasing
Volume:
Press
tee
A
button
to
turn
up
the
volume.
Decreasing
Volume:
Press
the
button
to
turn
dowr
the
volume.
Switching
Modes
Switching
Modes:
Fach
time
you
press
the
SRC
(source)
button,
the
mode
switches
as
follows:
Basic
operations
settings
displayed
Attenuator
This
function
allows
you
to
turn
down
the
volume
quickly.
2
Selecting
function
to
set
'
Press
the
m1
button
to
search
through
the
functions
until
you
Turning
Attenuator
On/Off:
sce
the
one
you
want
to
adjust
in
the
display.
Press
the
ATT
button
to
switch
the
attenuator
on
and
off.
Press
the
kd
button
to
search
through
the
functions
When
the
attenuator
is
on,
tne
AIT
indicator
blinks.
backward,
When
the
attenuator
is
off,
the
volume
retures
to
the
orig:nal
Example:
If
you
want
to
the
setting
of
the
touch
sensor
tone
level,
funcuon
from
on
to
off,
first
search
through
the
[NOTE
|
functions
until
you
see
"Beep
ON
in
the
display.
Turning
the
volume
all
the
way
down
deactivates
the
attenuator
:
:
Mmeven
2
ost
co
3
Changing
setting
for
currently
displayed
function
Press
oither
the
AM
or
FM
button.
The
setting
will
change
for
each
function.
Exatnple:
The
setting
of
the
touch
sensor
tone
wil!
switcn
trom
o”
to
off,
and
"Beep
OFF"
is
displayed.
Loudness
This
function
amplifies
low
and
high
tones
when
the
volume
is
turned
down.
The
LOUD
indicator
lights
up
when
the
loudness
function
is
on.
Hi
ats,
tte,
anes,
my
ii
>
ket
trey
Atty
pee
r}
eg
fee
Turning
Loudness
On/Off:
Press
the
LOUD
button
for
at
least
one
second
to
switch
the
loudness
on
and
off.
4
Ending
the
menu
mode
Press
the
MENU
button.
The
selection
includes:
Foucn
Sensor
Tone
(Beep
ON
/
OFF}
«>
Time
Adjustment*”
<Manual>
(Clock
Adjust*'}
«»
Automatic
Time
Adnistment*:
(SYNC
OFF
/ON)*®
«>
Security
mode
(Security)
«>
Selectable
filumination
(Color
Green
/
Amber)
«>
Contrast
Adjustment
(Contrast
##)
«>
Dimmer
(Dimmer
ON
POPP)
Black
mask
(BLK
MASK
OFF
/
ON)
«>
Switching
Preout*"
(SWPRE
Rear
/
N-Fad)
«>
Dual
zone
system"
(Zone
2
ON
/
OFF)**
«>
External
Amplifier
Control
(AMP
BASS
FLT
/+6/
+12)*"
«>
Manual
Open
Switch
Setting
(OPEN
SW
#)
«<>
Traffic
Information
Function
(Tl
OFF
/
ON)*
<>
Clean
Reception
System
Circuit*’
(CRSC
ON
/
OFF}
«>
Text
Scroli™
(Scroll
Auto
/
Manu)
«*
Touch
Sensor
Tone
When
Automere
Time
Acqustnent
sof
Es
[itries
Menu
System
To
accommodate
a
greater
number
of
functions,
a
menu
system
has
been
employed
for
making
settings.
Press
the
MENU
button
to
enter
the
menu
mode
and
then
dispiay
the
function
to
make
the
setting.
Details
on
each
setting
are
explained
separately
in
the
corresponding
function
page.
1
Press
the
MENU
button
for
at
least
one
second
MENU"
is
displayed
when
the
menu
mode
is
entered.
The
function
that
you
can
adjust
is
indicated
with
the
current
WLS
TVEN,
Vader
ontersa
“Ne
ites
a
Fir
Moar
Osteria
chs
conceal
node
“KACO
Zs
Ip
Exteres
dc
corel
race
Tuner
features
*
KRG
XOb/
Orty
it
DISP/NAME.S
SRC
FM
me
e
Make
sure
to
end
the
menu
mode
when
finished.
It
you
fail
to
end
the
menu
mode,
several
functions
may
not
operate
properly,
including
the
Traffic
Information
function
and
the
Alarm
function.
¢
The
"##
display
indicates
the
setting
value.
Band
display
Frequency
Preset
stavion
number
onuas
&
@
SHnag
one wan
1
-
~
i
'
oa 8n
r
:
es
r
ua
}
t
ga
ea
t
'
f
uaas
uar
J
Hoge
'
a
_d
:
of
fal
a
:
ti
:
t '
ana
as
Besnae
ua
aan
ch
fms
Ue
T
rn
1
ty
AUTO
indicator
a
Way
ST
indicator
Tuner
features
You
can
choose
from
three
tuning
modes:
auto
seek,
preset
station
seek,
and
manual.
The
"AUTO
1"
indicator
lights
up
when
auto
seek
tuning
is
selected,
and
the
"AUTO
2"
indicator
lights
when
preset
station
seek
tuning
is
selected.
Selecting
Tuning
Mode:
Press
the
AUTO
button.
Each
time
you
press
the
AUTO
button,
the
mode
switches
as
follows.
=
Auto
1
(Auto
Seek
Tuning}
v
Auto
2
(Preset
Station
Seek
Tuning!
v
Manual
(Manua!
Tuning)
Tuning:
1
Press
the
SRC
(source)
button
repeatedly
to
select
the
tuner
mode.
"TUNER"
is
displayed
when
the
tuner
mode
has
been
selected.
2
press
either
the
FM
or
AM
button
to
select
the
band.
Each
time
you
press
the
FM
button,
the
band
switches
between
the
FM1,
FM2
and
FM3
iwhich
are
used
for
groups
of
preset
stations).
Press
the
AM
button
to
select
the
AM
band.
3
©
Auto
Seek
Tuning
Press
the
mi
button
to
seek
higher
frequencies,
Press
the
<@
button
to
seek
lower
frequencies.
¢
Preset
station
seek
tuning
Press
the
!
button
to
move
to
the
next
preset
Station
(t.e.,
the
one
with
the
next
highest
number),
and
the
jae
button
to
nove
to
the
last
preset
station
(i.e.,
the
one
with
the
next
lowest
number).
¢
Manual
Tuning
Press
the
I
button
to
increase
the
freauency
by
one
step.
Prass
the
ld
button
to
decrease
the
frequency
by
one
step.
|
NOTE
|
The
ST
indicator
lights
up
when
stereo
broadcasts
are
being
received.
|
Station
Preset
Memory
;
Store
the
frequency
of
a
station.
You
can
then
recall
that
station
with
a
single
touch
of
a
button.
1
Selec?
the
band/
station
that
you
want
to
have
stored.
2
Press
tne
button
(#1-6)
that
you
want
to
use
for
the
station,
fo
a!
least
two
seconds,
In@
button
number
blinks
once
in
the
display
to
indicate
that
the
data
has
been
stored.
Recalling
a
Preset
Station:
Press
the
preset
station
button
(#1-6)
for
the
desired
station.
The
number
of
the
recalled
station
is
displayed,
[
NOTE
|
You
can
store
six
stations
in
each
of
the
FM1,
FM2,
FM3,
and
AM
bands
Auto
Memory
Entry
You
can
automatically
store
all
the
receivable
frequencies
in
the
band
currently
being
listened
to,
and
then
recall
them
with
the
touch
of
a
button
later.
This
function
is
especially
useful
when
you
are
travelling
and
do
not
know
what
stations
are
available.
Up
to
six
frequencies
can
be
stored
this
way.
1
Select
the
band
for
auto
memory
entry
2
Press
the
AME
button
for
at
least
two
seconds
to
start
auto
memory
entry.
The
numbers
of
the
preset
station
buttons
are
shown
in
order
When
all
the
stations
in
a
certain
band
are
stored
in
the
preset
memory,
the
auto
memory
entry
stops.
The
tuner
then
plays
the
last
station
received.
Recalling
a
Preset
Station:
aie