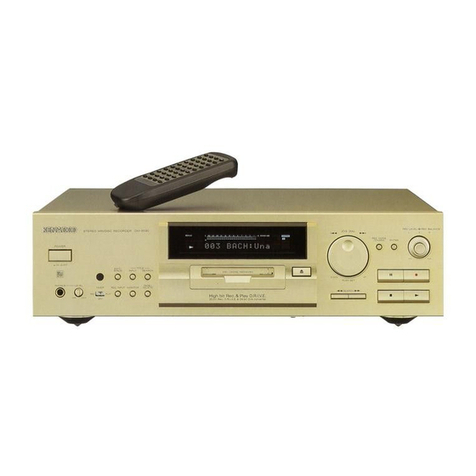
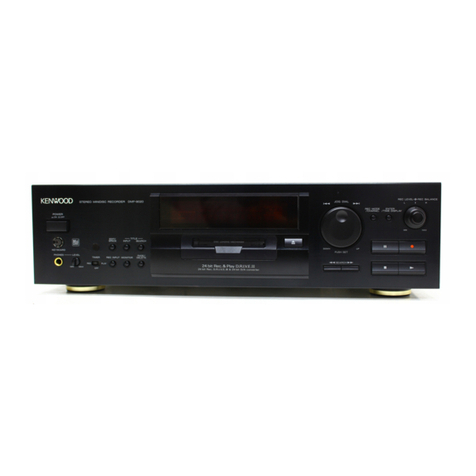
Kenwood DM-SE9 User manual

MINIDISC RECORDER
B60-3546-00 ( K, T, M )
98/12 11 10 9 8 7 6 5 4 3 2 1 97/12 11 10 9 8 7
KENWOOD CORPORATION
INSTRUCTION MANUAL
DM-SE9
JA
AP

DM-SE9(En)
2
Introduction
Introduction
Units are designed for operation as follows.
U.S.A. and Canada..............................................................................................................................................................AC 120 V only
Europe and U.K....................................................................................................................................................................AC 230 V only
Taiwan...................................................................................................................................................................................AC 110 V only
Before applying power
THE LIGHTNING FLASH WITH ARROWHEAD SYMBOL, WITHIN AN EQUILATERAL
TRIANGLE, IS INTENDED TO ALERT THE USER TO THE PRESENCE OF UNINSULATED
“DANGEROUS VOLTAGE” WITHIN THE PRODUCT’S ENCLOSURE THAT MAY BE OF
SUFFICIENTMAGNITUDETOCONSTITUTEARISKOFELECTRICSHOCKTOPERSONS.
THE EXCLAMATION POINT WITHIN AN EQUILATERAL TRIANGLE IS INTENDED TO
ALERT THE USER TO THE PRESENCE OF IMPORTANT OPERATING AND MAINTE-
NANCE (SERVICING) INSTRUCTIONS IN THE LITERATURE ACCOMPANYING THE
APPLIANCE.
WARNING : TO PREVENT FIRE OR ELECTRIC SHOCK, DO NOT EXPOSE THIS APPLIANCE TO RAIN
OR MOISTURE.
Safety precautions
Caution : Read this section carefully to ensure safe operation.
RISK OF ELECTRIC SHOCK
DO NOT OPEN
CAUTION
Factory fitted moulded mains plug
1. The mains plug contains a fuse. For replacement, use only a 13- Amp ASTA-approved (BS1362) fuse.
2. The fuse cover must be refitted when replacing the fuse in the moulded plug.
3. Do not cut off the mains plug from this equipment. If the plug fitted is not suitable for the power points in your home
or the cable is too short to reach a power point, then obtain an appro priate safety approved extension lead or adapter,
or consult your dealer.If nonetheless the mains plug is cut off, remove the fuse and dispose of the plug immediately,
to avoid a possible shock hazard by inadvertent connection to the mains supply.
IMPORTANT :
The wires in the mains lead are coloured in accordance with the following code :
Blue : Neutral
Brown : Live
Do not connect those leads to the earth terminal of a three - pin plug.
For the United Kingdom
CAUTION: TO REDUCE THE RISK OF ELECTRIC SHOCK, DO NOT
REMOVECOVER(OR BACK).NOUSER-SERVICEABLE PARTSINSIDE,
REFER SERVICING TO QUALIFIED SERVICE PERSONNEL.
Themarkingislocatedontherearpanelandsaysthatthe
component uses laser beams that have been classified
as Class 1. It means that the unit is utilizing laser beams
that are of a weaker class. There is no danger of hazard-
ous radiation outside the unit.
CLASS 1
LASER PRODUCT
The marking of products using lasers
(Except for some areas)
Caution : Read this section carefully to ensure safe operation.
REQUIREMENT BY NEDERLAND GAZETTE
Batteries are supplied with this prod-
uct. When they empty, you should not
throw away. Instead, hand them in as
small chemical waste.

DM-SE9(En)
3
Introduction
Contents Caution : Read the pages marked carefully to ensure safe operation.
Introduction...........................................................................................................................2
Before applying power........................................................................................................2
Safety precautions ..............................................................................................................2
IMPORTANT SAFEGUARDS...............................................................................................4
Before operation ...................................................................................................................6
Accessories ........................................................................................................................6
Special feature....................................................................................................................7
Safety Precautions .............................................................................................................8
Maintenance.......................................................................................................................9
MD system...........................................................................................................................10
System connections ...........................................................................................................12
System operation features...............................................................................................13
Names and functions of parts ...........................................................................................14
Display/Main unit..............................................................................................................14
Remote control unit..........................................................................................................15
Operation of remote control unit......................................................................................16
Playback of Mini Disc..........................................................................................................17
Playing tracks in order from track No. 1...........................................................................17
Playback from desired track .............................................................................................18
Listening in random order (RANDOM playback) ..............................................................18
Searching a desired track by its title (TITLE SEARCH).....................................................20
Programming ......................................................................................................................21
Programming tracks in a desired order ............................................................................21
Repeated playback ...........................................................................................................23
Recording (analog input)....................................................................................................24
Analog recording ..............................................................................................................24
Recording (digital input) ....................................................................................................26
Digital recording ...............................................................................................................26
Digital recording and SCMS .............................................................................................28
Simplified CD recording .....................................................................................................29
Recording a single CD track (O.T.E.) ................................................................................29
Recording all tracks on a CD (O.T.E.) ...............................................................................29
Synchro recording with CD player....................................................................................29
Changing the displayed contents .....................................................................................30
TIME key ..........................................................................................................................30
TEXT key ..........................................................................................................................30
Editing ..................................................................................................................................31
Selecting the editing function type ..................................................................................31
Changing tracks during playback (TRACK MOVE)............................................................32
Moving several tracks at a time (QUICK MOVE) .............................................................34
Dividing a track during playback (TRACK DIVIDE)............................................................36
Combining tracks during playback (TRACK COMBINE) ...................................................38
Erasing several tracks at a time (QUICK ERASE).............................................................40
Erasing a single track during playback (TRACK ERASE)...................................................42
Erasing a part of a track....................................................................................................43
How to edit titles..............................................................................................................44
Changing or deleting a title ..............................................................................................46
CD Text Editing ...................................................................................................................48
In case of difficulty..............................................................................................................49
Specifications ......................................................................................................................52

DM-SE9(En)
4
Introduction
Pleasereadallofthesafetyandoperatinginstructions
beforeoperatingthisappliance.Adheretoallwarn-
ingsontheapplianceandintheinstructionmanual.
Follow all the safety and operating instructions.
Thesesafetyandoperatinginstructionsshouldbe
retained for future reference.
1. Power sources – The appliance should be con-
nected to a power supply only of the type de-
scribed in the instruction manual or as marked on
the appliance. If you are not sure of the type of
power supply to your home, consult your appli-
ance dealer or local power company. For appli-
ances intended to operate from battery power, or
other sources, refer to the instruction manual.
2. Power-cord protection – Power-supply cords
should be routed so that they are not likely to be
walked on or pinched by items placed upon or
against them, paying particular attention to cords
at plugs, convenience receptacles, and the point
where they exit from the appliance.
3. CAUTION–Polarization–Thisappliancemay
be equipped with a polarized alternating-current
line plug (a plug having one blade wider than the
other). This plug will fit into the power outlet only
oneway.This isasafetyfeature. Ifyouareunable
toinserttheplugfullyintotheoutlet,tryreversing
the plug. If the plug should still fail to fit, contact
yourelectriciantoreplaceyourobsoleteoutlet.Do
not defeat the safety purpose of the polarized
plug.
4. Ventilation–Slotsandopeningsinthecabinetare
provided for ventilation and to ensure reliable
operation of the appliance and to protect it from
overheating, and these openings must not be
blocked or covered. The appliance should be situ-
ated so that its location or position does not
interfere with its proper ventilation.
Tomaintaingoodventilation,donotputrecordsor
atable-clothonthe appliance. Placetheappliance
at least 10 cm away from the walls.
Do not use the appliance on a bed, sofa, rug or
similarsurfacethatmayblocktheventilationopen-
ings. Thisapplianceshouldnotbeplacedinabuilt-
in installation such as a bookcase or rack unless
properventilationisprovidedorthemanufacturer’s
instructions have been adhered to.
IMPORTANT SAFEGUARDS
5. Water and moisture – The appliance should not
be used near water - for example, near a bathtub,
washbowl, kitchen sink, laundry tub, in a wet
basement, or near a swimming pool, etc.
6. Temperature – The appliance may not function
properly if used at extremely low, or freezing
temperatures. The ideal ambient temperature is
above +5°C (41°F).
7. Heat – The appliance should be situated away
from heat sources such as radiators, heat regis-
ters, stoves, or other appliances (including ampli-
fiers) that produce heat.
8. Electric shock – Care should be taken so that
objects do not fall and liquid is not spilled into the
enclosure through openings. If a metal objects,
such as a hair pin or a needle, comes into contact
with the inside of this appliance, a dangerous
electric shock may result. For families with chil-
dren, never permit children to put anything, espe-
cially metal, inside this appliance.
9. Enclosure removal – Never remove the enclo-
sure.Iftheinternalpartsaretouchedaccidentally,
a serious electric shock might
10.Magnetic fields – Keep the appliance away from
sourcesofmagneticfieldssuchasTVsets,speaker
systems, radios, motorized toys or magnetized
objects.
11.Cleaning – Unplug this appliance from the wall
outlet before cleaning. Do not use volatile sol-
vents such as alcohol, paint thinner, gasoline, or
benzine,etc.tocleanthecabinet. Useacleandry
cloth.
Caution : Readthissectioncarefullytoensuresafe
operation.
DM-SE9(En)
5
Introduction
16.Servicing – The user should not attempt to
servicetheappliancebeyondthatdescribedinthe
instruction manual. All other servicing should be
referred to qualified service personnel.
17.Power lines – An outside antenna system should
not be located in the vicinity of overhead power
lines or other electric light or power circuits, or
where it can fall into such power lines or circuits.
When installing an outside antenna system, ex-
tremecareshouldbetakentokeepfromtouching
such power lines or circuits as contact with them
might be fatal.
18.AC outlets – Do not connect other audio equip-
ment with a power consumption larger than that
specifiedtotheACoutletontherearpanel. Never
connect other electrical appliances, such as an
iron or toaster, to it to prevent fire or electric
shock.
19.Overloading – Do not overload wall outlets, ex-
tensioncords,orintegralconveniencereceptacles
as this can result in a risk of fire or electric shock.
20.Attachment–Donotuseattachmentsnotrecom-
mended by the appliance manufacturer as they
may cause hazards.
21.Replacement parts – When replacement parts
are required, be sure the service technician has
usedreplacementpartsspecifiedbythemanufac-
turer or have the same characteristics as the
original parts. Unauthorized substitutions may re-
sult in fire, electric shock, or other hazards.
22.Safety check–Upon completionofany serviceor
repairs to this appliance, ask the service techni-
cian to perform safety checks to determine that
the appliance is in proper operating condition.
12.Accessories – Do not place this appliance on an
unstable cart, stand, tripod, bracket, or table. The
appliancemayfall,causingseriousinjurytoachild
oradult,andseriousdamagetotheappliance.Use
only with a cart, stand, tripod, bracket, or table
recommended by the manufacturer, or sold with
the appliance. Any mounting of the appliance
shouldfollowthemanufacturer’sinstructions,and
should use a mounting accessory recommended
by the manufacturer. An appliance and cart com-
bination should be moved with care. Quick stops,
excessive force, and uneven surfaces may cause
the appliance and cart combination to overturn.
13.Lightning –For added protection for this appli-
ance during a lightning storm, or when it is left
unattended and unused for long periods of time,
unplug it from the wall outlet and disconnect the
antenna or cable system. This will prevent dam-
age to the appliance due to lightning and power-
line surges.
14.Abnormal smell – If an abnormal smell or smoke
is detected, immediately turn the power OFF and
unplugtheappliancefromthewalloutlet.Contact
your dealer or nearest service center.
15.Damagerequiringservice–Theapplianceshould
be serviced by qualified service personnel when:
A. The power-supply cord or the plug has been
damaged.
B. Objects have fallen, or liquid has been spilled
into the appliance.
C. The appliance has been exposed to rain or
water.
D. The appliance does not appear to operate
normally by following the instruction manual.
Adjust only those controls that are covered by
the instruction manual as an improper adjust-
ment of other controls may result in damage
and will often require extensive work by a
qualifiedtechniciantorestore the applianceto
its normal operation.
E. Theappliancehasbeendropped,or the enclo-
sure damaged.
F. The appliance exhibits a marked change in
performance.

DM-SE9(En)
6
Before operation
Before operation
Unpacking
Unpack the unit carefully and make sure that all accessories are put aside so they will not be lost.
Examine the unit for any possibility of shipping damage. If your unit is damaged or fails to operate, notify your
dealerimmediately. Ifyourunitwasshippedtoyoudirectly,notifytheshippingcompanywithoutdelay.Onlythe
consignee (the person or company receiving the unit) can file a claim against the carrier for shipping damage.
We recommend that you retain the original carton and packing materials for use should you transport or ship the
unit in the future.
Audio cord (2) Systemcontrolcord(1) Optical fiber cable (1)
Remotecontrolunit(1) Batteries (2)
Check that the following accessories are present.
Keep this manual handy for future reference.
Accessories
CAUTION :
Use of controls or adjustments or performance of procedures other
thanthosespecifiedhereinmayresultinhazardousradiationexposure.
IncompliancewithFederalRegulations,followingarereproductionsof
labels on, or inside the product relating to laser product safety.
For the U.S.A.
FCC WARNING :
Thisequipmentmaygenerateoruseradiofrequencyenergy.Changesormodificationstothisequipmentmay
cause harmful interference unless the modifications are expressly approved in the instruction manual. The
user could lose the authority to operate this equipment if an unauthorized change or modification is made.
NOTE :
This equipment has been tested and found to comply with the limits for a CLASS B digital device, pursuant
to Part 15 of the FCC Rules. These limits are designed to provide reasonable protection against harmful
interference in a residential installation. This equipment may cause harmful interference to radio communi-
cations,ifitisnotinstalledandusedinaccordancewiththeinstructions.However,thereisnoguaranteethat
interference will not occur in a particular installation. If this equipment does cause harmful interference to
radio or television reception, which can be determined by turning the equipment off and on, the user is
encouraged to try to correct the interference by one or more of the following measures:
— — Reorient or relocate the receiving antenna.
— — Increase the separation between the equipment and receiver.
— — Connecttheequipmentintoanoutletonacircuitdifferentfromthattowhichthereceiverisconnected.
— — Consult the dealer or an experienced radio/TV technician for help.
For the U.S.A.
- - - - - - - - - - - - - - - - - - - - - -
- - - - - - - - - - - -
- - - - - - - - - - - - - - - - - - - - - -
KENWOOD CORPORATION
2967-3,ISHIKAWA-CHO,HACHIOJI-SHI,
TOKYO, JAPAN
KENWOOD CORP. CERTIFIES THIS
EQUIPMENT CONFORMS TO DHHS
REGULATIONS NO. 21 CFR 1040.10,
CHAPTER I, SUBCHAPTER J.
- - - - - - - - - - -
Location: Bottom Panel

DM-SE9(En)
7
Before operation
Thisunit isaudioequipment basedonthe MiniDiscformat. TheMiniDisc (MD)isan applicationofthe optical
and magneto-optical technology and has the capability to record signals on discs.The operability of the MD is
equivalent to the Compact Disc (CD). The MD uses optional non-contact system so the recordings are not
degraded by eternal factors and the discs are never scratched or damaged in playback.
Special feature
The contents of the disc recorded by yourself can be edited
as you need.
¶Reordering tracks
: The order of tracks can be changed by moving them as desired.
¶Dividing a track
: A single track can be split into two by inserting an additional track
number.
¶Combining two tracks
: Two tracks can be merged into a single track by deleting a track
number.
¶Erasing tracks
: Music tracks or an entire disc you do not want to listen to can be
erased, or all titles are erased.
Convenient editing features
WhenthisunitiscombinedwiththeCDplayer(DP-SE7orDP-
SE9), the O.T.E. (One Touch Edit) function allows to record
desired tracks with a one-touch operation.
Simplified CD recording (O.T.E.)
This unit incorporates a high-performance, 1-bit DAC for
playback with a high sound quality. Digital recording with a
highsoundqualityisalsopossiblethankstotheopticalinput
jack.
High-quality playback/recording
After recording of music tracks on a Mini Disc, their title can
be registered additionally. Once the titles have been regis-
tered,thedesiredmusictracksontheMiniDisccanbeplayed
by referring to the display, not the record jacket, etc.
Convenient title search
When used in combination with a CD player (DP-SE7 or DP-
SE9), the text information (disc and track titles) can be
displayed on the side of this unit. Depending on the type of
characters, display may not be possible.
CD-TEXT display

DM-SE9(En)
8
Before operation
Installation position
TheMD recorder isverysensitive to vibrations.Itshould
be installed in a position subject to as small vibration as
possible.
Beware of condensation
When water vapor comes into contact with the surface
of cold material, water drops are produced.
If condensation occurs, correct operation may not be
possible, or the unit may not function correctly.
This is not a malfunction, however, the unit should be
dried.
(Todothis,turnthePOWERswitchONandleavetheunit
as it is for several hours.)
Be especially careful in the following conditions:
¶When the unit is brought from a cold place to a warm
place, and there is a large temperature difference.
¶When a heater starts operating.
¶Whentheunitisbrought from an air-conditioned place
to a place of high temperature with high humidity.
¶When there is a large difference between the internal
temperature of the unit and the ambient temperature,
or in conditions where condensation occurs easily.
WARNING NOTICE:
IN MOST CASES IT IS AN INFRINGEMENT OF COPY-
RIGHT TO MAKE COPIES OF TAPES OR DISCS WITH-
OUT THE PERMISSION OF THE COPYRIGHT OWN-
ERS. ANYONE WISHING TO COPY COMMERCIALLY
AVAILABLETAPESORDISCSSHOULDCONTACTTHE
MECHANICAL COPYRIGHT PROTECTION SOCIETY
LIMITEDORTHEPERFORMINGRIGHTSSOCIETYLIM-
ITED.
Memory backup
The memory storage is held for about a day after the
power cord has been unplugged from the power outlet.
Incasethepowersupplyhasstoppedor the power cord
has been left unplugged for an extended period of time,
the information related to recording and editing (re-
corded at the moment a Mini Disc is ejected) may be
cleared or destroyed before it is recorded on the disc.
The lost information cannot be recovered later.
To ensure the recording of the recording and editing-
relatedinformation on the MiniDisc,besureto eject the
Mini Disc after every recording or editing operation.
Dust countermeasure
The shutter of the disc cartridge is permanently open
while the disc is loaded in the set. Therefore, to prevent
dustfrompenetratinginsidethedisc,takethediscoutof
the unit immediately after completion of recording or
playback.
USandforeignpatentslicensedfromDolbyLaboratories
Licensing Corporation.
Safety Precautions
What is CD-TEXT?
CD-TEXT is a standard for display of character informa-
tion (disc name, track titles, artist names, etc.) recorded
onaCDinadditiontothemusic.WhenthisunitandaCD
player (corresponding to CD-TEXT) are connected by
digital connection, the CD character information can be
copied to the MD.
However, as of 1997, some CDs contain a copy prohibi-
tion code, so that the character information can not be
copied. In such a case, the character information will be
displayed on the screen, but it can not be copied.
“CD text edition” operation becomes possible for CDs
without copy prohibition code. i

DM-SE9(En)
9
Before operation
Do not touch the disc directly.
Do not touch the disc by opening the shutter with your
hand. The cartridge will be damaged if it is forced open.
Handling of Mini Disc
As the Mini Disc is accommodated inside a cartridge, it
can be handled without caring about dust or fingerprint.
However,stainedorsoiledcartridgemaycausemalfunc-
tion. To enjoy beautiful sound for extended period of
time, take care on the following points.
Storage position
DonotleaveMiniDiscsinplacewhere thetempera-
ture and/or humidity are extremely high (for ex-
ample, in a place subject to direct sunlight).
Care
Wipe periodically dust and dirt attached on the
cartridge with a dry cloth.
Write protect tab
To protect recorded contents against accidental
erasure,set the write protect tab of the disc open.
Return the tab to the original position when you
want to record signals on the disc.
Slide close.
(Recording enabled)
Slide open.
(Recording disabled)
Write protect tab
Disc back side
Note related to transportation and movement
Before transporting or moving this unit, carry
out the following operations.
1.Withnodiscloadedintheunit,pressthe“on/
standby” key to on.
¶Check that no disc is present in the unit.
2.Waitafewsecondsandverifythatthedisplay
shown appears.
3.Press the “on/standby” key to off (standby).
(
−
dB)
NOIDISC
R
L
∞
3
0130 10 5
Caution against contact revitalizer
Do not use contact cleaners because it could cause a
malfunction. Be specially careful against contact clean-
ers containing oil, for they may deform the plastic
componente.
Maintenance
Unplug power cord
Cleaning
Unplug this appliance from the wall outlet before clean-
ing. Do not use volatile solvents such as alcohol, paint
thinner, gasoline, or benzine, etc. to clean the cabinet.
Use a clean dry cloth.

DM-SE9(En)
10
MD system
The Mini Disc system has the features as summarized in the following.
1Like CD (Compact Disc), playback can be started from any position. (Random access)
2It uses a disc with a diameter of 64 mm that is accommodated in a cartridge.
3Two types of discs can be used. (playback only discs, recordable / playable discs).
4Up to 74 minutes of recording or playback is possible using high-efficiency coding technology.
5Countermeasure against vibration is taken using semiconductor memory chip.
Playback-only Mini Disc
This type of MD can be used only for playback, and is used by the commercially-available music MD software packages.
The playback-only MD is an optical disc like the Compact Disc (CD). The signals are recorded as the presence or absence
of small pits and read out by an optical, non-contact pickup.
Recordable Mini Disc
This MD is a magneto-optical disc which can be recorded by magnetic field modulation. To record signals, laser light is
irradiated from the bottom side of the magneto-optical disc and magnetic field is applied from the upper side of it.

DM-SE9(En)
11
MD system
Sound-skip prevention memory
During playback, this unit always stores signals in memory temporarily to prevent sound from being skipped in case of
vibration. As a result, even when the data from the optical pickup is interrupted due to vibration, etc., the music will not
be interrupted because the memory holds the data for several seconds.
During normal playback In case of vibration
Reproduced
sound
When the readout from disc
is interrupted momentarily
due to vibration or shock, the
reproduced sound from the
memory will not be inter-
rupted.
The sound data for several
seconds is always stored
during playback.
Mini Disc
Small sound near large sound
A small sound is not audible to human ears if it is
produced at the same time as a large sound. (Mask-
ing effect)
Sound does not affect the sensitivity of ears
High-efficiency coding technology “ATRAC” (Adaptive TRansform Acoustic Coding)
The Mini Disc has only a half the size of the Compact Disc but provides the same recording time. This is made possible
by ATRAC*, a newly developed high-efficiency coding technology.
The ATRAC compresses the music data to about 1/5 the amount of data which would be obtained with conventional
technology, by cutting off the sound components which do not pose problem in audition even when they are not present.
This has made it possible to record or play up to 74 minutes.
Lowest and highest
frequencies are not
audible unless the
sound has a certain
level of volume.
12
6
39
Sensitivity of ears
Lowest
frequencies Highest
frequencies
Several sec. of data
Digital memory Reproduced sound

DM-SE9(En)
12
LR
DIGITAL IN
OPTICAL
SYSTEM
CONTROL
REC
IN
PLAY
OUT
1
2
DIGITAL
OUTPUT
OPTICAL
DIGITAL IN
OPTICAL
SYSTEM
CONTROL
L
R
PLAY
REC
MD
1
System connections
Make connection as shown below. When con-
necting the related system components, refer
also to the instruction manuals of the related
components.
Caution: Do not plug in the power lead until all
connections are completed.
1. Connect all cords firmly. If connections are loose, there could be loss of sound or noise produced.
2. When plugging and unplugging connection cords, be sure to first remove the power cord from the AC outlet.
Plugging/unplugging connection cords without removal of the power cord can cause malfunctions or damage
to the unit.
Malfunction of microprocessor
If operation is not possible or erroneous display
appears even though all connections have been
made properly, reset the microprocessor refer-
ring to “In case of difficulty”. o
¶For CD recording, the CD-TEXT function, and for posi-
tivesystemoperation,connecttheCDplayer(DP-SE9)
to “DIGITAL IN OPTICAL 1”.§ªº
¶Commercial digital equipment (BS tuner, DAT, etc.)
can be connected to “OPTICAL 2”.§¶
DM-SE9
TO WALL
AC OUTLET
System control
cord
Optical fiber cable
DIGITAL IN jack (OPTICAL)
Remove the protective
capbeforeusingtheDIGI-
TAL IN jack.
Audio cords
R-SE9 (optional)
DP-SE9 (optional)
Remove cap.
Notes
Notes

DM-SE9(En)
13
System connections
Note on connection of optical-fiber cable
The optical-fiber cable is designed for use in the
connection of the CD player (DP-SE7 or DP-SE9).
The digital signal transmission makes it possible
to record the high-quality sound of CDs without
degradation.
¶Insert the optical-fiber cable straight into the connector
until it clicks.
¶Besuretoattachtheprotectioncapwhentheconnector
is not used.
¶Never bend or bundle the optical-fiber cable.
Easy operation function
When this unit is connected with the amplifier-tuner (R-
SE9) via a system control cord, the basic operations of
this unit can be controlled from the remote control unit
provided with the R-SE9. This connection also makes
possible the easy operation function which activates
operations according to the input selection made on the
R-SE9 (two-way operations). For details, refer to the
Instruction Manual of the R-SE9.
Timer recording/playback
When this unit is connected with the amplifier-tuner (R-
SE9) via a system control cord, timer playback of a disc
and timer recording of radio broadcasting are possible.
For details, read this instruction manual as well as the
Instruction Manual of the R-SE9.
Operations on this unit: Steps 1to 4in “Analog
recording.” ¢
System operation features
Insert the connector straight until it clicks.
Plugging the connector. Unplugging the connector
Connection of system control cord
While pushing the two sides of the connector, pull it
straight out.
Click!

DM-SE9(En)
14
8
¶
4
1
¢
¡
7
0
3
minidisc recorder
disc loading mechanism
rec
level
O.T.E.
on/standby
D.R.I.V.E.
REPEAT
(
−
dB)
MANUAL
REMAIN
TOTAL
SINGLE
TITLE
•
••••
•
•
•
••
R
L
∞
3
0130 10 5
SEARCH
PGM
DIGITAL 1 2 MONITOR
CD TEXT O.T.E
.
23 6
!0987
451
Names and functions of parts
Play indicator Character information display
Pause indicator
REC indicator
Peaklevel in-
dicator
MANUAL indicator
Display/Main unit
1Remote control sensor ^
The key control signals from the remote control unit
enter the main unit from here.
2Mini Disc insertion slot &
Insert a minidisc.
3Pause (8) key (
Press to temporary stop the disc operation.

4Eject (0) key (
Press to unload the Mini Disc.
5Play (3) key &
Press to start playback.
6Stop (7) key (
Press to stop the disc operation.
7“on/standby ( )” key &
Press to turn the unit on or off (standby).
8Record (¶) key ∞
Press when starting recording.
9One-Touch Edit (O.T.E.) key ª
Use this key to record the track being from a CD
immediately.
0Fast forward and fast backward (1, ¡)
/ rec level keys (
During playback, this key is used to move the played
position forward or backward.
During recording, this key is used to adjust the record-
ing level. ¢
At the time of editing, the cursor movement and the
selected title can be confirmed.
⁄›‚t
!Skip (4, ¢) keys (
Press to skip disc tracks during playback.
Duringediting,thiskeyisusedtoselecttracknumbers,
title and characters. ¤rt
About the STANDBY mode
WhiletheSTANDBYindicatorislitonthedisplay,asmallamountofpowerissuppliedtothesystemtobackupthememory.
This is called the standby mode. Under that condition, the system can be turned ON by the remote control unit.
Please also refer to the description in “Memory backup.” 8
REPEAT indicator
SINGLE indicator
PGM indicator
TOTAL indicator
REMAIN indicator
TITLE indicator
SEARCH
indicator
DIGITAL input indicator
Display
CD-TEXT indicator
O.T.E. indicator
MONITOR indicator

DM-SE9(En)
15
Names and functions of parts
1¡
78 3
4¢
AUTO/
MANU.
REMOTE CONTROL UNIT
RC-MSE9(E)
TIME TEXT
MONITOR
REC
INPUT
O.T.E.
CLEAR
DELETE CHECK
SPACE EDIT
CANCEL EDIT P.MODE
CHARACTER
CHARACTER
REPEATRANDOM
ENTER
TITLE
INPUT TITLE
SEARCH
SET
JOG REC
JOG/SHUTTLE
LR
CURSOR/CHECK
1
2
3
4
5
6
7
8
9
0
+10+100
ABC DEF
GHI JKL MNO
PRS TUV WXY
QZ ' ,
: ? !
/
& ( )
1
43
2
5
Remote control unit
3Numeric keys
: Press to specify the desired track number. *
: Used at the time of title input for selection of charac-
ters and symbols. ty
1Display/recording operation keys
One-Touch Edit (O.T.E.) key ª
: Press to record immediately the track being played
from a CD.
REC INPUT (Recording input) key ¢
: Thiskeyisusedtoswitchtherecordinginputsource.
MONITOR key ¶
: The sound of the unit connected to “DIGITAL 2” is
heard.
AUTO/MANU. key ¢∞
: This is used for selection of automatic (AUTO) or
manual (MANU.) track number assignment at the
time of recording.
TIME key º
: Press to switch the time display mode.
TEXT key º
: The CD-TEXT disc title or track title is displayed.
Model: RC-MSE9(E)
Infrared ray system
4Program/Editing-related operation keys
P.MODE (Play mode)/CHARACTER key ¡
: This key is used in program playback. During title
input, it is used to select the character group.
CHECK/SPACE key ™
: This key is used to check the program contents.
During title input, it is used to insert a blank space
character.
CLEAR/DELETE key ™
: This key is used to clear the program. During title
input, it is used to delete a character.
EDIT key ¤
: This key is used to switch the editing mode.
EDIT CANCEL key ‹
: Used to cancel editing.
TITLE INPUT key r
: This key is used to switch the title input mode.
TITLE SEARCH key )
: This key is used to switch the title search mode.
SET key ¤
: Press to set the editing result or input title definitely
in memory.
ENTER key ‹
: Press to execute editing or title input operation.
RAMDOM key *
: Used at the time of random playback.
REPEAT key £
: Press to play tracks repeatedly.
5Basic operation/applied operation keys
1¡
: Fast forward and fast backward keys.(
4¢: Skip keys. (
REC : Record key 8 : Pause key
7 : Stop key 3 : Play key
(The above keys have the same functions as the
corresponding keys on the main unit.)
JOG : Press this to operate the JOG dial.
JOG dial (inside) : When the indicator is lit, this
works in the same way as
the 4¢ keys (
SHUTTLE ring (outside): Always works in the same
way as the 1¡keys.
(
CURSOR/CHECK
2on/standby ( ) key
: Press to turn the unit on or off (standby).
CHARACTER
CHARACTER
CURSOR/CHECK

DM-SE9(En)
16
++
minidisc recorder
disc loading mechanism
D.R.I.V.E.
Operation of remote control unit
1Remove the cover. Insert batteries.
23Close the cover.
¶Insert two R03 (“AAA”-size) batter-
iesfollowingthepolarityindications.
The unit can be turned on by plugging the power
cord into a power outlet and pressing the “on/
standby ( )” key of the remote control unit.
After the unit has been turned on, press the desired
operation key.
Operation
1. The provided batteries are intended for use in operation checking, and their service life may be short.
2. When the remote controllable distance becomes short, replace both of the batteries with new ones.
3. If direct sunlight or the light of a high- frequency fluorescent lamp (inverter type, etc.) is incident to the remote
sensor, malfunction may occur. In such a case, change the installation position to avoid malfunction.
Notes
Notes
Remote sensor
6 m 30° 30°
Reference operating range
¶When pressing more than one remote control keys
successively, press the keys securely by leaving an
interval of 1 second or more between pressing of keys.
Loading batteries
++
2
1

DM-SE9(En)
17
Playback of Mini Disc
disc loading mechanism
Use the following procedure to play a MD in the
original order of tracks from track No. 1.
1Turn the unit ON.
Playback of Mini Disc
Playing tracks in order from track No. 1
¶In a few seconds, playback starts from track No, 1.
3Start playback.
2Load a Mini Disc.
¶Insert the minidisc correctly into the slot of this unit.
¶“READING” blinks while the unit checks the contents
of the disc.
¶If a title has been assigned to the disc, that title will be
displayed.
-STANDBY-
(
−
dB)
NO DISC
R
L
∞
3
0130 10 5
(
−
dB)
SINGLE
001 0:00
R
L
∞
3
0130 10 5
(
−
dB)
SINGLE
001 0:12
R
L
∞
3
0130 10 5
Elapsed time of track
being played
Track No. being
played
In the direction of the arrow.
Main unit
Main unit
Main unit
: Keys and control used in the operations de-
scribed on this page.
In case no disc is loaded:
on/standby
3
minidisc recorder
disc loading mechanism
D.R.I.V.E.

DM-SE9(En)
18
Playback of Mini Disc
1Let the “PGM” indicator go off.
Playback from desired track
2Select the desired track number. Press the numeric keys as shown below...
To enter track No. 23 : 0, 0, 3
To enter track No. 40 : 0, 0, 0, 0, )
¶If the “PGM“ indicator is lit, press the P.MODE/CHAR-
ACTER key of the remote control unit to turn it off.
(
−
dB)
SINGLE
001 0:00
R
L
∞
3
0130 10 5
“PGM“ goes off
Disc recorded in monaural mode
This unit is capable of playing a disc recorded in the monaural mode.
As the amount of data required to record information in the monaural mode is half the amount required
in the stereo mode, the play (record) time of a disc recorded in the monaural mode is twice (max. 148
minutes) as that of a disc recorded in the stereo mode.
Operate in stopped condition.
Tolistenfromanintermediatepositionofatrack:
Listening from the middle of track 7 (7.5)
: Press 7,),5in this order.
Listening from an intermediate position of the
title being played (.3)
: Press ),3in this order.
±
Example : Specification is possible in
the range from 1to 9.
Listening in random order (RANDOM playback)
As the title each time will be selected at random, you can listen for a long time without getting bored.
Operate in stopped condition.
To select a different title during listening :
Press the ¢key.
1
2
3
4
5
6
7
8
9
0
+10+100
ABC DEF
GHI JKL MNO
PRS TUV WXY
QZ ' , : ? !
/
& ( )
RANDOM
P.MODE
CHARACTER

DM-SE9(En)
19
Playback of Mini Disc
Searching in a track
Skipping tracks
Ejecting the disc
¶Playback restarts from the position with which the key
is released.
¶Ifforwardorreversesearchisstartedduringplay-pause,
thedisccanbesearchedatahighspeedbutsoundisnot
output.
¶When the reverse search is started during the program
mode and the beginning of the current track is attained,
it will be played from the beginning. ¡
¶The track in the direction of the pressed button is
skipped, and the selected track will be played from the
beginning.
¶When the 4key is pressed once during playback, the
track being played will be played from the beginning. (If
it is pressed within 2 seconds from the start of a track,
theprevioustracktothecurrenttrackwillbeplayedfrom
the beginning.)
To pause playback
¶Each press pauses and plays the MD alternately.
To stop playback
Main unit
Forward searchReverse search
To skip forwardTo skip backward
EJECT NODI
S
C
Mini Disc has been
ejected.
4¢
CHARACTER
1¡
LR
CURSOR/CHECK
7
0
8
How to use JOG/SHUTTLE
1Press JOG.
JOG : Thisworksinthesamewayasthe4 ¢
key.
2Turn the inner dial
¶Operates while the indicator
is lit (about 1 min)
JOG JOG/SHUTTLE
Lights up
1Lightly turn the
outer ring.
SHUTTLE : This works in the same way as the
1¡key.
¶This works always, in-
dependent of the JOG
indicator.
To skip
backward To skip
forward
JOG/SHUTTLE
Forward
search
Reverse
search
CURSOR/CHECK
CHARACTER

DM-SE9(En)
20
Playback of Mini Disc
disc loading mechanism
1Press the TITLE SEARCH key.
2Select the desired title.
3Start playback.
¶With a track to which no title has been assigned, the
track number and “• • • • • •”are displayed.
Preparation
To smaller
track No. To larger
track No.
To abort operation, press the TITLE SEARCH key
again.
(
−
dB)
SINGLE
TITLE
002 TITLE
R
L
∞
3
0130 10 5
SEARCH
(
−
dB)
TITLE
002TITLE
R
L
∞
3
0130 10 5
SEARCH
(
−
dB)
TITLE
001 TITLE
R
L
∞
3
0130 10 5
SEARCH
Characters flow toward the left.
Track played
¶Let the “PGM” indicator go off.
Title
Searching a desired track by its title (TITLE SEARCH)
: Keys and control used in the operations de-
scribed on this page.
“PGM” goes off
P.MODE
CHARACTER
TITLE
SEARCH
4¢
CHARACTER
3
¶Operation also is possible using the JOG dial.(
Table of contents
Other Kenwood Mini Disc Recorder manuals

Kenwood
Kenwood DMF-3020 User manual

Kenwood
Kenwood DM-3090 User manual

Kenwood
Kenwood DM-SE7 User manual

Kenwood
Kenwood DM-VH7 User manual

Kenwood
Kenwood DMF-9020 User manual

Kenwood
Kenwood DM-VH7 User manual

Kenwood
Kenwood DMF-3020 User manual

Kenwood
Kenwood 1050MD User manual

Kenwood
Kenwood DMF-3020 User manual

Kenwood
Kenwood DM-S500 User manual

Kenwood
Kenwood DMF-3020 User manual

Kenwood
Kenwood DMC-G7R User manual

Kenwood
Kenwood DMF-9020 User manual

Kenwood
Kenwood DMF-5020 User manual

Kenwood
Kenwood 1090MD User manual

Kenwood
Kenwood 1050-DM User manual

Kenwood
Kenwood 1050MD User manual

Kenwood
Kenwood DMF-9020 User manual

Kenwood
Kenwood DMC-J7R User manual

Kenwood
Kenwood 1090MD User manual