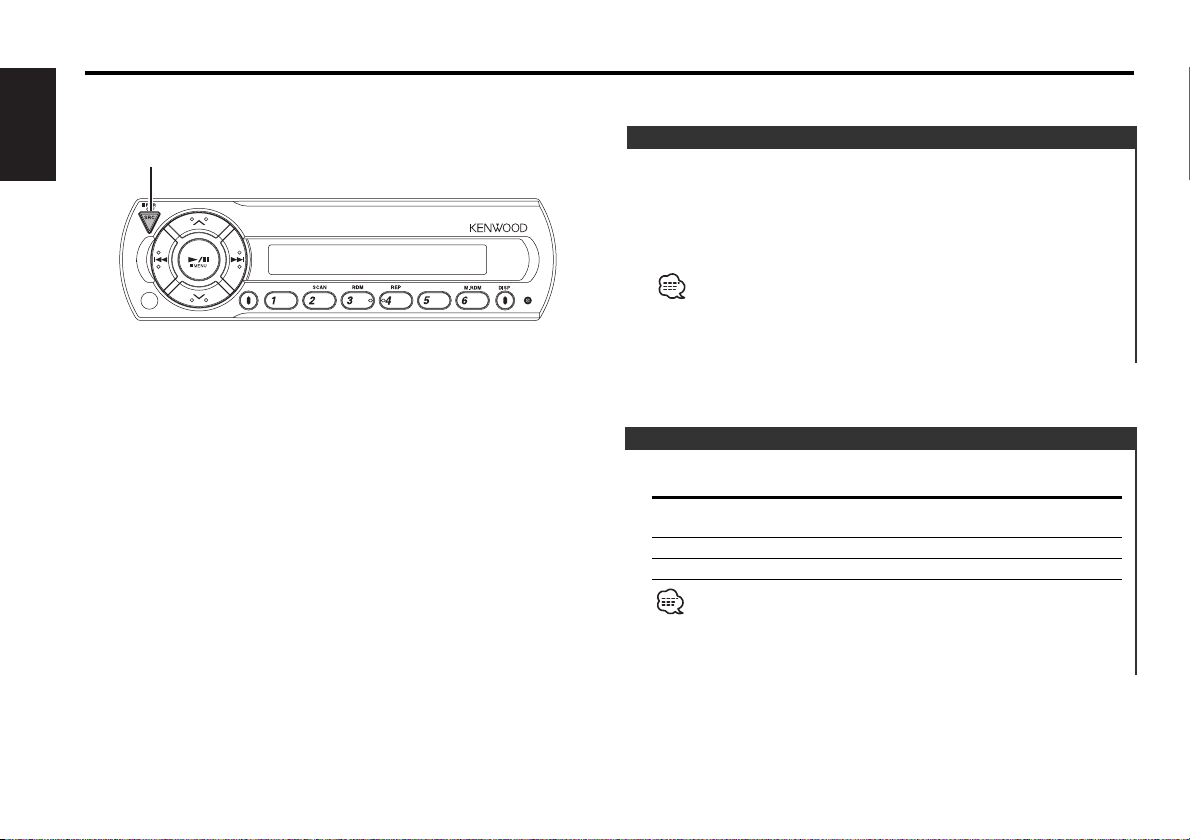
Kenwood KCA-R71FM User manual

©B64-2781-00/00 (E)
FM MODULATOR SYSTEM
INSTRUCTION MANUAL
SYSTEME A MODULATION DE FM
MODE D’EMPLOI
SISTEMA DE MODULADOR FM
MANUAL DE INSTRUCCIONES
KCA-R71FM
Take the time to read through this instruction manual.
Familiarity with installation and operation procedures will help you
obtain the best performance from your FM modulator system.
For your records
Record the serial number, found on the back of the unit, in the spaces desig-
nated on the warranty card, and in the space provided below. Refer to the
model and serial numbers whenever you call upon your KENWOOD dealer for
information or service on the product.
Model KCA-R71FM Serial number

— 2 —
English
Contents
Before use
Safety Precautions ........................................................................3
General features
Power............................................................................................4
Selecting the Source.....................................................................4
Disc control features
Playing Disc...................................................................................5
Fast Fowarding and Reversing .....................................................5
Track Search..................................................................................5
Disc Search ...................................................................................6
Direct Track Search .......................................................................6
Direct Disc Search ........................................................................6
Track/Disc Repeat .........................................................................6
Track Scan.....................................................................................6
Random Play .................................................................................6
Magazine Random Play ................................................................7
Folder Search ................................................................................7
Text/Title Scroll ..............................................................................7
Switching Display..........................................................................7
Menu system
Menu system................................................................................8
Changing the Transmission Frequency.........................................9
Modulation level............................................................................9
Dynamic control ............................................................................9
Text Scroll......................................................................................9
Basic Operations of remote...............................................10
Installation
Accessories.................................................................................12
Installation Procedure .................................................................12
Connecting Wires to Terminals...................................................13
Installation...................................................................................14
Troubleshooting guide .........................................................15
Specifications ..........................................................................19

Reset button
— 3 —
Take the following precautions to
prevent fire and avoid personal injury:
•When extending the ignition wire, battery
wire, or ground wire, use 0.75mm2(AWG18)
or larger automotive grade wire to avoid wire
deterioration or damage to the covering.
•Check that no metal objects (coins, tools,
etc.) are left inside the unit to avoid short
circuits.
•If you smell or see smoke, turn the power
off immediately and consult your Kenwood
dealer.
•Do not touch the liquid crystal fluid if the
LCD is damaged or broken due to shock. The
liquid crystal fluid may be dangerous to your
health or even fatal.
If the liquid crystal fluid from the LCD
contacts your body or clothing, wash it off
with soap immediately.
Take the following precautions to
keep the unit in proper working order.
•Be sure the unit is connected to a 12V DC
power supply with a negative ground
connection.
•Do not open the top or bottom cover.
•Do not install the unit in places it is exposed
to direct sunlight, high heat or humidity,
water may splash over it, or dust exists.
2CAUTION
2WARNING IMPORTANT INFORMATION
About the disc changer to be
connected:
To connect a disc changer having the "O-N"
switch to this unit, set the "O-N" switch to "N".
Note that none of the KDC-C100, KDC-C302,
C205, C705, and non-Kenwood CD changers
can be connected.
You can damage both your unit and the CD
changer if you connect them incorrectly.
Precautions when connecting disc changers
released in 1997 or earlier.
The optional switching adapter KCA-S210A is
necessary to connect a disc changer that is
not equipped with the "O-N" switch except
KDC-C100, KDC-C302, C205 and C705.
Cleaning the Unit
If the front panel gets dirty, turn off the
power and wipe the panel with a dry silicon
cloth or soft cloth.
Do not use hard cloths or paint thinner,
alcohol, or other volatile solvents. These may
damage external surfaces or remove
indicator characters.
2CAUTION
Safety Precautions
•When replacing a fuse, only use a new one
with the prescribed rating. Using a fuse with
the wrong rating may cause your unit to
malfunction.
•To prevent a short circuit when replacing a
fuse, first disconnect the wiring harness.
•If you have difficulty in installing this unit in
your vehicle, contact your Kenwood dealer.
•If it doesn’t seem to be working properly,
first press the Reset button. If the
malfunction persists, consult your Kenwood
dealer.
•Some car stereos cause the sound of the
tuner to make for a moment when an
engine is activated.
•The reception of the tuner may be reduced
a little if the KCA-R71FM is used.
•If the sound is lower than the tuner sound,
raise up the volume level of the CD/MD
with using the receiver.
•Do not use your own screws. Use only the
screws provided. If you use the wrong
screws, you could damage the unit.
NOTE

— 4 —
English
General features
SRC
Turning ON the Power
Press the [SRC] button.
Turning OFF the Power
Press the [SRC] button for at least 1 seconds.
The FM modulator is turned OFF and the radio can be heard.
•Be sure to turn down the volume whenever you listen to the radio
or a cassette tape after stopping the disc play.
•During the disc play is being conducted, you are not able to
receive ordinary Radio broadcasting because antenna output is
switched into compact disc player‘s side.
Power
Set the car radio FM station to 88.3 MHz. See Page 9 for
more information on changing the transmission frequency.
Press the [SRC] button.
Source required Display
CD/MD changer "CHANGER"/"CHANGER-1"/
"CHANGER-2"
Auxiliary input "AUX"
Off
For Auxiliary input one of the below optional accessories is
necessary.
- KCA-S210A
- CA-C1AX
- CD changer with an Auxiliary input function installed.
Selecting the Source

— 5 —
Disc control features
Play:
Press the [SRC] button.
Select the "CHANGER"/"CHANGER-1"/ "CHANGER-2" display.
Stop the play:
Press the [SRC] button for at least 1 second.
The FM modulator is turned OFF and the radio can be heard.
Pause and play:
Press the [6] (38...Remote) button.
Each time the button is pressed it pauses and plays.
If you press the switch once more, the disc is replayed from the
paused part.
This unit enables control of an MP3-compatible disc auto-changer.
MP3 media formats, refer to the instruction manual of the MP3-
compatible disc auto-changer to be connected.
Playing Disc
Fast Forwarding
Hold down on the [¢] button.
Release your finger to play the disc at that point.
Reversing
Hold down on the [4] button.
Release your finger to play the disc at that point.
Fast Forwarding and Reversing
Searching for a song on the disc or in the MP3 folder.
Press the [4] or [¢] button.
Track Search
d
u
4
6
¢
SRC
DISP
SCAN RDM REP M.RDM
Track number Track time
Disc number
Indicator

— 6 —
English
Disc control features
Doing Disc Search by entering the disc number.
1Enter the disc number
Press the number buttons on the remote.
2Do Disc Search
Press the [+] or [–] button.
Canceling Direct Disc Search
Press the [38] button.
Input "0" to select disc 10.
Direct Disc Search
(Function of disc changers with remote)
Replaying the song, disc in the Disc changer or MP3 folder
you're listening to.
Press the [REP] button.
When it's ON, the "REP" indicator is ON.
Each time the button is pressed the Repeat Play switches as
shown below.
Repeat play Display
Track Repeat Track No. blinks.
Disc Repeat Disc No. blinks.
OFF —
Track/Disc Repeat
Play all the songs on the disc or MP3 folder in random order.
Press the [RDM] button.
Each time the button is pressed Random Play turns ON or OFF.
When it's ON, the "RDM" indicator is ON and the track number
blinks.
When the [¢] button is pressed, the next song select starts.
Random Play
Playing the first part of each song on the disc or MP3 folder you
are listening to and searching for the song you want to listen to.
1Start Track Scan
Press the [SCAN] button.
"SCAN" indicator is ON.
2Release it when the song you want to listen to is played
Press the [SCAN] button.
Track Scan
Doing Track Search by entering the track number.
1Enter the track number
Press the number buttons on the remote.
2Do Track Search
Press the [T.UP] or [T.DOWN] button.
Canceling Direct Track Search
Press the [38] button.
Direct Track Search (Function of remote)
Selecting the disc set in the Disc changer.
Press the [u] or [d] button.
Disc Search

— 7 —
Scrolling the displayed CD text, or MD title.
Press the [DISP] button for at least 1 second.
Text/Title Scroll
Selecting the folder you want to listen to.
1Enter Folder Search mode
Press the [6] (38...Remote)button.
File No. display changes to Folder No. display during the Folder
Search mode.
2Select the folder
Press the [u] or [d] button.
With the [d]button you move to the previous folder, and with
the [u]button to the next folder.
3Decide the folder to play
Press the [6] (38...Remote)button.
The Folder Search mode releases, and the MP3 in the folder
being displayed is played.
Folder Search (Function of MP3)
Play the songs on all the discs in the disc changer in random
order.
Press the [M.RDM] button.
Each time the button is pressed the Magazine Random Play turns
ON or OFF.
When it's ON, the "RDM" indicator is ON and the track and disc
number blink.
When the [¢] button is pressed, the next song select starts.
Magazine Random Play
(Function of disc changer)
Switching the information displayed.
Press the [DISP] button.
Each time the button is pressed the display switches as shown
below.
Information Display
Play Time
Disc title "DISC TITLE"
Track title "TRACK TITLE"
Switching Display

— 8 —
English
Menu system
The Menu system basic operation method is explained here. The
reference for the Menu items and their setting content is after
this operation explanation.
1Enter Menu mode
Press the [MENU] button for at least 1 second.
"MENU" is displayed.
2Select the menu item
Press the [u] or [d] button.
3Set the menu item
Press the [4] or [¢] button.
You can continue by returning to step 2 and setting other items.
4Exit Menu mode
Press the [MENU] button.
When other items that are applicable to the basic operation method
above are displayed afterwards their setting content chart is
entered.
Menu System
d
u
¢
4
MENU

— 9 —
Select the frequency.
Display Setting
"T-FREQ 87.7" 87.7 MHz
"T-FREQ 87.9" 87.9 MHz
"T-FREQ 88.1" 88.1 MHz
"T-FREQ 88.3" 88.3 MHz (Initial setting)
"T-FREQ 88.5" 88.5 MHz
"T-FREQ 88.7" 88.7 MHz
"T-FREQ 88.9" 88.9 MHz
"T-FREQ 89.1" 89.1 MHz
"T-FREQ 89.3" 89.3 MHz
"T-FREQ 89.5" 89.5 MHz
"T-FREQ 89.7" 89.7 MHz
"T-FREQ 89.9" 89.9 MHz
Some car radios cannot receive a 87.7 MHz frequency.
Changing the Transmission Frequency
Select the modulation level.
Display
"MOD LEVEL 1"
"MOD LEVEL 2" (Initial setting)
"MOD LEVEL 3"
"MOD LEVEL 4"
Modulation level
Setting the Dynamic control.
Display Setting
"D-CONT ON" The dynamic control is ON.
"D-CONT OFF" The dynamic control is OFF. (Initial setting)
The unit comes with the prevention of distortion function to
reduce sound distortion.
If the sound is distorted severely, press the [4]or[¢]button
on the display unit and then set the function to "ON". If the
prevention of distortion function is set to "ON", the sound
extension is reduced.
If a disc with a high recording level is used, the sound may distort
even if the prevention of distortion function is set to "ON". In this
case, reduce the modulation level.
Dynamic control
Setting the displayed text scroll.
Display Setting
"SCROLL MANU" Doesn't scroll.
"SCROLL AUTO" Scrolls when the display changes.
The texts scrolled are shown below.
• CD text
• Song title/ Artist name/ Album title/ Category name
• MD title
Text Scroll

— 10 —
English
SRC
M.RDM
DIRECT
SCAN
T.
DOWN
T.
UP
D.REP
REP
RDM
DISC
+
—38
Basic Operations of remote
[SRC] button
Each time the button is pressed the source switches.
Basic operations
Use two "AA" batteries.
Slide the cover while pressing downwards to remove it as
illustrated.
Insert the batteries with the +and –poles aligned properly,
following the illustration inside the case.
Store unused batteries out of the reach of children. Contact a doctor
immediately if the battery is accidentally swallowed.
•The provided batteries are intended for use in operation
checking, and their service life may be short.
•When the remote controllable distance becomes short, replace
both of the batteries with new ones.
•Aportion of the operations may not be possible, depending on
the unit that is connected.
Do not set the remote on hot places such as above the dashboard.
2WARNING
Loading and Replacing the battery

— 11 —
[T.UP]/ [T.DOWN] buttons
Doing track forward and backward.
[+]/ [–] buttons
Doing disc forward and backward.
[38] button
Each time the button is pressed the song pauses and plays.
[REP] button
Each time the button is pressed Track Repeat function turns ON
or OFF.
[D.REP] button
Each time the button is pressed Disc Repeat function turns ON
or OFF.
[RDM] button
Each time the button is pressed Random Play turns ON or OFF.
[M.RDM] button
Each time the button is pressed Magazine Random function
turns ON or OFF.
[SCAN] button
Each time the button is pressed Trak Scan function turns ON or
OFF.
[0] — [9] buttons
When in <Direct Track Search> (page 6) and <Direct Disc
Search> (page 6), enter the track/disc number.
In Disc source

English
— 12 —
1. To prevent a short circuit, remove the key from the ignition and
disconnect the -battery.
2. Make the proper input and output wire connections for each unit.
3. Connect the wiring harness wires in the following order: ground,
battery, ignition.
4. Install the unit in your car.
5. Reconnect the -battery.
6. Press the reset button.
When drilling a hole in the car chassis to install the unit, check
first that nothing is on the other side.
•If the fuse blows, first make sure the wires aren’t touching to
cause a short circuit, then replace the old fuse with one with
the same rating.
•Do not let unconnected wires or terminals touch metal on the
car or anything else conducting electricity. To prevent a short
circuit, do not remove the caps on the ends of the
unconnected wires or the terminals.
•After the unit is installed, check whether the brake lamps,
blinkers, wipers, etc. on the car are working properly.
•Insulate unconnected wires with vinyl tape or other similar
material.
•Some disc changers require optional equipment for connection.
See the section on "Safety Precautions" for details.
2CAUTION
2WARNING
Accessories Installation Procedure
External view Number of items
................................................1
2
................................................2
1
................................................1
3
The use of any accessories except for those provided might result in
damage to the unit. Make sure only to use the accessories shipped with
the unit, as shown above.
................................................1
4
................................................1
5

— 13 —
Connecting Wires to Terminals
To prevent fire when the ignition wire (Red) or battery wire
(Yellow) is short-circuited by coming into contact with the
vehicle chassis (ground), only connect the power supply after
making the fuse box connections.
Be sure to press the reset button after installation.
2CAUTION
2WARNING
Do not install an antenna of radio equipment or distribute
the antenna wire near the changer output wire, for this
could cause malfunction with this unit.
Control output
Control input
Changer connection wire
FM modulator unit
Ground wire (Black) -(To car chassis)
Car fuse box
ACC
Ignition key
switch
Output
Battery
Display unit
Battery wire + (Yellow)
Ignition wire +(Red)
CD/MD auto - changer input
CD/MD auto-changer
O-N selection switch
"N"
FM/AM
antenna input
Or
Audio Right output
Audio Left output
FM/AM antenna output
Antenna plug for
automobile
Car stereo
with FM tuner

English
— 14 —
Installation
Installation of Display unit
■
• Installation without using the trim mount plate 3
Attach one strip of Velcro to the
slanted-line of the the display
units as shown to the left, and
attach the other strip of Velcro
to the parts where you wish to
attach the display units.
Then, put velcros together and
install the display units.
• Installation using the trim mount plate 3
Display unit
Display unit
2
3
Pass the wire from the display unit through the hole on the
trim mount plate and push fit the display unit into the trim
mount plate until it locks.
•Be sure not to place the unit on such place as where it is
exposed to direct sunlight and temperature eventually rises.
It results in the deformation of the case.
•Depending on the installing location, the display unit may
not be able to receive the signals from the controller unit.
Install them after confirming that the signals can be
received.
•Install the unit in such a way that it does not disturb driving.
2CAUTION
Installation of FM modulator unit
■
Install the FM modulator unit beneath the front seat using
Metal fixture and Bind head screw as shown in the above
figure.
Take sufficient care so
that the wires are not
caught under the seat.
If they are caught, they
may break.
2CAUTION
φ
3
1

— 15 —
Troubleshooting Guide
What might seem to be a malfunction in your unit may
just be the result of slight misoperation or miswiring.
Before calling service, first check the following table
for possible problems.
General
?The power does not turn ON.01
✔The fuse has blown.
☞After checking for short circuits in the wires, replace the fuse with
one with the same rating.
✔No ACC position on vehicle ignition.02
☞Connect the same wire to the ignition as the battery wire.
?Nothing happens when the buttons are pressed.04
✔The computer chip in the unit is not functioning normally.
☞Press the Reset button on the display unit (page 3).
?No sound or sound is low.52
✔The O-N selection switch of the disc changer is not set properly.
☞Set the O-N selection switch to "N" position.
✔The radio volume is sets to the minimum level.3
☞Turn the radio volume up.
✔The input/output wire or wiring harness is connected incorrectly.55
☞Connect the input/output wire or wiring harness correctly. See
<Connecting Wires to Terminals> (Page 13).
?Sound distortion.67
✔The signal levels differ depending on sources.
☞Change the Modulation level / Dynamic control setting. (Page 9)
?Nothing appears on the display.04
✔The control output of the display unit is not connected properly.
☞Connect the control output properly.
Disc source
?CD/MD play does not start.52
✔CD/MD auto-changer input is not connected to the unit.
☞Connect the CD/MD auto-changer input to the unit.
✔Power button is not turned ON.53
☞Turn the power button ON.
?The specified disc does not play, but another one plays instead.52
✔The specified CD is quite dirty.
☞Clean the CD.
✔The CD is upside-down.53
☞Load the CD with the labeled side up.
✔The disc is loaded in a different slot from that specified.54
☞Eject the disc magazine and check the number for the specified
disc.
✔The disc is severely scratched.55
☞Try another disc instead.
?The specified track will not play.58
✔Random play or magazine random play has been selected.
☞Turn off random play or magazine random play.
?Cannot play CD-R or CD-RW.60
✔Finalization processing is not being conducted for CD-R/CD-RW.
☞Conduct finalization processing with CD recorder.
?Direct Track Search and Direct Disc Search can’t be done.66-1
✔Another function is ON.
☞Turn Random Play or other functions OFF.
?Track Search can't be done.66-2
✔For the discs first or last song.
☞For each disc, Track Search can't be done in the backward
direction for the first song or in the forward direction for the last
song.

English
— 16 —
Troubleshooting Guide
?Sound skips due to vibration.67
✔Something is touching the CD/MD auto-changer.
☞Keep it away from the CD/MD auto-changer.
✔The disc is dirty or damaged.68
☞If sound skips at the same part, the disc is faulty. Check and, if
possible, clean the disc.
✔Changer unit is mounted on the a slant.69
☞Mount the unit so that is level.
✔Changer unit is mounted in an unstable place.8
☞Mount the unit in a stable place.
✔The angle adjustment switches are set improperly.69
☞Set the angle adjustment switches to the correct positions.
?Sound quality is poor.67
✔The recording of the disc is poor.
☞Try playing another disc. If the sound is good, the fault was with
the original disc.
✔The disc is dirty or damaged.8
☞Check and, if possible, clean the disc.
?No sound is heard even though the information concerning the
CD/MD auto-changer is displayed.67
✔The radio volume is sets to the minimum level.
☞Turn the radio volume up.
✔The microcomputer does not function correctly.68
☞Press the Reset button of the display unit. (Page 3)
✔The system is not connected properly.69
☞Connect the system properly. See <Connecting Wires to
Terminals>. (Page 13)
MP3 source
?Cannot play an MP3.67
✔The disc format is not accepted in the unit connected.
☞Refer to the instruction manual of the disc changer (slave unit) for
creation of compatible formats.
✔The MP3 has no or invalid track name extension.68
☞Add the ".MP3" extension to the MP3 track name.
✔The media is scratched or dirty.69
☞Clean the media.
?Noise or no sound generated when an MP3 is played.70
✔The track has the MP3 track name extension while it is not an MP3.
☞Do not use the ".MP3" extension in non-MP3.
?Takes time before the unit starts playing MP3.71
✔The medium contains many discs, tracks, and hierarchical levels.
☞The unit checks all tracks on the loaded medium first. If the
medium has many tracks recorded, it may take a long time for the
unit before it starts playing MP3.
?Fails to play MP3 in the intended order.72
✔The MP3 tracks were not written by the CD writer in the order in
which you wanted them to be played.
☞Depending on the CD writer, you may be able to set the order in
which MP3 tracks are to be played by writing them onto a
medium with their track names beginning with play sequence
numbers such as "01" to "99".
?The sound skips when an MP3 is being played.73-1
✔The media is scratched or dirty.
☞Clean the media.
✔The recording condition is bad.73-2
☞Record the media again or use another media.

— 17 —
?The songs in the selected folder aren’t played in Folder Search
mode.77
✔There are no MP3 in the selected folder.
☞Make sure there’s recorded content in the MP3 media.
?The MP3 track search takes time.78
✔Many tracks are recorded on the media.
☞When the media directory is complex, the track search can take
time.

English
— 18 —
Troubleshooting Guide
The messages shown below display your systems condition.
EJECT: No disc magazine has been loaded in the changer. The disc magazine is not completely loaded.E01
➪Load the disc magazine properly.
NO DISC: No disc has been loaded in the disc magazine.E02
➪Load a disc into the disc magazine.
TOC Error: No disc has been loaded in the disc magazine.E04
➪Load a disc into the disc magazine.
The CD/MD is quite dirty. The CD is upside-down. The CD is scratched a lot.
➪Clean the CD/MD and load it correctly.
BLANK DISC: Nothing has been recorded on the MD.E77
➪The next MD will automatically be played.
No Track: No tracks are recorded on the MD, although it has a title.E77
➪The next MD will automatically be played.
E-12: Now reading the data in the disc.E77
➪Normal playback is resumed upon completing the reading of the disc data.
E-77: The unit is malfunctioning for some reason.E77
➪Press the reset button on the display unit. If the "E-77" code does not disappear, consult your nearest service center.
Mecha Error: Something is wrong with the disc magazine. Or the unit is malfunctioning for some reason.E99
➪Check the disc magazine, and then press the reset button on the display unit. If the "Mecha Error" code does not
disappear, consult your nearest service center.
Hold Error: The protective circuit in the unit activates when the temperature inside the automatic disc changer exceeds 60°C (140°F),
stopping all operation.E0d
➪Cool down the unit by opening the windows or turning on the air conditioner. As the temperature falls below 60°C
(140°F), the disc will start playing again.

— 19 —
Specifications
Specifications subject to change without notice.
Modulating Frequency (200KHz STEP) ..........87.7, 87.9, 88.1, 88.3,
88.5, 88.7, 88.9, 89.1,
89.3, 89.5, 89.7, 89.9,
MHz
General
Operating Voltage................................................14.4 V (11 ~ 16 V)
Current consumption ..............................................................1.0 A
Operating Temperature ................................................–10 ~ 50 °C
Preout Level (mV)/ Load (during disc play) ..............1000mV/10 kΩ
Preout impedance ................................................................≤600Ω
Size (W × H × D)
Remote Controller ........................................45 × 140 × 29 mm
Display unit....................................................154 × 43 × 17 mm
FM modulator unit ........................................126 × 30 × 69 mm
Trim mount plate ..........................................188 × 58 × 18 mm
Weight
Remote Controller ................................................................90 g
Display unit..........................................................................145 g
FM modulator unit ..............................................................400 g

— 20 —
Français
Table des matières
Avant l'utilisation
Précautions de sécurité ..............................................................21
Caractéristiques générales
Alimentation................................................................................22
Sélectionner la source ................................................................22
Fonctions de contrôle de disque
Lire un disque .............................................................................23
Avance rapide et retour...............................................................23
Recherche de plages ..................................................................23
Recherche de disques ................................................................24
Recherche de plage directe ........................................................24
Recherche directe de disque ......................................................24
Répétition de plage/disque .........................................................24
Balayage des plages ...................................................................24
Lecture aléatoire .........................................................................24
Lecture aléatoire du chargeur .....................................................25
Recherche de dossier .................................................................25
Défilement du Texte/Titre ...........................................................25
Mode de commutation de l'affichage.........................................25
A propos du menu
A propos du menu ......................................................................26
Comment changer la fréquence de transmission.......................27
Niveau de modulation .................................................................27
Contrôle dynamique....................................................................27
Défilement du texte....................................................................27
Opérations de base de la télécommande ....................28
Installation
Accessoires.................................................................................30
Procédure d'installation...............................................................30
Connexion des cables sur les prises ..........................................31
Installation...................................................................................32
Guide de depannage .............................................................33
Spécifications ..........................................................................37
Other manuals for KCA-R71FM
4
Table of contents
Languages:
Other Kenwood Modulator manuals

Kenwood
Kenwood DEM-999D User manual

Kenwood
Kenwood KCA-20FM User manual

Kenwood
Kenwood KCA-R30FM User manual

Kenwood
Kenwood KC-Z1 User manual

Kenwood
Kenwood KCA-20FM User manual

Kenwood
Kenwood KCA-R71FM User manual

Kenwood
Kenwood DEM-9991D User manual

Kenwood
Kenwood KC-Z1 User manual

Kenwood
Kenwood KAC-R51FP User manual

Kenwood
Kenwood KCA-R2FMA User manual