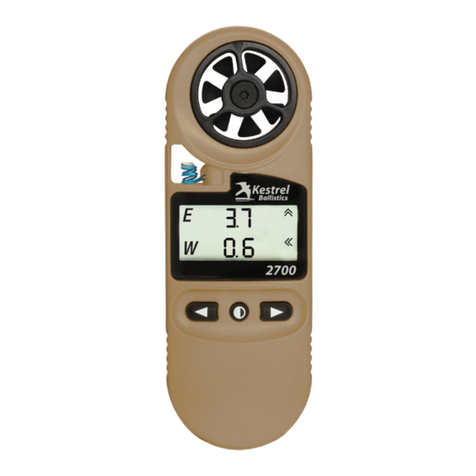
Kestrel Ballistics 2700 User manual

USER GUIDE
2700
www.kestrelballistics.com

2
Your Kestrel Ballistics Weather Meter is designed to provide accurate measurement of current conditions only.
Depending on your location and environment, conditions may change rapidly.
Rapid temperature changes (i.e., moving your meter from indoors to outdoors) may cause inaccurate readings of temperature. Before relying on
Kestrel Weather Meter readings, be sure to use care to either a) force air ow over the sensors by waving or slinging your meter through the air; or b)
wait until your unit has equilibrated to its new environment.
To maximize the accuracy and reliability of your readings:
• Ensure that your Kestrel Meter is in good repair.
• Take readings frequently and carefully according to the guidelines above.
• Allow your meter’s readings to stabilize after signicant changes in temperature (i.e., changing location from indoors to outdoors).
Use extra care and good judgment when referring to your Kestrel Ballistics Weather Meter to make any decisions
regarding safety, health or property protection.
CAUTION
!
CR2032 batteries contain lithium, a toxic substance. Ingestion may
cause serious injury or death. Keep battery out of the reach of children.
If swallowed, immediately seek medical help. Have doctor phone
24-hour hotline at (202) 625-3333, call collect if necessary. Dispose of
batteries properly and according to local regulations. Do not puncture
or burn batteries. If the battery compartment does not close securely,
stop using the product and keep it away from children.
CAUTION
!
WARNING: This product and/or its included or branded
accessories can expose you to chemicals, including lead, lead
compounds and phthalate DEHP, which are known to the State
of California to cause cancer and lead and lead compounds,
bisphenol A (BPA), and phthalate DnHP, which are known to the
State of California to cause birth defects or other reproductive
harm. For more information, go to www.P65Warnings.ca.gov.

3
CONTENTS
Features & Options ..........................................................4
Getting to Know Your Kestrel........................................5
Getting Started.................................................................6
Replacing the Battery.................................................... 11
Sensor Calibration .........................................................12
Troubleshooting Checklist...........................................13
Warranty ..........................................................................14
This User Guide contains only the information you need to get
started using your Kestrel meter. For FAQ’s, chat and e-mail
support, visit www.kestrelballistics.com.
CONTACT US AT
(800) 784-4221 Toll Free North America
(610) 447-1555
Email: support@kestrelballistics.com
Facebook: fb.com/KestrelMeters
Twitter: @KestrelWeather

4
The table below shows all Measurement screens available, listed
with their corresponding screen icon and “Hint” abbreviation.
Measurement Icon Units of Measure
Elevation EMILs | TMOA | SMOA | Clicks | in | cm
Windage WMILs | TMOA | SMOA | Clicks | in | cm
Target Range y | m
Temperature ˚F |˚C
Direction of Fire deg
Wind Speed mph |m/s |km/h
Wind Direction clock
Inclination Angle deg
FEATURES & OPTIONS

5
2700
REPLACEABLE
IMPELLER
PRESSURE
SENSOR
SERIAL
NUMBER
RANGE
SCROLLING
BUTTONS
POWER/TARGET
SETUP
BUTTON
TEMPERATURE
THERMISTOR
FRONT
BATTERY DOOR:
CR2032 LITHIUM
COIN CELL
BACK
GETTING TO KNOW YOUR KESTREL

6
OUT OF THE BOX
1. Turn the 2700 On:
Press the center button to turn your Kestrel 2700 on.
Pressing and holding the center button will turn it o.
Note: To conserve battery, the Kestrel will also power o after
45 minutes of inactivity.
2. Calibrate the Compass:
» Hold the Kestrel vertical.
» Press the center button.
» Carefully spin the Kestrel at about 8 seconds per rotation
while the screen counts down from 30 to 0. (Either direction
works.)
When calibrated, the display will change to show the solutions screen.
Note: Every time the battery is replaced the compass in the 2700 will
need to be recalibrated and the screen will display “CAL CPS”.
Trouble shooting: If the calibration fails and returns to the CAL CPS screen,
simply press the center button and repeat.

7
3. Download the Kestrel LiNK Ballistics app:
Note: Make sure to choose LiNK
Ballistics, not LiNK Weather, when
selecting the app.
4. Connect your 2700 to your phone or tablet:
With your Kestrel turned on, open the app and connect to
your 2700.
Trouble shooting: Make sure Bluetooth is turned on in your mobile
device. Do not try to connect the Kestrel using the Bluetooth menu in
your mobile device, use the “Connect Device” option in the app instead.
2700 - 2265604
12
7

8
5. Create your gun prole:
Select gun prole management. Select + (IOS) or (Android) to
add a new prole.
1
2 2
OR
iOS Android

9
OR
iOS Android
6. Enter your gun information:
Name your gun prole and enter required data. If you are unsure what
information to enter in a eld or where to nd it, tap the name next to the eld
for additional guidance and refer to the following page. When done hit the
“Save” button (iOS) ; tap the three dots in the upper right corner (Android).

10
Try to pick a prole name you can dierentiate from other gun/caliber combinations.
Picking your bullet from the Bullet Library will auto-populate the Diameter, Weight
and Ballistic Coecient elds for your bullet.
Be careful when entering bullet diameter as many common caliber names do not
equal the actual measurement of the bullet diameter. The bullet library lists the actual
bullet diameter next to the commonly used caliber names.
Bullet Weight will be printed by the manufacturer on the box.
The G1/G7 BCs in the Bullet Library are lab-tested and more accurate than most
manufacturer data. For most long range bullets, a G7 BC produces more accurate
solutions than a G1 BC. If your source for BCs does not indicate G1 or G7, assume G1.
If you don’t have access to a chronograph, enter the Muzzle Velocity from the ammo
manufacturer or reloading guide and then use the MV Calibration tool in the app. (See
MV Calibration in Additional Tools)
We recommend using a distance of approximately 100 yards/
100 meters to avoid zero shift due to environmental changes.
Conrm your exact zero range with a laser or measuring tape.
Make sure the Elevation & Windage Unit settings match the turrets and reticle in
your scope. (MIL = MRAD/Milliradians, TMOA = True MOA (Most common), SMOA =
Shooters MOA, or exactly 1”at 100 yards)
Gun Prole Builder Tips

11
Note: You can build and store multiple proles in the app, but the 2700 can only
hold one prole at a time. A prole is any unique combination of gun and bullet.
To change proles, simply transfer a new prole to the 2700.
OR
OR
2
1
3
1
2
iOS Android
7. Send your gun prole to the 2700:
Select the desired prole, then tap“Send Prole” to transfer the prole to your Kestrel 2700.
OR

12
8. Conrm Prole Transfer:
To conrm your gun prole has transferred correctly to your 2700,
check the “Current Prole:” line in the app and make sure the name of
your new gun prole is shown.
OR
Load and go! You can put away your phone now and head to
the range. The 2700 works completely independently once your
prole has been transferred.
iOS Android

13
At the Range
1Update Temperature:
Press the center button once to begin step
one – temperature capture. To ensure an
accurate temperature reading, air must be
owing over the blue temperature sensor.
Conrm the thermometer is showing on the
screen, then simply spin or swing the Kestrel
by the lanyard. Spin for 5 to 10 seconds,
then press the center button to record the
temperature and move to the next step.
2Update Direction of Fire:
Conrm the compass and target icons are
showing on the screen. Holding the 2700
vertical, point the back of the Kestrel at the
target. Press the center button again to conrm
the direction of re and move to the next step.
Target Setup
Target setup is a three step routine to capture all the details of your shot environment.

14
3Update Wind Speed & Wind Direction:
Conrm the wind icon is showing on the screen.
Holding the 2700 vertical, point the back of the
Kestrel into the wind for at least 10 seconds
to capture wind direction and average wind
speed. Wind capture "snapshots" a moving 5
second average of wind speed and direction.
Once representative wind values are shown on
the screen, press the center button to capture
the wind and end the target setup routine.
4Set Target Range:
Press and hold the left or right buttons to scroll
target range. The solution will update automatically
when you stop scrolling the range.
Note: You can press the left or right button once to
check your current range. You can also adjust target
range without repeating the Target Setup Routine
when your target is in the same direction and wind
and temperature have not changed signicantly.
Note: To update wind speed and direction without performing the
other Target Setup steps double-tap the center button from the
solution screen. Press any button to capture the wind and return to
the solution screen–updated for the wind reading.
Target Range

15
5Take Your Shot:
The numbers and arrows on the solution screen show you how much, and in which
direction, to shift your point of aim. The “E”, or Elevation line, shows you the up/
down correction and the “W”, or Windage line shows the left/right correction.
Note: It can be easy to forget whether to hold on the left or right side of your reticle. Remember, you
always want to shift your muzzle toward the direction the wind is coming from.
If your 2700 indicates 3.4 Up
and 1.5 Left, aim your rie
3.4 up from your target and
1.5 to the left of your target.
Depending on your scope, you
will change your point of aim by
holding visually in your reticle
or dialing using your scope’s
turrets (or a combination of
the two). Make sure the E & W
units set in the 2700 match your
scope’s turrets and reticle.
Wind Direction
Shoot!

16
Additional Tools:
Muzzle Velocity Calibration:
If the solution provided by the Kestrel does not put you
on target, rst try repeating the Target Setup Routine and
conrming your range. If you're still hitting high or low, the
Muzzle Velocity Calibration tool will adjust your muzzle
velocity to provide on target solutions.
Connect your 2700 to the app, then follow the steps in the
Muzzle Velocity Calibration tool. When the calibration routine
is complete, the prole saved in your 2700 will be updated
with the new muzzle velocity.

17
Changing units of measure:
To change the units for target range, temperature or wind
speed, follow the "At the Range" steps to navigate to the
screen for the units you wish to change. Press the center
and right buttons at the same time to step through the
available units. To change elevation or windage units,
create a new gun prole in the app and send it to the 2700.
Inclination Angle Correction:
The Kestrel 2700 can also correct for high angle shots. To
turn Inclination Angle on, connect to the app and toggle
the Inclination Angle setting from Off to On. With this
setting turned on, the last step in the Target Setup routine
will allow you to manually enter a shot angle by pressing
the left or right buttons.
Note: Wind Speed measurements can be displayed in mph, m/s and
km/h. Mph and m/s are indicated by icons. If no Wind Speed unit icon is
shown, km/h is being used.
Note: Your Kestrel ships set to MILs. To change to MOA,
see Gun Prole Builder Tips on pg. 10.

18
1 Connect your Kestrel to the Kestrel LiNK App.
2 Place your Kestrel in the Kestrel Basic Series Vane Mount (PN# 0782-K123)
on a tripod in an open location exposed to the same winds affecting your
shot. The Bluetooth range of the Kestrel is about 100 feet – reduced by
trees or obstructions.
3 Select the Single Target Screen in the app.
4 Toggle “Wind Vane Mode” to “ON” to command the Kestrel to start
streaming real-time wind speed and direction data. Your solution will
update in real time based upon changing winds.
5 While in Wind Vane Mode, the Kestrel will display the current wind readings
and ash the wind icon to indicate it is connected and streaming.
6 To exit Wind Vane Mode:
• Toggle “Wind Vane Mode” to “Off”
in the app;
• Navigate to any other screen in
the app; or
• Press any button on the Kestrel.
Both the Kestrel and the App will display the last solution calculated. You
will need to return to the single target screen in the app and toggle the
Wind Vane Mode indicator back to On to restart wind streaming.
Vane Mount
Sold Separately
COMING SOON!
Wind Vane Mode:
As an added feature, your Kestrel 2700 can be used with the Kestrel Basic
Series Vane Mount (sold separately) as a real-time wind speed and direction
station for the Kestrel LiNK Ballistics App:

19
When your display disappears, you need to change
the battery.
Use a US nickel or similar coin to twist open the
battery compartment.
Replace battery with a new, clean CR2032 coin-cell
battery, with positive side (+) facing up.
CR2032 batteries are available in most stores that
sell batteries.
When replacing the battery door, be sure to keep the black
rubber o-ring seated in the groove on the case back.
REPLACING THE BATTERY

20
Impeller
The Kestrel impeller calibration drift is less than
1% after 100 hours of use at 16 MPH | 7 m/s. Drift
increases with higher-speed use. For most users,
the impeller will provide accurate wind speed/air
ow readings for years if not physically damaged.
However, if your application requires extremely high
precision or if you perform frequent high-speed
readings, we recommend you replace your impeller
at one-year intervals. Every replacement impeller is
supplied with a certicate of conformity and restores
your Kestrel’s calibration upon installation.
Temperature Sensor
The Kestrel temperature sensor exhibits virtually
zero drift over time and generally does not require
recalibration for accurate performance during the
life of the product. If a calibration check is desired,
please contact Kestrel for options and pricing.
Pressure Sensor
The Kestrel pressure sensor drift may be up to 1
mbar over 12 months. which for practical purposes
means it will not require recalibration for the life of
the product. If a calibration check is desired, please
contact Kestrel for options and pricing.
SENSOR CALIBRATION
Table of contents
Other Kestrel Ballistics Measuring Instrument manuals