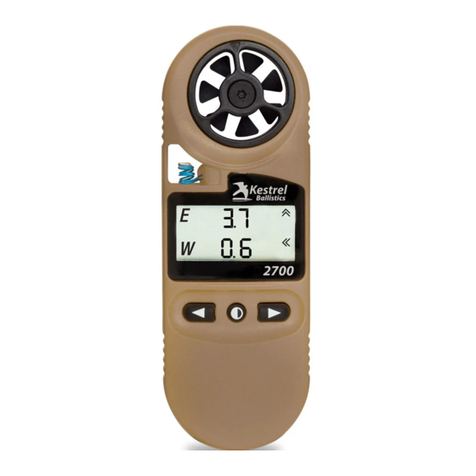
Kestrel Ballistics 5700 User manual

1
Getting Started with your Hornady Kestrel 5700 Ballistics Meter
Please note: This guide goes through Ballistics mode not Easy mode.
1) Install battery and lanyard and turn unit on.
2) Go to Ballistics Mode.
a) Press the Gear button to open the main menu. Use the right or left arrow to change Mode
to Ballistics.
3) Calibrate the compass.
a) Use the down arrow to navigate to System and press the center button. Navigate to the
Compass Calibrate line in the System submenu and press the center button.
b) Stand the Kestrel on its end, preferably on a table at least 3 feet away from any metal
objects.
c) Press the center button and begin rotating the Kestrel in either direction at a constant
speed, counting to between 6-10 seconds per rotation. Rotate at least three times, or until
the screen says "Cal Complete".
4) Set your Latitude.
Press the Gear button until you are back to the main ballistics screen. Use the down arrow to
scroll to Environment and press the center button. Highlight Lat… and use the left or right arrow
to adjust the latitude to match your current location. Your latitude can be found through an
internet search. Alternatively, you can connect to the Kestrel LiNK Ballistics app (Android or
iOS) and send your phone’s current Latitude directly to the Kestrel.
5) Create a bullet file.
You can create a bullet file directly on the Kestrel or by building a bullet file in the Kestrel LiNK
Ballistics application and sending it over to the Kestrel through Bluetooth. The advantage of

2
using the application is that there a library full of 4DOF bullet files which have been extensively
tested by Hornady and should provide the best results right out of the box. Below is information
if you wanted to build the gun on the Kestrel itself.
GUN – Create a gun name that will be identifiable to you when selecting the profile.
MV – Muzzle Velocity. If you have a calibrated chronograph, use it to measure your muzzle
velocity. If not, enter your best estimate. You can look for the manufacturer’s generic estimate
(based on average barrel length) on the ammo box or on the manufacturer’s website.
Compensations can be made later in this document to account for inexact muzzle velocity
entries.
DM/BF – Drag Model / Bullet File. This field is called drag model (DM) if using G1 or G7
standard drag models. However if you instead load a bullet file from the Kestrel LiNK Ballistics
app, this field becomes a bullet file and uses Hornady’s 4DOF Doppler modeling of the bullet.
BC – Bullet Coefficient. The ballistic coefficient is a ratio of how aerodynamic your bullet is
versus the drag model it is being compared against. BC values will be based on the G1 or G7
model. You can find these values on bullet manufacturer’s websites although if only 1 value is
given, it is typically for a G1 model. The Kestrel LiNK Ballistics bullet library also lists a majority
of these values if building a profile in the app. Please note: if using a bullet file, the BC will show
as “---“.
BW - Bullet Weight. Measured in grains or grams, this is usually given as part of the bullet’s
name. The bullet weight of a 180-grain 0.308 round is 180 grains.
BD – Bullet Diameter. Ensure you are using correct measurements, as the names of many
calibers are not accurate representations of the actual bullet diameter (i.e., 30 caliber rounds
are actually 0.308”, not 0.300”).
Rifle/Scope Data – In addition to Muzzle Velocity, additional information about your rifle and
scope are needed to calculate a ballistic solution.
ZR/ZA – Zero Range / Zero Angle. Zero Range is the distance at which your rifle was zeroed. If
the rifle is zeroed at longer ranges (200-300 yards) environmental changes cannot be ignored
which is why zeroing at shorter distances (100 y or 100 m) is recommended. If you highlight ZR
and press the center button, you can change this value to ZA (Zero Angle). Zero Angle on the
other hand is a measure of the angle between the straight line following the axis of the scope
and the straight line following the axis of the rifle barrel. This angle is very small and would be
difficult to measure directly but the 4DOF ballistics engine can find the angle when provided
with environmental data and bullet impact location. Once the solver knows the Zero Angle
between your rifle and scope a very accurate solution can be provided regardless of how long
the zero range is or how much the weather changes. It is recommended to follow the Cal Zero
Angle guide on the Kestrel to find the appropriate value for your rifle/scope.
BH – Bore Height. Also known as Scope Height, this is the distance from the center axis of the
scope to the center axis of the barrel. Measuring the vertical distance from the center of the

3
windage turret to the center of the bolt is an easy way to find Bore Height (just need to be
accurate to within ¼”).
RT – Rifle Twist. This is the distance along the barrel it takes for the rifling to complete one
rotation. If the Rifle twist is not known, it can be measured by pushing a tight fitting patch
through the barrel and measuring the distance required for the cleaning rod to make one full
rotation. RTd is the rifle twist direction and can be changed by highlighting RT and pressing the
center button. The vast majority of rifles have a right twist (clockwise from the position of the
shooter).
Eunit/Wunit – Elevation / Windage Unit. These are the units of measure used in the elevation
and windage turrets of the scope.
1) MIL – Miliradian
2) TMOA – True Minute of Angle (typically written as MOA) where 1 MOA equals
1.047” at 100 yards.
3) SMOA – Shooter’s Minute of Angle. This is less frequently used but 1 MOA equals
exactly 1 inch at 100 yards.
4) Clck– A user settable value representing the angle adjustment made by each “click”
or detent of the turret when turned.
5) Inch - A straightfoward method of determining drop based on the amount of inches
the bullet drops.
6) CM - A straightfoward method of determining drop based on the amount of
centimeters the bullet drops.
Eclck/Wclck – Elevation/Windage Click Setting. If Euint or Wunit are set to clik, the Kestrel will
provide solutions indicating the number of “clicks” the turret needs to be turned to dial the
solution. The percent of a full Mil or MOA represented by each “click” of the turret must be set
by the user. For example, if you know your turret is 1 click per 1/4 MOA, set the Eunit/Wunit to
clicks and set the Eclck/Wclck to 4/MOA. This means every 4 clicks equals 1 MOA or 1 click = 1/4
MOA.
6) Capture Target Information.
On the main Ballistics screen, scroll to Tgt…. and press select. Input information about each of
the following target variables.
a) TR – Target Range. This is the line of sight range to the target. Use the left and right
arrow to adjust the value.
b) DoF – Direction of Fire. Measured in degrees or hours from North, this value can be
manually inputted or captured automatically.
i. Capturing Direction of Fire – To capture DoF automatically, enter the
DoF submenu and select Capture. While pointing the back of the
Kestrel towards the target and holding the Kestrel vertically, press the
select button.
c) Ideg – Inclination angle is the angle above or below the horizon to the target.

4
Pro Tip: You can also highlight TGT on the main ballistics screen and press the red button in the
top center. TGT will become T-> and then you can point the back of the Kestrel at the target and
press the red button again to capture the direction.
6) Capture Wind Information.
On the main Ballistics screen, scroll to Wind… and press select. You will need to input three
attributes of the wind manually or do an automatic capture. It is important to keep the Kestrel
high above the ground and pay attention to the terrain around you that may put you in “dirty”
or unrepresented air. If you can tell that the downrange wind conditions along the path of the
bullet, take those into account when applying a wind hold but remember the wind at the gun
will typically have the strongest impact on the flight of the bullet.
a. WD – Wind Direction. Measured in degrees or hours from the direction of fire, this
variable can be input manually or captured automatically together with the other wind
variables when making a capture. Please note: wind direction is relative to the DOF and
not an absolute value; therefore if your DOF is at 180 degrees (6 o’clock) and have an
East wind (90 degrees / 3 o’clock), this value will show as a West wind (270 degrees / 9
o’clock) on the Kestrel.
b. WS1 –Average Wind Speed. This variable can be input manually or captured
automatically together with the other wind variables when making a wind capture.
c. WS2 –Maximum Wind Speed. This variable can be input manually or captured
automatically together with the other wind variables when making a wind capture.
i. Capturing Wind Automatically –To capture all the wind values together
automatically enter any of the submenus for WD, WS1 or WS2 and select
Capture. Next, point the back of the Kestrel directly into the prevailing wind
and while holding vertically, press the select button and hold your position for
at least 5 seconds, then press select to end the capture. You can take as long of
a wind sample as you would like but 5 seconds should be the minimum amount.
Note: Remember, because the wind direction (WD) is relative to the direction of fire (DoF), if
you change your direction of fire, you need to update the inputs for both DoF and WD.
Pro Tip: You can also highlight Wind on the main ballistics screen, point to the back of the Kestrel
into the prevailing wind and press the red button in the top center. Wind will become W->. Take
as long a wind sample as you would like and press the red button again. Wind values and
direction would then be captured. If you do not press the red button a second time, the Kestrel
will be capturing real-time wind values which is useful if mounting the Kestrel in a vane mount.
7) Capture Environmental Data.
The Kestrel monitors real-time environmental data and constantly updates the 4DOF solver.
Please note that you should never have to adjust anything in Weather Mode such as REF ALT or

5
REF BARO. The Kestrel will provide accurate weather information for the 4DOF solver at all
times, wherever you travel.
From the main Ballistics screen, scroll down to Enviro…and use the left or right button to ensure
Live is shown as the option. When set to Live, the ballistics engine will continually pull in new
environmental data and update the solution accordingly. It is recommended to expose the
Kestrel to ambient airflow by waving it back and forth for several seconds. If you are going from
extreme temperature shifts (e.g., air conditioned truck to very hot range) please allow more
time for the Kestrel to reach equilibrium. Once you are satisfied with the environmental
capture, we typically tell customers to change Enviro to Lock. If the Kestrel is placed on a hot,
black mat or has direct sunlight hitting the thermistor, the temperature can artificially raise so
that is why locking is recommended. Repeat this process any time conditions change
dramatically or about every 30 minutes to update to current conditions.
Now that all the gun, bullet, target, wind, and environmental inputs have been set in the Kestrel,
the solution provided on the targeting screen will be based on your environment and shot. Take
a minute to familiarize yourself with the values on the screen and how to implement them in
your scope. Please note that solutions on the Kestrel’s targeting screen are given referencing
point of aim, so W 3.20L indicates a change in point of aim is needed 3.20 to the left of the
target.
8) Calibrate Axial Form Factor
Due to differences in barrel machining, muzzle breaks, propellants and other factors, when the
same bullet is fired from different rifles there will be a slight difference in the drag the bullet will
experience. The Hornady 4DOF solver assumes the bullet will be fired from an "average" barrel
but in reality your rifle may impact the bullet slightly differently. To account for any differences
the Axial Form Factor value can be modified to align the output from the solver to what your
bullet is experiencing.
From the main Ballistics screen, scroll down to Gun and press the center button. Scroll to the
bottom of the Gun submenu and select Cal Axial FF... and press the center button. A step-by-
step guide will assist you in figuring out your gun’s Axial Form Factor. After confirming your
Latitude and Environment, you will want to find a target between 300 and 800 yards. Enter the

6
range of your target by highlighting the Range… menu item and use the right and left arrows.
Select Continue and next point the back of the Kestrel towards the target to capture DOF. After
that, point the Kestrel into the prevailing wind and capture the wind for several seconds.
You will notice an Elevation number at the top of the screen. Take a group of shots using this
Elevation hold at the range that was specified. Measure the distance (up and down) between
center of the target and your group of shots. Adjust the Elevation to match the actual elevation
drop.
For example, the above shows an Elevation hold of 18.21 MOA. After shooting, you notice that
the elevation drop was 0.5 MOA below center of the target. Therefore the total elevation drop
you witnessed was 18.21 + 0.5 = 18.71 MOA.
Adjust the Elevation to the drop you actually saw, in this case 18.71 MOA. The Axial FF will
change, select Continue to accept this adjustment and your gun profile will be calibrated
through the supersonic, transonic and subsonic regions.
Congratulations! You have now calibrated your Hornady 4DOF Kestrel 5700 and will receive
accurate solutions at any range, under any weather conditions, and at any altitude without
having to adjust your solution.
Table of contents
Other Kestrel Ballistics Measuring Instrument manuals
Popular Measuring Instrument manuals by other brands

DAKOTA ULTRASONICS
DAKOTA ULTRASONICS MX-5 Operation manual

Shakmat
Shakmat Four Bricks Rook user manual

KROHNE
KROHNE OPTIWAVE 400 Series Supplementary instructions

KYORITSU
KYORITSU KEW 2062 instruction manual

Oregon Scientific
Oregon Scientific THGR238N user manual

Tektronix
Tektronix H600 RFHawk Service manual