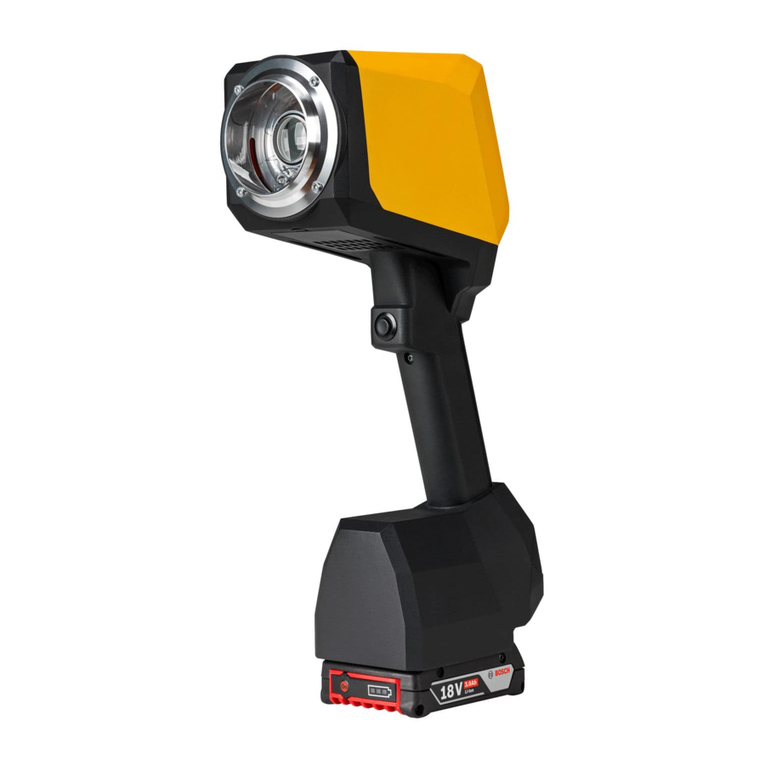
Coatmaster 3D User manual

coatmaster 3D
user manual

Flugplatzstrasse 5
8404 Winterthur
Switzerland
May 2020, Version 1.0
All rights reserved. No part of this publication may be reproduced, distributed, or transmitted in any form or by any means,
including photocopying, recording, or other electronic or mechanical methods, without the prior written permission of the
publisher, except certain noncommercial uses permitted by copyright law.
© 2020 coatmaster AG

coatmaster 3D user manual
3/63
Table of contents
1General...................................................................................................................... 6
1.1 Information ................................................................................................................... 6
1.2 About this manual ......................................................................................................... 6
1.3 Liability limitation.......................................................................................................... 6
1.4 Copyright ...................................................................................................................... 7
1.5 Warranty conditions ...................................................................................................... 7
1.6 Scope of delivery ........................................................................................................... 7
2Safety ........................................................................................................................ 9
2.1 Responsibility of the operator........................................................................................ 9
2.2 User qualification .......................................................................................................... 9
2.3 Proper use..................................................................................................................... 9
2.4 Improper use................................................................................................................. 9
2.5 Use in the presence of flame dectectors. ...................................................................... 10
2.6 Safety warnings and signals used in this manual........................................................... 10
2.6.1 Description of the safety warnings................................................................................ 10
2.6.2 Used symbols................................................................................................................. 11
2.7 Product safety ............................................................................................................. 11
2.7.1 General hazards............................................................................................................. 12
2.7.2 Integrated safety elements ........................................................................................... 13
3coatmaster Hardware Interfaces .............................................................................. 14
3.1 coatmaster 3D ............................................................................................................. 14
4System Installation .................................................................................................. 17
4.1 Hardware installation .................................................................................................. 17
4.2 Software requirements................................................................................................ 18
4.3 Interface to connect with control computer ................................................................. 19
4.4 Network and administrator settings............................................................................. 19
4.4.1 Configuring coatmaster network .................................................................................. 19
4.4.2 Installing coatmaster Desktop Software ....................................................................... 20
4.4.3 Define administrator settings within the Operating System......................................... 21
4.4.4 Dark mode selection...................................................................................................... 22
5Measuring coating thickness with coatmaster .......................................................... 23
5.1. Measuring principle..................................................................................................... 23
5.2. coatmaster application for rough surfaces.................................................................... 24
5.3. Best practices .............................................................................................................. 25
5.3.1. Measuring on moving parts (optional).......................................................................... 25
5.3.2. Setting the measuring time........................................................................................... 26
5.3.3. Flash generator statu..................................................................................................... 26
5.3.4. Setting the energy level and lamp lifetime ................................................................... 27
5.3.5. NUC................................................................................................................................ 28

coatmaster 3D user manual
4/63
5.4. coatmaster applications for coatings before curing....................................................... 28
5.4.1. Measuring powder coatings before curing ................................................................... 28
5.4.2. Measuring wet coatings before curing/drying.............................................................. 30
5.4.3. Procedure to make coatmaster applications for measuring coating thickness before
curing 30
5.5. Making new coatmaster applications ........................................................................... 31
5.5.1. Setup application........................................................................................................... 32
5.6. Measuring with coatmaster Operating System ............................................................. 35
5.6.1. Adjusting the position of the coatmaster 3D head ....................................................... 36
5.6.2. Adjusting the position of the coatmaster 3D lamps...................................................... 37
5.6.3. Management of the applications .................................................................................. 40
5.6.4. Manual measurement ................................................................................................... 41
5.6.5. Visualising results with the coatmaster 3D ................................................................... 41
5.6.6. System information ....................................................................................................... 44
5.7. Back-up and Transfer of coatmaster 3D applications..................................................... 45
5.7.1. Export applications........................................................................................................ 45
5.7.2. Import applications ....................................................................................................... 46
5.8. Export measurement data ........................................................................................... 47
5.8.1. Exporting data manually................................................................................................ 47
5.8.2. Exporting data automatically ........................................................................................ 48
6. Remote control........................................................................................................ 49
6.1. TCP/IP ......................................................................................................................... 49
6.1.1. General format of commands and results .................................................................... 49
6.1.2. MEASURE command...................................................................................................... 51
6.1.3. GETCONFIGURATION command.................................................................................... 52
6.1.4. GETCONFIGURATIONS command.................................................................................. 52
6.1.5. GETCONFIGIDS command ............................................................................................. 53
6.1.6. GETCOATMASTERSTATUS ............................................................................................. 53
6.1.7. GET_FLASH_ENERGY command .................................................................................... 54
6.1.8. SET_FLASH_ENERGY command..................................................................................... 54
6.2. Siemens S7 .................................................................................................................. 55
7. Maintenance / Service ............................................................................................. 56
7.1. General ....................................................................................................................... 56
7.2. Lamps ......................................................................................................................... 56
7.3. Lamp glass................................................................................................................... 56
7.4. Measurement cameras ................................................................................................ 56
7.5. Climatized electrical cabinet air filter ........................................................................... 57
8. Troubleshooting....................................................................................................... 58
9. Technical data.......................................................................................................... 59
9.1. Data sheet coatmaster 3D............................................................................................ 59
10. Transport, packaging, storage ............................................................................... 60

coatmaster 3D user manual
5/63
10.1. Transport inspection ................................................................................................ 60
10.2. Packaging ................................................................................................................ 60
10.3. Storage.................................................................................................................... 60
11. Appendix A: tests with flame detector .................................................................. 62
11.1. STS flame detector................................................................................................... 62
11.2. Total Walther UV-03 flame detector......................................................................... 63

coatmaster 3D user manual
6/63
1 General
1.1 Information
This manual describes the coatmaster 3D and provides all information required for its safe operation
and to maintain it in good working order.
Read this manual carefully before installing and running your system and note the safety precautions
in chapter 2 in particular. Store the manual in the immediate vicinity of the instrument, so that it can
be consulted at any time.
Figures in this manual serve the general understanding and might deviate from the actual product
design.
1.2 About this manual
The User Manual contains instructions on proper installation, use of the coatmaster, safety infor-
mation, and user maintenance and trouble shooting. More detailed information on network and com-
munication setup, calibration, applications and external remote control are available in the User Man-
ual.
Paragraphs starting with NOTE contain helpful information for working with the device/software or its
supplementaries. NOTE’s are not related to any kind of hazard or damage (see following example).
NOTE
Useful tips for the easy operation of the instrument/software.
1.3 Liability limitation
The device is designed and built in accordance with current state-of-the-art technology. Nevertheless,
risks to users, property, and the environment can arise when the device is used carelessly or improp-
erly.
coatmasster AG has determined the following residual dangers emanating from the device:
•The User Manual is not considered.
•The device is not operated according to its proper use.
•The device is operated by insufficiently trained personnel.
•Unauthorized modification of the device.
•Use of unlisted spare parts
Appropriate warnings in this manual serve to make the user alert to these residual dangers.
Due to special designs, additional options are latest technical modifications, the actual scope of deliv-
ery might deviate from the descriptions and illustrations herein.
The obligations agreed upon in the delivery contract, the General Terms and Conditions as well as
the delivery conditions of the manufacturer and the legal provisions in effect at the time of contract
closure shall be applicable.

coatmaster 3D user manual
7/63
1.4 Copyright
No technical modifications may be made to the device without the prior written agreement of coat-
master AG. Unauthorized modifications may affect the system safety or result in accidents.
This manual is copyright. Information from it may not be reproduced, distributed, or used for com-
petitive purposes, nor made available to third parties. The manufacture of any component with the
aid of this manual without prior written agreement is also prohibited.
1.5 Warranty conditions
The warranty conditions are part of the General Terms and Conditions of the manufacturer.
Any system modification and modification of the embedded PC as e.g.
•Installation of further software
•Software updates
can affect or damage the coatmaster and are therefore prohibited.
coatmaster AG assumes no liability for data loss on the embedded PC. It is suggested to regularly
backup the data on the embedded PC (application and measurement data).
1.6 Scope of delivery
Version 2 with lamps:
•1 coatmaster 3D optical head
•1 CM flash generator unit (19“-rack insert, 3 height units)
•1 CM control unit (19“-rack insert, 3 height units)
•2 lamps mountend on aluminum support
•1 USB stick with the coatmaster 3D User Interface
•1 set of cables (up to 6 Ethernet cables max 25m each, 3 90-264V C13/C14, 1 sync cable and
2 Harting HAN16B)
•1 User Manual
Version 4 with lamps:
•1 coatmaster 3D optical head
•2 CM flash generator unit (19“-rack insert, 3 height units)
•1 CM control unit (19“-rack insert, 3 height units)
•4 lamps mountend on aluminum support
•1 USB stick with the coatmaster 3D User Interface
•1 set of cables (up to 8 Ethernet cables max 25m each, 3 90-264V C13/C14, 1 90-264V C20, 1
sync cable and 4 Harting HAN16B)
•1 User Manual

coatmaster 3D user manual
8/63
Version 6 with lamps:
•1 coatmaster 3D optical head
•3 CM flash generator unit (19“-rack insert, 3 height units)
•1 CM control unit (19“-rack insert, 3 height units)
•6 lamps mountend on aluminum support
•1 USB stick with the coatmaster 3D User Interface
•1 set of cables (up to 10 Ethernet cables max 25m each, 4 90-264V C13/C14, 1 90-264V C20,
1 sync cable and 6 Harting HAN16B)
•1 User Manual
Version 8 with lamps:
•1 coatmaster 3D optical head
•4 CM flash generator unit (19“-rack insert, 3 height units)
•1 CM control unit (19“-rack insert, 3 height units)
•8 lamps mountend on aluminum support
•1 USB stick with the coatmaster 3D User Interface
•1 set of cables (up to 12 Ethernet cables max 25m each, 5 90-264V C13/C14, 1 230V/400V
CEE16, 1 sync cable and 8 Harting HAN16B)
•1 User Manual

coatmaster 3D user manual
9/63
2Safety
This section gives an overview of all relevant safety aspects for an optimal personal protection as
well as for a save and undisturbed operation.
2.1 Responsibility of the operator
The operator is responsible for training his/her personnel.
The operator shall inform the manufacturer without delay of any safety-related incidents which might
occur during operation of the device or its accessories.
Issues can be reported to the e-mail address: info@coatmaster.com
Legal regulations, such as local, state and federal laws applying to the device or its accessories must
be strictly followed.
2.2 User qualification
Before the use of the coatmaster the user manual must be read and understood.
The device may only be used by persons who on account of training or professional experience have
an overview of the dangers which may arise when operating the device.
2.3 Proper use
The coatmaster is exclusively designed for measuring thicknesses of coatings. It can be used for the
following coatings:
•powder coatings on metallic substrates
•adhesive coatings on metallic substrates
•polymer coatings on metallic substrates
•wet paint on metallic substrates
•wet paint (wet-state) on non-metallic substrates
•thermal spray coatings.
The device must only be operated and cleaned by trained personnel. The proper use also includes
adherence to this manual. The service intervals must be strictly followed.
2.4 Improper use
Use not mentioned above or use that does not comply with the technical specifications is considered
improper use. The operator bears the sole risk for any damages caused by such improper use. The
following uses are forbidden:
•Use of the coatmaster in environments, where liquids can enter the housing.
•Introduction of any objects into the coatmaster 3D.
•Opening the coatmaster’s housing. Exception: Cleaning or changing the filter pad (see chap-
ter 7). This is also valid when the coatmaster is not connected to the mains. When the coat-
masters is opened, the warranty is void and the manufacturer disclaims all liability.
•If liquid leaks from the coatmaster, unplug the device immediately and contact technical sup-
port.

coatmaster 3D user manual
10/63
Technical support for the coatmaster +41 (0) 52 212 02 77, [email protected]
2.5 Use in the presence of flame dectectors.
Tests were extensively carried out to assess a possible triggering of a flame detection system in the
vicinity of a coatmaster 3D in operation mode.
•The alarm of the flame detector from the brand STS (models FL-8.64 and FL.9) is not trig-
gered for UV+IR setting in any combination of coatmaster type and flame detector type. The
alarm is triggered only for IR setting. The certification page by the company STS Brand-
schutzsysteme GmbH (Germany) can be found in chapter 11.1 on page 62.
•The alarm of the flame detector from the mark Walther-Total (model UV-03) is not triggered
by any combination of coatmaster type and settings. The certification page by the company
Tyco Integrated Fire & Security AG (Switzerland) can be found in chapter 13.2 on page 63.
The full testing reports are available upon request.
2.6 Safety warnings and signals used in this manual
2.6.1 Description of the safety warnings
DANGER, WARNING, CAUTION and NOTICE are standardized signal words for identifying levels of
hazard seriousness of risks related to personal injury and property damage. All signal words, which
are related to personal injury are accompanied by the general safety sign.
For your safety it is important to read and fully understand the below table with the different signal
words and their definitions!
Sign
Signal word
Definition
Risk level
DANGER
Indicates a hazardous situation which, if not
avoided, will result in death or serious injury.
����
WARNING
Indicates a hazardous situation which, if not
avoided, could result in death or serious injury.
���
CAUTION
Indicates a hazardous situation which, if not
avoided, may result in minor or moderate injury.
��
NOTICE
Indicates possible property damage, but no prac-
tices related to personal injury.
Supplementary safety information symbols may be placed in a rectangular panel on the left to the
signal word and the supplementary text (see below example).

coatmaster 3D user manual
11/63
DANGER
Supplementary text, describing the hazard/risk (e.g. explosion). Result of the hazard
if not avoided (e.g. death).
1. List of measures to avoid the herein described hazard or harzardous situation.
2.6.2 Used symbols
The below reference list incorporates all safety information symbols used in this manual or on the
device and their meaning.
Symbol
Meaning
General hazard
Device damage
Electrical hazard
2.7 Product safety
The device is designed and built in accordance with current state-of-the-art. Nevertheless, risks to us-
ers, property, and the environment can arise when the device is used carelessly or improperly.
coatmasster AG has determined the following residual dangers emanating from the device:
•The device is operated by insufficiently trained personnel.
•The device is not operated according to its proper use.
Appropriate warnings in this manual serve to make the user alert to these residual dangers.
This device was tested in compliance with the safety requirements for electrical equipment for meas-
urement, control and laboratory use IEC 61010-1 (2010) and the Low Voltage Directive 2014/35/EU.
The device satisfies the EMC requirements for electrical equipment for measurement, control and
laboratory use of the international standard IEC 61326-1 (2012). This class equipment is intended for
use in an industrial environment. And as such, there may be potential difficulties in ensuring electro-
magnetic compatibility in other environments, due to conducted as well as radiated disturbances

coatmaster 3D user manual
12/63
To ensure photobiological safety the device should be operated in accordance with the
guidelines for the safe use of intense pulsed light source equipment on humans IEC 62471-3
(2015).
2.7.1 General hazards
The following safety messages show hazards of general kind which may occur when handling the de-
vice. The user shall observe all listed counter measures in order to achieve and maintain the lowest
possible level of hazard.
Additional warning messages can be found whenever actions and situations described in this manual
are related to situational hazards.
WARNING
Explosive Environment
Working in potentially explosive rooms and environments is prohibited because small
sparks develop upon triggering the flash.
◊Never work in potentially explosive environments.
◊Do not work near flammable material.
◊Do not store flammable material in direct vicinity of flash generators and flash lamps
to avoid fire hazards.
CAUTION
Integrated light source.
The coatmaster® contains a flash lamp which falls under the risk group 3 according to
the photobiological safety of IEC62471:2015. The coatmaster® does not emit harmful
UV radiation.
Hazardous optical radiation may possibly be emitted from this product in case of di-
rect and narrow eye contact. Visual impairment or eye injury may result.
◊ Never look directly into the light source.
◊ Never point the device towards a person in the near vicinity.
◊ For the use of the coatmaster® in an operator process environment, we recommend
setting up any protective means (blackened metal sheet) to limit any risks of direct ex-
posure to the flash light.
◊In case of damage to skin or eyes caused by intensive optical radiation consult a phy-
sician immediately.
◊ Use the coatmaster® in a well-lit environment.
CAUTION

coatmaster 3D user manual
13/63
Ozone Formation
If the room is not enough ventilated, the ozone can lead to respiratory disease.
◊ Closed rooms must be ventilated frequently to prevent excessive ozone formation
which can result from the use of strong flash units.
2.7.2 Integrated safety elements
An overcurrent protector of 10A or 16A (depending on the version) for each phase is installed inside
the control unit.

coatmaster 3D user manual
14/63
3coatmaster Hardware Interfaces
3.1 coatmaster 3D
Figure 1. 3D CAD illustration of the coatmaster 3D optical head
Figure 2. Frontal (upper) and top (lower) views of the coatmaster 3D optical head

coatmaster 3D user manual
15/63
Figure 3 coatmaster 3D generator unit rack

coatmaster 3D user manual
16/63
Figure 4 coatmaster 3D control unit for different versions (2, 4, 6 and 8 lamps)

coatmaster 3D user manual
17/63
4System Installation
NOTE
Inspect the device for damages during unpacking. Accept damaged packages only under reservation
of possible damage. Write this reservartion on the delivery note. Immediately inform the carrier and
the sender and do not unpack the damaged package until notification of the sender.
Keep the original packaging material for future transportation.
4.1 Hardware installation
Before the use of the coatmaster the user manual must be read and understood.
The installation of the device must be done only by an integrator (partner of the customer or directly
from coatmaster AG). The device may only be used by persons who on account of training or profes-
sional experience have an overview of the dangers which may arise when operating the device.
•The racks have to be installed in a hermetic climatizer electrical cabinet so their will be
properly cooled.
•The head has to be installed on a moving axis or fixed on a rail in the way to have a good im-
age of the samples. See chapter 5.6.1.
•Do not place any objects on or under the device.
•Connect the device with the mains by means of the mains cable contained in the scope of
delivery.
WARNING
Risk of burns by electric current. Serious injuries or death can result.
Check for proper grounding before use. Replace defective cabling instantly.
CAUTION
Integrated light source.
The coatmaster® contains a flash lamp which falls under the risk group 3 according to
the photobiological safety of IEC62471:2015. The coatmaster® does not emit harmful
UV radiation.
Hazardous optical radiation may possibly be emitted from this product in case of di-
rect and narrow eye contact. Visual impairment or eye injury may result.
◊ Never look directly into the light source.
◊ Never point the device towards a person in the near vicinity.
◊ For the use of the coatmaster® in an operator process environment, we recommend
setting up any protective means (blackened metal sheet) to limit any risks of direct ex-
posure to the flash light.
◊ Use the coatmaster® in a well-lit environment.

coatmaster 3D user manual
18/63
NOTE
To cut the power in case of an emergency by unplugging, the devices or any other items must not
block the mains plug!
NOTICE
Risk of false alarm of flame detectors.Incompatible flame detectors might be triggered
wrongly by means of the coatmaster’s light impulse.
For rooms where the coatmaster 3D is operated, use compatible fire detectors with dual
UV/IR sensors (e.g. from the company STS Brandschutzsysteme GmbH or Walther-Total (see
section 2.5 on page 6).
NOTICE
Risk of device error by fingerprints on the camera lense.Contaminations on the camera lense
might lead to measurment errors.
Never touch the lense directly. Clean the lens and measurement window as described in chap-
ter 7.2.
NOTICE
Risk of overheating.Too little or too hot air flow within the lamps can lead to overheating.
Always check the cooling system of the lamps if it works correctly.
4.2 Software requirements
The coatmaster 3D can be operated via two different software environments:
coatmaster 3D Operating System: Starting measurements, creating applications, exporting measure-
ment data, display measurement values and statistics. The creation of applications and the export of
measurement data can only be done with the coatmaster 3D Operating System. The software must
be installed on a Windows-PC.
System requirements:
•Operating system: Windows 10, 32 or 64bit
•Processor: 2.4 GHz
•Working memory: 4 GB
•Available harddisk memory: 300 MB
•Display resolution: 1024 x 768

coatmaster 3D user manual
19/63
Remote control: Measure over the TCP/IP-interface. This interface is used to trigger measurements
and to transfer measurement data. Examples: PLC systems like Siemens S7 or Beckhoff TwinCAT.
Before you can measure through the remote control, a corresponding application must be created
with the coatmaster 3D Operationg System. This is described in chapter.5.5
4.3 Interface to connect with control computer
To be able to operate the coatmaster 3D, the computer must be connected with an Ethernet cable to
the coatmaster 3D.
4.4 Network and administrator settings
Make sure that the coatmaster is correctly installed as described in chapter 4.1 Hardware installation
and switch it on. Proceed as follows to configure network and install software:
1. Configure the coatmaster network access as described in chapter 4.4.1.
2. Install the coatmaster Operating System at least on one Windows-computer as described in
chapter 4.4.2. The coatmaster Operating System is needed to create coatmaster applications.
4.4.1 Configuring coatmaster network
Make sure the coatmaster and the operating computer are connected with an Ethernet cable. The IP
address of the coatmaster is noted in the coatmaster Maintenace Manual, which is part of the scope
of delivery. If you want to change the network configuration (IP address and gateway), proceed as
follows:
Enter the device menu trough File -> Devices. The device settings windows will appear as shown in
Figure 5. When you click on CHANGE IP ADDRESS a new window will appear, where is possible to set
a new IP addreas and gateway.
Figure 5 Device settings

coatmaster 3D user manual
20/63
After having changed the network settings, restart the coatmaster (switch off the main switch, wait
for 10 seconds and switch on the device again).
4.4.2 Installing coatmaster Desktop Software
1. Copy the cm3dGui_V2_013 (or the latest version) compressed folder from the USB stick to
the laptop and unzip it.
2. The extracted archive contains the folder release which contains the executive file
“cm3dguiQml”. Create a link from “cm3dguiQml” and move it to the desktop so that it is eas-
ily accessible.
3. Switch on the cm3D rack (front button) and the ventilation, if present (wait one minut in or-
der to startup all the components of the coatmaster).
4. Start the coatmaster Operating System 19 software by double-click on the icon.
5. On the main window of the GUI. Select File and then Device (see Figure 7).
6. In the dialog window select the coatmaster to connect to (see Figure 8).
7. In case the coatmaster does not appear in the list select the add new device button and enter
the IP address of the coatmaster 3D (here: 192.168.10.155)
8. In the field Connect to device enter the coatmaster IP address (see chapter 4.4.1).
9. Connect the PC and the coatmaster via an ethernet cable. Click connect to make sure that
the connection can be established. If the connection fails, please verify the IP address, the
Ethernet connectivity and the software version.
Please pay attention that the laptop-client and the cm3D must be in the same subnet
Figure 6. Open the connecting window
Table of contents
Other Coatmaster Measuring Instrument manuals