KewlFlow 6429 User manual

Page 1 of 10
USER GUIDE
Circulatory Cooling System
(Version: Cooler)
KewlFlow Cooling Vest
Colors: Blue, Custom
Sizes: S, M, L, XL
KewlFlow Cooler
Colors: Black, Custom
Sizes: 9 Quart & 4.5 Quart
Thank you for purchasing a KewlFlow™ Circulatory Cooling System.
Please read all operating instructions before using your new system.
If you have any questions, comments or suggestions, please do not
hesitate to contact us at 1-888-823-2665. Stay Kewl !

Page 2 of 10
KewlFlow™ POWER SUPPLY OPTIONS
Option #1 … 12V Connector (included)
Option #2 … Converter for 110VAC
Option #3 … Battery Pack
PRECAUTIONS - Cooler Use
Do not use anything but water (or water with a recommended cleaning agent) and ice (no dry
ice) in the system.
Do not operate dry - extended dry operation may damage the pump and will void the warranty.
Do not put the entire inner container (with pump) into a freezer - the pump can be damaged if
frozen.
Power requirements are 10 to 15 Volts DC, 0.5 Amps maximum.
FILLING
1) Unzip the cooler's outer shell and rotate the top backward.
2) Open the inner container by pushing down on the lid while lifting up and out on all four
locking tabs.
3) Fill with ice to the top of the container if desired.
4) Add at least 16 ounces of water for system circulation.
5) The pump is auto-priming if submerged in at least 2 inches of water.
6) When replacing the lid, ensure that the gasket in the lid is firmly seated along the entire
top edge of the container.
7) Press down on the lid while engaging the four locking tabs.
POWER CONNECTIONS & OPERATION
1) Pull the Power Switch out of the pouch on the back of the
cooler.
2) Connect the white Power Connector into the mating
connector on the External Power Cord that was included with
your cooler.
3) Plug the other end of the External Power Cord into a 12V
accessory power outlet, or a 110VAC to 12VDC adapter.
4) Turn the pump on using the Power Switch.
5) You may see a small stream of water coming from the outlet
“stem” of the pump if the water level is below it. This is a
normal function of the pump’s self-priming feature.
DRAINING WATER BEFORE REFILLING WITH ICE
There is no need to tilt the cooler over to drain out the water. Instead, follow these steps for an
easier way to drain the cooler:

Page 3 of 10
1) Disconnect the cooler hose from the vest.
2) Remove the lid from the inner container.
3) Switch the pump ON.
4) Press in on the tip of the male connector on the cooler hose with just the tip of your
finger or fingernail to let the water stream out.
5) Leave an inch or more of water in the bottom of the cooler for circulation when refilling
with ice.
CLEANING
Add one teaspoon of chlorine bleach to two quarts of water and circulate through the cooler
and vest before end-of-season storage and/or periodically to prevent build-up of potentially
harmful micro-organisms.
HOW TO DETERMINE YOUR CORRECT VEST SIZE
It's important to get the right size vest so it fits you properly and stays in place during all your work &
play activities.
To determine your correct size, you need to make a measurement of your Torso Length. Do not use
your T-shirt size as your primary guide in selecting your vest size.
Measure from the boney or protruding bump on the top of your shoulder (the end of your clavicle, also
known as the AC Joint) to the top of your pants at the center of your body, as shown in the figure
below:
Be sure to follow these instructions when making your Torso Length measurement:
1. Have someone else measure you - Attempting to do this by yourself
may cause significant errors in the result.
2. Wear the type of pants or shorts that you plan to use with the vest,
and wear them at the height that is "normal" for you. For example, you
may wear work pants with a belt at a different height than sports shorts
with an elastic waist band.
3. Don't suck in your stomach; doing so may result in a Torso Length
measurement that is too short, possibly causing you to order a vest that
is too small for you.
4 Use either a fabric (tailor's) tape measure or a piece of string that
doesn't stretch. Don't use a metal tape measure; doing so may result in
a Torso Length measurement that is too long, possibly causing you to
order a vest that is too large for you.
5. Take the measurement on both sides of your body to ensure that the
location at the top of your pants is centered. If the two measurements
are not equal, you may not be standing straight or measuring to the
center of your body at the top of your pants. To correct this, either try again or average the two
measurements.

Page 4 of 10
6. Don't wear anything thicker than a thin T-shirt when making this measurement. Wearing a thicker
shirt may result in a Torso Length measurement that is too long, possibly causing you to order a vest
that is too large for you.
Now compare your measurement to the size chart below to determine your size.
Vest Size
Torso Length
Chest
Waist
Small
18" to 20"
30" to 50"
28" to 48"
Medium
20" to 22"
32" to 55"
30" to 52"
Large
22" to 24"
35" to 60"
32" to 57"
Extra-Large
24" to 26"
38" to 66"
34" to 62"
ANSWERS TO QUESTIONS YOU MAY HAVE:
Q. How is the Vest supposed to fit and why is it so important to get the right size?
A. The most important thing is to get the right length vest. The elastic straps on the sides provide a
very large range of adjustment to accommodate almost anyone's chest & waist size. Please refer to
the size chart above to verify that your measurements fit within the range of adjustment for the size
vest you plan to order.
If the vest you get is too small, the shirttails won't tuck far enough into
your pants. When you raise your arms above your head, they may
pull out a little more from your pants. If there is less than 2" of the
shirttails tucked in, they could come out easily, allowing the vest to
"ride up" higher on your abdomen. Keeping the lowermost elastic
straps tighter will help minimize this.
If the vest you get is too large, the shirttails will tuck fully into your
pants and the bottom end of the zipper on the vest may end up below
the top of your pants. If the end of the zipper is more than about 1/2"
below the top of your pants, the hose coming from the vest won't
make it out and over the top edge of your pants unless you pull the
vest further up on your body. When you pull the vest up, you will
create some slack in the shoulders of the vest. In other words, the
shoulders of the vest will no longer be pulled down tightly over the
tops of your shoulders. This will happen naturally (even with the
correct size vest) when you raise your arms above your head.
With the correct size vest on, the top of your pants should be
somewhere in the range shown in the figure below:
Q. My torso length measurement is on the borderline between two sizes. Which one should I
get?
A. In general, choosing the larger size may be preferred because you will not lose any cooling by
having some slack in the shoulders. But if you prefer that your vest conforms smoothly and tightly
over the tops of your shoulders, smaller might be better. Before deciding, first review how you took
your torso length measurement to see if any factors like sucking in your stomach or wearing your

Page 5 of 10
pants higher than normal may have caused a shorter measurement, or if any factors like wearing a
thicker shirt or using a metal tape measure may have caused a larger measurement.
We want you to be happy and get the best performance possible from your KewlFlow Personal
Cooling System. Selecting the correct size vest is the first (and perhaps most important) step in the
process. After you receive your vest, it is recommended that you adjust the elastic straps to obtain the
best fit.
See the "Adjusting the Vest to Fit You Correctly" section of the Vest User Guide for instructions.
Adjusting Your Vest
The first step in adjusting your KewlFlow Personal Cooling Vest to fit you properly is to verify that the
length of the vest is correct. If you have not already read the Vest Sizing Guide section, please refer to
the second figure that shows where the bottom end of the Vest Zipper should be located on your body
when wearing the vest. Don't worry if the vest is initially adjusted too small or large for your chest and
waist - it's the length that you want to check first.
If the length is far outside of the recommended range, please do not flow water through the vest. We
will gladly exchange it for another size. Please read our Return Policy at the end of this guide for
details. A return charge will apply if water flows through it, so please be sure you have the right size
before you flow water through the vest.
If you have verified that the vest length is correct, but feel that it fits you too tightly or loosely, the six
Elastic Straps at the sides of the vest can be adjusted for a custom fit. To adjust, please follow these
steps:
1. Remove the Velcro Wrap from each of the six Elastic Straps and set them aside. You will reinstall
them later. Then unfold each Strap as shown in the figure to the left.
2. Push the end of each Strap out from the black metal Adjuster (as shown in the figure to the right) so
the Strap lies straight and flat as shown below.
3. Each Strap can now be pulled easily through its Adjuster to lengthen or shorten as required to adjust
the gap between the Front and Back Panels of the Vest.
4. Try on the Vest and readjust the Straps as required until you obtain a snug but comfortable fit. When
you are satisfied with the fit, slip each Strap back through its Adjuster, as shown in the figure to the
right.
5. Fold up the excess length of the each Strap and secure each with a Velcro Wrap.

Page 6 of 10
Answers to Some Questions You May Have:
Q. How tight should the vest fit?
A. It is necessary for the tubes to be touching your skin (or a very thin garment against your skin) to
take heat away. There is no cooling where they don't touch. Tension or "stretch" in the adjustable-
length elastic straps on the sides of the vest cause the tubes to be pressed against your body. For
optimum body cooling, adjust the vest for a snug fit so as much of the tubing as possible is touching
your skin, but not so tight that it feels uncomfortable or limits your movement.
Q. Why are there flaps (shirttails) at the bottom of the vest?
A. These are designed to tuck into your pants to keep your vest securely in place during all of your work
and play activities. Of course, you don't have to tuck them in if you don't want to.
Q. Can I wear a T-shirt underneath, or do the tubes have to touch my bare skin?
A. You will get maximum cooling when the tubes are against your bare skin, but a thin T-shirt
underneath is fine as long as you wear something else (another T-shirt or thicker) over the vest.
Otherwise, you may cool the surrounding air more than you cool yourself.
Q. Can I wear clothing over the vest?
A. Certainly! That's what it was designed for and how it works best. By placing a layer of clothing over
the vest you insulate it and yourself from the surrounding air, keeping more of the cold inside to cool
your body. We recommend that bicyclists wear at least a thin jersey over the vest. Leathers worn by
motorcyclists are ideal.
KewlFlow™ Personal Cooling System Specification & Fact Sheet
What is it?: The KewlFlow™ Personal Cooling System is a self-contained highly portable personal
cooling solution combining a lightweight, breathable zippered vest through which ice-chilled water is
circulated from an insulated backpack via a high efficiency battery-powered pump. It’s an affordable,
easy-to-use system that creates a microclimate of cool that easily fits under a T-shirt, jacket or leathers,
providing cooling comfort in a wide variety of activities while allowing maximum mobility.
What does it do?: The System cools the wearer’s upper body, providing long-term relief from heat
stress, even when worn under heavy, insulating clothing (such as motorcycle leathers) and is sure to
appeal to a wide variety of people who work and play in the heat, for whom no other practical &
effective personal cooling solution exists. Economical to operate using ordinary ice and AA batteries in
a quick-change power pack, the system also serves as a source of on-demand, chilled, filtered drinking
water.
Features and Benefits:
•Creates a personal "microclimate of cool" around the wearer’s upper body

Page 7 of 10
•Utilizes NASA-developed space-age technology
•Similar technology is currently used by U.S. Armed Forces helicopter pilots & tank drivers, but those
systems cost $2,000+, and often compromise user mobility
•Easy and convenient to recharge using ordinary ice
•Single charge of ice lasts for 2 - 4 hours (actual duration dependant on user activity level and
ambient temperature)
•Economical to operate - uses only four pounds of ice and rechargeable batteries.
KewlFlow Vest Specifications:
•Thin, lightweight & comfortable - can be worn under a close-fitting shirt, jacket or leathers
•Made of fast-wicking, quick-drying, highly breathable mesh fabric
•Cold water is circulated through a network of more than 50 feet of flexible micro-tubing
•Does not rely on evaporation for cooling - works inside of sealed garments
•Available in small, medium, large and extra large sizes
•Six size-adjustable elastic straps provide a custom fit for a large range of chest and waist sizes,
allowing full range of motion
•Durable, hand washable
•Easy to take on/off with zippered front
•Shirttail design keeps vest in place during activity
•Quick-disconnect fittings on a single, flexible, insulated hose for easy connection to backpack
•Warranty: One year on all materials and workmanship
•Patent pending
What is the KewlFlow Personal Cooling System and what does it do?
The KewlFlow Personal Cooling System is composed of a lightweight Cooling Vest through which ice-
chilled water is circulated from an insulated Backpack or Cooler via a battery-powered pump. The
system provides the wearer relief from heat stress, even when worn under heavy, insulating clothing
and is sure to appeal to a wide variety of people who work and play outdoors, for whom no other
practical & effective personal cooling solution exists.
Who will benefit from using the KewlFlow Personal Cooling System?
In general, anyone who works or plays in a hot environment, particularly those people who need to be
mobile, active and unencumbered by a heavy or wet cooling garment. Some specific examples are:
- Athletes of all types, including auto racers
- Outdoor adventurers and tropical tourists
- Motorcycle riders, especially those who wear jackets or full (racing) leathers
- Bicycle riders, especially mountain bikers and long-distance riders

Page 8 of 10
- Construction and event workers, costumed mascots and security guards
- Welders, coal miners, foundry workers and other "hot" occupations
- Many Others !
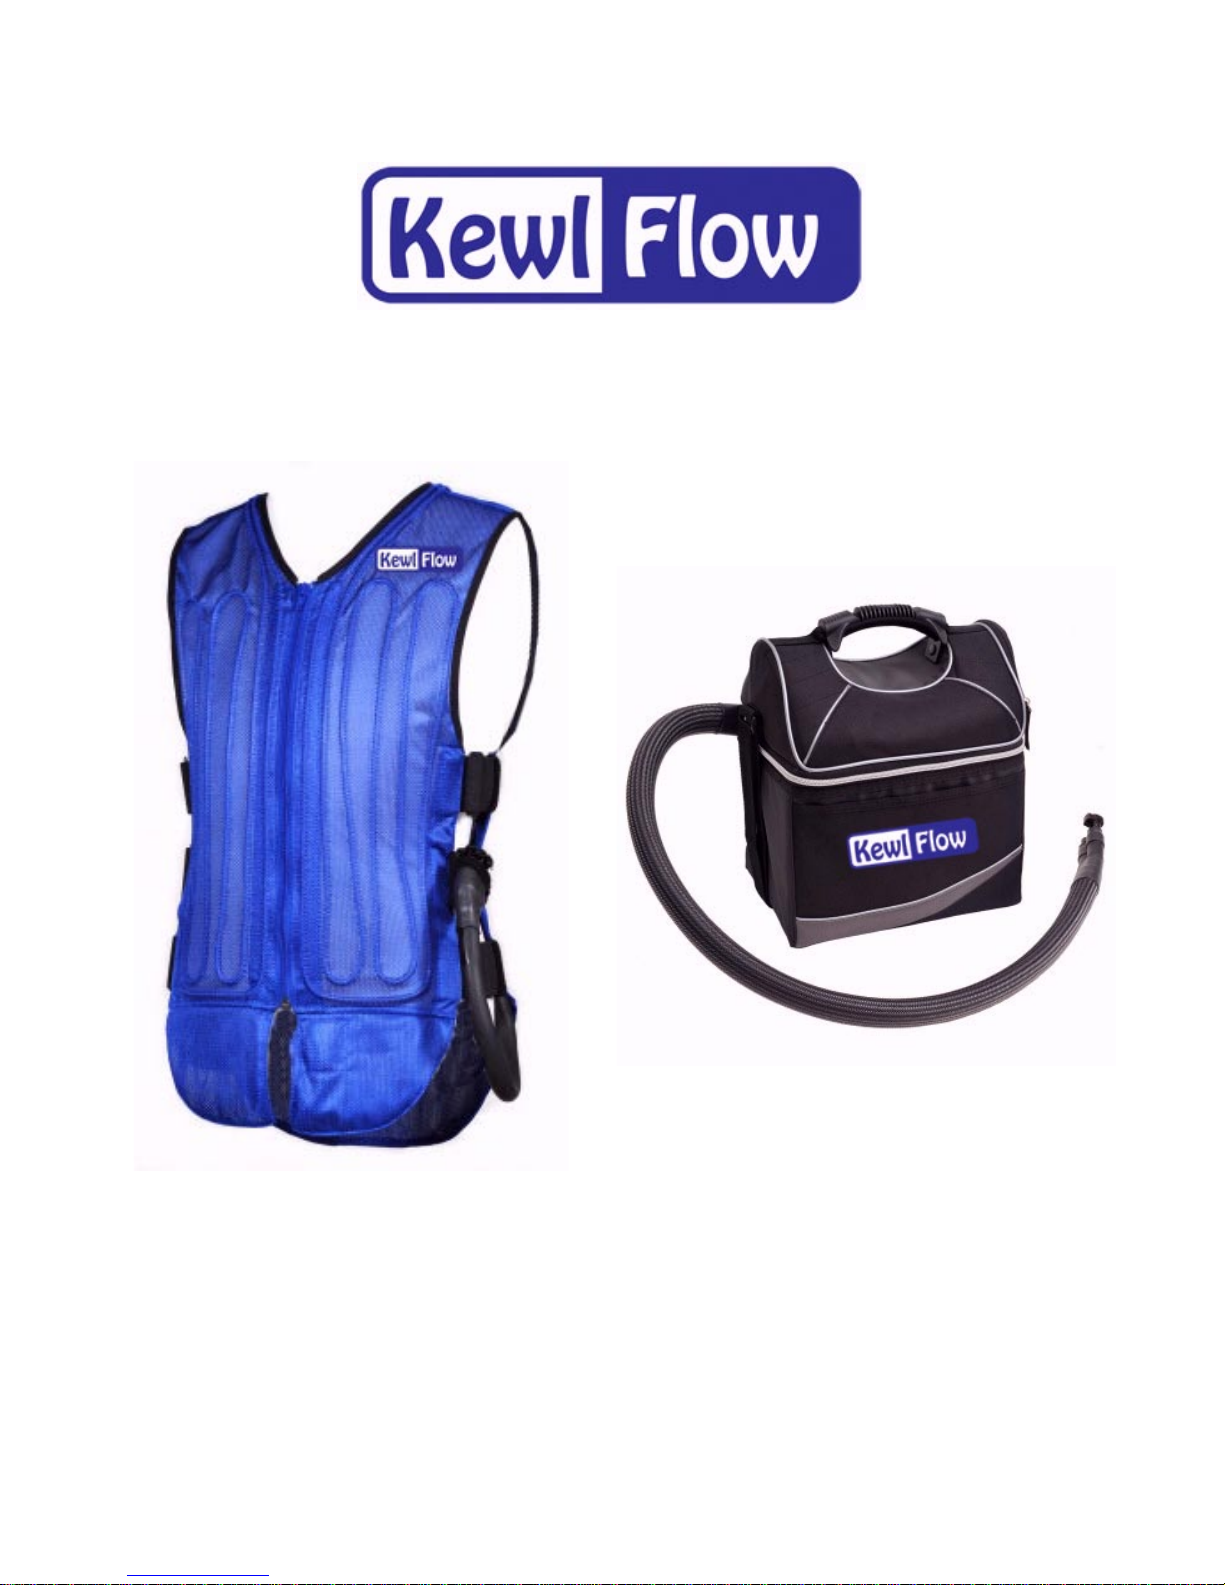
What makes the KewlFlow Cooling Vest better than the other water-cooled garments on the
market?
As part of our product development process we have tested most of the competitors' offerings and
strongly feel we have a vastly superior product in terms of cooling effectiveness, ease of use
(particularly taking on/off), durability and value.
How do I fill or "recharge" the system?
Simply open the zippered flap on the back of the backpack, release the quick-disconnect fitting on the
hose and unscrew the fill cap. Then add four pounds of ice plus one pint of water. Screw the cap back
on, reconnect the hose, close the flap and you are ready to go! You can use store-bought ice, home-
made ice cubes or any form of ice that fits through the 3.5 inch diameter fill port. See the "Filling the
Reservoir" section of our Backpack User Guide for additional details.
How long will the ice last?
The ice can last as long as four hours or more, or can melt in as little as 90 minutes in extreme cases.
The actual duration depends on many factors which can be divided into two groups: How much "cold"
you start with and how rapidly heat is absorbed.
It takes more heat to melt a pound of ice just removed from a deep freezer than a pound of ice that has
been sitting out and is beginning to melt, thus the colder the ice you start with, the better. When you
add water to that ice (which is necessary for circulation through the pump and vest), it "warms up" the
ice, so adding only a minimal amount of the coldest water possible (ice water) is best.
More body heat is generated by a person rigorously exercising than at rest. More heat will be absorbed
when the vest is worn tightly against bare skin as compared to loosely over a shirt. In addition, more
heat is absorbed from the surrounding environment when the ambient temperature is high and there is
nothing worn over the vest. This is why we recommend wearing a lightweight windbreaker-type jacket
over the vest to minimize loss of cold to the atmosphere.
The heat absorbed by the water in the vest is in turn, absorbed by the ice, causing it to slowly melt. You
will obtain the best cooling performance if you start with the coldest ice, the coldest and least amount of
water and minimize your loss of "cold" to the atmosphere by wearing a lightweight garment over the
vest.
How long will the batteries last?
The water circulation pump in the backpack can run for eight hours or more continuously on a fully
charged set of batteries. If run intermittently, the total run time can be even longer. When required, the
batteries can be easily changed by removing the quick-change Power Pack (see the "Changing the
Batteries" section of our Backpack User Guide).
Won't this feel like pouring ice water on my skin?
No, not at all. When the water is circulating, the temperature inside the tubing is 32° F, but the outside
of the tubing is approximately 60° F. There is a "temperature gradient" through the wall of the tubing

Page 9 of 10
which controls the heat transfer rate from your skin to the water. The 60° F tubes feel cool against your
skin, not cold.
How do I make sure I order the right size vest?
See the Vest Sizing Guide on our website. If you do end up receiving a vest that is the wrong size, we
will gladly exchange it for you.
How tight should the vest fit?
It is necessary for the tubes to be touching your skin (or a very thin garment against your skin) to take
heat away. There is no cooling where they don't touch. Tension or "stretch" in the adjustable-length
elastic straps on the sides of the vest cause the tubes to be pressed against your body. Adjust the
straps so that as much of the tubing as possible is touching your skin, but not so tight that it feels
uncomfortable or limits your movement. See the "Adjusting Your Vest" section of our Vest User Guide
for information on adjusting the vest to fit you correctly.
Why are there flaps (shirttails) at the bottom of the vest?
These are designed to tuck into your pants to keep your vest securely in place during all of your work &
play activities. Of course, you don't have to tuck them in if you don't want to.
Can I wear a T-shirt underneath, or do the tubes have to touch my bare skin?
You will get maximum cooling when the tubes are against your bare skin, but a thin T-shirt underneath
is fine as long as you wear something else (another T-shirt or thicker) over the vest. Otherwise, you
may cool the surrounding air more than you cool yourself. See the FAQ for more information about
wearing clothing over the vest.
Can I wear clothing over the vest?
Certainly! That's what it was designed for and how it works best. By placing a layer of clothing over the
vest you insulate it and yourself from the surrounding air, thus keeping more of the cold inside to cool
your body. We recommend that bicyclists wear at least a thin jersey over the vest. Leathers worn by
motorcyclists are ideal.
Isn't that hose coming from the vest a little large in diameter to fit under my jacket?
Inside the sponge rubber insulation are eight 3/16" diameter tubes which when "flattened" lay nearly
side-by-side, thus reducing the thickness of the bundle of hoses to about one-half of what you see. The
sponge rubber insulation additionally ensures user comfort where the hoses exit from under your
jacket.
I wear one-piece racing leathers. How do I get the hoses to the outside?
You will have to cut a "buttonhole" in your leathers at about waist level. An upholstery shop that makes
leather seat covers can probably do this for you. The vertical slit should be about 2-1/4" high. On the
inside, back up the slit with a 3" high by 1" wide piece of Velcro Loop (the soft part, not the scratchy)
material. In winter, when not using the cooling vest, you can simply place a 3" x 1" piece of Velcro Hook
material over the Velcro Loop piece before putting on your leathers to ensure that the slit stays shut.
We can provide the pair of Velcro pieces with your order if you tell us you wear racing leathers.

Page 10 of 10
Will the KewlFlow Vest work with other companies' coolers?
If you are an auto racer and already have a chilled water supply but would like to use our vest, then
yes, certainly that's possible. Please contact us to purchase the mating quick-disconnect fittings to
adapt your chilled water supply to our vest. Simply remove the existing fittings from your chilled water
supply source and replace with ours and you should be ready to go!
Will the KewlFlow Vest work with a HANS device?
Yes, it should work fine. We purposely routed the tubes connecting the front of the vest to the back as
close as possible to the neck and not on the tops of the shoulders so that a HANS device would not
pinch the tubes closed.
What maintenance is required?
Only periodic cleaning of the water circulation system. See the “Care & Maintenance" section of the
Vest User Guide and Backpack User Guide for more information.
This manual suits for next models
1
Table of contents
Other KewlFlow Accessories manuals