GA201
IMPORTANT SAFETY INSTRUCTIONS
WEEE
Please dispose of this product at the end of
its operational lifetime by bringing it to your
local collection point or recycling center for
such equipment.
The exclamation point within an equilateral
triangle is intended to alert the user to
the presence of important operating and
maintenance (servicing) instructions in this
guide.
For indoor use only
This electrical equipment is designed
primarily for indoor use.
Operator’s manual; operating instructions
This symbol identifies the operator’s manual
that relates to the operating instructions
and indicates that the operating instructions
should be considered when operating the
device or control close to where the symbol
is placed.
This symbol alerts the user to the presence
of recommendations about the product’s
use and maintenance.
The lighting flash with arrowhead symbol
within an equilateral triangle is intended to
alert the user to the presence of uninsulated,
dangerous voltage within the product
enclosure that may be of magnitude to
constitute a risk of electrical shock.
This device complies with Restriction of
Hazardous Substances Directive.
Warning. Failure to follow these safety
instructions could result in fire, shock or
other injury or damage to the device or
other property.
General heed and warnings
• Read these instructions.
• Keep these instructions.
• Heed all warnings.
• Follow all instructions.
• Do not use this apparatus near water.
• Clean only with dry cloth.
• Do not block any ventilation openings. Install in
accordance with the manufacturer’s instructions.
• Do not install near any heat sources such
as radiators, heat registers, stoves, or other
apparatus (including amplifiers) that produce heat
• Do not defeat thesafetypurpose of the polarized
or grounding plug. A polarized plug has two
blades with one wider than the other. A grounding
plug has two blades and a third grounding prong.
The wide blade or the third prong is provided for
yoursafety. If the provided plug does not fit into
your outlet, consult an electrician for replacement
of the obsolete outlet.
• Only use attachments/accessories specified by
the manufacturer.
• Protect the power cord from being walked on or
pinched particularly at the plugs, convenience
receptacles, and at the point where they exit from
the apparatus.
• Clean the product only with a soft and dry fabric.
Never use liquid cleaning products, as this may
damage the products cosmetic surfaces.
• Use only with the cart, stand, tripod, bracket, or
table specified by the manufacturer, or
sold with the apparatus. When a cart is
used, use caution when moving the cart/
apparatus combination to avoid injury
from tip-over.
• Unplug this apparatus during lightning storms or
when unused for long periods of time.
• Avoid placing the product in a location under
direct sunlight or near any appliance that
generates UV (Ultra Violet) light, as this may
change the product surface finishing and cause a
change in color.
• Refer all servicing to qualified service personnel.
Servicing is required when the apparatus has
been damaged in any way, such as power-supply
cord or plug is damaged, liquid has been spilled
or objects have fallen into the apparatus, the
apparatus has been exposed to rain or moisture,
does not operate normally, or has been dropped.
Installation and commissioning may only be carried
out by qualified and authorized personnel.
These apparatus are intended for professional use.
• CAUTION: These servicing instructions are for use
by qualified service personnel only. To reduce the
risk of electric shock, do not perform any servicing
other than that contained in the operating
instructions unless you are qualified to do so.
• WARNING: Only use attachments/accessories
specified or provided by the manufacturer (such
as the exclusive supply adapter, battery, etc.)
• Before turning the power on or off for all devices,
set all volume levels to minimum.
• Use only speaker cables for connecting speakers
to the speaker terminals. Be sure to observe the
amplifier’s rated load impedance particularly
when connecting speakers in parallel. Connecting
an impedance load outside the amplifier’s rated
range can damage the apparatus.
• KGEAR will not shoulder any responsibilities for
products modified without prior authorization.
Installation
According to Table 35 of IEC/EN 62368-
1:2018, equipments are suitable for mounting
at heights ≤2 m.
Install in a well ventilated location at
35°C (95°F) max environment temperature.
Service
To obtain service:
1. Please have the serial number(s) of the
unit(s) available for reference.
2. Contact the official KGEAR distributor
in your country: find the Distributors
and Dealers list on www.kgear.it
website. Please describe the problem
clearly and completely to the Customer
Service.
3. You will be contacted back for on-line
servicing.
4. If the problem cannot be resolved over
the phone, you may be required to send
the unit in for service. In this instance,
you will be provided with an RA (Return
Authorization) number which should be
included on all shipping documents and
correspondence regarding the repair.
Shipping charges are the responsibility
of the purchaser.
Any attempt to modify or replace
components of the device will invalidate
your warranty. Service must be performed
by an authorized K-array service center.
Cleaning
Use only a soft, dry cloth to clean
the housing. Do not use any solvents,
chemicals, or cleaning solutions containing
alcohol, ammonia, or abrasives. Do not use
any sprays near the product or allow liquids
to spill into any openings.
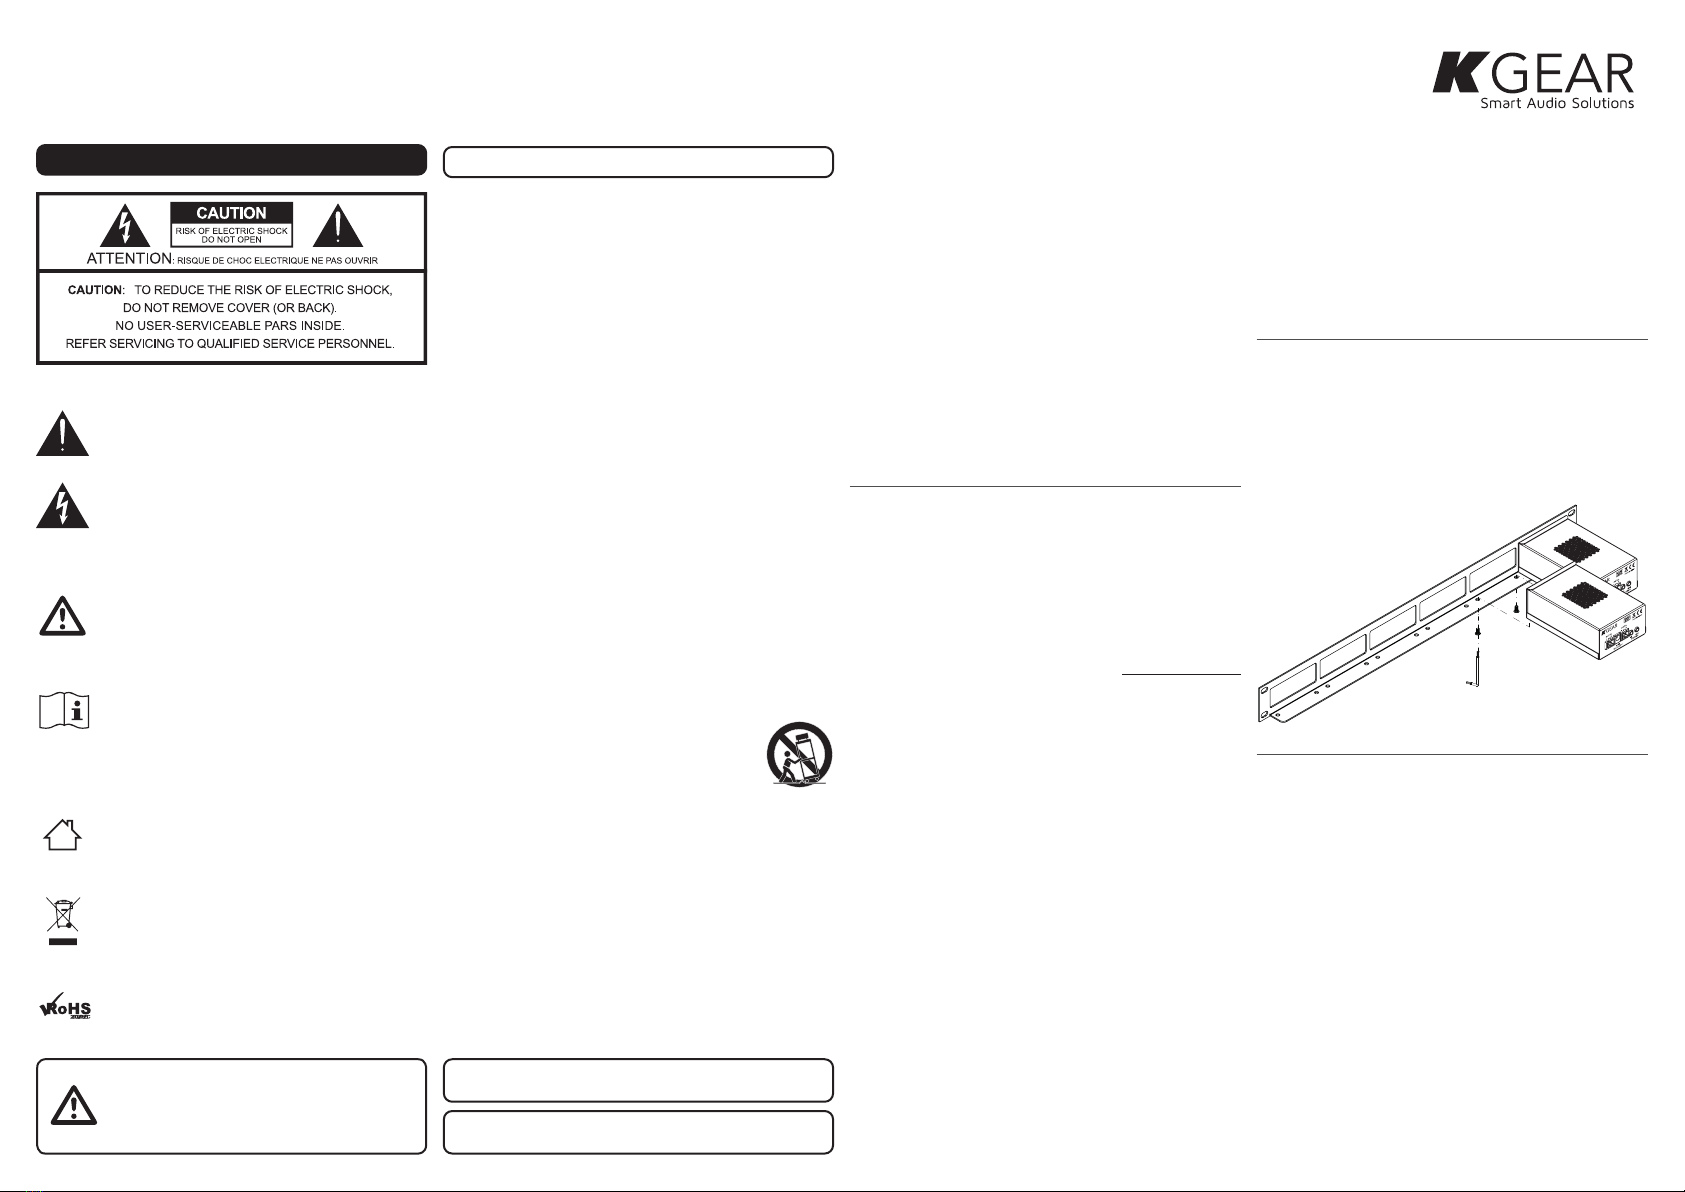
Rack Mount Assembly
The GA201 audio amplifier can be rack
mounted with the G-RACKMINI accessory.
Up to 6 GA201 units can be installed in one
rack unit.
Tor x T6