manuals.online logo
Brands
  1. Home
  2. •
  3. Brands
  4. •
  5. Kicker
  6. •
  7. Subwoofer
  8. •
  9. Kicker BassStation PT8 User manual

Kicker BassStation PT8 User manual


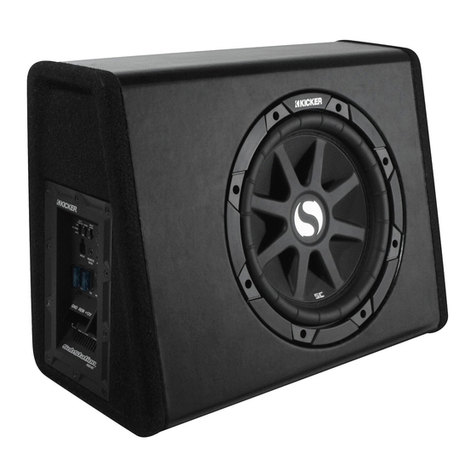
The KICKER Impulse BassStation is a great way to easily and economically
add real KICKER bass to you system. Installation is simple, and the sound is
A KICKER!
IMPULSE BassStation™
PC10, PC12 Powered Car & PT8, PT10
Powered Truck Subwoofer Systems
Features of the Impulse BassStations
• Built- n Amplifier
• Active Electronic Crossover – 90Hz at 12dB with equalization circuit.
• Universal nputs
• Audio-Activated Auto Turn-On
• Gain Control
• Lower Power Requirements – Full power requires less than 10 Amps of current.
Installation Information
The position of your K CKER mpulse BassStation will affect the quality and the amount
of the bass it reproduces. The best results will come from boundary loading the output of
the BassStations into the corners of the vehicle. Both PC & PT speaker systems contain
woofer(s) on the front side of the enclosure and then ports on either end, depending on
model and amplifier location. Directing the ports toward specific locations in the vehicle will
control which portion of the bass gets reinforced. Firing the ports into the corners of the
vehicle will boost the lower frequencies while positioning the ports away from the corners
will increase the output of the upper bass.
Specifications
Model Subwoofer Frequency Length Top Width Base Width Height
Response (Hz)
PC10 10 nch 35-90 18" 10-3/16" 12-3/4" 12-1/4"
PC12 12 nch 32-90 20-1/2" 11-1/16" 14" 14"
PT8 8 nch 38-90 19" 4" 6-7/8" 13-1/16"
PT10 10 nch 35-90 21-1/2" 4-3/16" 7-1/4" 14-1/2"
Common to all Models:
nput Sensitivity – 100mV to 10V
Crossover – 90Hz at 12dB/octave
Mounting
After determining the mounting position, turn the enclosure upside-down and attach
the four mounting brackets to the bottom of the enclosure using the enclosed small
screws. Each bracket must be positioned so the rounded end protrudes approximately
3/4 inch from under the cabinet to allow a screw to easily pass through it for attachment
to the vehicle.
Position the enclosure in its mounting position and securely attach it to the vehicle with
the enclosed large screws. f the brackets and screws are not applicable to your installation,
some other means must be used to secure the enclosure to your vehicle.
Mounting brackets are included with the PC car speaker enclosures for
secure installations.
Position the PT truck speaker enclosures in a secure location within the cab of
the vehicle.
Controls
The gain control is used to match the output of your K CKER BassStation to the rest of
the system. After mounting and wiring the BassStation, turn the gain control all the way
down. Turn the system on and check the level of the bass in relation to the mids and highs.
f you require more output from the BassStation simply turn the gain control up until the
sound suits your listening preference.
Wiring
The power wire for your BassStation should be connected directly to the vehicle’s
battery using an appropriate connector, or you can use a high-current tap in the fuse box,
if one is available. A 10 Amp fuse should be inserted in the power lead within 18 inches or
less from the power source. The wire should then be routed through the firewall using a
rubber grommet. The black ground wire should be as short as possible and connected to
the sheetmatal of the vehicle using a screw and a star or lock washer. Be sure to clean
away all dirt, grease, and any paint away from the ground connection.
Your BassStation accepts either low (line) level inputs from the RCA outputs on your
head unit or high (speaker) level input from your system’s speaker wiring. The diagrams
below illustrate both wiring schemes. DO NOT USE THE LOW LEVEL AND HIGH LEVEL INPUTS
AT THE SAME TIME AS THIS COULD DAMAGE YOUR UNIT.
Wiring HIGH LEVEL Installations Wiring LOW LEVEL Installations
LOW LEVEL RCA INPUTS
HIGH LEVEL INPUTS
RIGHT
LEFT
KICKER
R
GROUND POWER SOURCE
–
+
+
+–
12V FUSE
–
RIGHT
INPUT
GAIN
HIGH LEVEL
LEFT RIGHT
INPUT
GAIN
HIGH LEVEL
LEFT
– +– +
RED = +
BLACK = –
SPEAKER ENCLOSURE
INPUTS FROM SOURCEINPUTS FROM SOURCE
SPEAKER ENCLOSURE
HOW LONG WILL IT TAKE?
Stillwater Designs maintains a goal of 24-hour service for all returns. Delays may be incurred if
lack of replacement inventory or parts is encountered.
INTERNATIONAL WARRANTY
Contact your International Stillwater Designs dealer or distributor concerning specific
procedures for your country’s warranty policies.
P.O. Box 459 • Stillwater, Oklahoma 74076 • U.S.A. • 405 624-8510
• Install slips (screwdriver holes)
• Damage caused by exposure to water
and/or excessive heat.
• Damage through negligence, misuse, or
accident.
• Items physically damaged due to abuse.
• Freight damage.
• The cost of shipping product to Stillwater
Designs Service.
• Items previously repaired by any
unauthorized repair facility.
• Items returned from unauthorized
individuals or dealers.
• Return shipping on non-defective items.
• Speakers damaged due to amplifier
clipping or distortion.
• Speakers with silicon caulk used for gasket
material.
KICKER drivers are capable of producing sound levels that can permanently
damage your hearing! Turning up a system to a level that has audible distortion is
more damaging to your ears than listening to an undistorted system at the same
volume level. The threshold of pain is always an indicator that the sound level is
too loud and may permanently damage your hearing.
Please use common sense when controlling volume!
WARNING:
MARCH 2000
SPEAKER SYSTEMS LIMITED WARRANTY
Stillwater Designs warrants this product to be free from defects in material and workmanship under
normal use for a period of one (1) year from date of original purchase, unless this product is labeled “B
Stock”, in which case it is warranted for ninety (90) days from date of purchase. Should service be neces-
sary under this warranty for any reason due to manufacturing defect or malfunction during the warranty
period, Stillwater Designs will replace or repair (at its discretion) the defective merchandise with equiva-
lent merchandise at no charge. Warranty replacements on “B-Stock” may have cosmetic scratches and
blemishes. Discontinued products may be replaced with equivalent products.
This warranty is valid only for the original purchaser and is not extended to owners of the product sub-
sequent to the original purchaser. Any applicable implied warranties are limited in duration to a period
of the express warranty as provided herein beginning with the date of the original purchase at retail,
and no warranties, whether express or implied, shall apply to this product thereafter. Some states do not
allow limitations on implied warranties, therefore these exclusions may not apply to you.
This warranty gives you specific legal rights; however you may have other rights that vary from state to
state.
WHAT T D IF Y U NEED WARRANTY R SERVICE
Defective merchandise must be returned to your local Authorized Stillwater Designs (Kicker/Impulse)
Dealer for warranty. Assistance in locating an Authorized Dealer can be obtained by writing or calling
Stillwater Designs direct. You can confirm that a dealer is authorized by asking to see a current author-
ized dealer window decal.
If it becomes necessary for you to return defective merchandise, call the Kicker Customer Service
Department at (405)624-8510 for a Return Authorization (RA) number. Package all defective items in the
original container or in a package that will prevent shipping damage, and return to
Stillwater Designs, 5021 North Perkins Road, Stillwater, K 74075
The RA number must be clearly marked on the outside of the package. Return only defective compo-
nents. Return of entire cabinets, system packs, pairs, etc. increases your return freight charges. Non-
defective items received will be returned freight collect.
Include a dated proof-of-purchase from an Authorized Dealer. Warranty expiration on items returned
without proof-of-purchase will be determined from the manufacturing date code. Coverage may be
invalidated if this date is greater than one (1) year previous to the date item is sent in. Freight must be
prepaid; items received freight collect will be refused.
Failure to follow these steps may void your warranty. Any questions can be directed to the Kicker
Customer Service Department at (405)624-8510.
WHAT IS NOT COVERED?
This warranty is valid only if the product is used for the purpose for which it was designed.
It does not cover:


Other manuals for BassStation PT8

2

This manual suits for next models

4

Other Kicker Subwoofer manuals

Kicker Comp DC12 User manual

Kicker

Kicker Comp DC12 User manual

Kicker Solo-Baric S15L5 User manual

Kicker

Kicker Solo-Baric S15L5 User manual

Kicker Solo-Baric C-Series User manual

Kicker

Kicker Solo-Baric C-Series User manual

Kicker Comp VR C18d User manual

Kicker

Kicker Comp VR C18d User manual

Kicker Solo X S10X User manual

Kicker

Kicker Solo X S10X User manual

Kicker SOLO-BARIC S15L7 User manual

Kicker

Kicker SOLO-BARIC S15L7 User manual

Kicker CompVT CVT12 User manual

Kicker

Kicker CompVT CVT12 User manual

Kicker Comp DC12 User manual

Kicker

Kicker Comp DC12 User manual

Kicker GOLD Series User manual

Kicker

Kicker GOLD Series User manual

Kicker SOLO-BARIC L7 Series User manual

Kicker

Kicker SOLO-BARIC L7 Series User manual

Kicker KM12 User manual

Kicker

Kicker KM12 User manual

Kicker L7QB82 User manual

Kicker

Kicker L7QB82 User manual

Kicker Comp C15 User manual

Kicker

Kicker Comp C15 User manual

Kicker PWRA4P11 User manual

Kicker

Kicker PWRA4P11 User manual

Kicker CompVR C12VR User manual

Kicker

Kicker CompVR C12VR User manual

Kicker 19417164 User manual

Kicker

Kicker 19417164 User manual

Kicker PTRTP User manual

Kicker

Kicker PTRTP User manual

Kicker CompVR CVR10 User manual

Kicker

Kicker CompVR CVR10 User manual

Kicker PWRA2P07 User manual

Kicker

Kicker PWRA2P07 User manual

Kicker Soundgate SWRA406 User manual

Kicker

Kicker Soundgate SWRA406 User manual

Kicker COMP8 User manual

Kicker

Kicker COMP8 User manual

Kicker Q-CLASS CompQ12 User manual

Kicker

Kicker Q-CLASS CompQ12 User manual

Kicker subwoofer ES104 User manual

Kicker

Kicker subwoofer ES104 User manual

Kicker Comp C15 User manual

Kicker

Kicker Comp C15 User manual

Popular Subwoofer manuals by other brands

EarthQuake SuperNova MKVI user manual

EarthQuake

EarthQuake SuperNova MKVI user manual

Rockford Fosgate M2 ELEMENT READY M2D4-10S manual

Rockford Fosgate

Rockford Fosgate M2 ELEMENT READY M2D4-10S manual

EAW SB1000zR Specifications

EAW

EAW SB1000zR Specifications

Focal Sub 10 Dual user manual

Focal

Focal Sub 10 Dual user manual

Jensen JW10A Installation & owner's manual

Jensen

Jensen JW10A Installation & owner's manual

SVS PB12-Plus quick start guide

SVS

SVS PB12-Plus quick start guide

Sony XS-L101 Installation/connections

Sony

Sony XS-L101 Installation/connections

OHM BRS-12A3 user manual

OHM

OHM BRS-12A3 user manual

Linn Sizmik 10.25 manual

Linn

Linn Sizmik 10.25 manual

Aiwa TS-W50 operating instructions

Aiwa

Aiwa TS-W50 operating instructions

Alphasonik ALPHA 800 PSW810E owner's manual

Alphasonik

Alphasonik ALPHA 800 PSW810E owner's manual

Hama Sound Unlimited Impulse 720 user manual

Hama

Hama Sound Unlimited Impulse 720 user manual

Mackie MR S10 owner's manual

Mackie

Mackie MR S10 owner's manual

XTZ 99 W10.16 user manual

XTZ

XTZ 99 W10.16 user manual

Vibe CVEN Series manual

Vibe

Vibe CVEN Series manual

MTX ROADTHUNDER RT12PT owner's manual

MTX

MTX ROADTHUNDER RT12PT owner's manual

Audiovox Prestige PSW-10D owner's manual

Audiovox

Audiovox Prestige PSW-10D owner's manual

Next HFA112s user manual

Next

Next HFA112s user manual

manuals.online logo
manuals.online logoBrands
  • About & Mission
  • Contact us
  • Privacy Policy
  • Terms and Conditions

Copyright 2025 Manuals.Online. All Rights Reserved.