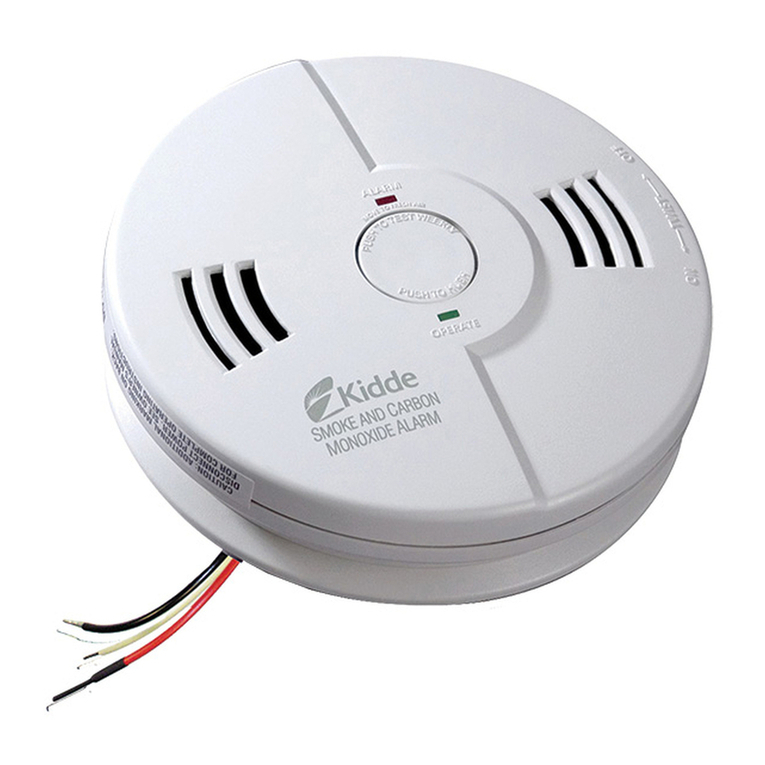
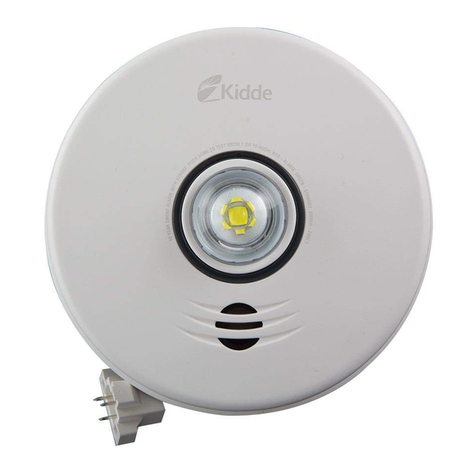
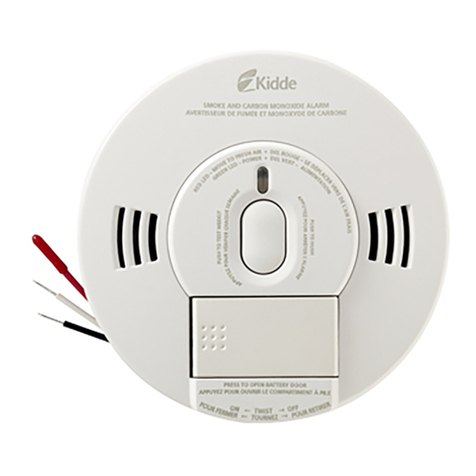
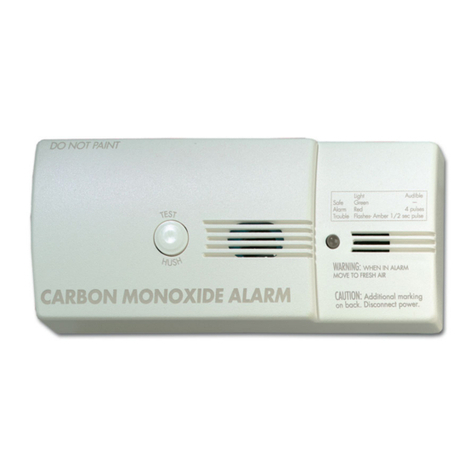
Kidde P4010ACLEDSCOCA User manual

2561-7202-00 EN
NOTE: Battery backup supplies power to the smoke and CO alarm portion
only. Strobe will not work without AC power.
ATTENTION: Please take a few minutes to thoroughly read this user
guide which should be saved for future reference and passed on to any
subsequent owner.
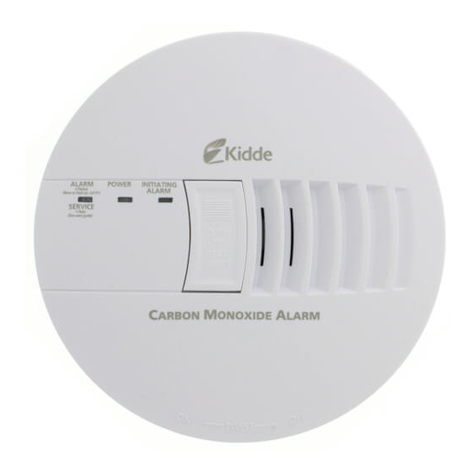
Photoelectric Smoke / CO
Alarm with LED Strobe
and Voice
User Guide
120V AC with 10-year sealed lithium battery backup
Model: P4010ACLEDSCOCA (with voice message system)
SINGLE AND/OR MULTIPLE
STATION SMOKE ALARM.
SINGLE AND/OR MULTIPLE
STATION CARBON MONOXIDE ALARM

The smoke alarm takes precedence when both smoke
and carbon monoxide are present.
• Alert small children in the home as well as anyone else
that might have difficulty recognizing the importance of
the alarm sounding or that might have difficulty leaving
the area without help.
• Leave immediately by your escape plan. Every second
counts, so don’t waste time getting dressed or picking up
valuables.
• In leaving, don’t open any inside door without first feeling
its surface. If hot, or if you see smoke seeping through
cracks, don’t open that door! Instead, use your alternate
exit. If the inside of the door is cool, place your shoulder
against it, open it slightly and be ready to slam it shut if
heat and smoke rush in.
• If the escape route requires you to go through smoke,
stay close to the floor where the air is cleaner. Crawl if
necessary, and breathe shallowly through a cloth, wet if
possible.
• Once outside, go to your selected meeting place and make
sure everyone is there.
• Call the fire department from your cell phone outside, or
from your neighbor’s home-not from yours!
• Don’t return to your home until the fire officials say that it
is safe to do so.
• There are situations where a smoke alarm may not be
effective to protect against fire as stated in the NFPA
Standard 72. For instance:
a) smoking in bed
b) leaving children home alone
c) cleaning with flammable liquids, such as gasoline
Smoke alarm pattern is 3 long beeps with voice
“Fire! Feu!”, 1.5 second pause, 3 long beeps, repeating.
What to do When the Alarm Sounds!
SMOKE ALARM ACTIVATION

CO ALARM ACTIVATION
WARNING:
Carbon monoxide alarm
activation indicates the presence of Carbon
Monoxide (CO) at high concentrations which
can kill you.
1) Immediately move to fresh air – outdoors or by an open
door/window. Do a head count to check that all persons are
accounted for. Do not re-enter the premises nor move away
from the open door/window until the emergency services
responders have arrived, the premises have been aired out,
and your alarm remains in its normal condition.
2) Call your local emergency service.
(fire department or 911)
Never restart the source of a CO problem until it has
been corrected. Never ignore the sound of the alarm!
In an interconnected system, the initiating alarm Green
LED will flash every second. Pressing the Test/Hush
button on the initiating alarm unit will silence the
alarm notification, including all interconnected units.
Pressing the Test/Hush button on any unit other than the
initiating alarm unit does nothing. If the CO condition
that caused the alarm in the first place continues, the
initiating alarm unit will reactivate in alarm mode.
If the unit goes into alarm mode again within six
minutes, it is sensing high levels of CO which can quickly
become a dangerous situation.
PHONE NUMBER
What to do When the Alarm Sounds!
Carbon monoxide (CO) alarm pattern is four quick beeps
with voice “Warning! Carbon Monoxide! Monoxyde de
carbone!” repeating every 5 seconds.

Contents of This User Guide
1. Introduction
2. Product Features and Specifications
3. Limitations of Smoke and CO Alarms
4. Recommended Locations
5. Locations To Avoid
6. Installation / Activation Instructions
7. Operation And Testing
8. Alarm Visual and Audible Indicators
9. Smoke Alarm Nuisance And Hush
10. Battery
11. Discharging / Killing The Battery
12. General Carbon Monoxide (CO) Information
13. Maintenance
14. Good Safety Habits
15. Warranty
1. Introduction
Model P4010ACLEDSCOCA AC wire-in photoelectric smoke / CO
alarm and LED strobe light can be directly interconnected with Kidde
3-wire smoke, heat and CO alarms. This alarm is acceptable for use in
all residential applications where smoke alarms are required, and can
be used as a Single Alarm or in a Multiple Alarm system, (up to 24
devices).
Thank you for purchasing this integrated smoke / CO/strobe alarm. It
is an important part of your family’s home safety plan. You can trust
Kidde to provide the highest quality safety products. We know you
expect nothing less when the lives of your family are at stake.
Please take a few minutes to thoroughly read this user guide, and save
it for future reference. Teach children how to respond to the alarms,
and that they should never play with the unit.
If you have any questions about the operation or installation of your
alarm, please call our toll free Consumer Hotline at 1-800-880-6788.
IMPORTANT: Read all instructions before installation and keep
this user guide near the alarm for future reference.
WARNING! Do not try to repair this unit yourself.
WARNING! Disconnection or loss of AC and depleted
batteries will render this alarm inoperative.
WARNING! The strobe light is extremely bright. Do not look
directly at the light when the light is flashing.
This alarm detects products of combustion using photoelectric
technology. After ten (10) years of cumulative power up, this unit will
“chirp” two times every 30 seconds. This is an “operational end of
life” feature which will indicate that it is time to replace the alarm.
To help identify when to replace the unit, a label showing the
installation and replace by date has been affixed to the side of the
alarm.
2. Product Features and Specifications
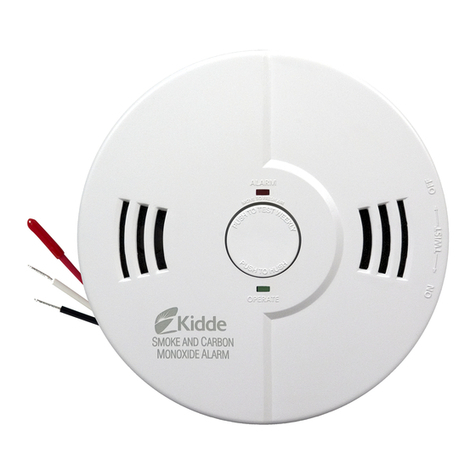
Test / Hush
Button (dome)
Red Alarm
Light
Discharging / Killing
the Battery (see
“Discharging / Killing
the Battery section)
Green Operate
Light
Alarm Sounder
AC Connector

AC Connector
Model Number:
P4010ACLEDSCOCA (3 wire interconnect unit)
Power:
120 V AC (60 Hz, 863 mA max) wire-in connector with sealed lithium
battery backup for the smoke and CO alarm only. Strobe will not flash
without AC power.
Interconnectable to other compatible alarms (see Installation /
Mounting Instructions section for details).
Note: If more than one P4010ACLEDSCA and/or P4010ACLEDSCOCA
strobe is in the interconnected system, all other P4010ACLEDSCA and/
or P4010ACLEDSCOCA strobes will synchronize within 20 seconds of an
initiating alarm.
ALARM EVENTS:
Smoke Alarm: Repeating pattern of 3 long beeps in time with red
LED blinks, followed by “Fire! Feu!” Strobe flashes once every second
continuously.
CO Alarm: Repeating pattern of 4 quick beeps in time with red LED
blinks, followed by “Warning! Carbon Monoxide! Monoxyde de
carbone!”. Strobe will flash 4 times every 5 seconds.
Temperature:
Operating Range: 4.4°C (40°F) to 37.8°C (100°F)
Humidity:
Operating range: 10-95% relative humidity, non-condensing
Audible Alarm:
85+ dB at 10’ @ 3.2±0.5 KHz pulsing alarm, with voice messages “Fire!
Feu!” “Warning! Carbon Monoxide. Monoxyde de carbone!”.
CO Alarm Response Times:
70 PPM = 60-240 min.
150 PPM = 10-50 min.
400 PPM = 4-15 min.
2. Product Features and Specifications

2. Product Features and Specifications
CEILING
90° 90°
0°
45°45°
SOURCE
LIGHT
CEILING
90° 90°
0°
45°45°
SOURCE
LIGHT
25 90
25 85
30 80
30 75
35 70
35 65
40 60
45 55
55 50
75 30-45
90 5-25
100 0
(LIGHT INTENSITY) (IN DEGREES)
PERCENT ANGLE
25 90
25 85
30 80
30 75
35 70
35 65
40 60
45 55
55 50
75 30-45
90 5-25
100 0
(LIGHT INTENSITY) (IN DEGREES)
PERCENT ANGLE
90° 60 55 50 45 40 35 30
0
ZERO AXIS
WALL
FLOOR
5
10
15
20
25
Sensor:
Photoelectric and Electrochemical
Mounting:
Wall or ceiling
Applications:
Primary Direct or Indirect and Supplementary
Light Output:
177 Candela minimum (on axis measurement)
The following diagrams show that the light intensity gradually decreases
as the viewing angle is increased. Use this information to determine the
best location for the strobe light.

WARNING: PLEASE READ CAREFULLY AND THOROUGHLY
• NFPA 72 states: Life safety from fire in residential occupancies
is based primarily on early notification to occupants of the need
to escape, followed by the appropriate egress actions by those
occupants.
• Fire warning systems for dwelling units are capable of protecting
about half of the occupants in potentially fatal fires. Victims
are often intimate with the fire, too old or young, or physically
or mentally impaired such that they cannot escape even when
warned early enough that escape should be possible. For these
people, other strategies such as protection-in-place or assisted
escape or rescue are necessary.
• Leading authorities recommend that both ionization and
photoelectric smoke alarms be installed to help ensure maximum
detection of the various types of fires that can occur within the
home. Ionization sensing alarms may detect invisible fire particles
(associated with fast flaming fires) sooner than photoelectric
alarms. Photoelectric sensing alarms may detect visible fire
particles (associated with slow smoldering fires) sooner than
ionization alarms.
• A battery powered alarm must have a battery of the specified
type, in good condition and installed properly (This model has a
sealed backup battery).
• Smoke alarms must be tested regularly to make sure the battery
and the alarm circuits are in good operating condition.
• Smoke alarms cannot provide an alarm if smoke does not reach
the alarm. Therefore, smoke alarms may not sense fires starting in
chimneys, walls, on roofs, on the other side of a closed door or on
a different floor.
• If the alarm is located outside the bedroom or on a different floor,
it may not wake up a sound sleeper.
• The use of alcohol or drugs may also impair one’s ability to hear
the smoke alarm. For maximum protection, a smoke alarm should
be installed in each sleeping area on every level of a home.
3. Limitations of Smoke Alarms

WARNING: PLEASE READ CAREFULLY AND THOROUGHLY
IMPORTANT: This carbon monoxide alarm is designed to detect carbon
monoxide gas from ANY source of combustion. It is NOT designed to
detect any other gas.
!
CAUTION: This alarm will only indicate the presence of carbon
monoxide gas at the sensor. Carbon monoxide gas may be present in
other areas. Never restart the source of a CO problem until it has been
fixed. NEVER IGNORE THE ALARM!
• Industry experts recommend a CO alarm be installed on each level
of the home—ideally on any level with fuel burning appliances
and outside of sleeping areas.
WARNING: This product is intended for use in ordinary indoor
locations of family living units. It is not designed to measure
compliance with commercial or industrial standards. It is not
suitable for installation in hazardous locations as defined in your
local building code. It is not designed for use in a recreational
vehicle (RV) or boat.
• The installation of this device should not be used as a substitute
for proper installation, use, and maintenance of fuel burning
appliances, including appropriate ventilation and exhaust systems.
• This alarm does not prevent CO from occurring, nor can it solve
any existing CO problem.
WARNING: This device is designed to protect individuals
from acute effects of carbon monoxide exposure. It may not fully
safeguard individuals with specific medical conditions. If in doubt,
consult a medical practitioner. Individuals with medical problems
may consider using warning devices which provide audible and
visual signals for carbon monoxide concentrations under 30 PPM.
• This alarm has not been investigated for carbon monoxide
detection below 70 PPM.
• This combination Smoke/CO/Strobe alarm requires a continuous
supply of electrical power – it will not work without power.
3. Limitations of CO Alarms

4. Recommended Locations
WARNING: PLEASE READ CAREFULLY AND THOROUGHLY
• For rooms larger than 250 sq. ft. the notification device should
be located within 4.88 m (16’) of the pillow when located in a
sleeping area.
• Locate the first strobe or combination strobe alarm in the bedroom in
which the hearing impaired individual sleeps. Try to monitor the exit
path, as the bedrooms are usually farthest from the exit. Locate the
first alarm in the immediate area of the bedrooms. If more than one
sleeping area exists, locate additional alarms in each sleeping area
(Figure 1A).
• Locate additional strobe or combination strobe alarms in any lived-
in room where a hearing impaired individual would need to be
notified of an alarm condition and near any stairway as stairways
act like chimneys for smoke and heat.
• Locate at least one alarm on every floor level (Figure 1B).
• Locate an alarm in every Sleeping Room.
• Locate an alarm in every room where electrical appliances are
operated (i.e. portable heaters or humidifiers).
• Locate an alarm in every room where someone sleeps with the
door closed. The closed door may prevent an alarm not located in
that room from waking the sleeper.
• Smoke, heat, and combustion products rise to the ceiling and
spread horizontally. Mounting the smoke alarm on the ceiling in
the center of the room places it closest to all points in the room.
Ceiling mounting is preferred in ordinary residential construction.
• When mounting an alarm on the ceiling, locate it at a minimum of
10 cm (4”) from the side wall (Figure 2A).
• When mounting the alarm on the wall, use an inside wall with
the top edge of the alarm at a minimum of 10 cm (4”) and a
maximum of 30.5 cm (12”) below the ceiling (Figure 2A).
• Put smoke alarms at both ends of a bedroom hallway or large
room if the hallway or room is more than 9.1 m (30’) long.
• For mobile home installation, select locations carefully to avoid
thermal barriers that may form at the ceiling. For more details, see
Mobile Homes.

4. Recommended Locations
DINING
ROOM
LIVING
ROOM
Required Smoke or Smoke / CO Alarms
Ionization Type Smoke Alarm with
Hush® Control or Photoelectric Type
Smoke Alarms for Additional Pr
otection
KITCHEN BEDROOM
BEDROOM
BEDROOM
LIVING
ROOM KITCHEN
BEDROOMBEDROOM HALL
BASEMENT
SINGLE FLOOR PLAN MULTIPLE FLOOR PLAN
FIGURE 1A FIGURE 1B
BEDROOM
LIVING ROOM
WORKSHOPBASEMENT
KITCHEN
HALL
GARAGE
MASTER
BEDROOM
FIRE
EXTINGUISHERS
SMOKE
ALARMS
CARBON
MONOXIDE
ALARMS
SMOKE/CO
ALARM
TOTAL HOME PROTECTION
FIGURE 1C
• Install smoke alarms on sloped, peaked or cathedral ceilings
following the mounting guidelines outlined in Figure 2B and
2C. Smoke alarms in rooms with ceiling slopes greater than
0.3 m in 2.4 m (1 foot in 8 feet) horizontally shall be located
on the high side of the room (Figure 2B and 2C).
• Install Smoke Alarms on tray-shaped ceilings (coffered ceilings)
on the highest portion of the ceiling or on the sloped portion
of the ceiling within 30.5 cm (12”) vertically down from the
highest point (Figure 2D).

4. Recommended Locations
NOT IN
THIS AREA
ANYWHERE IN
THIS AREA
0.9 m (3’) 0.9 m (3’)
HORIZONTAL DISTANCE
FROM PEAK
NOT IN
THIS AREA
ANYWHERE IN
THIS AREA
0.9 m (3’)
MINIMUM
BEST
PLACEMENT
STAGNANT AIR
MINIMUM
10 cm (4”)
NEVER
HERE
ACCEPTABLE
PLACEMENT
30.5 cm (12”)
MAXIMUM
CEILING
10 cm (4”)
ANYWHERE IN
THIS AREA
30 cm (12”)
SIDE WALL
FIGURE 2A
FIGURE 2B
FIGURE 2C
FIGURE 2D

4. Recommended Locations
5. Locations to Avoid
Mobile Homes
Modern mobile homes have been designed to be energy efficient. Install
smoke alarms as recommended in Figure 2A.
In older mobile homes that are not well insulated compared to present
standards, extreme heat or cold can be transferred from the outside to the
inside through poorly insulated walls and roof. This may create a thermal
barrier that can prevent the smoke from reaching an alarm mounted on the
ceiling. In such units, install the alarm on an inside wall with the top edge
of the alarm at a minimum of 10 cm (4”) and a maximum of 30.5 cm (12”)
below the ceiling (Figure 2A).
If you are not sure about the insulation in your mobile home, or if you notice
that the outer walls and ceiling are either hot or cold, install the alarm on an
inside wall. For minimum protection, install at least one alarm close to the
bedrooms. For additional protection, see Figure 1A.
WARNING: Test your alarm operation after mobile home has
been in storage or unoccupied, and at least once a week during use.
• Do not place in direct sunlight or install near high ambient light
areas; the bright light may reduce one’s ability to notice the strobe
light.
• Extreme temperatures may affect the sensitivity of the alarm.
Do not install in areas where the temperature is colder than
4.4°C (40°F) or hotter than 37.8°C (100°F), such as garages and
unfinished attics.
• Do not install in areas where the relative humidity (RH) is greater
than 95%, non-condensing. Very humid areas, with moisture or
steam, can cause nuisance alarms.
• Avoid outdoor locations (this device is not listed for outdoor use).
• Do not install within 0.9 m (3’) of the following: The door to a
kitchen, or a bathroom that contains a tub or shower, forced air
supply ducts used for heating or cooling, ceiling or whole house
ventilating fans, or other high air-flow areas.

• Do not place the alarm where drapes or other objects will block
the sensor. Smoke must be able to reach the sensor to accurately
detect conditions.
• Do not install in peaks of vaulted ceilings. In this area install as
shown in Figures 2B and 2C.
• Install at least 30.5 cm (12”) away from fluorescent lights as
electronic noise may cause nuisance alarms.
• Keep out of insect infested areas. Avoid excessively dusty, dirty or
greasy areas. Dust particles may cause nuisance alarms or failure
to alarm.
• Normal cooking may cause nuisance alarms. If a kitchen alarm
is desired, it should have an alarm silence feature or be a
photoelectric type.
• Do not install within 5 ft of heating or cooking appliances.
Wiring Instructions:
Wiring Requirements
•ThissmokealarmshouldbeinstalledonaCSAlistedorrecognized
junction box. All connections should be made by a qualified electrician
and all wiring used shall be in accordance with codes having
jurisdiction in your area. The multiple station interconnect wiring
to the alarms must be run in the same raceway or cable as the AC
power wiring. In addition, the resistance of the interconnect wiring
shall be a maximum of 10 ohms.
•Theappropriatepowersourceis120 V AC Single Phase supplied from
a non-switchable circuit, which is not protected by a ground fault
interrupter.
•Smokealarmsarenottobeusedwithdetectorguardsunlessthe
combination (alarm and guard) has been evaluated and found suitable
for that purpose.
WARNING: The alarm cannot be operated from power derived
from a square wave, modified square wave or modified sine wave,
inverter. These types of inverters are sometimes used to supply power
to the structure in off grid installations, such as solar or wind derived
power sources. These power sources produce high peak voltages that
will damage the alarm.
5. Locations to Avoid
6. Installation / Activation Instructions

6. Installation / Activation Instructions
WIRING INSTRUCTIONS FOR AC HARNESS
!CAUTION! TURN OFF THE MAIN POWER TO THE CIRCUIT
BEFORE WIRING THE ALARM.
• For alarms that are used as single station, DO NOT CONNECT THE RED
WIRE TO ANYTHING. Leave the red wire insulating cap in place to make
certain that the red wire cannot contact any metal parts or the electrical box.
• When alarms are interconnected, all interconnected units must be
powered from a single circuit.
• A maximum of 24 Kidde Safety devices may be interconnected in
a multiple station arrangement. The interconnect system should
not exceed the NFPA interconnect limit of 12 smoke alarms and/or
18 alarms total (smoke, CO, Smoke/CO Combination, heat detector,
etc.). With 18 alarms interconnected, it is still possible to interconnect
up to a total of 6 remote signaling devices and /or relay modules (see
below for details on interconnecting Kidde devices).
• The following models can be interconnected using the standard
AC wiring interconnect: i12020CA, i12020ACA, i12040CA,
i12040ACA, i12060CA, i12060ACA, i12010SCA, i12010SCOCA,
KN-SMFM-I-CA, KN-COB-ICB-CA, KN-COSM-IBCA, KN-COB-IC-CA,
KN-COSM-ICA, KN-COP-IC-CA, KN-COPE-ICA, P12040CA, Pi2000CA,
Pi2010CA, SM120X, CO120X, SLED177iCA, P4010ACLEDSCA,
P4010ACLEDSCOCA.
• The maximum wire run distance between the first and last unit in an
interconnected system is 305 m (1000’).
WIRES ON ALARM HARNESS CONNECTED TO
Black Hot side of AC line
White Neutral side of AC line
Red Interconnect lines (red wires) of other
units in the multiple station set up
Interconnect Wiring Diagram
FIGURE 3
FUSE OR CIRCUIT BREAKER
REDBLACK
WHITE
REDBLACK
WHITE
First
Alarm
Additional
Alarm
Kidde Relay Module
SM120X, CO120X
or both
Additional
Alarm
Optional
Accessory

6. Installation / Activation Instructions
• NOTE: This alarm is not compatible with Kidde CO-relays and
Strobes manufactured before Nov. 1, 2011.
• Figure 3 illustrates interconnection wiring. Improper connection may
result in damage to the alarm, failure to operate, or a shock hazard.
• Make certain alarms are wired to a continuous (non-switched)
power line. NOTE: Use standard CSA Listed household wire (as
required by local codes) available at all electrical supply stores
and most hardware stores.
• After selecting the proper location for your Smoke/CO/Strobe Alarm,
as described in RECOMMENDED LOCATIONS, and wiring the AC
Quick Connect Harness as described in the WIRING INSTRUCTIONS
(NOTE: AC power should be turned off at this stage), attach
the mounting bracket to the electrical box. To ensure aesthetic
alignment of the alarm with the hallway, or wall, the “A” line on
the mounting bracket must be parallel with the hallway when ceiling
mounted, or horizontal when wall mounted.
Activating The Alarm
1. After installation of the mounting bracket, attach the
AC quick connect harness to the unit.
• If AC power is on at this time, the unit will chirp once to signal
that power has been applied, and a voice message will prompt
you to push the test button.
• If AC power is on at this time, confirm the green LED is on
constant.
2. Rotate the unit fully onto the mounting bracket, which will
automatically activate the backup battery.
• NOTE: Attaching AC power first, without using the mounting
bracket, will result in a low battery chirp, and voice message
“Low Battery. Pile Faible.” because the battery backup has
not been activated. Attach unit to mounting bracket very soon
after applying AC power to avoid false low battery notification.
• NOTE: The battery activation is a one-time feature. After
activation, the battery cannot be turned off, and can only be
discharged at the end of product life. If the alarm is removed
from the mounting plate, the backup battery will remain
active. See Section 11: Discharging / Killing The Battery.
The alarm is now activated! After installation/activation, test your
alarm as described in Operation and Testing section.

6. Installation / Activation Instructions
7. Operation and Testing
WARNING: FAILURE TO PROPERLY INSTALL AND ACTIVATE
THIS ALARM WILL PREVENT PROPER OPERATION OF THIS ALARM
AND WILL PREVENT ITS RESPONSE TO FIRE AND/OR CARBON
MONOXIDE HAZARDS.
OPERATION: The alarm is operating once it is activated and testing is
complete.
The photoelectric smoke sensor monitors the air for the presence of
products of combustion. When products of combustion, (smoke), are
sensed, the unit sounds a loud 85 dB pulsing alarm with voice message.
The voice message for smoke detection is “Fire! Feu!”. The red LED
blinks in time with the alarm pattern and the strobe will flash every
second. This will continue until the air is cleared.
The carbon monoxide (CO) sensor monitors the air for the presence of
CO. It will alarm when there are high levels of CO present, and when
there are low levels of CO present over a longer period of time. When a
CO condition matches either of these situations, the alarm will sound a
loud 85 dB pulsing alarm with voice message. The voice message for CO
detection is “Warning! Carbon Monoxide! Monoxyde de carbone!”. The
red LED blinks in time with the alarm pattern and the strobe will flash 4
times, go off for 5 seconds, and then repeat until the air is cleared.
The CO sensor meets the alarm response time as follows:
At 70 PPM, the unit must alarm within 60-240 minutes.
At 150 PPM, the unit must alarm within 10-50 minutes.
At 400 PPM, the unit must alarm within 4-15 minutes.
WARNING: Due to the loudness (85 decibels) of the alarm,
always stand an arm’s length (about 2.5 feet) away from the
unit or use ear protection when testing, and avoid looking at the
bright strobe directly, or cover it with your hand.
Strobe Synchronization
This strobe alarm will automatically synchronize (flash at the same time)
with other P4010ACLEDSCA and P4010ACLEDSCOCA strobes that are
part of the interconnected system. Synchronization will take up to 20
seconds when in alarm.
NOTE: The alarms will not synchronize during test mode.
TESTING: Test your alarm by pressing the test button (dome) until the
unit chirps, then release the test button.

7. Operation and Testing
NOTE: For your convenience, after pushing the test button, there is a
5 second delay before the loud test pattern begins. This delay allows you
time to move and look away from the direct strobe flash (very bright),
and avoid ear discomfort.
The unit will then emit three long alarm beeps, followed by the voice
message “Fire! Feu!” and a series of strobe flashes. Alarm, voice, and
strobe will activate if the electronic circuitry, horn, speaker, and battery
are working. If the alarm, voice, or strobe do not activate, the unit must
be replaced.
Weekly testing is required to ensure proper operation. Erratic
or low volume sound (or no sound), or no strobe activation from your
alarm may indicate a defective alarm and it should be returned for
service. See Discharging / Killing The Battery section to determine how to
prepare the unit for shipment or disposal.
WARNING: DO NOT use an open flame to test your alarm,
you could damage the alarm or ignite combustible materials and
start a structure fire.
Smoke and CO Alarm Memory
If an alarm experiences a smoke or CO alarm event, and then stops
alarming, the red LED will blink once every 16 seconds to alert you that
this unit has previously alarmed. Pressing and releasing the Test/Hush
button will clear the alarm memory and return the alarm to normal
operation mode.
Ambient Light Sensing
During low light ambient conditions, the green LED will reduce in
brightness and intensity. The unit samples the ambient light conditions
of the alarm’s location and, if possible, determines a Night /Day cycle. A
valid Night / Day cycle will inhibit Low Battery chirps at night. It will also
inhibit End of Unit Life chirps at night if the unit is within the first 30
days of the End of Unit Life period. After 30 days, the chirps will not be
inhibited.
WARNING - REPLACE ALARM AS SOON AS POSSIBLE WHEN IN
END OF UNIT LIFE OR LOW BATTERY MODE.
If the unit cannot determine a valid Night /Day cycle because the unit
is located in either a constantly dark or lighted location, Low Battery
and End of Unit Life chirps will not be inhibited. If the unit is moved
to a location that is not constantly dark or lighted, it will determine a
Night / Day cycle because the unit continuously samples ambient light
conditions.

8. Alarm Visual and Audible Indicators
The following table describes the visual and audible conditions the unit may
encounter.
Operational
Mode
Visual
Indications
Audible
Indications Note / Action:
Normal
Operation
Green LED on
continuous: AC power
applied.
Green LED blink every
60 seconds: Battery
Backup, (DC Only).
None
Test/Hush Button
Press (strobe dome)
Red LED blink in time
with alarm pattern.
Strobe will flash 1 time
per second if AC power
is applied.
Two sets of 3 long beeps
with voice “Fire! Feu!”
and two sets of 4 quick
beeps with voice message
“Warning! Carbon
Monoxide. Monoxyde de
carbone.”
Perform Test/Hush
button press once a
week to verify proper
alarm operation.
Smoke or Fire
detected
Red LED blinks in time
with alarm pattern.
Strobe will flash 1 time
per second if AC power
is applied.
3 long beeps, voice
message “Fire! Feu!”,
3 long beeps repeating.
Smoke has been
detected. Follow the
instructions at the
beginning of this User
Guide under the section
“What to do when the
alarm sounds, Smoke
Alarm activation”.
CO detected Red LED blinks in time
with alarm pattern.
Strobe will flash 4 times,
go off for 5 seconds, and
then repeat, if AC power
is applied.
4 quick beeps, voice
message “Warning!
Carbon Monoxide.
Monoxyde de carbone.”,
4 quick beeps, repeating.
Carbon monoxide has
been detected. Follow
the instructions at the
beginning of this User
Guide under the section
“What to do when the
alarm sounds, CO alarm
activation.”
Smoke Alarm Hush
(button/dome press
while unit is in smoke
alarm)
Red LED blink every 2
seconds
Voice message “Hush
Mode Activated. Mode
Hush activé.”
Pressing the Test/Hush
button (dome) during
a known smoke alarm
event will activate the
Hush feature which
will silence the alarm
for approximately 8-10
minutes. This feature is
to be used only when a
known alarm condition,
such as smoke from
cooking, activates the
alarm.
Smoke Alarm Hush
Mode Cancelled
None Voice message “Hush
Mode Cancelled. Mode
Hush annulé.”
When smoke levels
drop below the alarm
threshold, or if the
user presses the Test/
Hush button (dome)
again, voice message
will occur.
Table of contents
Other Kidde Carbon Monoxide Alarm manuals

Kidde
Kidde SL177i User manual

Kidde
Kidde KN-COPE-I User manual

Kidde
Kidde KN-COSMXTR-BA User manual

Kidde
Kidde P4010ACSCO-WF User manual

Kidde
Kidde K10LLCO Programming manual

Kidde
Kidde KN-COB-DP-H) User manual

Kidde
Kidde KN-COP-DP-10YL User manual

Kidde
Kidde KN-COB-LCB-A User manual

Kidde
Kidde KN-COB-B-LS (900-0233) User manual

Kidde
Kidde KN-COPF-I User manual

Kidde
Kidde KN-COPP-B-LS-UK User manual

Kidde
Kidde KN-COB-ICB-CA User manual

Kidde
Kidde P4010DCSCO-W User manual

Kidde
Kidde 900-0213CA User manual

Kidde
Kidde K10LLCO User manual

Kidde
Kidde KN-COB-B-LS User manual

Kidde
Kidde KHU100-28 User manual

Kidde
Kidde K7CO User manual

Kidde
Kidde KN-OOB-B User manual

Kidde
Kidde KN-COPF-I User manual