King Champion MXA-10C User manual

Internet Radio Tuner
User Manual
Model No. MXA-10C

Important Safety Instructions and Warnings
Please read before installation
If this Internet radio has been moved from a cold place to a warm place, DO NOT plug it in for 2-3
hours (e.g. from a cold car boot to a warm room). There is a possibility that moisture may have
condensed in the Internet radio, this can cause damage to your Internet radio. To avoid damage
please unpack your Internet radio and allow it to stand at room temperature for 2-3 hours before
use. This will help any moisture evaporate and prevent unnecessary damage to your Internet radio.
POWER PLUG Ensure that the power plug is easily accessible.
COVERS Do not remove any fixed covers as this may expose dangerous voltages.
WEATHERIt is advisable to unplug an external antenna during a thunderstorm.
VENTILATION The ventilation holes on the casing of your Internet radio prevent it from over heating.
Do not block or cover these holes, especially with cloth or paper. Do allow a minimum distance of
5cm around the apparatus for sufficient ventilation.
DAMAGE Never use your Internet radio if it is damaged in any way. Always place your Internet radio
on a flat level surface avoiding anywhere which may be subject to strong vibration.
TEMPERATURE Avoid extremes of temperature, either hot or cold, place your Internet radio well
away from heat sources such as radiators or gas/electric fires.
DO NOT Use this apparatus in humid or tropical climates.
MOISTURE Do not allow your Internet radio to be exposed to rain, moisture or dust. If any liquid is
spilt into your Internet radio it can cause serious damage. If you spill any liquid into your Internet
radio switch it off at the mains immediately. Contact your store immediately.
WARNING
-To reduce the risk of fire or electrical shock, do not expose the product to rain or moisture.
-The product shall not be exposed to any dripping or splashing. Objects filled with liquids, such
as vases, should not be placed on the product.
-No open flame sources, such as lighted candles, should be placed on the product.
-Keep the remote control battery away from children. It may cause a fire or chemical bum if
mishandled. Do not recharge, disassemble, heat above 100ー C (212ー F), or incinerate. Dispose
of used batteries promptly. Replace only with a battery of the correct type and model number.
CAUTION
Do not open any covers and do not repair yourself. Qualified personnel must carry out repair work.
WARNING
This product may contain chemicals listed in Proposition 65 (http://www.oehha.ca.gov/prop65/
prop65_list/Newlist.html) that may be known to cause cancer, birth defects or other reproductive
harm
CAUTION:
please read the important safety instructions carefully
1.Retain instructions - the safety instruction should be retained for future reference.
2.Follow instructions all instructions should be followed.
2.Heed warnings - all warnings on the product and in the user's guide should be adhered.
4.Power source - the product should be connected to a power supply only of the type specified
in the user's guide or as marked on the product.
5.Power cord protection protect the power cord from being walked on or pinched, particularly
at plugs and convenience receptacles.
6.Water and moisture - the product should not be used near water (for example, near a
bathtub, washbowl. kitchen sink, laundry tub, in a wet basement. or near a swimming pool. etc)
7.Heat - keep the product away from heat sources such as radiators, heat registers, stoves or
other appliances that produce heat.
8.Damage requiring service - the product should be serviced by qualified service personnel
when:
a)the power supply cord or the plug has been damaged: or
b)objects have fallen or liquid has been spilled into the product: or
c)the product has been exposed to rain: or
d)the product does not appear to operate normally or exhibits a marked change in
performance: or
e)the product has been dropped, or the enclosure damaged.
9.Servicing - the user should not attempt to service the product. All servicing should be
referred to qualified service personnel.
10.Unplug the power adapter during lightning storms or when unused for long periods of time.
Changes or modifications not expressly approved by the party responsible for compliance
could void the user's authority to operate the equipment.

3
1
Pre./Play Mode Back
Power
Tune/
Select
SD Card
1 4 5 6 7 8
9 10
2
RL
LINE OUT
COAXIAL TOSLINK
DIGITAL
OUTPUT
LAN FM ANTENNA
ON
OFF
ANTENNA 5.0V 1.0A
11 12 13 14 15 16 17 18 19 1
1.Power button
2.Power LED indicator
3.Remote control lens
4.LCD display
5.Previous / Play button
6.Mode changing button
7.Back button
8.Tuning / Select knob
9.6.35 mm earphone jack
10.SD card slot
11.External Wifi antenna
12.Ethernet jack
13.Coaxial Digital output
14.Toslink Digital output
15-16.RCA analog line out
17.FM antenna socket
18.USB host
19.DC IN power input
20.Main on/off switch
Location of Controls
2
Turn on & set up your internet radio tuner
How to connect your radio to your network (scan for networks)
Switching on the radio;
Plug the cable from the AC adapter into the socket labeled 5V 1.2A DC at the back of the radio,
Turn on the main power switch at the rear of the cabinet.
CAUTION: Use only the power adapter supplied with this radio. Connecting a power adapter other
than the power adapter supplied is hazardous and may cause permanent damage to the unit, shock
or fire.
NOTE: your tuner can be connected to the internet using a wireless or a wired connection.
The display on the front of the radio will light up and show the following in order:
Welcome to
Internet Radio
Reciva Enabled
ARM Powered
After few seconds,the screen will display:
Starting…
The unit will then enter standby mode to show the initial time 00:00, you should press Power to
turn on the unit, then it will bring you to the Wizards sets:
Initialising
Network /
Scanning
.
Once the unit completes initializing, the unit with auto scan the ESSID (Network access points) as
follows:
The available ESSID names that are detected will then be displayed. Select the ESSIS that belongs
to you. IF there is a password required the unit may ask you to input the WEP (Wired Equivalent
Privacy) or WPA (Wi-Fi Protected Access) code.
If your ESSID does not require a WEP or WPA code, the unit will connect to the ESSID automatically
and display as follow:
Network OK
红色编号待定

3
Or if you are requested to input the encryption, you can do the following:
1. Select your ESSID from the list:
Select Network
Linksys
2. Request is displayed as follows:
Enter WPA
/WEP key
HINT:
The encryption code would have been set up by the person who set up
and configured your network
After 3 seconds the display goes into the code entry screen.
If the display does not automatically go into the code entry mode, press the TUNE/SELECT button.
To enter the code, use the TUNE/SELECT to select each character of the code, push down the
TUNE/ SELECT button to confirm each character.
3. Make sure the character you want is shown in the centre of the display to be able to select it.
(WEP or WPA code)
<END <> A BCDEF >
4. Once the code has been entered, find and select "END" to confirm and enter the code. The
display shows Connecting to network as the radio connects to the network.
Connecting to
Network
Connecting to
Linksys
5. If the connecting is OK, it will show you
4
Station Update
From Reciva
6. After the station update, it will display the following menu :
Internet Radio
My Stuff
Changing the volume for Earphone only
NOTE: The volume control on the unit is just for adjusting the volume for the earphone.
You can change the volume by turning the Tuning & Select button clockwise to increase the volume
and anticlockwise to decrease the volume. The display will show the volume bar. You cannot change
the volume when you are in a menu or when the radio is connecting to a station.
Changing the volume - for Speakers To change the volume for the external speakers, you need to
use the volume control from the external speakers, as typically found on your system amplifer or
speakers
Alarm Clock
Settings
<Network configuration>
Network Config
Version
Press Select to do the setting, adjust the TUNE button to your desired option. You can find some
sub-menus in it and one of them you can see <Wired/Wireless>
Edit Config
Wired/Wireless
You can select Auto, Wired only or Wireless only.
If you select Auto,the radio tuner will detect automatically for either wired connection or wireless
connection.
If you select Wired Only, the radio tuner will only connect through Wired connection.
If you select Wireless Only, the radio tuner will only connect through Wireless Wi-Fi connection.
Configuring the radio to only use a wired Ethernet connection
Selecting 'Wired Only' will cause the radio to reboot and then only use its Ethernet connection to
communicate with the network. The radio will also disable its wireless network capabilities.
Press the tuning and select button to enter the settings options. Scroll the tuning and select button
to your desired option. Available sub-menus will appear when an option is selected.
Select the Wired/ Wireless option to choose a connection with your wireless router or with your
Ethernet LAN connection.
How to set & modify Settings
In the main menu, find <Settings> to set and modify basic settings
Configuring the radio to only use a Wi-Fi connection
Selecting the 'Wireless Only ' option from the ' Wired/Wireless' menu will cause the radio to reboot
and then only use its Wi-Fi connection to communicate with the network. The radio will also disable
its Ethernet connection.

Configuring the radio to use either an Ethernet or a wireless connection Selecting the 'Auto' option
from the 'Wired/Wireless' menu will cause the radio to reboot and attempt to establish and an
Ethernet connection, if available, to communicate with the network. Otherwise, the radio will attempt
to establish a Wi-Fi connection to the network.
Once the radio has established a certain type of connection to the network, then this type of
connection will remain in use while the radio is on.
<Scan for network>
You will be guided to how to set the wireless application with the wizards. Please refer to Step 1
above for details.
<Enter network>
You can input the network name by using this feature
<View Config>
To view the current configuration of the network
<Edit config>
You can set the DHCP auto ON or OFF and if this DHCP ON is set, this device will auto set and get
the IP address and gateway DNS settings automatically. If you set the DHCP off, you will be asked
to input these address or number manually for the network configuration.
TIPS: Please set DHCP ON as default connect with your networkau tomatically.
<Signal Warning>
It allows you to choose whether or not the Internet radio displays a warning message when its
network signal strength is low. You can enable this feature by selecting 'Signal Warning
Other options under Setting
<Version>
Displays the firmware (software) version on your internet radio tuner.
<Upgrade Firmware >
Use this option to download new firmware for the radio from the Reciva portal on the internet. If
there is new firmware available, the radio will pop out a message and ask if you want to download
it or not. At this stage, you can still return to the previous menu by pressing the Back button.
IMPORTANT:
A firmware upgrade may take several minutes, so do no switch off the power to the radio until the
operation is complete otherwise the radio may become permanently damaged.
<Language>
You can select your desired language from the menu
5 6
com to establish a profile and register your radio tuner. You will require the registration key found
under the <Register> selection
<Set Time/Date>
You can set the time and day of your local time. Once your unit is connected to Internet
successfully, the time and date will be set with Greenwich standard time.
<Backlight>
You can set the LCD backlight level for active mode, inactive mode and standby mode.
Selecting this option will alter the internet radio's backlight values.
1. After selecting the 'Backlight' menu item, the radio will display three modes: 'Inactive', 'Active'
and 'Standby' as follow:
- Inactive mode: when there is no activity on the radio for 30 seconds.
- Active: when there is activity on the radio, e.g. controlling the buttons/to make a selection on the
radio
- Standby: When the radio is turned off.
2. Rotate the knob to highlight the desired menu mode and press SELECT.
3. The radio will now display the current backlight value for the menu mode. You can alter this
value by rotating the knob to increase or decrease.
<Contrast>
You can set the LCD contrast level by adjusting the knob
1. After selecting the 'Contrast' on the menu, the radio will display the current value of LCD
contrast ratio.
2. Tuning the knob to increase or decrease it until it is at the optimum level.
3. Press SELECT to confirm the change.
<UPNP>
Allows the user to configure the radio's UPnP device name. When the radio accesses a UPnP
server, the server will display the radio's configure device name in its list of clients
<WiFi Strength>
Shows the strength of the current WiFi signal.
Location
Genre
To listen to a desired station, use any of the following options to find and select a station on your tuner:
1. Select the station by <Location>:
Listen to your internet radio tuner
<Factory Reset>
You can select this option to clear all the settings you have made and return to the factory's default
settings. If you confirm to do this, all the Presets, Language, selected ESSID, network configuration
etc will return to the factory default settings
<Register>
You can use this key number to register your unit on Reciva's portal website. Go to grace.reciva.
Choose a Continent and country from the list. A list of radio stations will be displayed:
Caribbean
Europe UK
Ukraine

7
2. Select the station by <Genre>:
Choose the stations by category or by the type of music, such as the music from 90s, Classical,
90s
Adult
3. Press the Select button to choose the station you want to listen to, and the display will appear
Loading xxx
stations …
BBC Radio 1
BBS Radio 1Xtra
You can search your favorite station by entering the station name. Select <Search> from the
menu, and then input the name of the station by using the Tune /Select button. Tuning the button
to select the letter and push down to confirm.
Searching …
BBC Radio 1
BBS Radio 2
< END <> A BCDEF >
B/
8
How to enjoy your Media stream
(These are the letters that appear after the file name. e.g. MUSIC.mp3)
Select Media Player' on the menu:
My Stuff
Media Player
Playback music from SD card or USB drive
1. To playback music files from the SD card or USB drive, select <Local Media> from the menu,
then press Select to enter your local media player.
Windows Shares
Local Media
2. The unit begins scanning the files from the SD card or USB drive.
File Scanning…
Loading…
The music in the local media can be sorted by Album and by Artist:
By Album
By Artist
IMPORTANT: Please always insert the SD card or USB drive before you turn on the unit.
The file cannot be accessed if the SD card or USB drive are inserted under other operation
of the unit.
Go to <media player>, you can enjoy the music from your PC, SD card or USB drive.
The internet radio is able to playback the following formats:
FLIE EXTENSION SHOWN ON PC
.mp3
.wma
.Ra
.aac
.ogg
3. You can play the music by track. Select your desired music, then confirm by selecting
Add to Queue.
Or you can add the whole music folder into the playback queue:
[Add to Queue]
Music one
Streaming music from your PC by UPNP or Windows Shares:
UPnP Servers
Windows Shares
Playback music via 'Windows Shares':
In order to play the music files you have stored on your PC via the Media player you must ensure
the following:

9
-Your PC has the type of music files as listed in the table below
-The music files on your PC are not 'protected'
-The music files are stored in the correct location on your PC
- The music files on your PC are shared on the network
-You know the name of your PC
Set up your Windows PC to allow your radio to access your audio files via Windows Shares
1. Please ensure that your PC is available on the network for you Internet radio, then, using
windows Explorer, locate the folder where your audio files are stored.
2. Right Click on the folder.
5. Press the SELECT button, turn the knob until 'Scan for PCs' is displayed and press SELECT
6. The radio will now display 'Finding PCs '. Once the radio has finished, turn the knob to
highlight the correct PC.
7. Press the SELECT button. The radio will search for shared folder.
8. Turn the knob to highlight the correct shared folder and press SELECT.
9. The radio will display 'File Scan' as it scans through the media files in the shared folder. Text
on the bottom row of the display will change to indicate that the file scan is in progress. If you
have a large number of audio files this could take several minutes to complete.
10. Once the radio has finished scanning, it will display' By Album'. You can now browse through
the scanned media files, which will now be organized
'By Album',' By Artist'- if available.
NOTE: the first time the file scan is done a file called '.reciva_media_cache' is written to the
folder where the audio files are stored. This is in order to speed up subsequent file scans.
10
Listening the music by Artist
1. Turn the knob until ' By Artist' is displayed.
2. Press the SELECT button.
3. Turn the knob until the required artist is displayed.
4. Press the SELECT button.
Listening the music by Album
1 Turn the knob until the required album name is displayed.
2. Press the SELECT button.' [Add to Queue]' will be displayed.
3. Turn the knob until the required track is displayed.
4. Press the SELECT button. The track will begin playing.
Listening to a complete shared album
1. Turn the knob until 'By Artist' is displayed.
2. Press the SELECT button.
3. Turn the knob until the required artist is displayed.
4. Press the SELECT button.
5. Turn the knob until the required album name is displayed.
6. Press the SELECT button. '[Add to Queue]' will be displayed.
7. Press the SELECT button. The album will begin playing.
Queuing up tracks for playback later
1. Select the desired track.
2. 'Track Added To Queue' will be displayed.
Queuing up albums for playback later.
1. Select the desired album.
2. Press the SELECT Button.
3. Turn the knob until '[Add To Queue]' is displayed.
4. Press the SELECT button.' Tracks Added to Queue' will be displayed.
Listening to the music from Windows Shares
(1) By selecting the Windows Share feature, it will scan out the PCs available from the network.
Please follow the steps described above to enable the folders shared successfully from your PC.
Select the name of your PC, the press the SELECT button.
NOTE: If the PC does not have global file sharing turned on, or a third party firewall is
protecting the PC it will not be visible when you scan for it.
You may be asked to enter a username and password to access the PC you have selected.
This is the same user name and password you would enter for the PC.
The internet radio will now scan the PC you have selected and display a list of any folders which
NOTE: It will scan out the shared folders from your PC regardless of the type/content of the
folder. Select the folders which have the music file, and press the select button.
You can now view the content of the shared folder by Album or Artist. Use the TUNE/SELECT
button to browse through the list.
Controlling playback
1. Use the STOP button to stop playback.
2. Use the PLAY/PAUSE/STOP button to either pause a currently playing track or to restart a
currently paused track or to restart a stopped track.
3. Use the PLAY/PAUSE/STOP button to stop a currently playing when you press and hold the
button for 2 seconds.
4. Use the Left arrow button (<)on the remote control to start playback of the previous track in
the queue.
5. Use the Right arrow button (>) to start playback of the next track in the queue.
Browsing the list of tracks currently queued up for playback
1. Press the BROWSE button on the remote control. The currently playing track name will be
displayed.
2. Turn the Tune/Select knob to see which tracks are queued up for playback.
3. If you want to jump to a particular place in the queue the SELECT button when the required
track is displayed.

Playing tracks in random order
1. Navigate to top-level menu item 'Media Player' using the SELECT and BACK buttons.
2. Press the SELECT button.
3. Turn the knob until 'Playback Mode' is displayed.
4. Press the SELECT button.
5. Turn the knob until 'SHUFFLE' is displayed.
6. Press the SELECT button.
7. Turn the knob to select YES/NO to confirm that shuffle mode should be enabled.
Playing tracks in the queue repeatedly
1. Select the individual tracks as described previously.
2. Navigate to top-level menu item 'Media Player' using the SELECT and BACK buttons.
3. Press the SELECT button.
4. Turn the knob until 'Playback Mode' is displayed.
5. Press the SELECT button.
6. Turn the knob until 'Repeat' is displayed.
7. Press the SELECT button.
8. Turn the knob to select YES/NO to confirm that shuffle mode should be enabled.
Playback music from 'UPnP Severs'
You can enjoy the music from the UPnP device, follow the steps below:
Setup a Windows PC to allow the radio to access you audio files via a UPnP serves
1. If your PC is running Microsoft Windows XP, then you can use Windows Media Player 11
(WMP11) to act as your UPnP( Universal Plug and Play) media server 1.0. Windows Media
Player 11 may be downloaded from Microsoft's website and install by following the instructions
detailed in its installation wizard.
2. Once installed , Windows Media Player 11 will create a library from all the media files available
to it on your PC. To add new media files to the library,select' File > Add to Library> Advanced
Options', Click 'Add' and choose the files you wish to add and click' OK'.
3. You will now need to connect your Internet radio to Windows Media Player 11
and configure it to allow the radio to access your media library. In order to this , you will need to
a. Keep pressing BACK to get to the radio's top-level menu and then turn the rotary knob to select
b. Press SELECT and then turn the knob to highlight ' UPnP Serves'.
c. Press SELECT and the radio will scan for all available UPnP servers . Note, this may take a few
seconds for the radio to complete its scan and before the scan has completed , the radio will
display '[Empty]'. The radio will continue to display '[Empty]' if no UPnP servers and found.
d. After a successful scan. Select your UPnP server, by rotating the knob if there is more than
one UPnP server, and then press SELECT (note, your radio will display' Access Denied' at this
11
4. Your PC will now prompt you that a device has attempted to connect to yourUPnP server. In order
to allow the radio to have access to the media files, you will need to click the 'Library' tab from
Windows Media Player 11 and select the 'Media Sharing' item to open the 'Media Sharing'
12
5.From the 'Media Sharing' windows, the radio will be listed as an unknown device. Click on the
unknown device listed, then click the 'Allow' button and then click 'OK' Allowing the Radio to
Connect:
Selecting 'Media Sharing' for Windows Media Player11 :
6. Once the UPnP server is configure to share media files with the internet radio, you can play
the files by doing the following on the radio.
7. Select 'Media Player' from the main menu.
8. Press SELECT and then select 'UPnP Severs'.
9. Press SELECT and the radio will scan for all available UPnP servers.
Note: This may take a few seconds for the radio to complete its scan and before the scan
has completed, the radio will display '[Empty]' if no UPnP servers are found.

13
Media Player
FM
1. Push and hold the Tune/Select button, it will automatically scan up the FM frequency and play
the next one station, it can scan from 87.5MHz to 108MHz.
NOTE: You can only scan up 88.8MHz 89.8MHz.
2. If you want to fine tune the FM frequency, you can press the Select once to shift the Volume
control function to Frequency control as below
14
Frequency:
89.8MHz FM
Then you can turn the knob to adjust the frequency up or down to select the station. If you want to
adjust the volume, press the Tune/Select button again to switch from the Frequency mode to
NOTE: If you want to scan or auto scan the most clear and more stations, please place
your wire antenna (supplied in the package) in the position as far as it can be extend.
Set Time
09:06
Turn the knob to set the hours, then press Select to confirm the cursor will
jump to minute, so you can adjust the minute.
The Select to finish the time setting,and bring you to set the Date
Time and Date
Set
The display will show <Time Set> with the new time for 3 seconds, and then returns to the radio
station display.
Set Alarm
Sleep timer
2. You can select Disable all to disable all the alarm settings, or you can set to enable the 5 alarms.
3. Rotate the knob to 1 group of clock alarm setting, then press the SELECT button.
Set Alarm
08:20
Select FM on the main menu. Press Select to confirm and you can listen to your desired FM
Listening to FM stations
How to set the Time/Date
Under <settings> menu, select <Time/Date>, you can then set the time:
How to set the Alarm
1. On the main menu, select <Alarm/Clock> to set the Alarm clock:
Set Date
19.MAY.09
Turn the knob to set the day ,press "select" to confirm the coursor will jump to month set,and year ,
you ocnfirm all the sets are OK,press "select" to complete the Time/Date seting.
10. After a successful scan, select your UPnP server, by rotating the knob if there is more than on
UPnP server, and then press SELECT.
11. The radio will now list the media categories available from the UPnP server,e.g. 'Music',
'Playlists' etc. Turn the knob to select which category you wish to browse, press SELECT and
turnthe knob to highlight a sub category and press SELECT again. For example, you could
select'Music' and then 'Album'.
12. Select the music files that you wish to play.
13. The radio will display '[Add to Queue]', press SELECT and the radio will add the tracks to its
queue and begin playing them automatically.
5. There are 3 options of the wake to alarm for you to choose from: Buzzer, Preset Internet radio
station or last listened FM station.
Sleep Timeout
00:45
Select Sleep Timer from the Alarm clock menu.
Rotate the Knob to change the sleep timer and then press SELECT to begin the sleep timer;
The range of the sleep timer is available from 00:15 to 03:15 < 15 minutes for each step >.
Select OFF to turn off the sleep timer.
4. Adjust your desired time of Alarm.
NOTE: According to different time necessary, you can select your favorite setting for the alarm
setting;
Once/Every day /Weekly /Weekdays / Weekends options are available;
How to set the Sleep Timer
When a radio station (FM radio or internet radio) is being played, to store the station as a preset,
press Pre.Play once and select the Preset 1. Then press and hold the Select key to store the
playing station to preset 1
How to store and listen the Preset station

16
network, and the Internet Radio display will show Bad ESSID or key. To overcome this problem you
will need to add the Internet Radio's MAC address to the list of allowed equipment in your access
point. The Internet Radio's MAC address can be found using the menu item
Configure->Network Config ->View Config -> MAC address. You will need to refer
to the guide for you Access Point in order to enter the Internet Radio as an allowed piece of
equipment.
If you have an encrypted network, check that you have entered the correct key or passphrase into
the radio. Remember that text-format keys are case sensitive.
If your wireless network name(ESSID) is 'Hidden'(a setting on the wireless access point), then you
can either turn on the name, or you can manually enter the name
into the internet radio and media player, Select Configure, Select network, Enter ESSID. Confirm if
the Network is encrypted, e.g. requires a WEP or WPA key, then enter the network name.
Troubleshooting
15
If you need to recall the preset 1, press Preset to recall the stored station list then and select the
one you want to listen then press Select to confirm
Storing a radio station in a preset by the front remote control:
To store a preset, you must first be listening to the station that you would like to save, then press
STORE button. Then press the preset number you would like to save and allow 2 seconds to store
the station into the preset. The LCD will then show <Assigned to preset #>.
Once you have saved a station to one of the presets, you can recall it by pressing RECALL button.
Then press the preset number you would like to recall and the radio will connect to your station
NOTE: a maximum of 10 presets are possible using the preset buttons on the tuner
Requesting a station that is currently unavailable on-line
If you want to listen to a particular radio station which is currently not available on line, you can
visit the Reciva website at http://grace.reciva.com OR http://www.reciva.com/ and put in a request
to add the station to the list.
Switch the radio OFF and ON
To switch off, press POWER once and the clock will be displayed. To switch on, press STANDBY
once and the radio will take up to 60 seconds to start playing again, as it finds the radio station
you were last connected to and loads it into the buffer.
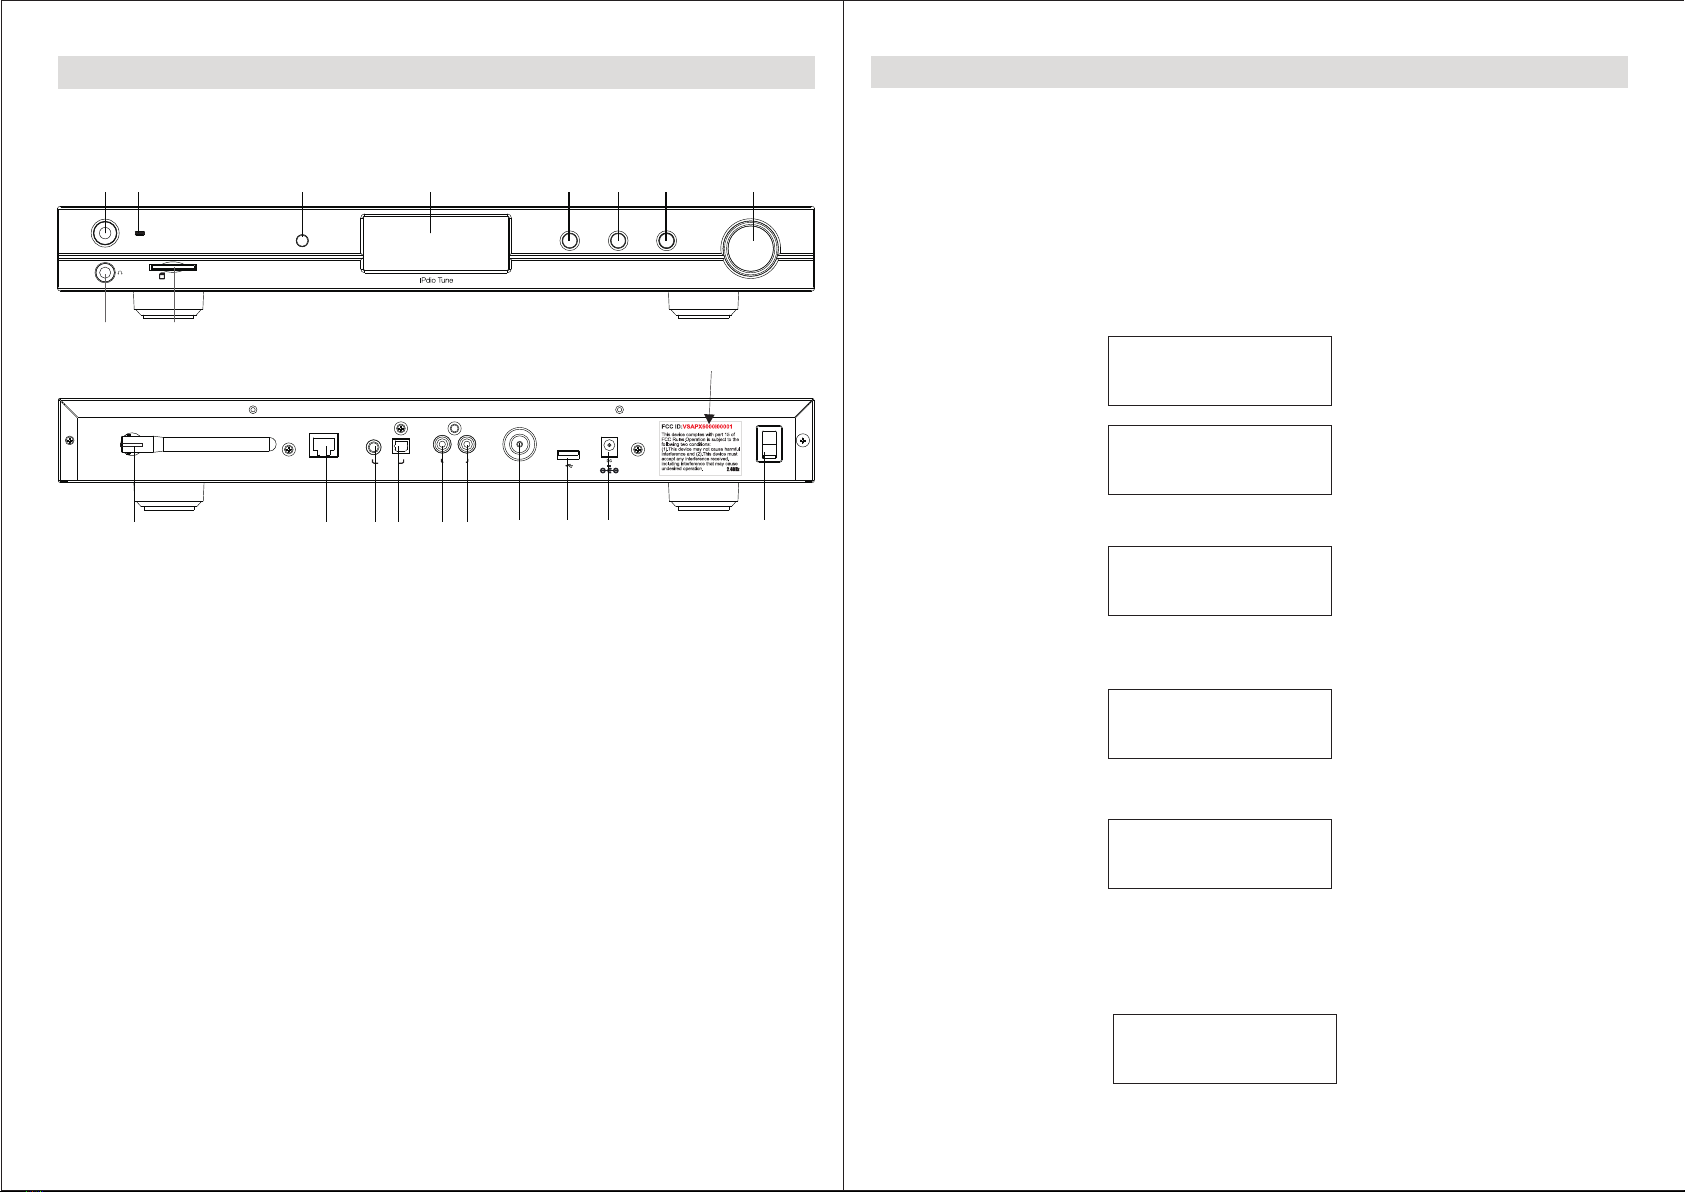
The radio unit has the following audio output jacks available:
-6.35mm stereo earphone output
-Analog RCA line out to connect to the external Hi/Fi system
1.If you have trouble connecting the radio to your wireless network, these steps may help
Confirm that a Wi-Fi or Ethernet Wired connected PC can access the internet (i.e. can browse the
web) using the same network.
Check that a DHCP server is available, or that you have configured a static IP address on the radio.
Check that you firewall is not blocking any outgoing ports. As a minimum the radio needs access to
UDP and TCP ports 80,554,1755,5000,and 7070.
Some access points may be set so that only equipment with registered MACaddresses can connect
to them. This is one possible cause of the Internet Radio being unable to connect to the Wi-Fi
2.If your radio can connect to the network successfully, but is unable to play particular
stations, it may be due to one of the following reasons:
-Optical Output: Toslink digital audio output and coaxial digital audio output to connect to the
NOTE: The audio output on FM will only pass through the Analog RCA line out
The station is not broadcasting at this time of the day (remember it may be located in a different time
zone).
The station has too many people trying to attach to the radio station server and the server capacity
is not large enough.
The station has reached the maximum allowed number of simultaneous listeners. The station is not
broadcasting anymore.
The link on the radio is out of date. This is updated automatically every day, so the next time you
turn on the link will be recognized. The internet connection between the server (often located in a
different country)and you is slow.
Some internet service providers may fail to stream in certain geographical areas. Try using a PC
to play back the stream via the broadcaster's web sit. If you can play back the station with a PC,
use the form at http://www.reciva.com/station/add_station.asp to notify us so that we can change
the station data that is used by the radio.
If you have a laptop, try connecting it if your Internet Radio cannot find the station.
3.When you scan for PCS none can be found, or the PC you are looking for does not appear
in the list:
Global File sharing is not enabled on the PC.
The PC you are looking for is in another part of the network separated by a router.(This may happen
if you have two access points on the same network, and the Media source is on one Access Point
and the internet Radio is on another).
The PC with the Media content may not have the same workgroup as the server managing the
network. The easiest solution is to change the PC workgroup name to the same as that being
supported by the server.
You have not connected to the wireless Access point. On the internet radio , select 'Configure',
'Network Configure', 'Select Network', 'Scan' and then select your Wireless network. (You may
need to enter a security key to access the network wirelessly).
You have not enabled simple file sharing on Windows 2000. In Windows 200 the simple file sharing
can be turned on by going to the Control Pane, selecting Folder options, view Tab. The safest way
for users to enable the service is to run the 'Set up a home or small office network' wizard from
Control Panel, Network Connections.
You have a firewall set on your PC which is stopping you accessing shared files. Windows 2K does
notcome with a real firewall so unless you have installed one this should not be a problem.
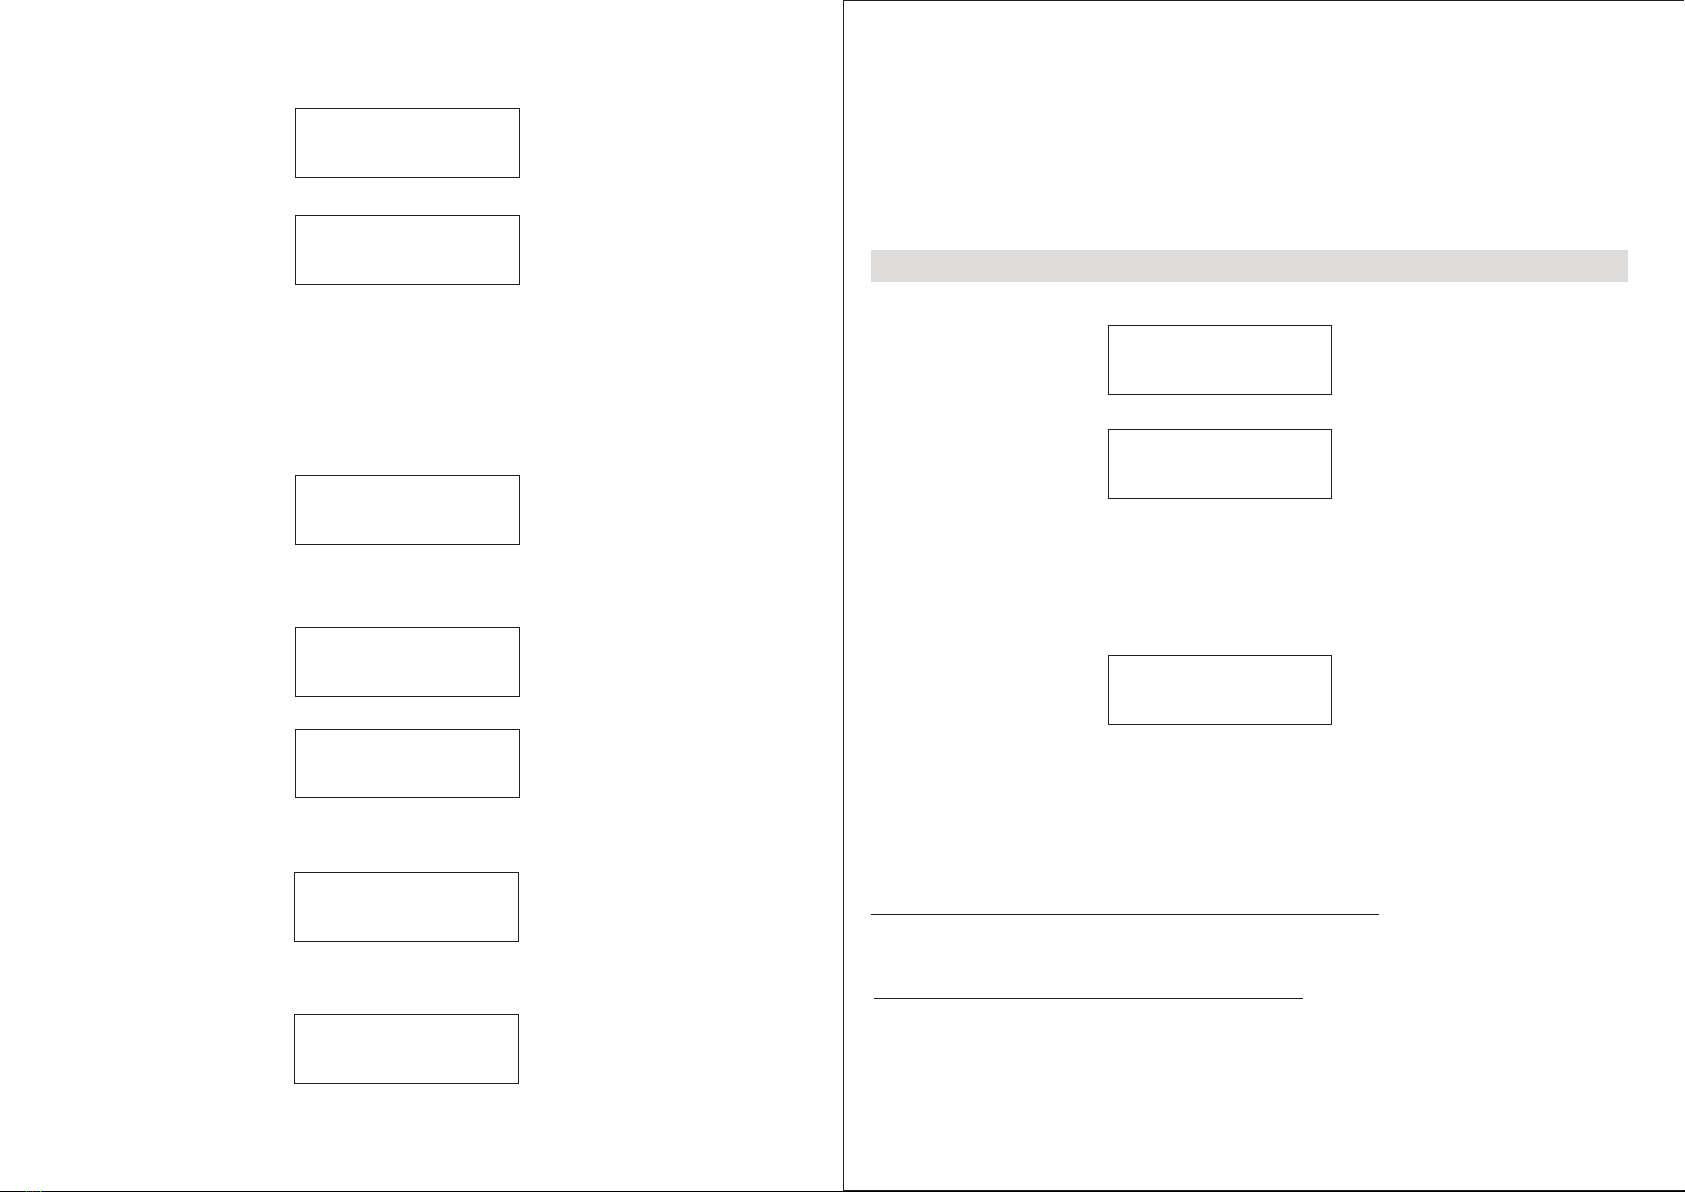
Assigned to
Preset 1
Dance or Rock music.
similar to the following:
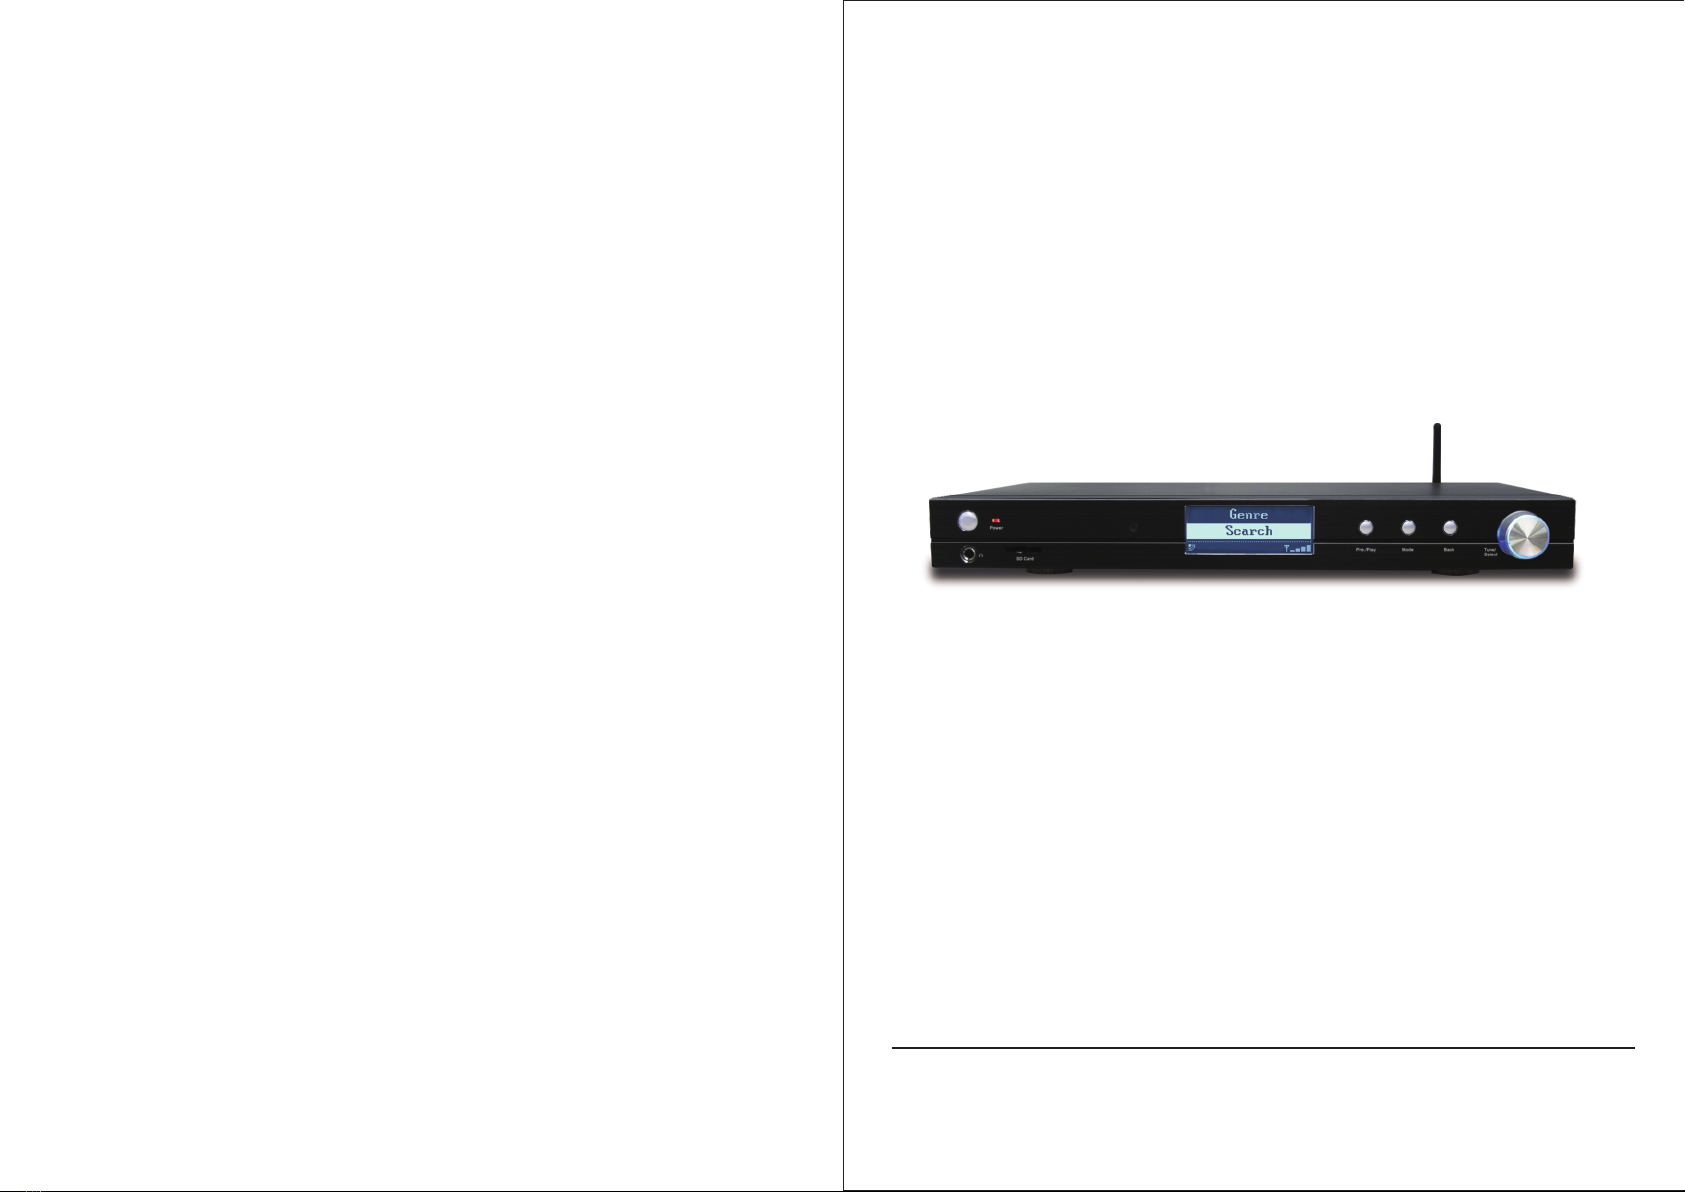
4. <Search> function
MUSIC CONTENT
FLIE TYPE
Mp3
Windows Media
Real
Itunes
Ogg Vorbis
3. Select 'Properties'.
4. Click on 'Sharing'.
again.
(2) Finding folders
have got 'sharing' enabled.
(3) Selecting music
do the following:
'Media Player'.
stage)
window.
Volume control mode.
stations.
that you recalled.
Audio output
to resolve the problem:
external Hi/Fi system

You have a third party firewall in your network, which is preventing file sharing.
If you have a third party firewall (Like Norton, or Zone Alarm) that will have its own control panel and
you will need to consult the manual for your firewall.
If your PC is connected to a managed network, with a server sometimes the PC being searched for
needs to be server Workgroup.
4.You can see the PC you want to play music from, but cannot find any folders on the PC:
The folder which has your music in it is not shared. You will need to locate the file you want to share,
right click on the folder, and select 'Properties', Then tick share this file.
The folder is not in an accessible place, i.e. it is in, My music, My documents or on the Desktop. You
will need to mode the folder to the root directory.
You have entered the wrong user name or password for the PC account you are trying to access.
Check and re-enter the user name and password, note the password is case sensitive.
17
Playlists:
Some media ripping applications allow 'Playlists' to be created. The Internet Radio is able to detect
and stream these playlists, but they must be stored in the folder with the rest of the Media content
and they must have the file extension.m3u. Windows Media player can create suitable playlist, just
select 'create new playlist', drag and drop the tracks you want into the playlist, then use 'Save as' to
ensure the file type is .m3u. (Existing play lists can be opened and re-saved in this format) When the
Internet Radio detects you have playlists, it will enable a new menu option allowing the playlist to be
selected and added to the queue.
18
You have a firewall running which is preventing the internet radio from seeing the shared folder.
As a quick check, you can disable firewalls like Norton to see if this overcomes the problem, if this
resolves the issue then you can either leave the firewall off, or allow file sharing through the
fire wall.
NOTE: If you firewall is required to provide security for your system, it should not be left off.
NOTE: Although you can share a CD drive, you cannot stream music directly from the drive.
5.Whenever I enter my media folder , the internet radio rescans the content of the folder:
Although the folder with your music in it is shared , it is 'write protected', so the
Internet Radio cannot save a list of the folder's content back onto the PC, as it needs to rescan
each time.Tick the box that allows the Folder to be modified across the network.
6.Although I can see my music files in the folder, I cannot play them and the Internet Radio says
they are 'Protected':
When you copied the music files to the hard drive you had 'Personal Rights management' turned
on, this protects the files from being played by a third party
device like the Internet Radio, you will need to copy the music files again, but with the protection
turned off.You are trying to play I-Tune files which have been purchased from the I-Tunes on
line store, these are protected and can only be played on an I-Pod. Locally created or 'ripped' files
for I-Pods can be played as they do not carry the extra layer of Media Protection.
7.I can access the PC with my Media, but when I change to the Use Account, I cannot see the
folder , although it is shared when I check my PC:
The Alternative account on the machine may be Private. If when the account was created, the
'Make this account Private' option was selected, then the contents of this account cannot be
seen over the network. You will need to move the music to an accessible account.
8.I can't share a folder , as the option is not highlighted:
The share folder option will not be available until you have turned simple file sharing on. Run the
wizard.
Scan Error:
When the internet radio is scanning the content of the folders on a PC, it is possible that a scan
error may occur if the windows file sharing application times out. This is most likely to occur if both
the PC with the media content and the Internet Radio are connected wirelessly.
Try re-connecting the PC with the media content into the network via cable. This will dramatically
increase the speed at which the Internet Radio is able to scan the content of the Media PC.
If you re-connect to another PC of folder, which does not have any Playlists in the .m3u. format, the
playlist option will not be presented in the menu.
9.If the Internet Radio keeps re-buffering radio station:
The Internet Radio is streaming the data from the radio station via your broadband connection,
if there is a high error rate on your broadband connection, or the connection is intermittent, then it
will cause the Internet Radio to pause until the connection is re-established and it has received
enough data to start playing again.
If your Internet Radio keeps stopping, please check the DSL modem to ensure that the Broadband
line is not suffering a high error rate or disconnections. If you are experiencing these problems, you
will need to contact your broadband supplier.
10. What is Buffering?
When playing a stream, the Internet Radio/Media player, downloads a small amount of the stream
before it starts playing. This is used to fill in any gaps in the stream that may occur if the internet or
the wireless network is busy.
The Internet Radio streams music data from the PC while you are listening. If a stream gets blocked
or experiences Internet congestion while transferring it may stop/interfere with the quality of play. If
this happens, check your internet connection speed- it must be faster than the speed of the streams.
Warning
Any changes or modifications not expressly approved by the party responsible for compliancecould
void the user's authority to operate the equipment
The apparatus shall not be exposed to dripping or splashing and that no objects filled with liquids,
such as vases.
Excessive sound pressure from earphones and headphones can cause hearing loss.
An appliance coupler is used as the disconnect device and it shall remain readily operable. To be
completely disconnected the power input, the appliance shall be disconnected from the mains
completely.
Batteries shall not be exposed to excessive heat such as sunshine, fire or the like; danger of
explosion if battery is incorrectly replaced, Replaced only with the same or equivalent type.
The plug portion of power supply is used as the disconnect device and it shall remain readily
operable. The power supply shall be disconnected completely, if any.
Power Adaptor
Vendor: DONGGUAN GAOBU YINGCHENG ELECTRONIC FACTORY
Model No: DYS18-050120W-2
Input : 100-240V AC 50/60Hz Output: 5.0V DC 1200mA

19
Configuring 'My Stuff'
Registering an account on Reciva's website
1. Open the website, http://www.reciva.com, from your internet browser.
2. Click on the 'My Account' link and follw the on-screen instructions to register an account.
Please note, during the registration process, a validation code will be sent to you via email.
Please enter this code when prompted to do so.
3. After logging into your account, you will be able to edit your information for 'My Stations','My
streams', 'My Detail' and My Radios from the 'My Account' section.
4. You can now add your Internet Radio to your account on the website by accessing the 'My
radios' link. From the 'My Radios' section, you will need to enter in your radio's eight-digit serial
number, which can be found from the
'Configure> Version' menu on the radio, and you will also need to enter in your radio's
registration code-which can be found from the 'Configure> Register' menu on the radio.
Configuring 'My stations'
1. It's possible to search for radio stations that are available in Reciva's stations' database from
Reciva's Website. When ever stations are searched for on the website, then will be displayed in
a list of search results together with a link to 'Add to my stations'.
2. Clicking on the 'Add to my stations' link, will add the station to your account's 'My stations' list.
This list can be edited by clicking on 'My stations' under the 'My account' section on the website.
3. Once you have internet station available in you 'My stations' list, you may play these stations
from your Internet Radio. These stations will be available on your radio from the menu item:
' Stations>My Stuff> My stations'. Please note , the stations will only be available to your radio
once your radio has downloaded a new stations' list. To cause the radio to download a new
stations' list immediately, please remove and reconnect the power to your radio.
Configuring 'My Streams'
1. once logged into your Reciva website account, you can add your own internet radio streams to
the 'My streams' section, which is listed under the ' My account' section
2. Clicking on' My streams' sill prompt you to enter the station's name and its media stream URL.
The media stream URL should be a link to a website's actual audio stream. If you have any doubt
about locating the media stream URL from a webpage, then please refer to the FAQs section on
Reciva's website, http://www.reciva.com
3. Once you have Internet radio streams available in you 'My streams' list, you may play these
stations from your internet radio. These station will be available on your radio from the menu item:
' Stations >My stuff> My streams'. Please note, the streams will only be available to your radio
once your radio has downloaded a new station' list. To cause the radio to download a new
stations' list immediately, please remove and reconnect the power to your radio.
Internet Service
20
Remoter controller
1. Power: <Press to switch the internet radio ON/OFF>
2. Mute: < Press to mute the voice of Earphone only>
3. Reply: <Reserved for future services>
4. 0---9: <Numeric buttons for Store and Recall functions>
5. Store: <Use to store 99 radio stations>
6. Recall: <Use to Play up the pre-setting stations>
7. --/- :<Select the numeric bits>
8. Select: <Press to select a displayed option>. Under FM mode, long press this button to
Start auto scanning mode of the FM stations
9. Back: <Press to go back to the previous display>
10. + VOL -: <Use to adjust the volume>
11. UP\DOWN:Use to manual scan down for FM stations, and use to change the option
show on the display>
12. Browse: <Press to view the name of the track currently playing and then turn the TUNE to
see the list of tracks waiting in the play queue>
13. Play/Pause: <Press to play/pause playback>
14. Stop: <Press to stop playback, with a track name displayed, press and hold to delete the
track>
15. <Press to start playback at the previous track>
16. <Press to start playback at the next track>
17. MODE: <Press to switch Flat/Bass/Classical/Jazz/Pop/Rock equalizations. The default for
this EQ is Flat style as default.>
to

(1) 15.105 statement:
This equipment has been tested and found to comply with the limits for a Class B digital device, pursuant to
Part 15 of the FCC Rules. These limits are designed to provide reasonable protection against harmful
interference in a residential installation. This equipment generates, uses and can radiate radio frequency
energy and, if not installed and used in accordance with the instructions, may cause harmful interference
to radio communications. However, there is no guarantee that interference will not occur in a particular
installation.
If this equipment does cause harmful interference to radio or television reception, which can be determined by
turning the equipment off and on, the user is encouraged to try to correct the interference by one or more of
the following measures:
-- Reorient or relocate the receiving antenna.
-- Increase the separation between the equipment and receiver.
-- Connect the equipment into an outlet on a circuit different
from that to which the receiver is connected.
-- Consult the dealer or an experienced radio/TV technician for
help.
The antennas used for this transmitter as shown in this filing must be installed to provide a separation distance
of at least 20 cm from all persons and must not be co-located or operating in conjunction with any other antenna
or transmitter.
21
Warranty and License Information
This product contains software licensed under version 2 of the GNU Public License and version 2.1 of the GNU
Lesser Public License. The source code for this software is available from http://iradio.gracedigitalaudio.com/gpl
This product includes technology owned by Microsoft Corporation and under a license from Microsoft Licensing
GP. Use or distribution of such technology outside of this product is prohibited without a license from Microsoft
Corporation and/or Microsoft Licensing, GP as applicable.
Your Internet Radio is guaranteed against original defects in materials, manufacture and workmanship for one
year from the date of purchase.
Under this warranty, repair of any defect or, at the company's discretion, replacement of the faulty component(s)
without charge for parts or labor, is agreed. This warranty does not imply any acceptance by Grace Digital,
retailers or its agents for consequential loss or damage and specifically excludes fair wear and tear, accident,
misuse of unauthorized modification.
This warranty is applicable in the United States only and does not in any way limit the customer's legal rights.
Claims and enquiries under the warranty for Grace products purchased outside the USA should be addressed to
the local importers or distributors. If you have reason to claim under the warranty please contact your dealer in
the first instance. Please retain all original packaging materials for possible future use. We suggest that you
complete details of purchase now and keep this information in a safe place for future reference. Grace Digital
provides their Canadian, Central & South American dealers, distributors, and retailers with a 1 year warranty.
Your INTERNET RADIO RECIEVER (MXA-10C) is supported by a limited manufacturer's warranty for product
defects in material or workmanship that may be evident under normal use for 1 year from date of purchase from an
authorized franchisee or dealer.
?The warranty stated herein is the only warranty applicable to this product. All other warranties, expressed or
implied are hereby disclaimed and are limited by the written limited warranties contained herein. Except as
provided herein, the manufacturer shall have no liability or responsibility to a customer or any other person or
entity with respect to any liability, loss or damage caused directly or indirectly by use or performance of the
product or arising out of any breach of this warranty, including, but not limited to, any damages resulting in
inconvenience, loss of time, data, property, or profit or any indirect, special, incidental, or consequential damages,
even if the manufacturer has been advised of the possibility of such damages.
?In the event of a product defect during the warranty period, return of the product and your sales receipt as proof
of purchase date for your GDI-IRDT200 unit is required and shall, at the discretions of the manufacturer, result
in: (a) correction of the defect by repair without charge for parts and labor; (b) replacement with the same or
similar design; or (c) refund for the purchase price if purchased directly and returned within 30 days of purchase.
All replaced parts and products, and products, on which a refund may be made, become the property of the
manufacturer. New and reconditioned parts and products should be warranted for the remainder of the original
warranty period.
The warranty does not cover:
(a) damage or failure caused by or attributed to acts of God, abuse, accident, misuse, improper installation or
improper maintenance, alteration, lightning or excessive voltage or current;
(b) any repairs other than those provided by a GDI-IRDT200 authorized service facility;
(c) consumables such as fuses or batteries;
(d) cosmetic damage;
(e) transportation, shipping or insurance costs;
(f) costs of product removal, installation, set-up, service adjustment or re-installation.
?Customers are responsible for any shipping costs related to product return, repair and/or refund.
?Warranty terms may be revised without notification at the discretion of the manufacturer.
Table of contents
Popular Tuner manuals by other brands

Luxman
Luxman R-1070 owner's manual

Sony
Sony XDRF1HD - HD Radio Tuner operating instructions

MFJ
MFJ -969 DELUXE Versa Tuner II instruction manual

Sirius Satellite Radio
Sirius Satellite Radio SIR-PNR2 installation guide

Pioneer
Pioneer TX-130L Series Service manual

Roland
Roland BOSS Chromatic Tuner TU-3 Service notes