King-Dome 9704 User manual

11200 Hampshire Avenue South, Bloomington, MN 55438-2453
Phone: (800) 982-9920 Fax: (952) 922-8424
www.kingcontrols.com
1305-UCW REV I: 9704/9754 SERIES TROUBLESHOOTING GUIDE
Troubleshooting Guide
9704 Series
9754 Series
Satellite Solutions for Mobile Markets
®


TABLE OF CONTENTS
Section Contents Page
1. INTRODUCTION . . . . . . . . . . . . . . . . . . . . . . . . . . . . . . . . . . . . . . . . . .2
2. WARRANTY INFORMATION . . . . . . . . . . . . . . . . . . . . . . . . . . . . . . . .3
3. OPERATING INSTRUCTIONS . . . . . . . . . . . . . . . . . . . . . . . . . . . . .4-7
Satellite Configuration . . . . . . . . . . . . . . . . . . . . . . . . . . . . . . . . .4-5
Stationary Operation . . . . . . . . . . . . . . . . . . . . . . . . . . . . . . . . . . .6
In-Motion Operation . . . . . . . . . . . . . . . . . . . . . . . . . . . . . . . . . . . .7
4. AUTOMATIC SATELLITE SWITCHING: DIRECTV . . . . . . . . . . . . . . .8
5. AUTOMATIC SATELLITE SWITCHING: DISH NETWORK . . . . . .10-13
Dish 500 . . . . . . . . . . . . . . . . . . . . . . . . . . . . . . . . . . . . . . . . .10-11
Dish 1000 . . . . . . . . . . . . . . . . . . . . . . . . . . . . . . . . . . . . . . . .12-13
6. TROUBLESHOOTING . . . . . . . . . . . . . . . . . . . . . . . . . . . . . . . . . .14-25
Block Times . . . . . . . . . . . . . . . . . . . . . . . . . . . . . . . . . . . . . . . . .14
Keypad Functions . . . . . . . . . . . . . . . . . . . . . . . . . . . . . . . . . . . .15
Keypad Codes . . . . . . . . . . . . . . . . . . . . . . . . . . . . . . . . . . . . . . .16
Direct to Circuit Board Cable . . . . . . . . . . . . . . . . . . . . . . . . . . . .17
Wiring Diagram for Flowchart . . . . . . . . . . . . . . . . . . . . . . . . . . .18
Flow chart . . . . . . . . . . . . . . . . . . . . . . . . . . . . . . . . . . . . . . . .19-25
7. REFERENCE . . . . . . . . . . . . . . . . . . . . . . . . . . . . . . . . . . . . . . . . .26-36
Wiring Schematics . . . . . . . . . . . . . . . . . . . . . . . . . . . . . . . . .26-27
Return Shipping Instructions . . . . . . . . . . . . . . . . . . . . . . . . . .28-29
Zone Maps . . . . . . . . . . . . . . . . . . . . . . . . . . . . . . . . . . . . . . .30-31
2 Part Removable Dome Feet . . . . . . . . . . . . . . . . . . . . . . . . . . .32
Definition of Terms . . . . . . . . . . . . . . . . . . . . . . . . . . . . . . . . . . . .33
Warranty Consideration Form . . . . . . . . . . . . . . . . . . . . . . . . . . .36
DIRECTV®is a registered trademark of DIRECTV, Inc.
Dish NetworkTM is an official trademark of Echostar Communications Corporation.
Bell ExpressVu is an official trademark of Bell Canada.
DVB®is a trademark of the DVB Digital Video Broadcast Project (1991-1996) Page 1
Note: Procedures not applicable to all units are noted in the text.
For more detailed installation information, please refer to the 9704 & 9704-LP, or the 9754 & 9754-LP
Installation and Operating Instruction Manuals available on our website at www.kingcontrols.com.

Page 2
SECTION 1 INTRODUCTION
The King Controls Service Department is dedicated
to providing its dealers and customers
with the highest possible level of satisfaction and service.
IMPORTANT!
For warranty reimbursement, you must call King Controls for a Service Order Number
BEFORE performing any work: (800) 982-9920.
(Please have serial number and model of unit available when calling.)
The satellite TV market is expanding and changing. The King Controls Service Department stays
up to date with the latest information to assist you in keeping troubleshooting and repair time to a
minimum.
When calling our service department, a King-Dome technician will issue a Customer ID Number
(or Case Number) and then clearly define the proper course of action to follow. If any work is to
be performed or parts replaced, a Service Order Number will also be issued. Additionally, the
King-Dome technician will create a call log to aid in properly documenting the warranty claim.

Page 3
SECTION 2 WARRANTY INFORMATION
Every King-Dome Satellite System is covered by a TWO YEAR PARTS AND ONE YEAR LABOR limited warranty
from the date of original purchase. (Upgrade kits are one year parts only.)
This warranty does not cover installation and external wiring, or refurbished units. This warranty also does not apply
where:
• The product has been abused, misused, improperly installed or improperly maintained.
• Repairs have been made or attempted by others that are not certified by King Controls to do such repairs.
• Repairs are required because of normal wear and tear.
• Alterations have been made to the product.
PROCESSING A WARRANTY CLAIM
1) Technician must first determine if the unit is under warranty by verifying original owner and date of original
purchase. Dealer must provide one of the following when submitting a warranty claim:
• copy of original purchase receipt, or
• if unit was installed by an OEM, verification of in-service date
2) Technician must call King Controls to get a Service Order Number (800) 982-9920.
TECHNICIAN MUST NOT PROCEED WITHOUT A SERVICE ORDER NUMBER.
• A King-Dome technician will issue a Service Order Number and advise technician on how to proceed.
3) After repairs are completed, the following must be sent to King Controls:
• Defective Part (Warranty Labor Claim will not be processed until part is returned.)
• Warranty Consideration Form
• Copy of Work Order
• Proof of Purchase
KEY POINTS
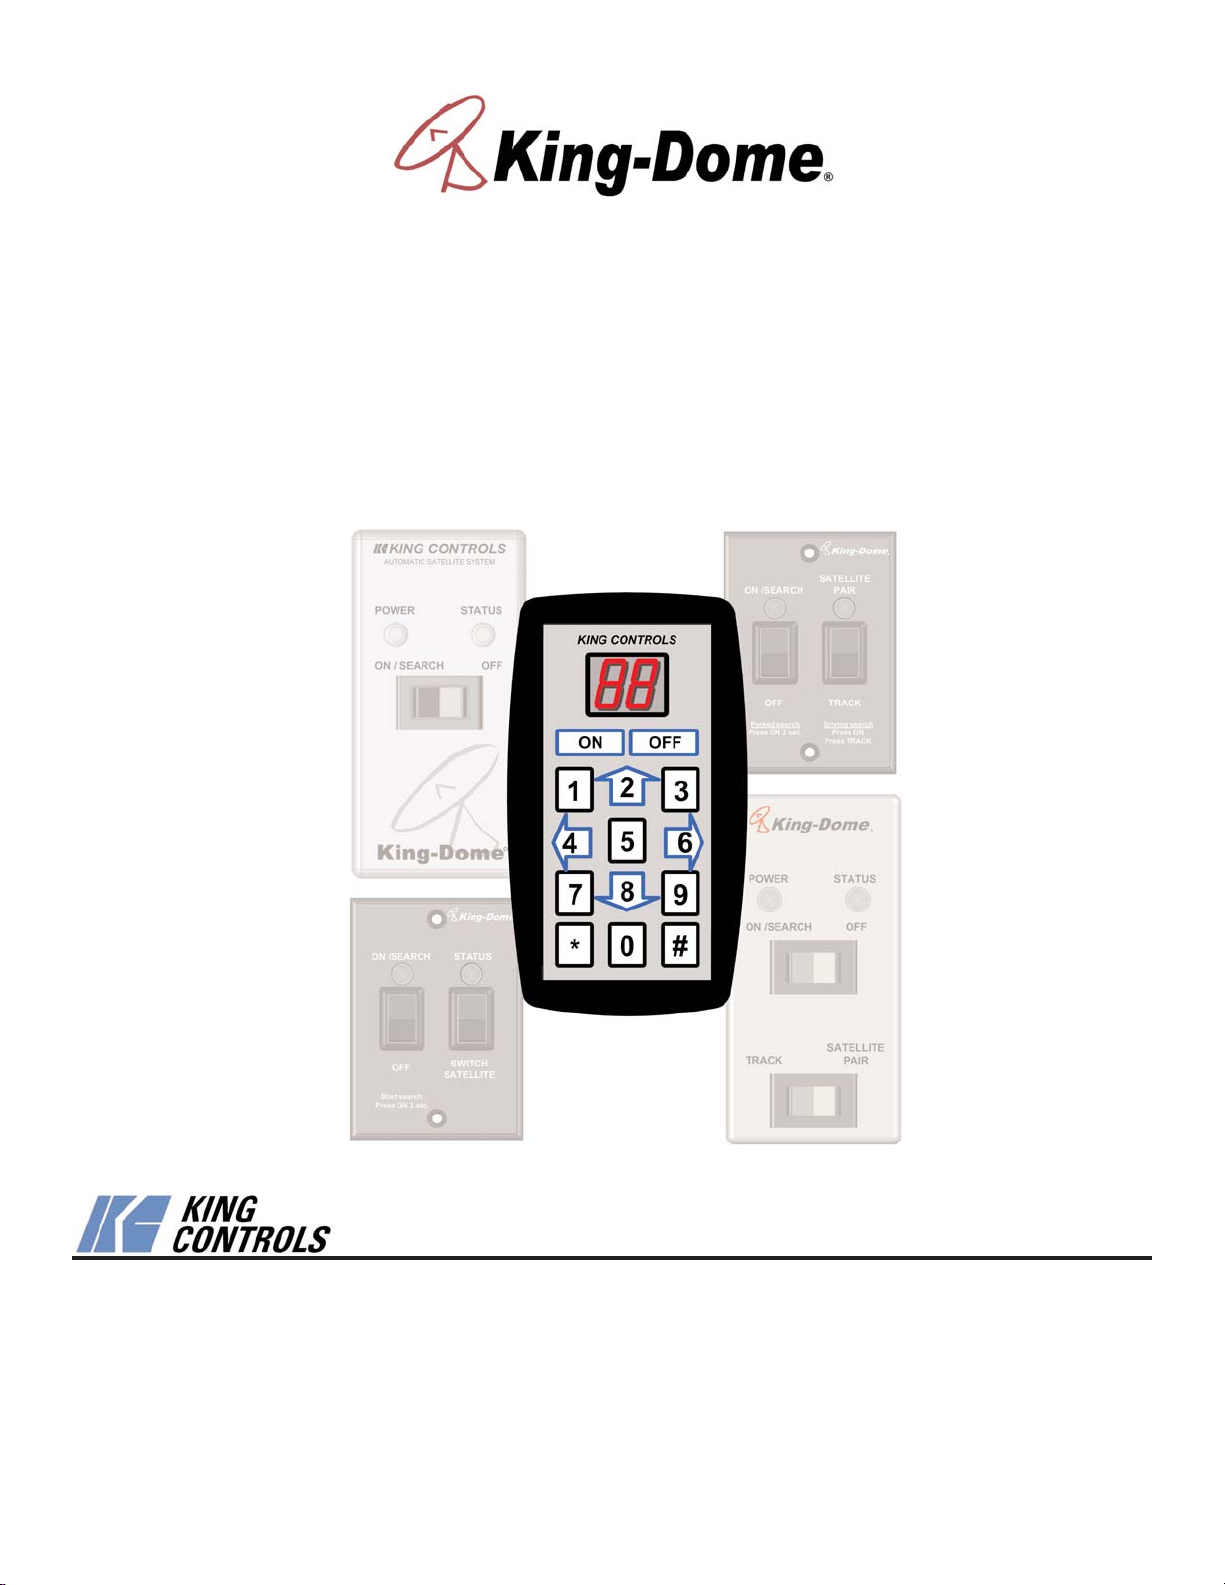
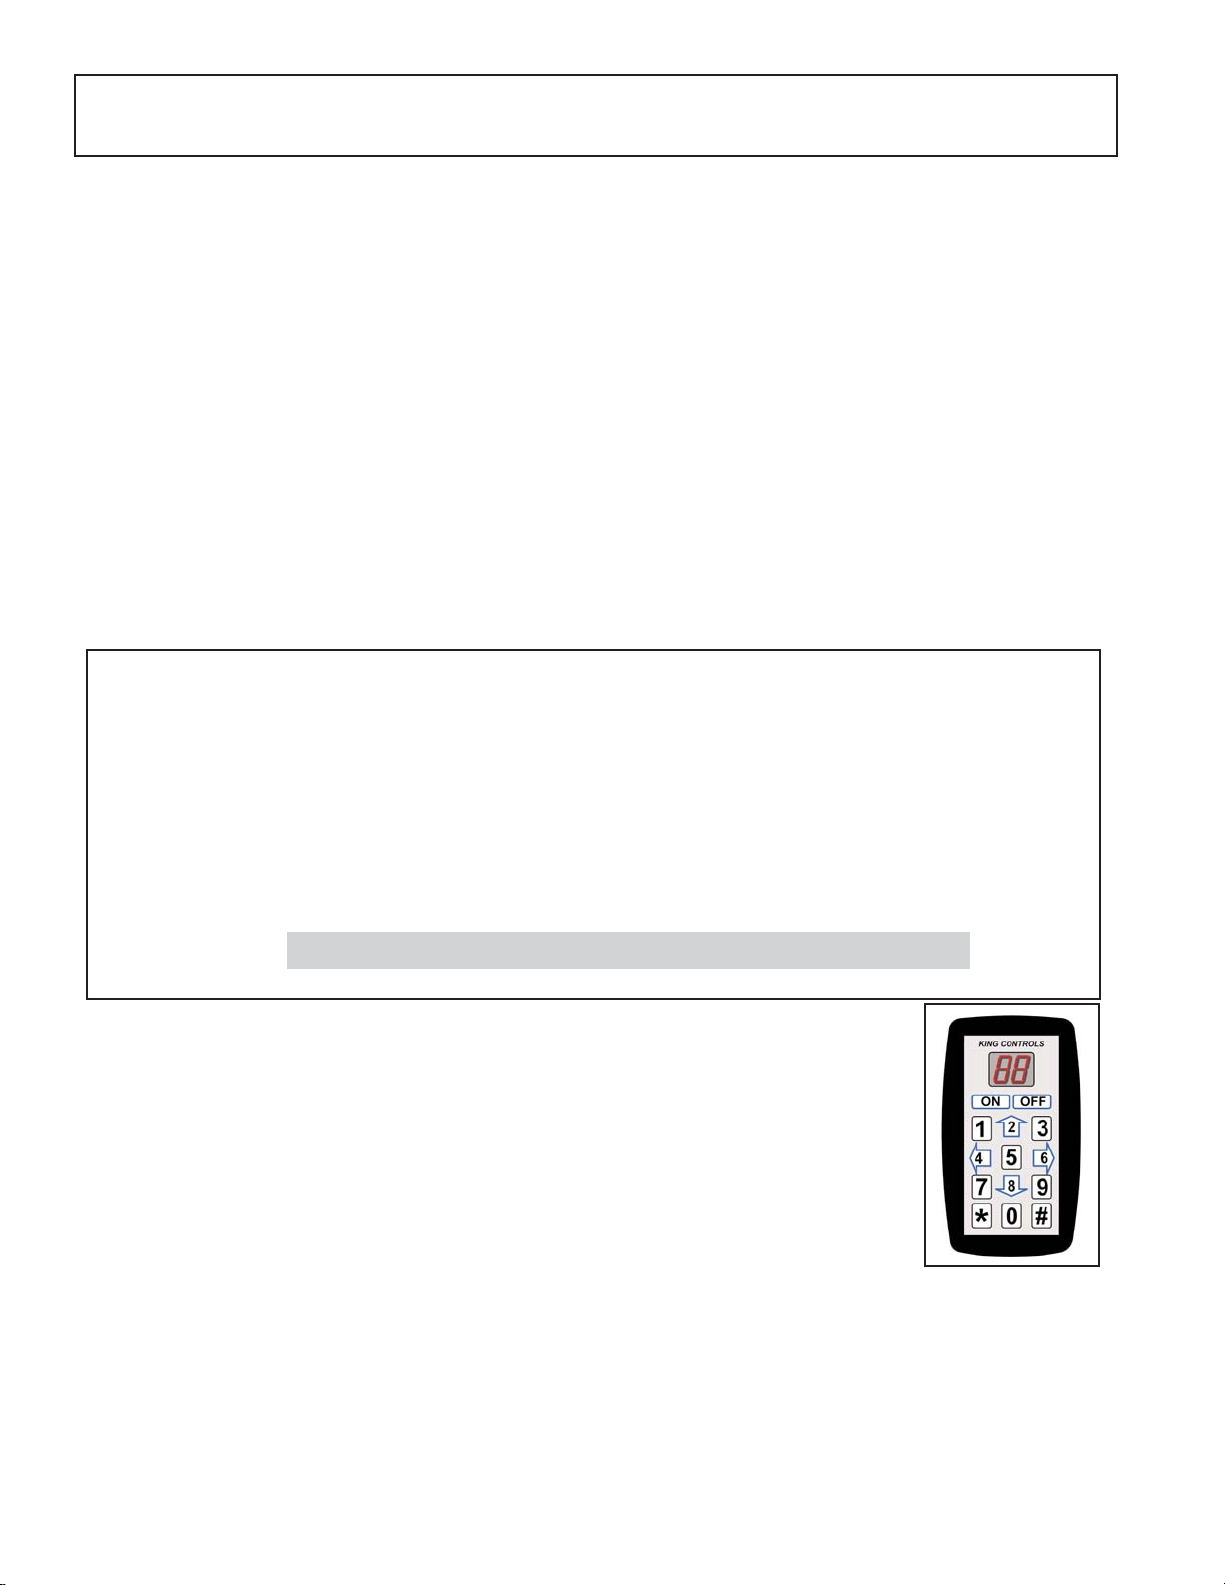
1) Technician must have the King-Dome Diagnostic Keypad #1844.
2) For units in service longer than one year, the customer is responsible for labor time.
3) Installation parts (coax, power and data cables, etc.) are not covered.
4) Replacement parts (including domes) are sent directly from King Controls. DO NOT USE NEW PRODUCT
FOR WARRANTY REPLACEMENT WITHOUT WRITTEN AUTHORIZATION FROM KING CONTROLS.
5) Technician must call King Controls before performing any work for which warranty labor reimbursement will
be submitted to King Controls. A King-Dome technician will issue a Service Order Number and specify the
allotted time for the repair. If repairs will take longer than the allotted time, and the servicing dealer wishes
to receive proper reimbursement, the technician must receive prior authorization to exceed the allotted time.
6) Warranty claims must include: proof of purchase, Warranty Consideration Form with Service Order Number,
and copy of work order with labor time which matches that allotted by King Controls.
7) King Controls shall reimburse the servicing dealer for warranty work at their published labor rates.
8) Enclose paperwork with defective part. Clearly mark the Service Order Number on outside of box.
Note: Only King Controls certified dealers are authorized to perform warranty evaluations and repairs.

Page 4
SECTION 3 OPERATION
1. Unplug the controller and plug in the Diagnostic Keypad.
2. Press ON.
3. Press * 46 # to display the current satellite switching mode.
4. To change the satellite switching mode, press * 96 #
* 66 #
* 88 #
5. Press the UP and DOWN arrows (2 and 8 keys) to choose the desired switching mode.
6. Press * 47 # to lock in setting.
King-Dome models 9704/9704-LP and 9754/9754-LP can be configured to lock on a specific
satellite, or auto switch between a pre-set pair of satellites.
The system is factory pre-set for basic DIRECTV service broadcast from the 101° W satellite.
To configure the dish for other services, you will need to change the satellite switching mode and
satellite service configuration as outlined below and on the next page.
SATELLITE SWITCHING MODE
You can configure the antenna to automatically switch between satellites for either Dish Network
or DIRECTV as follows:
* Note: Requires optional DIRECTV HD converter accessory #9748.
16 DIRECTV Plus a. (satellites 101, 119)
b. (satellites 101, 110, 119 HDTV*)
26 DISH 500 (SW21 switch) (satellites 110, 119)
62 DISH 1000 (SW64 switch) (satellites 110, 119, 129 HDTV)
66 DISH 1000a (SW64 switch) (satellites 61, 110, 119 HDTV)
02 Single satellite mode (manual switching)
Switching Mode Satellite Service Satellites
SATELLITE CONFIGURATION

Page 5
1. Press * 24 # to display the current service provider.
2. To change the current service provider, press * 96 #
* 66 #
* 88 #
3. Press the UP and DOWN arrows (2 and 8 keys) to choose the desired service provider.
4. Press * 25 # to lock in setting.
5. Turn unit OFF and back ON to save setting.
6. Press * 24 # to display the code for the new service provider selected.
7. Press OFF.
8. Unplug the Diagnostic Keypad and plug the controller back in.
01 DIRECTV
10 DISH Network
91 Bell ExpressVu satellite 91°
Provider Code Satellite Service Provider
7. Turn unit OFF and back ON to save setting.
8. Press * 46 # to display code for new satellite switching mode.
SATELLITE SERVICE
You can select the desired satellite service provider as follows:

1. Turn on TV and Receiver. “Searching for Satellite” or similar will appear on TV screen.
2. On King Dome controller, press and hold
ON/SEARCH for 3 FULL SECONDS.
Power light turns steady GREEN.
Page 6
Note: If you are using the automatic satellite switching feature, you must leave the King-Dome on.
3. If the status light is steady green (search is complete), and your programming does not
appear, press the reset button on your DIRECTV receiver. If using Dish Network, hold the
receiver power button in for 10 seconds to reset your receiver. Consult your receiver
owner’s manual for further details.
4. When receiver reset is complete, select a channel or the program guide to view your
programming. Turn off the King-Dome and enjoy.
STATIONARY OPERATION
STATUS LIGHT SYSTEM STATUS
flashes a variety of colors
for about 30 seconds
RED-flashing
GREEN-flashing (may start
flashing RED again)
GREEN-steady
unit performs self-diagnostic
search in progress
potential satellite found
satellite(s) found and search is complete
9704 Series
9754 Series

Page 7
IN-MOTION OPERATION
9754 SERIES ONLY
1. Turn on TV and Receiver. “Searching for Satellite” or similar will appear on TV screen.
2. On King Dome controller,
momentarily press ON/SEARCH.
3. Press TRACK.
4. If the status light is steady GREEN (search is complete), and your programming does not
appear, press the reset button on your DIRECTV receiver. If using Dish Network, hold the
receiver power button in for 10 seconds to reset your receiver. Consult your receiver
owner’s manual for further details.
5. When receiver reset is complete, select your desired channel and enjoy.
alternating colors
GREEN-flashing
GREEN-steady
Initializing
Potential satellite found
Target satellite found (tracking)
STATUS LIGHT SYSTEM STATUS
Note: While driving and in tracking mode, objects such as bridges, buildings and trees may occasionally block the
satellite signal from reaching the antenna. Line of sight obstructions may cause the picture on your TV to
freeze, pixelate or be lost temporarily.
If the antenna does not sense vehicle motion after several minutes, it will enter sleep mode. The antenna
will automatically wake and begin tracking if it senses vehicle motion or a severe drop in satellite signal.
When you park for the evening or any extended period, it is recommended that you perform a stationary
search.

Page 8
To receive programming from the DIRECTV 101 satellite only, the receiver must be set for round
dish-1 satellite. Do this through the receiver’s satellite set-up menu screens.
To automatically switch between the 101 and 119 satellites for DIRECTV, the King-Dome must
be configured for the DIRECTV Plus switching mode (see SATELLITE CONFIGURATION) and
the receiver must be set for oval dish-2 satellites (do this through the receiver’s satellite set-up
menu screens).
For DIRECTV HD programming, an optional HD converter accessory #9748 is available which
allows you to receive the specially formatted HD signals from DIRECTV’s 110° satellite and
allows you to automatically switch between satellites 101/110 and 101/119 when simply changing
channels. When selecting a channel from the program guide results in a “Searching for Satellite”
message or a different channel than selected appearing on the TV screen, press SATELLITE
PAIR on the controller (see below) to change the switching pair between 101/110 and 101/119 as
necessary.
The automatic satellite switching feature can be active on 1 or more receivers depending on how
the system is installed. See the REFERENCE section for details on satellite switching
configurations.
SECTION 4 AUTOMATIC SATELLITE SWITCHING
DIRECTV
Note: Controllers may vary.

This page intentionally left blank.
Page 9

Page 10
1. Turn on the TV and satellite receiver.
2. On the King-Dome controller, press and hold the ON/SEARCH button for 3 FULL
SECONDS. The antenna will lock onto the 110 and 119 satellites before completing the
search process.
After the satellites have been located and the acquisition process is complete,
the status light will be steady green.
3. On the receiver remote, press menu, 6, 1, 1.
4. Highlight Check Switch and press select.
DISH NETWORK (DISH 500): Satellites 110 & 119
The King-Dome will automatically switch between the 110 and 119 satellites for Dish Network by
using the receiver’s remote control, after the receiver has been properly configured.
Screen graphics may vary.
IMPORTANT! King Controls recommends using a Dish Network model 311 receiver for automatic
satellite switching.
In order for all receivers to work properly, each one must be configured separately while
connected to the MAIN port on the King-Dome.
Note: The SW21 switch is a receiver software configuration that is loaded into the receiver after running a check
switch test with the dish locked on and configured for Dish 500 switching mode. This is a one time
procedure and will not need to be repeated after successful installation, unless the check switch test is run
again while connected to a home dish system.
SECTION 5 AUTOMATIC SATELLITE SWITCHING
DISH NETWORK: DISH 500 AND DISH 1000 HDTV

Page 11
5. Make sure Superdish and Alternate boxes
are NOT selected.
6. Highlight Test and press Select.
The unit will perform a check switch test,
and the dish will periodically move back and forth.
(This process will take several minutes.)
7. When test is complete, SW21 appears as the
installed device, and there must be no
“X”s in the indicated columns.
8. If indicated results are not obtained, go back to
Step 3 and run test again. Test may need to be
run several times before correct switch setting appears.
MUST SHOW “SW21”
NO “X”s
OPERATION
1. Simply choose your desired channel using the receiver’s remote control. The King-Dome
will automatically switch to the appropriate satellite.
Note on Error Messages: It is common to receive a temporary error message displayed on the TV when the
antenna is switching between satellites or the signal has been blocked. If an error
message appears for an extended period, selecting CANCEL may help clear the
message more quickly.
Note: For better performance when using the automatic satellite switching feature, change channels by selecting
your program from the channel guide rather than channel surfing.
Note: If you do not have a clear view of both satellites, the switch will not load.

Page 12
1. Turn on the TV and satellite receiver.
2. On the King-Dome controller, press and hold the ON/SEARCH button for 3 FULL
SECONDS. The antenna will lock onto the 110, 119 and 129 satellites before completing
the search process (or the 61, 110, and 119 satellites if you have selected DISH 1000a).
After the satellites have been located and the acquisition process is complete,
the status light will be steady green.
3. On the receiver remote, press menu, 6, 1, 1.
4. Highlight Check Switch and press select.
DISH NETWORK (DISH 1000): Satellites 110/119/129 or 61/110/119
The King-Dome offers a 3-satellite switching feature that allows easy access to all available
programming, including HDTV channels. The antenna can be configured to automatically switch
between satellites 110, 119, and 129 or alternatively between satellites 61, 110, and 119. The
appropriate configuration will depend on your geographical location.
IMPORTANT! Even under perfect conditions, the 129° W satellite may not be available everywhere.
Customers in select areas, including New England, Florida, south Texas and parts of the
west coast may not be able to view HD programming from the 129° W satellite based on
geographical location.
If you are in one of these areas and you cannot receive the 129 satellite, you can still use
the DISH 1000 feature by selecting DISH 1000a (see SATELLITE CONFIGURATION). This
runs the checkswitch with the 61, 110, and 119 satellites. (The 61 satellite mirrors the HD
programming from the 129 satellite.)
King Controls recommends using a Dish Network model VIP211 HDTV receiver for
automatic satellite switching.
In order for all receivers to work properly, each one must be configured separately while
connected to the MAIN port on the King-Dome.
Note: The SW64 switch is a receiver software configuration that is loaded into the receiver after running a check
switch test with the dish locked on and configured for Dish 1000 switching mode. This is a one time
procedure and will not need to be repeated after successful installation, unless the check switch test is run
again while connected to a home dish system.
Screen graphics may vary.

Page 13
5. Make sure Superdish and Alternate boxes
are NOT selected.
6. Highlight Test and press Select.
The unit will perform a check switch test,
and the dish will periodically move back and forth.
(This process will take several minutes.)
7. When test is complete, SW64 appears
as the installed device, and there must
be no “X”s in the indicated columns.
8. If indicated results are not obtained, go back to
Step 3 and run test again. Test may need to be
run several times before correct switch setting appears.
OPERATION
1. Simply choose your desired channel using the receiver’s remote control. The King-Dome
will automatically switch to the appropriate satellite.
Note on Error Messages: It is common to receive a temporary error message displayed on the TV when the
antenna is switching between satellites or the signal has been blocked. If an error
message appears for an extended period, selecting CANCEL may help clear the
message more quickly.
Note: For better performance when using the automatic satellite switching feature, change channels by selecting
your program from the channel guide rather than channel surfing.
Note: If you do not have a clear view of all three satellites, the switch will not load.
MUST SHOW
“SW64”
NO “X”s

Page 14
SECTION 6 TROUBLESHOOTING
TROUBLESHOOTING BLOCK TIMES
Note: See www.kingcontrols.com for detailed instructions.
Time in Minutes
Procedure
Main Circuit Board
DVB Board
HD Converter
LNB
45
45
30
30
Actuator Unit 60

Page 15
KEYPAD FUNCTIONS
To use the Keypad, simply unplug the existing controller and plug in the Keypad.

* 46 #
16 DIRECTV Plus a. (satellites 101, 119)
b. (satellites 101, 110, 119 HDTV*)
26 DISH 500 (SW21 switch) (satellites 110, 119)
62 DISH 1000 (SW64 switch) (satellites 110, 119, 129 HDTV)
66 DISH 1000a (SW64 switch) (satellites 61, 110, 119 HDTV)
02 Single satellite mode (manual switching)
Switching Mode Satellite Service Satellites
* Note: Requires optional DIRECTV HD converter accessory #9748.
* Note: Keypad shows the last satellite found during a search, or the current satellite after a
search is complete.
Page 16
KEYPAD DISPLAY CODES
KEYPAD PROGRAMMING CODES
* 24 #
* 41 #
* 92 #
* 98 #
* 01 # thru * 16 #
62 61.5 Dish Network
82 82 Bell ExpressVu
91 91 Bell ExpressVu
01 101 DIRECTV
10 110 DIRECTV / Dish Network
19 119 DIRECTV / Dish Network
29 129 Dish Network
48 148 Dish Network
Displays sum of components present in system.
9704 Series= 60
Software Revision
Programs Elevation Zone (see Zone Maps in REFERENCE Section).
01 DIRECTV
10 DISH Network
91 Bell ExpressVu satellite 91°
Provider Code Satellite Service Provider
Satellite ID Code Satellite
CODE INFORMATION DISPLAYED
CODE PROGRAMMING
Azimuth Gyro 01
20 Magnetic Sensor 20
40 DVB Board 40 9754 Series = 61

Page 17
IMPORTANT! Only the Direct to Circuit Board Cable will work for this procedure. A standard phone cord
WILL NOT WORK.
Call King Controls before performing this procedure.
Note: Warranty does not cover external wiring.
The Direct to Circuit Board Cable (supplied by King Controls) is used to verify that the data cable
in the external wire harness is good.
Leave the external wire harness connected to the back of the dome unit.
Connect the Direct to Circuit Board Cable between the Keypad and the circuit board and press
ON. The Keypad should turn on.
DIRECT TO CIRCUIT BOARD CABLE

Page 18
WIRING DIAGRAM FOR FLOW CHART
This manual suits for next models
5
Table of contents
Other King-Dome Marine Radar manuals