KingKutter S-XB Guide


TO THE PURCHASER
Thismanualcontainsvaluableinformation aboutyournew
Seeder.Ithas beencarefullypreparedtogiveyou helpful
suggestionsforoperating,adjusting,servicing andordering
repairparts.
Keepthismanualinaconvenientplaceforquick andeasy
reference.Studyitcarefully.You havepurchasedadependable
and sturdyseeder,butonlybyproper careand operation canyou
expecttoreceivetheservice and long lifedesignedand builtinto
it.
Sometime in thefuture yourseeder mayneednewpartsto
replace those thatare wornorbroken.Ifso, gotoyourdealer and
providehimwith themodeland partnumber.
CustomerInformation
Name______________________________________________
Purchased From______________________________________
DatePurchased______________________________________
ModelNo. ___________________________________________
SerialNo. ___________________________________________
3

Itisthepurchaserand/oroperator’sresponsibilityto….
• Read and understand theinformation contained inthismanual.
• Operate, lubricate, assembleand maintain the equipment in
accordancewithall instructionsand safetyproceduresin this
manual.
• Inspect the equipment andreplaceorrepairanypartsthat are
damaged orwornwhichundercontinued operation would
causedamage,weartootherparts,orcauseasafetyhazard.
• Returnthe equipment orpartstothe authorized King Kutter
dealer, fromwhereitwaspurchased, forserviceor
replacement of defectivepartsthat arecovered bywarranty.
(The King KutterFactorymayinspect equipment orparts
beforewarrantyclaims arehonored.)
• Paymentofallcostsincurred bythedealer fortraveling to or
transporting theequipmentforwarrantyinspection andor
claims.
4

5
CONTENTS
ITEM PAGE
Introduction.................................................................6
SafetyInformation ......................................................6
GeneralInformation....................................................8
Getting FamiliarwithYourSeeder............................10
SafetyTraining .........................................................11
Preparation&Starting and Stopping Safety.............12
OperationalSafety....................................................13
Transport safety........................................................14
SafetySigns.............................................................15
Attaching ToTractor..................................................18
SizingPTO...............................................................20
Maintenance&Storage Safety.................................21
Adjustments..............................................................22
Lubrication................................................................28
ReplaceSpreaderVanes..........................................29
ReplacementParts...................................................30
Warranty………………………………………………...32

INTRODUCTION
The fertilizerspreadersareusedforthedistributionofsolidgranularfertilizers andseeds.
Theycan be usedwithatractorwithsmall or mediumhorsepower.It isrecommended to
read thisoperator’smanual and followthe recommendationtoensuresafeandefficient
operation.
This manualistogivethe customerall the informationandsafetyrulesaswell asuseand
maintenanceinstructionstogetthebestefficiencyoutofyour seeder.The manual should
always be available soitcanbe consulted when questionsarise.It you loseoryour copyor
it gets destroyed youmayrequest acopyfromyour dealer.Ifyou havean issue with
imagesor instructions pleasecontact your dealerormanufacturer.
SAFETY
READAND FOLLOWTHEINSTRUCTIONSINTHIS
MANUALAND ESPECIALLYINTHESAFETY
SECTION. FAILURETODOSOCANRESULTIN
SERIOUSINJURYORDEATH.
TAKE NOTE!THISSAFETYALERTSYMBOL
FOUND THROUGHOUTTHISMANUALISUSED
TOCALLYOUR ATTENTIONTOINSTRUCTIONS
INVOLVINGYOUR PERSONALSAFETYAND THE
SAFETYOFOTHERS.
SIGNALWORDS:
The signalwords DANGER, WARNING and CAUTION areusedwiththe safetymessagesin
thismanualandwitheachsafetysigns. Theyaredefined asfollows:
DANGER: Indicatesan immediatehazardoussituation that, ifnotavoided,couldresultin
seriousinjuryordeath.Thissignalwordistobe limited tothe mostextremesituationstypically
formachine componentsthat, forfunctionalpurposes, cannot be guarded.
WARNING: Indicatesapotentiallyhazardoussituation that, ifnotavoided,couldresultin
seriousinjuryordeath,and includeshazardsthatareexposed when guardsareremoved.It
mayalsobe used toalert against unsafepractices.
CAUTION: Indicatesapotentiallyhazardoussituation that,ifnotavoided,mayresultinminor
ormoderateinjury. It mayalsobe used toalert against unsafepractice.
If you haveanyquestionsnotanswered inthismanualorrequireadditionalcopiesorthe
manualis damaged,pleasecontactyourdealerorKing Kutter,Inc.P.O.Box1200 Winfield,AL
35594 (205)487-3202 or www.kingkutter.com
6
THIS SYMBOL MEANS
ATTENTION!BECOMEALERT!
YOUR SAFTEYIS INVOLVED

7
EQUIPMENTSAFETYGUIDELINES
• Safetyoftheoperatorandbystandardsisoneofthemain concernsin designingand
developing aseeder.However,everyyear accidentsoccur whichcouldhavebeen
avoided byafewsecondsofthoughtandamorecarefulapproachtohandling
equipment.You,theoperator,canavoid manyaccidentsbyobserving thefollowing
precautions and insistthoseworkingwithyou, orforyou, followthem.
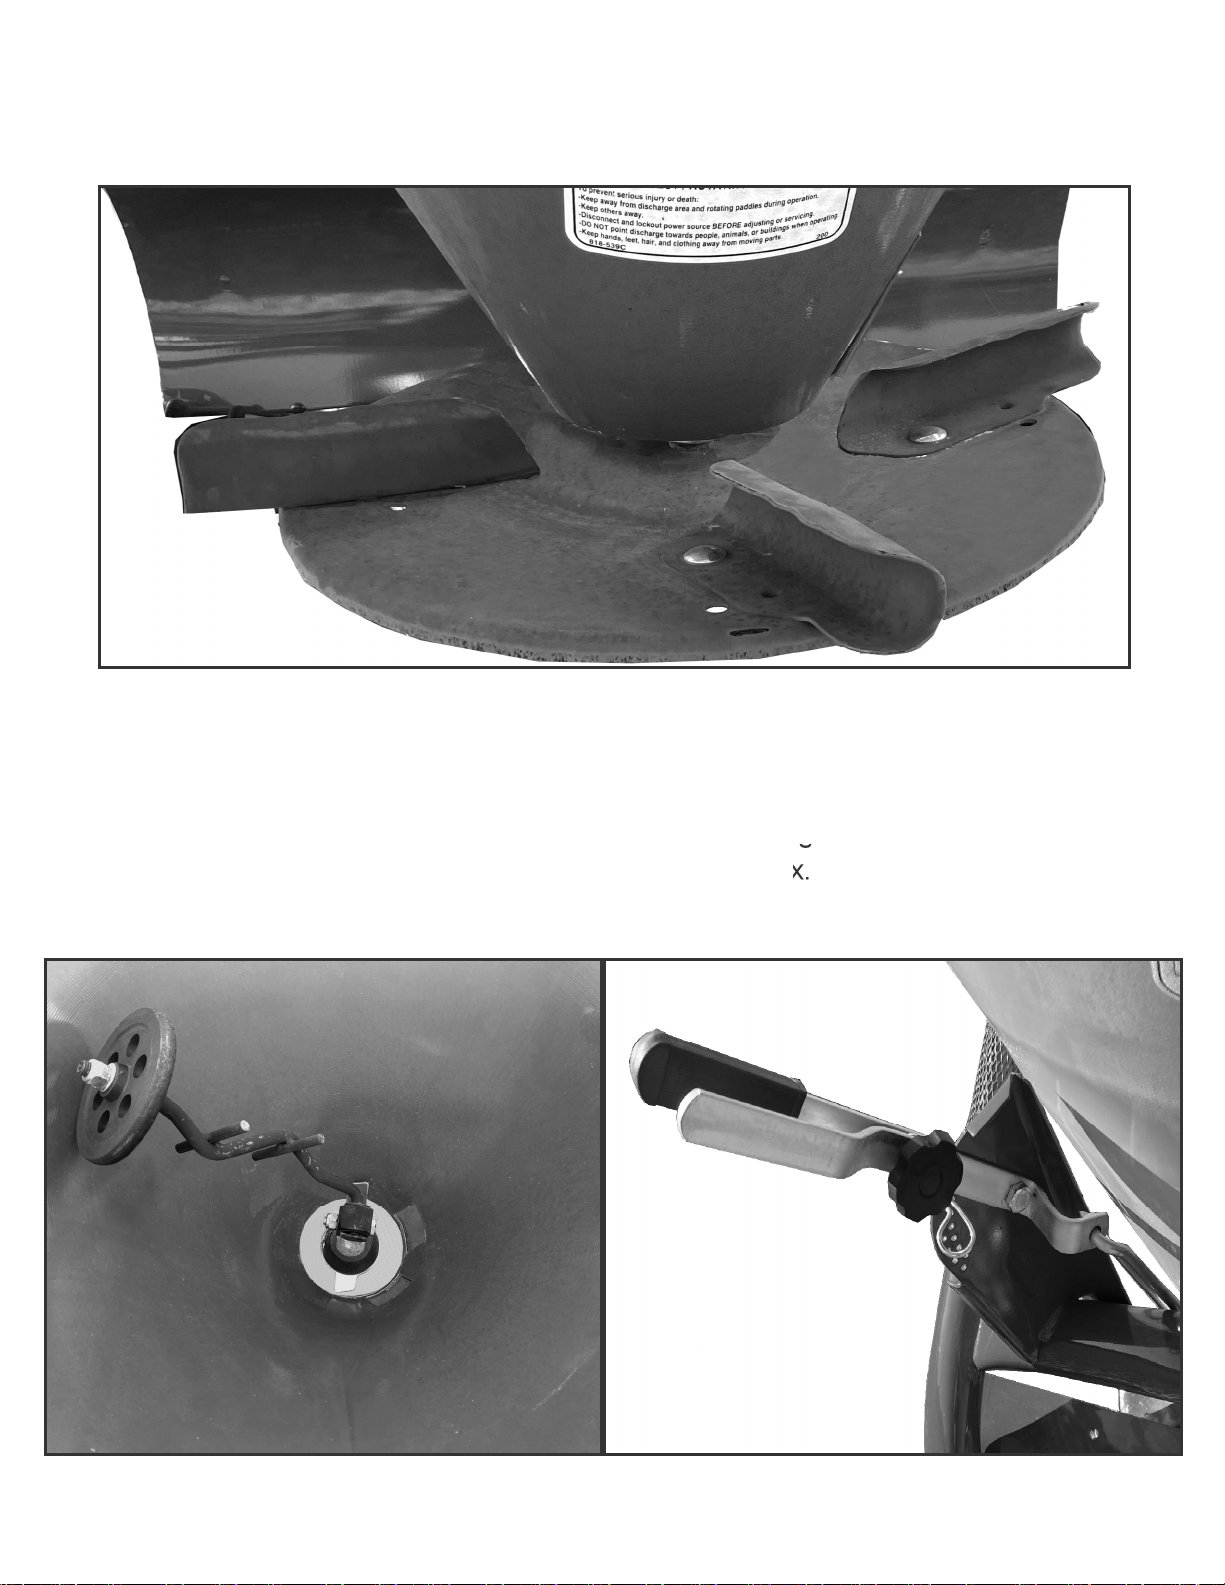
• Inordertoprovide abetterview,certainphotographsorillustrationsinthismanual may
showan assemblywithasafetyshieldremoved.However,equipmentshouldnever be
operatedin thiscondition.Keep allshieldsin place.Ifshield removalbecomes
necessaryfor repairs,replacethe shieldpriortouse.
• Replaceanysafetysignthatisnotreadable orismissing.Locationofsuchsafetysigns
is indicatedinthis manual.
• Never usealcoholicbeveragesordrugsthatcanhinderalertnessorcoordinationwhile
operatingthisequipment. Consultyour doctor aboutoperating thismachine while taking
prescription medications.
• Underno circumstances shouldchildrenundertheageof18beallowedtowork
withthisequipment.Donotallowpersonstooperateor assemblethisunituntil
theyhavereadthismanualand havedevelopedathorough understanding ofthe
safetyprecautionsand ofhowitworks.Reviewthesafetyinstructionswithall
usersannually.
• Thisequipmentisdangeroustochildren andpersonsunfamiliar withitsoperation.The
operatorshouldbe aresponsible,properlytrainedandphysicallyable person familiar
withfarmmachineryand trainedinthisequipment’soperations. If the elderlyare
assistingwithfarmwork,theirphysical limitationsneed toberecognizedand
accommodated.
• Useatractorequipped withaRoll OverProtectiveSystemand seatbelts.(ROPS)
• Never exceed thelimitsofapieceofmachinery.Ifitsabilitytodoajob,ortodo so
safely, is inquestion- DON’TTRYIT.
• Donotmodifythe equipmentinanyway.Unauthorizedmodificationcouldresultin
seriousinjuryor deathand mayimpairthefunctionandlifeof the equipment.
• Inaddition tothe design andtheconfirmation ofthisimplement, including safetysigns
and safetyequipment,hazardcontroland accidentprevention aredependent upon the
awareness,concern,prudence,andpropertrainingofpersonnel involved inthe
operation,transport,maintenance,andstorageofthemachine.Referalsotosafety
messagesand operation instruction ineachoftheappropriatesectionsofthe tractor
and seedermanuals.Paycloseattention tothe safetysignsaffixed tothetractor and
the seeder.

8
GENERAL INFORMATION
The modelsinthis manual havebeendesignedandmadeexclusivelyfor thedistributionof
solid, granularfertilizers andseeds.It is notdesignedtospread anythingelse.
Theseseedersareusuallyusedduringthedaylighthours. Ifyou are requiredtouseitat
nightwithpoorvisibility, you will need tousethelightingfromyour tractororthe equipment
you havethe seederattachedtosee properly.
Anymodificationmade tothisseederrelieves themanufacturer fromanyresponsibilityfor
damagestoseed, operatororanythirdpartyinvolved.
NAMEPLATE
On everyseeder there is anameplatebarcodethatshowsthemodel, serialnumber and
UPCnumber foryour seeder. When spare parts areneededitis necessarytobe ableto
provide Model andserialnumbertoensurethecorrectparts.
CHARACTERISTICSOFTHESEEDER
The hardness ofthesteelwelded frametogetherwiththelifeofthehoppers, let’syou
obtainthehighestqualitylevel ofseeders.Thepaint isepoxyvarnishwithsuccessive
bakingat150°Celsius(302°F)withtheapplication ofaprimer bath,assuringgreat
protectionandlong lifeoftheseeder.

The seeder hasadistributor, equippedwithaspreaderdisc with(4) adjustableveins, with
(4) different positionsettings.Toobtainthemaximumspreading precisionanduniformityin
the distribution, depending onthe kindof materialthatmustbespread.
The seedorfertilizer is gravityfed through anopening,located onthe bottomofthehopper,
whichhasaagitatorinside toprevent lumps inyour material.Aguard islocated onthefront
sidefacingtractortoprevent materialbeing fed towardsthewtractor.
The materialdeliveryis controlled byusingtheproper opening settingonthegates atthe
hopper bottom. Thespreaderis connected through agearbox.
9

10
GETTINGFAMILIARWITH YOUR SEEDER
A. Regulating lever
B. Top LinkConnection
C. Spreading Guard
D. Lift Pin
E. GearboxShafttoPTO
F. Hopper
G. SteelFrame
H. DistributorVanes
The manufactureris not responsible in case of:
• Improperuse of seeder, orused bynot trained person.
• Seedernot maintained.
• Changesormodificationsof the seeder.
• Use of not originalparts.
• Totalorpartialinobservance of the instructions.
• Not observing the safetyrules.
• Seederused fornon intended jobs.

11
SAFETYTRAINING
l Safetyisaprimaryconcern in thedesignand manufactureofour product.
Unfortunately,our effortstoprovide safeequipmentcanbe wiped outbyasingle
careless actof anoperatororbystander.
l Inadditiontothedesignandconfigurationofequipment, hazardcontrolandaccident
prevention are dependentupontheawareness,concern,prudenceandproper
trainingofpersonnel involved in theoperation,transport, maintenanceandstorageof
thisequipment.
l It hasbeen said,“The bestsafetydeviceisan informed,carefuloperator.”Weask
you tobe thatkind ofoperator.It istheoperator’sresponsibilitytoread and
understandallsafetyand operatinginstructionsinthemanual andtofollowthem.
Accidents can beavoided.
l Workingwithunfamiliar equipmentcan lead tocareless injuries.Read thismanual,
and themanualforyour tractor,beforeassemblyor operating,toacquaintyourself
withthemachines.Ifthismachineisusedbyanypersonotherthanyou,orisloaned
or rented,itisthe seederowner’sresponsibilitytomakecertain thatowner'smanual
be available totheoperatorpriortooperating:
1- Reads and understandstheoperator’smanuals.
2- Isinstructedin safeand properuse.
l Knowyour controlsandhowtostoptractor,engine,and theseederquicklyinan
emergency. Read this manual and theone provided withyour tractor.
l Train allnewpersonnel andreviewinstructionsfrequentlywithexisting workers.Be
certain onlyaproperlytrained and physicallyable personwill operatethe machinery.
Apersonwho has notread and understoodalloperatingand safetyinstructionsisnot
qualifiedtooperatethemachine.An untrainedoperatorexposes himselfand
bystanderstopossible serious injuryor death.If theelderlyare assistingwithfarm
work, their physical limitations need toberecognized and accommodated.

PREPARTION
l Never operate thetractor and seeder until you haveread and completely
understand this manual, the Tractor Operator’s Manual, and each ofthe safety
messages found on the safetysigns on the tractor and seeder.
l Personal protection equipment includinghardhat,safetyglasses, safetyshoes, and gloves
are recommended during assembly,installation, operation, adjustment, maintenance,
repairing, removal, ormoving the implement. Do not allowlonghair, loose fitting clothing, or
jewelryto be aroundequipment.
l PROLONGEDEXPOSURETOLOUD NOISEMAYCAUSE PERMANENTHEARING
LOSS!Tractors withor withoutseedersattached can oftenbe noisyenough to cause
permanent, partial hearing loss. Werecommend that you wear hearing protection on afull-
time basisif thenoiseintheoperator’spositionexceeds80db. Noise over80db.on along-
term basiscan causesevere hearingloss. Noise over 90 db. adjacentto the operator over a
long-term basis maycausepermanent, total hearingloss. NOTE: Hearingloss from loud
noise (fromtractors,chainsaws, radios, andother suchsourcesclosetotheear)is
cumulative over a lifetime without hope of natural recovery.
l Operate the seederonlywith atractor equippedwith an approved Roll-Over-Protective
System (ROPS). Always wear yourseatbelt. Seriousinjuryofeven deathcouldresult from
falling off thetractor — particularlyduringaturnover when the operator couldbepinned
under the ROPS or the tractor.
l Clear area of stones,branches or other debris that might cause injuryor damage.
l Operateonlyin daylight or good artificial light.
l Ensure seeder is properlymounted, adjusted andin good operating condition.
l Ensure that all safety shielding and safetysigns are properlyinstalled and ingood condition.
STARTINGAND STOPPINGSAFETY
l Checkthetractormaster shieldoverthe PTOstubshaft. Make sure itis in goodcondition
and fastenedsecurely to thetractor. Purchaseanewshieldif old shieldis damaged or
missing.
l All tractorsthat are not equipped with a“live”power takeoff (PTO) need to be equipped with
an over-running PTOclutch. Theseareavailablethroughmost farmequipment stores.
NOTE: The additionof anover-runningPTOclutchmaychangethelength of the PTO
driveline required. Payextra attention to the instructions on thePTOdriveline Installation. Be
sure that the driveline systemguarding is adequate.
l Seederoperatingpoweris supplied fromtractor PTO. Refer toyour tractormanualfor PTO
engagement anddisengagement instructions. Knowhowto stop tractor andseederquickly
in case of an emergency.
12

13
OPERATIONAL SAFETY
l When engaging PTO, the engine RPMshould alwaysbeat idle speed. Onceengaged and
readyto start cutting, raise PTOspeedto 540 RPMandmaintain throughoutcutting
operation.
l The use of this equipment is subject to certain hazards that cannot beprotected against by
the mechanical means or product design. All operatorsof this equipmentmust read and
understand this entire manual, payingparticular attention to safetyandoperating
instructions, priorto using.If there is somethinginthismanual youdonot understand,ask
your supervisor, or your dealer, toexplainit to you.
l Most accidents occurbecauseof neglector carelessness. Keep allhelpersandbystanders
at least several hundred feetfrom an operating seeder.Onlyproperlytrainedpeopleshould
operatethis machine.
lWhen machine is operated inpopulated areas where thrown objects couldinjurepersonsor
property, operation must be stopped when anyone comes within several hundred feet.
l The majorityoftheaccidentsinvolveentanglement onthedriveline, injuryofbystanders by
the objects thrown bythe rotating blades, and operatorsbeing knocked off the tractor bylow
hanginglimbs andthen being runover bythe seeder. Accidentsare most likelytooccur with
machines that are loaned or rentedto someone whohasnotread the owner’smanual and is
not familiar with a seeder.
l The seeder is designed for use onlyon tractors with 540-RPM power take off.
l Install andsecureallguards andshields before starting or operating. The discharge chute,
bands, flaps, drivelineguards and tractor,shields shouldbe used andmaintainedin good
working condition. Theyshould be inspected carefully,at least daily,for missingor broken
cable, chain links,shields, or guards. (Worn items must be replacedat onceto reduce
possibility of injury)
l Disengage power takeoff (PTO) and placetransmission inneutral before attempting to start
engine.
l Manyvaried objects, such as wire, cable,rope, or chains, canbecomeentangledinthe
operating parts of the seeder. These items could then swing outside the housing at greater
velocities than the blades. Such asituation is extremelyhazardous. Inspectthe cutting area
for such objects before mowing. Removeanylike objects fromthe site.
l Never allowthe cutting blade tocontactsuch items. Cut material higherat first,allowing
seeder to clear hidden objects. Never assume an area is clear. AlwaysCheck!

14
OPERATIONALSAFETY continued...
l Passseederdiagonallythroughsharpdipsand avoid sharp dropstoprevent“hanging
up” tractor and seeder.Practicewill improveyour skillsin maneuvering onrough
terrain.Alwayscutdownslopes,never acrosstheface.Alwayschecktractor manual
for properuseonslopes.
l When usingaunit,aminimum20% oftractorand equipmentweightmustbe on
tractorfrontwheels. Withoutthisweight,tractor could tipover,causingpersonal injury
or death.The weightmaybe attainedwithafront- end loader,frontwheel weights,
ballastin the tiresor fronttractor weights.When attainingaminimum20% oftractor
and equipmentweightonthefrontwheels,you mustnotexceed the ROPS weight
certification. Weighthe tractor and equipment. Do notguess or estimate!
TRANSPORTSAFETY
l Complywithstateand local lawsgoverning highwaysafetyand movementoffarm
machineryon public roads.
l The useofflashingamber lightsisacceptable in mostlocalities.However,some
localitiesprohibittheir use.Locallawsshouldbecheckedfor alllightingandmarking
requirements.
l Atall times,when driving thetractorand equipmentontheroadorhighwayunder 20
mph (32kph)useflashingamberwarning lights andaslowmoving vehicle (SMV)
identificationemblem.Donotexceed 20mph(32kph).Reducespeedonrough roads
and surfaces.
l Plan your routetoavoid heavytraffic.
l Always install transportlocks,pinsor brackets before transporting.
l Donotdrinkand drive.
l Be asafeandcourteousdriver.Alwaysyield tooncoming trafficinallsituations,
includingnarrowbridges,intersections,etc.Watchfortrafficwhen operatingnearor
crossingroadways.
l Turn curvesor goup or downhillsonlyatalowspeedand atagradualsteering
angle.Makecertainthataleast 20%ofthetractor’sweightisonthefrontwheelsto
maintain safesteerage.Slowdownon roughor uneven surface.Alwayschecktractor
manual for properuseonslopes.
l Useextremecareand maintain minimumgroundandwhen operatingclosetoditches
or fences. Becareful when turning sharp corners.
l Never allowriders on eithertractor or seeder.

15
ATTENTION!Besurethatthesafetylabelsarelegible.Clean them up using acloth,
waterand soap. Replace damagedlabelsplacing them inthecorrect
position.
SAFETYSIGNS
The safetysignsontheunitsuppliesyou withimportant information:following those
precautions help you tobesafeas possible.
1
5
3
4
2

16
1
2
3

17
4
5
MODELNO.
DESCRIPTION
SN#XXXXXXXXXX

18
ATTACHINGTOTRACTOR
STEP1 Slowlyback tractoruptothe Seeder/Spreaderwhile usingtractor’s
3-pointhydrauliccontrollever toalignhitchholesinlower arms withlower
hitchpins.
STEP2 Engagetractorparkbrake,shuttractorengine off,and removekeybefore
dismountingfromtractor.
STEP3 Ensurethatthelower hitcharms areblockedtopreventexcessiveside
movement.
STEP4 Withtractor’slowerhitcharmsaligned andpositionedcorrectly,attach
arms tohitchpinsandsecurewithlinchpins.
STEP5 Connect topcenterlinktoupperpivothitchusing customersupplied clevis
pinandlinchpin.
STEP6 Return totractorandslowlyoperatecontrolsupanddowntomakesure
thespreaderclearstractortires, frameanddrawbar.Moveor removethe
drawbar ifitinterferes withthespreader.
STEP7 Adjust 3-Pointhitchsothatthespreaderdisc ishorizonal.
STEP8 Manuallyadjust lengthoftop-linktolevelSeeder/Spreaderfromfrontto
rear.
STEP9 Determineifthe PTOshaftneedstobeshortened.
NOTE: Due tothemanyvariationsinthetractorhitchpoints anddistancesbetween
equipmentgearboxinputshaftandtractorPTOoutputshafts,somecombinations
mayrequire PTOshafts tobeshortened as describedbythe following steps.
WARNING
Never standbetween tractor
and seederwhile backing up
tractortothehitch.

19
ATTACHINGTOTRACTOR continued....
STEP10 Raiseand lower seederin ordertolocatetheshortestdistancebetween
equipmentgearboxinputshaft andtractorPTOoutputshaft. Withtheseeder inthe
shortestdistanceposition shutdownthe tractor andSECURELYBLOCKSEEDERIN
POSITION.
STEP11 Pullapart PTOshaft andattachoutersectiontotractorPTOoutput shaft.
NOTE: Besuretopull onPTOshaftsectiontoensure yokehas locked intoplace.
STEP12 Placeand hold inner PTOshaftsection nexttooutersectionandcheckifPTO
shaft istoolong.Eachsectionshouldend approximately3inchesshortofreachingu-
jointshieldontheoppositesection.If theshaft istoolong measure3inchesback
fromeachu-jointshield andmarktheothershaftsection.Besure todothisforboth
PTOshafthalves. NOTE: Donot cut PTOshaftsections atthistime.
STEP13 Raiseseeder andremoveblocking. Raiseandlower seederinorder tolocatethe
longestdistancebetween equipmentinputshaftandthetractor PTOoutputshaft.
Withtheseeder inthe longest distancepositionshutdownthetractorandSECURELY
BLOCKTHESEEDERIN POSITION.
STEP14 Asinstep 5holdPTOshaftsectionstogether and checkfor aminimumof6
inchesofoverlap. IfPTOshafthas beenmarkedforcuttingtheoverlap is thedistance
measured between the twomarks.If thePTOshaft has lessthana6inchoverlap, DO
NOTUSE.Contactyour authorized KingKutterDealer.
NOTEIfthe PTOshaft lengthistoolong goto SIZINGPTOSHAFT (pg. 20)
STEP15 Applyanymulti-purposegreasetotheoutsideofthemale (inner) PTOshaft
section.AssemblePTOshaftand install onseeder and tractor.
WARNING - Failuretoinstallretainingclip ongearboxinputshaft would allow
drivelinetoswingfreelyifboltis shearedcausingpossibleinjuryordeath.
STEP16 Pull ontractorsideofPTOshaft yoketobe sure ithaslocked inplace.Make
certain PTOshaft shielding isin placeand goodworking condition.
STEP17 The PTOshaftshield isanon-rotatingdesignand mustbesecured prior to
equipmentuse.Using thechain oneachyokeshieldattachtoafixed objecton the
tractorand equipmentendsthatwill notallowthe PTOshaftshieldtorotateduring
operation.

20
SIZINGPTOSHAFT
STEP1
Cutting the PTOshaft tolength.NOTE:Be sure
tocutequallengthsofeachPTOshaftsection.
Clampend ofPTOshaftinaviceand cutoff
shieldwhere marked.(Figure 1-A&1-B)
STEP2
Using cut sectionoftheshield asaguide cutshaft
off the sameamount.(Figure2)
STEP3
Repeatsteps1and2forother PTOshaft section.
STEP4
Useafiletodeburr PTOshafts.Clean upall
chips, burrsand filingsfrombothendsofthe PTO
shaft.
Note: If you sheartheboltthatattachesthePTOshaft
tothegearboxre-placewithagrade2boltonly.
Replacementwithanothergrade ofboltwill void
your warrantyand maycauseterminaldamage to
the PTOshaft,gearbox, or tractor.
Figure1-A
Figure1-B
Figure2
This manual suits for next models
2
Table of contents
Other KingKutter Seeder manuals
Popular Seeder manuals by other brands

Seederman
Seederman GS2 Owners Manual and Operating Guide

Earth Way
Earth Way 1001-B Assembly and operating instructions

Sulky
Sulky Kronos Original instructions

Klarstein
Klarstein 10033229 manual

Land Pride
Land Pride Disc Harrows DH3510 Operator's manual

Sulky
Sulky CULTLINE VR 300 Series Original instructions