Inst ll tion / Oper ting Instructions
for Wireless Digit l Progr mm ble Thermost t
- THPW1-CA, THPW1-CB, THPW1-CC,
THPW1-CD & THPW1-CE
GENERAL
INSTALLATION
OPERATION AND PROGRAMMING INSTRUCTIONS
The THPW1 digital programma le thermostat consists of the
thermostat transmitter and the remote mains operated receiver
unit.
It has 7days preset programs which can e tailored to suit your
lifestyle.
The THPW1transmitter is operated y 2x AA size atteries and
can replace any mechanical standard 2wire thermostat.
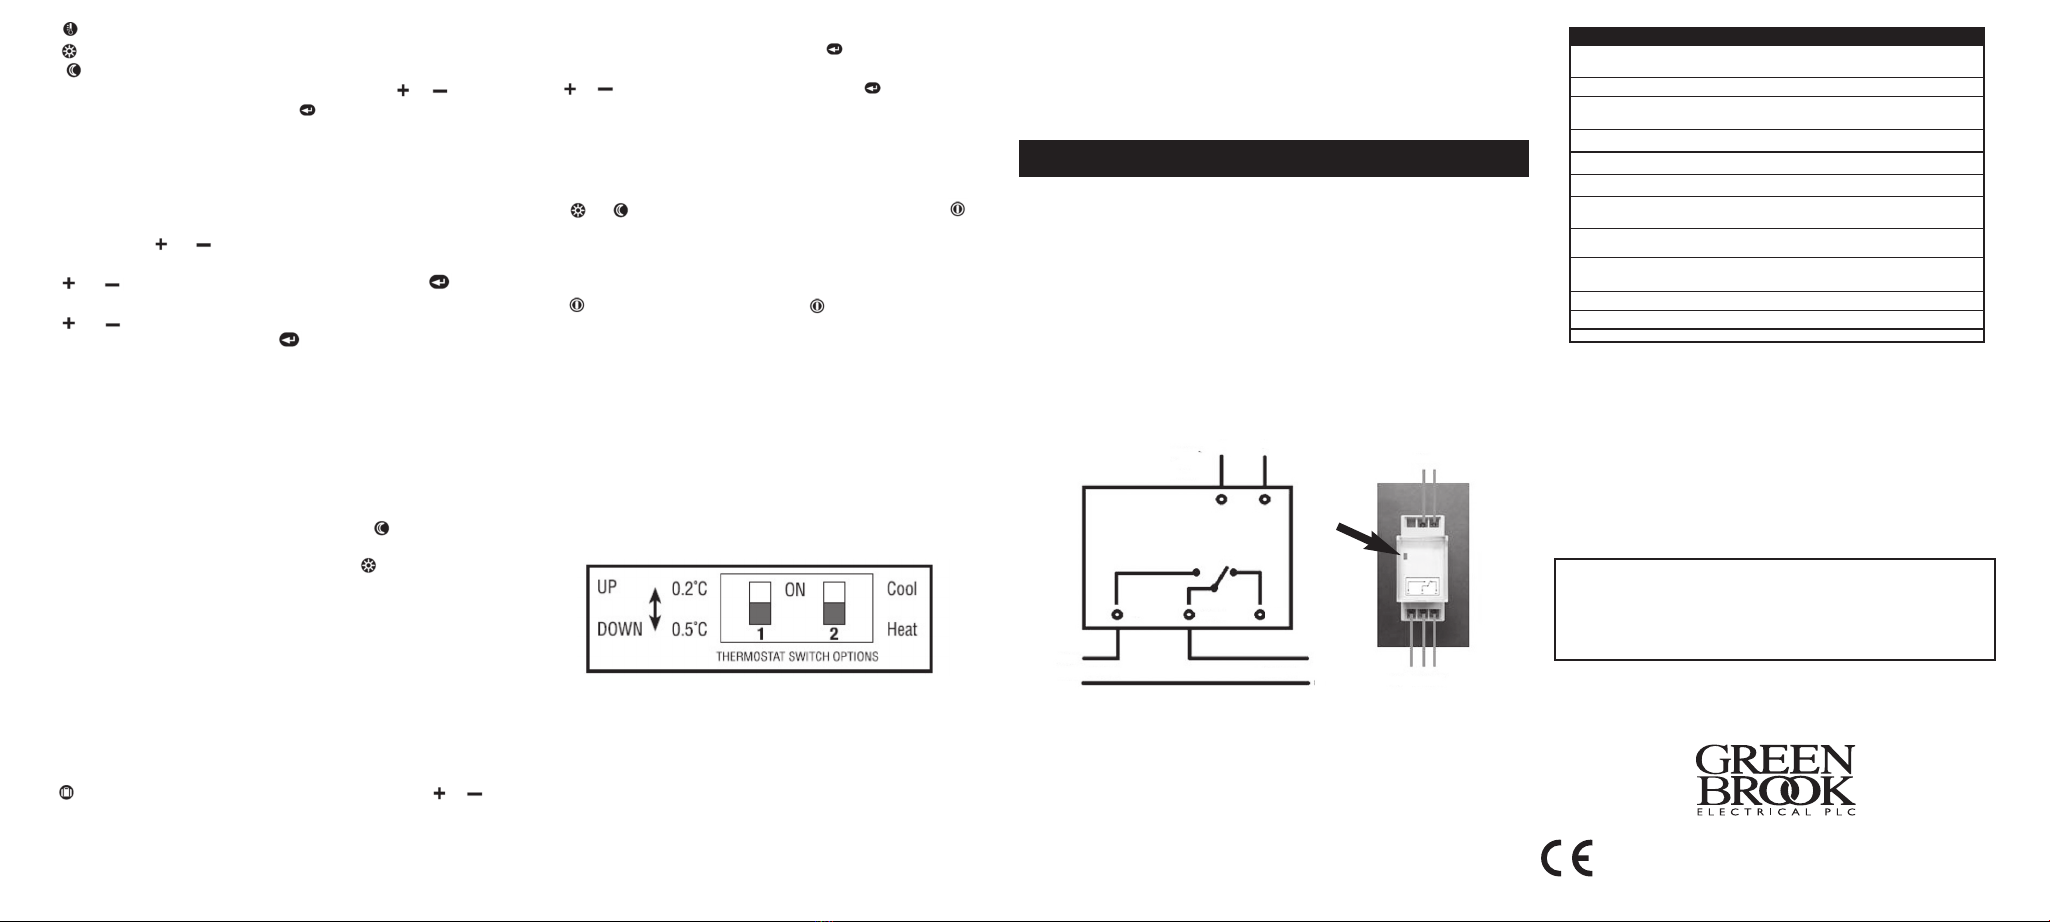
Please note that the maximum resistive load is 16A.
These units are paired during manufacture and the operating
channel is given y a letter code. When installing more than one
unit in a system ensure each thermostat pair has a different letter
code.
SAFETY INSTRUCTIONS
Ple se re d these instructions fully before
ttempting inst ll tion.
This unit sh uld be installed by a c mpetent pers n in
acc rdance with the current IEE Wiring Regulati ns.
If in d ubt c nsult a qualified electrician
1. You should place the thermostat as following:
a. A out 160cm up from the floor.
.Only on inside walls (not on an outside wall).
c. Do not expose to direct sun light.
d.Do not position close to a heater, ventilation outlet or
close to an outside door.
2. Remove the front cover. Unscrew the screw in the attery
compartment. Remove the front housing from the ase.
3. Using the ase as a template, drill two holes in the wall and
secure the ase with appropriate wall plugs and screws.
4. Replace the front housing onto ase and replace the screw
in attery compartment.
5. Install 2x AA size atteries into attery compartment and
replace front case.
6. Press the reset utton once to enter time set mode.
Fe tures of the LCD displ y nd keys:
THPW1 LCD displ y
Fig 1
Fig 3
Fig 2
To view programs:
THPW1 thermostat is a weekly programma le thermostat, and
each day can e programmed separately.
Each hour can select or temperature. However a weekly
factory preset program is installed.
This preset program is set to suit most families life style. See
ta le 3.1 for factory preset program.
Description of e ch key function:
- To enter into progr m mode
- To view n Temper tures
- To enter into time nd d y djustment mode
Reset - To reset the unit into initi l mode
- To turn the unit on or off
- To enter into V c tion mode
- To confirm setting
- To override into CT (COMFORT Temper ture) mode (20°C)
- To override into ET (ECONOMY Temper ture) mode (17°C)
- Tempor ry temper ture override mode or incre se
v lue djustment
- Tempor ry temper ture override mode or decre se
v lue djustment
Press key. The Monday preset program at 0.00 is on display.
Press or key the display will show the temperature setting in
each hour. E.g. Monday program show 0:00 - 5:59 and 8:00 -
15:59 are set at evening temp.,6:00 - 7:59 and 16:00 - 22:59 is
set at CT. Note 23:00 - 0:00 is set at ET.
Press key the next day preset program is displayed. Again
Press or key. This will show the temperature setting at each
hour. Repeat a ove steps, each preset program will display until
Sunday. Once Sunday program has een reviewed. Press key.
The display will return into running mode.
To set clock and day:
After the atteries (2x AA size) have een installed into the
thermostat unit, or reset or key is pressed, the thermostat is
in time adjustment mode.
The hour is flashing. Press or key to adjust hour.
Press key to confirm setting. The minute is flashing.
Press or key to adjust minute. Press key to confirm
setting. The day is flashing. Press or key to adjust day.
Press key to confirm setting. This will
confirm the setting of time and day.
The display will return into running mode.
E.g. If you have set the clock at 8.30 FRIDAY
and the room temperature is 25°C.
The display will display in Fig 3.
To change preset program:
The preset program may not e suita le for some families ut
the program may e adjusted to suit your living life style.
The following instruction will allow you to change the preset
program.
Press key to enter into program viewing mode.
Press key to select the day of program to make a change.
Press or key to select the hour to make change. Press or
to select the temperature to make change. E.g. To change
Saturday 12:00 - 16:59 from CT to 12:00 - 16:59 ET.
1. Press key to enter into program viewing mode.
2. Press key to select the day to Saturday program.
3. Press key until 12:00 with CT setting.
4. Press key to change CT period to ET period.
5. Repeat step 3& 4to change 13:00 - 14:00 from CT period to
ET period.
6. Press key to confirm setting. Press key to return into
running mode.
7. You can review the program on
Saturday to check the program and
confirm the setting (Fig 4).
Fig 4
Mode Air-conditioning He ting
23°c 20°c
28°c 17°c
Important
N te: D n t set the beginning and end f the pr gram t 0:00
due t the therm stat needing this time f r its reference use.
Theref re y u must set the beginning r end time at 23:00 r
01:00.
To view and change or temperature:
The CT and ET temperature is preset at elow ta le for heating
and air-conditioning mode:
Fig 3.1
Our latest microprocessor controlled programma le thermostat
has een designed to reduce your heating and air-conditioning
ill. The THPW1 is made to e user friendly and easy to use.
THPW1-C In .qxp_Layout 1 30/07/2014 11:57 Page 1