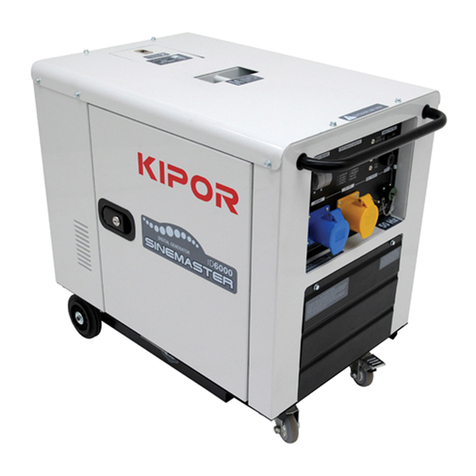
Kipor KDE180XW User manual

AIR-COOLED DIESEL
WELDER AND
GENERATOR SET
KDE180XW
KDE180EW
KDE180TW


Generator Appearance Diagram
1.1 EW/XW Series External Appearance Diagram
1.2 TW Series External Appearance Diagram
2. Main Technical Specifications and Data
2.1 Main Technical Specifications and Data
2.2 Basic Parameters
2.3 Overall and Installation Dimensions for the Set
2.4 Electric Wiring Diagrams for All Types of the Set
3. Use for Welder and Generator Set
3.1 Use Essentials and Cautions
3.2 Preparation before the Start
3.3 Inspection and Operation of the Diesel Engine
3.4 Starting the Welder and Generator Set
3.5 Operation Program for Starting the Generator Set
3.6 How to operate the Welder and Generator Set
3.7 Loading
3.8 Breaking the Welder and Generator Set
3.9 KDE180 Set
4. Maintenance of the Welder and Generator Set
4.1 Regular Maintenance
4.2 Maintenance for a Long Time Storage
5. Inspection, Repair and Trouble Shooting for Welder and Generator Set
5.1 Maintenance and rimedy
5.2 Question and problem
6. Appendixes
6.1 List for Tools, Accessories and Fittings with the Machine
6.2 Technical Documentation
6.3 The choice of the electric cable
6.4 Modified coefficient table of ambient condition power
1.
CONTENTS
1
1
1
2
2
3
3
4
7
7
9
13
14
17
19
20
23
24
25
25
28
29
29
29
30
30
30
31
32
1. Generator Appearance Diagram
--
1.1 EW/XW Series External Appearance Diagram
1.2 TW Series External Appearance Diagram

2.1 Main Technical Specifications and Data
2. Main Technical Specifications and Data
--
50
2.8
230
12.2
60
2.8
240/120
11.7/23.3
Single phase
1.0
65-70
160
25 ~ 30
60%
50 ~ 180
3000 30003600 3600
XW:130 EW:147
XW/EW:720 480 645
5.9
6.6
KM186FAG
Item
Set Type
Welder and Generator Set
Diesel Engine
Generating Working
State (AC)
Working State
(DC)
Rated frequency (Hz)
Rated power (kW)
Rated voltage (AC)(V)
Rated current (AC)(A)
Phase No.
Power factor (Cos )
Rated welding current (DC)(V)
Welding operating voltage (DC)(V)
Welding load persistence rate
Welding current adjustment scope (A)
Welding No load welding voltage (DC)(V)
Rated revolution speed (r/min)
Excitation mode
Working mode
Structure mode
Connection mode
Total mass (kg)
Overall dimensions (L W H)(mm)
Engine power type
Persistence power (kW/rpm)
Max. Power (kW/rpm)
Type
Cooling system
Lubrication system
Lubrication oil quantity (L)
Start system
Combustion oil
Start battery
Combustion oil tank volume (L)
Low oil pressure stop protection system
Cylinder diameter Stroke (mm)
Continuous operation for 10 hours
Three phase+IGBT(PWM)
Transmission shaft rigid connection
Four-strok, single cylinder, air-cooled, directly injecting type
86 72
418
Forced air-cooled system
Pressure splash, duplex type lubrication
1.65
XW: Recoil hand start EW/TW: 12V electric start
Diesel oil
16
With
12V 36Ah
KDE180XW/EW KDE180TW
50
2.8
230
12.2
60
2.8
240/120
11.7/23.3
Self-excitaion (AVR) voltage regulation
191
910 520 740
6.6
7.35
Cylinder discharge capacity (ml)
2.2 Basic Parameters
2.2.1 Under the following conditions, the set should output the rated power:
2.2.2 Under the following conditions, the set should output the stipulated power
and word reliably.
2.3 Overall and Installation Dimensions for the Set
2.3.1 XW/EW series set overall and installation dimensions
2.3.2 TW series set external appearance
1000 5-40 90%
--
0+20 60%
Environment temperature( )
Altitude height(m)
Altitude height(m)
Relative humidity
Relative humidity

2.4 Electric Wiring Diagram for All Types of the Set
--
2.4.1 KDE180XW type electric wiring diagram
Current Sampling
Sampling
Winding
Black
Yellow/Green
Red
Low Oil
Pressure Switch
Welding output
Absorb Plate
Red/Black Blue/Black White/Black
Red Blue
Plastic
Sheath
Plastic Sheath
Protector
IGBTControl Black and its Assy
Low oil pressure protector
Plastic Sheath
Driving
Plate
No.
Parts No.
Description Qty.
1
2
3
4
5
6
7
8
9
10
11
12
13
14
15
16
17
18
19
20
21
22
23
24
25
26
27
28
QF1
V
HL
X1 X2
DT
FU1
Z1
Z2
W1
W2
W3
W4
W5
W6
W7
AVR
Rp
SW
Lp
L1
C
1
1
1
2
1
1
1
1
1
1
1
1
1
1
1
1
1
2
2
Breaker
Voltmeter (0-300V)
Operating indicator light (green)
Receptacle
Print circuit board assembly
Stop electromagnet
Fuse( 6 30)
Rectifier bridge
Rectifier bridge
Generating and sampling winding
Excitation winding
Vice winding
Flywheel generator winding
12V winding
Welding winding
Control winding
Automatic voltage regulator
Potentiometer (parenthesis knob)
Welding current select switch
Shunt
Plain wave reactor
IGBT
IGBT control black and its assy
Capacitor
Welding output terminal post assembly
--
No.
Parts No.
Description Qty.
1
2
3
4
5
6
7
8
9
10
11
12
13
14
15
16
17
18
19
20
21
22
23
24
25
26
27
28
QF1
V
HL
X1 X2
SA
DT
FU1
Z1
Z2
W1
W2
W3
W4
W5
W6
W7
AVR
Rp
SW
Lp
L1
C
GB
1
1
1
2
1
1
1
1
1
1
1
1
1
1
1
1
1
2
2
1
1
Breaker
Voltmeter (0-300V)
Operating indicator light (green)
Receptacle
Ignition switch
Print circuit board assembly
Stop electromagnet
Fuse( 6 30)
Rectifier bridge
Rectifier bridge
Generating and sampling winding
Excitation winding
Vice winding
Flywheel generator winding
12V winding
Welding winding
Control winding
Automatic voltage regulator
Potentiometer (parenthesis knob)
Welding current select switch
Shunt
Plain wave reactor
IGBT
IGBT control black and its assy
Capacitor
Welding output terminal post assembly
Battery
Charge adjustor
2.4.2 KDE180EW type electric wiring diagram
Current Sampling
Sampling
Winding Black
Yellow/Green
Green
White
Yellow
Blue
Red
Yellow
Red
Green
White
Yellow/
Green
Black
Black
Blue
Black
Blue
Low Oil
Pressure Switch
Welding output
Start
Relay
Start
Motor
Absorb Plate
Red/Black Blue/Black White/Black
Charge Adjustor
Red Blue
Plastic
Sheath
Plastic Sheath
Protector
IGBTControl Black and its Assy
Plastic Sheath
Driving
Plate

2.4.3 KDE180TW type electric wiring diagram
Current Sampling
Sampling
Winding
Black
Yellow/Green
Low Oil
Pressure Switch
Welding output
Start
Relay
Start
Motor
Absorb Plate
Red/Black Blue/Black White/Black
Charge Adjustor
Red Blue
Plastic
Sheath
Plastic Sheath
Protector
IGBTControl Black and its Assy
Low Oil
Pressure
Switch
Plastic Sheath
Driving
Plate
-6-
No.
Parts No.
Description Qty.
1
2
3
4
5
6
7
8
9
10
11
12
13
14
15
16
17
18
19
20
21
22
23
24
25
26
27
28
QF1
V
HL
X1 X2
SA
YV
FU1
Z1
Z2
W1
W2
W3
W4
W5
W6
W7
AVR
Rp
SW
Lp
L1
C
GB
1
1
1
2
1
1
1
1
1
1
1
1
1
1
1
1
1
2
2
1
1
Breaker
Voltmeter (0-300V)
Operating indicator light (green)
Receptacle
Ignition switch
Print circuit board assembly
Stop electromagnet valve
Fuse( 6 30)
Rectifier bridge
Rectifier bridge
Generating and sampling winding
Excitation winding
Vice winding
Flywheel generator winding
12V winding
Welding winding
Control winding
Automatic voltage regulator
Potentiometer (parenthesis knob)
Welding current select switch
Shunt
Plain wave reactor
IGBT
IGBT control black and its assy
Capacitor
Welding output terminal post assembly
Battery
Charge adjustor
3. Use for Welder and Generator Set
3.1 Use Essentials and Cautions
In order to ensure that you safely operate the welder and generator set, be sure
that you read and understand the operation manual. Especially the attention
should be paid to the use main points listed below. Otherwise the personal
accidents and the equipment damages may be caused.
3.1.1 Fire prevention. The combustion oil used in the diesel engine is light
diesel oil. The gasoline, kerosene and other oils should not be used.
Use a clean cloth to wipe off the overflowed oil. The gasoline, kerosene, match
and other inflammable and explosive matters should not be put near the set
because the temperature for the place around the exhaust noise suppressor is
very high while the diesel engine is running.
For the purpose to prevent the fire and to supply the sufficient ventilation
condition, during the operation, at least 1.5m distance between the set and the
building and other equipment should be kept.
Operating the welder and generator set should be carried out on a smooth floor. If
the set is oblique, the oil will overflow.
3.1.2 Prevent the suction of the exhausted gas
The exhausted gas includes the poison carbon monoxide. At the places with poor
ventilation, the welder and generator set should not be used. If it is necessary to
operate the set indoors, the suitable ventilation condition should be supplied to
prevent the personnel and livestock from the affection.
3.1.3 Prevent the burn. When the diesel engine is running and is hot, it is not
allowed to touch the noise suppressor and its housing.
3.1.4 Electric shock and short-circuit. In order to avoid the electric shock or the
short-circuit, when the welder and generator set is wet or when your hand is wet,
contacting the welder and generator set is not allowed. This welder and generator
set is not waterproof so that it should not be used at places in rain, snow and
water mist.
-7-

In order to prevent the electric shock, the welder and generator set should be
grounded. Connect the grounding terminal of the generator with the external
grounding device by using a conductor. Please see Fig.2-1 and Fig.2-2. Before
the start, don't connect the other equipment with the welder and generator set.
At the time of the start, most motors will exceed their
rated power. On any sockets, the current should not
exceed the stipulated limit.
3.1.5 Other safety main points
In order to know how to quickly brake the set, the operators should be familiar
with operating all the switches. Anyone without passing through the correct
guidance should not carry out the operation. The operators should wear the
safety shoes and the suitable clothes. The children and livestock should be kept
far from the welder and generator set.
3.1.6 Charge the battery.
The electrolyte of the battery contains sulphuric acid. In order to protect your eyes,
skin and clothes, if you touch it, it is necessary to use water for wash. If your eyes
touch it, you should go to a clinic for wash.
The hydrogen produced from the battery is the explosive gas. Don't smoke
particularly at the charge time. Any spark should not be splashed to the places
near the battery.
Charge the battery at the places with good ventilation.
NOTE
Potentiometer
Electric Lock
Wiring Terminal AC Output Receptacle Grounding Terminal
Automatic Air Switch
Fuse
-8-
ab
3.2 Preparation before the Start
3.2.1 Select and treat with combustion oil.
Combustion oil tank
Only use the light diesel oil. The combustion oil should filtered
cleanly. The attention should be paid to that don't let any dust and
water to be mixed into the combustion oil and the oil tank. Otherwise
the high-pressure pump and the oil nozzle may be blocked up.
Attention: Overflowing the oil is very dangerous. Filling the oil into
the oil tank should not exceed the top of the red cock inside the filter.
Air filter core
Don't wash the air filter core because the component is
the dry type. When the diesel engine output is not good
or the color of the exhausted waste gas is abnormal,
change the filter core immediately. Never start the
diesel engine without using the filter core.
Cap
Red cock
Speed change lever
Stop
Start/Run
a. After purchasing the fuel, put the fuel in the
barrel for 3 to 4 days.
b. After 3 to 4 days, put the suction pipe into
the barrel at the place with a half depth of the
barrel (water and foreign matter will be sunk
onto the lower position in the barrel.)
At the places of filling the oil into the diesel engine or
of storing the diesel oil, don't smoke. Don't let any
spark go into this area. At the time of filling the oil, the
oil should not be overflowed. After the oil filling, be
sure fastening the cover nut on the oil inlet.
NOTE
-9-

3.2.2 Filling the Machinery Oil
Lubrication Oil Filling Inlet
Put the generator set in a level state. Fill the oil into the oil-filling inlet. At the time
of checking the oil level, it is necessary only to lightly insert the oil ruler. Please
pay attention to that you should not rotate the oil ruler.
The factor of the affection, to the performance and reliability of the diesel engine,
caused by your lubrication oil, is bigger than other factors. If you use any poor
quality machinery oil or if you do not change the oil for your diesel engine
according to stipulation, it is easy to block up the piston. It is also to quicken the
wearing of the cylinder, bearings, and other moving components so that the life of
your diesel engine is reduced.
KM186FG
1.65 (0.36)
A.P.I. Diesel engine maintenance
classification. The lubrication oil
should be CC or CD grade.
Volume (L) English gallon
Volume
Type
Operating temperature
Recommended value
Applicable limit
About one month or 20 hours Interval of 3 months or 100 hours
Time for changing the oil
Top Limit
Lower Limit
--
Although there are the low oil pressure alarm system---the stop device. At
the time of starting the set, it is necessaryto check the oil quantity. If the oil
quantity is not sufficient, please add some oil. Discharging the machinery
oil should be carried out while the diesel engine is hot. After the cooling, it
is very difficult to dischargethe oil cleanly.
Don't fill the machinery oil into the diesel engine
when the dieselengine id running.
3.2.3 Check theair filter.
(1) Unfasten the butterfly nut, open the filter cover, and take out the filter
core. Never wash the filter core by using any detergents. When the output
is reduced or the color of the exhausted gas is not good, change the filter
core. Never start the generator set without the air filter core. Otherwise the
diesel engine willsoon be worn out.
(2) After mounting the filter core, cover the air filter housing and fasten the
butterfly nut.
WARNING
Oil-filling Hole Cock
(Dipstick)
Oil Drain Bolt
Filtration Cover
Check Cover of Air-filter
Butterfly Screw
Cover of Air-filter
--

3.2.4. Inspection for the welder and generator set
Before starting the set, be sure that the air switch should be turned to OFF state.
If the switch is not turned to OFF state, when starting the diesel engine,
suddenly loading is very dangerous.
The generator should be grounded to prevent the electric shock.
Blow the dust out of the generator control box inside and surface by using dry
compressed air(air pressure should be less than 1.96 x 10⁵ Pa) or manual.
Check the clean condition on the slide rings, check the carbon brush pressure,
check whether the position on the slide rings are correctly fitted. Check whether
the fixing is reliable and whether the contact is good.
According to the electric wiring diagram, check whether the wiring lines are
correct and whether the connection joints are firm.
Use a 500V megameter to measure the insulation resistance of the electric
device section and the resistance should be not less than 2 megohms. Otherwise
it is necessary to carry out a dry treatment. While measuring, AVR should be
disconnected. Otherwise AVR may be burned out. (For the noise quieting type set,
it is possible not to carry out this check.)
3.2.5. Before delivering the diesel engine from the factory, the fuel oil and
the machinery oil had been discharged.
Before filling the fuel oil and starting the diesel engine, it is necessary to check
whether there is any air mixed into the oil circuit. If there is any, the air should be
discharged. The concrete method is to unfasten the connecting nut between the
oil injection pump and the oil transmission pipe so as to discharge the air in the
fuel oil until there is no air bubbles to be appeared. Then fasten the connecting
nut again.
Potentiometer
Electric Lock
DC Output Receptacle
Anode Wiring Terminal Cathode Wiring Terminal
Grounding Terminal
Knob Switch
Automatic Air Switch
Voltmeter
Operation
Director Light
--
3.3 Inspection and Operation of the Diesel Engine
3.3.1 Low oil pressure alarm system/braking device
Our diesel engine possesses the low oil pressure alarm system/braking device.
When the oil pressure goes down, the device will automatically brake the diesel
engine to avoid the blocking-up of the diesel engine because the oil pressure is
too low and the lubrication is insufficient. (2 GF-L can not stop the machine
automatically.)
If the diesel engine is running under the condition that the lubrication oil is
insufficient, the oil temperature will go up too high. On the other hand, it is also
dangerous if these is too much oil. Because the machinery oil may be burned,
this will make that the revolution speed of the engine increase suddenly and
results in abnormal fast running . For this purpose, it is necessary to check the
machinery oil and the oil level should reach the stipulated height.
3.3.2 How to open the machinery casing door and the housing (TW series
set)
(1) Open the machinery casing door,
rotate the handle counterclockwise. Lift
the door and carry out the daily check.
(2) Unfasten the bolts of the air filter
housing and take out the oil nozzle
housing to check the air filter.
3.3.3 Trial run operation
When your diesel engine is a new set, a large loading will reduce the engine's
life. Within the first 20 hours, it is necessary to carry out the trial run.
Handle
--

c. Quickly draw out the buffer start handle by two hands.
While operating (or after the start), don't let the handle fly out of your hand to
avoid that it smashes onto the diesel engine. Slowly and lightly let the handle
return its position to avoid damaging the starter.
When the diesel engine is running, never draw out the
start handle otherwise it will damage the diesel
engine.
d. In the cold days, when it is difficult to start the
diesel engine, unplug the rubber cock on the
rocker arm of the diesel engine and fill in 2ml
machinery oil.
Plug the rubber cock before the start.
The rubber cock should be plugged except filling
in the oil. Otherwise the rain, water, dust and
other dirt may enter into the diesel engine to
cause the fast wearing of the inside components.
This will result in serious problem.
3.4.2 Electric start
3.4.2.1 Start (the preparation for this start is the
same as the hand start.)
(1) Insert the electric door key and make it in
OFF position.
(2) Set the speed handle of the diesel engine in
run position.
(3)Turn the start switch to start position
clockwise.
(4) After the diesel engine starts, your hand should relieve the switch handle. Let
the switch restore to ON position automatically.
(5)If the diesel engine doesn't start after 10 seconds, please wait for anther 15
seconds and make the start again.If the start motor rotates for a long time and the
voltage of the battery will go down to cause the start motor running hysteresis.
When the diesel engine is in operation always leave the start key in ON position.
CAUTION
Speed Hande
--
(1) Avoid the overload.
During the trial run stage, it is necessary to avoid the large load. It uses only
75%of the rated load.
(2) Change the machinery oil of the engine according to the stipulation.
At the beginning of the use, change the oil once each 20-hours or once a month.
After this, change the oil once each 3-months or once for each 100-hours.
3.4 Starting the Welder and Generator Set
3.4.1. Recoil start (manual start)
Start the engine according to the following
procedures:
(1) Switch on the fuel oil switch (in ON
position).
(2) Set the speed handle of the engine at
run position.
(3) Draw out the buffer start handle.
a. Draw out the handle till you feel your hand
has the resistance force. Then relieve it and
let it restore to the initial position.
b. Press down the pressure reduction handle
(when the buffer starter is drawn, it will
automatically be restored.).
Fuel Switch
Speed Handle
Decompression Lever
--

3.5 Operation Procedure for Starting the Generator Set
--
If the start motor rotates for a long time and the
voltage of the battery will go down to cause the start
motor running hysteresis. When the diesel engine is in
operation, always leave the start key in ON position.
3.4.2.2. Battery
Check the electrolyte level height of the
battery once a month. When the liquid
level goes down to a lower mark, add
some distilled water to make that the
liquid level goes up to a higher mark.
If the electrolyte in the battery is too less,
the diesel engine will not start. Because the electric power is insufficient at this
time, it is necessary to keep the liquid is at a place between the higher limit and
the lower limit.
If the electrolyte in the battery is too much, the liquid may overflow and this may
corrode its surrounding components.
Attention should be paid to avoiding that the electrolyte is too much or is too less.
Charge the battery once a month.
CAUTION
Liquid Top Limit
Liquid Low Limit
--

3.6 How to Operate the Welder and Generator Set
3.6.1 Operating the Diesel Engine
(1) Preheat the diesel engine for three minutes under the condition without any
load.
(2) For the diesel engine having the low oil pressure alarm system, it is necessary
to check whether the oil pressure signal indicator lights up.
For the diesel engine having the low oil pressure alarm system, the lubrication oil
alarm indicator will light up when the oil pressure is low or the lubrication is
insufficient, and the diesel engine will stop automatically. If no lubrication oil is
added and you do not make a restart, the diesel engine will still stop immediately.
It is necessary to check the oil height and add some oil.
(3)Do not unfasten the adjustment bolt used for adjusting the speed limit of the
diesel engine or do not unfasten the high-pressure pump limit bolt (they were
adjusted well when delivered from the factory.). Otherwise their performance will
be affected.
3.6.2 Inspection during the Operation
(1) Check whether there is any abnormal sound or vibration.
(2) Check whether the diesel engine does not start or the operation is not good.
(3) Check the exhausted gas color (is it black or is it too while?)
If you find one of the above mentioned phenomena, it is necessary to brake the
set, to find out the trouble cause and shoot the trouble. If the settlement can not
be made, please contact agency of our company nearby, or contact our company
directly.
Adjustment Bolt
-19-
-18-

The revolution speed of the generator (50Hz) should be increased up to the rated
speed 3000r/min (the speed handle should be turned to the top.).
(3)At the time of connecting with the generator, all kinds of equipment should be
connected in order. For the matter of the motor load, firstly the large power
motors should be connected. After the operation is normal, then the small power
motors can be connected. If the operation is incorrect, the generator will cause
the running hysteresis or will brake suddenly. It is necessary to unload the load
immediately and to turn off the generator switch. Check where the trouble
appears.
If the circuit overload makes that the air switch of AC circuit trips, it is necessary
to reduce the circuit load. It is not allowed that the set runs under the overload
condition. Maximum output power of the generation for the set should not exceed
the stipulation in Table 1-1. It is necessary to wait for several minutes before
restoring the operation. If the indication on the voltmeter is too low or too high, the
revolution speed can be adjusted. If there is any trouble and any abnormal
running condition, it is necessary to stop the generator for check.
(4) When the selection switch is set onto GEN, the switch is used for the
generation output.
At this time, there is also the welder voltage output at the welder output terminals.
But the output current is smaller, which can be used only for the electric welding
rods below 3.2mm. The welding current to be selected can be only below 130A.
While welding, the load attached at the generation output side should not exceed
1 kW. In such a way, it is possible to ensure a bigger welding current. The set will
supply only the essential illumination at the welding time to avoid the overload.
(5) When the selection switch is set to WELD (welding), the set will supply the
welding output (at this time, there is no voltage output from the generation socket.).
According to the electric welding rods or the operation demand, the current can
be adjusted through the potentiometer knob on the switching board. By adjusting
to a suitable position, the welding can be carried out. If a smaller current is
needed, it is possible to reduce the not be used for a long time. The position for
the rated current is one marks less than maximum position, the rate welding
current is 160A.
(6) Before using the set. It is necessary to firmly connect the welding cable joints
with the wiring terminals and so as to avoid burning out the terminals because of
poor connection.
(7) While the set is in operation, it is necessary to keep good ventilation. The
welder and generator set should not be covered with foreign matter to prevent the
matter from hindering the heat dissipation.
--
3.7 Loading
3.7.1 Load
Load according to the stipulated parameters. For the electric principle diagram of
the welder and generator set, please see the following figure.
3.7.2 Welder and Generator Output
(1) Be sure that the revolution speed of the welder and generator set be
increased to the rated speed (the speed handle of the diesel engine should be
turned to the top.). Otherwise the automatic voltage adjustment device will
produce the forced excitation. If the running is for a long time under such
condition and AVR will be burned out. For the rated revolution speed of the
generator, please see 1.1. Main Technical Specifications and Data in Chapter 1.
(2) After switching on the air switch, observe the voltmeter on the panel of the
control cabinet and the voltmeter should point to 230V 5% (50Hz),(for 60Hz set,
point to 240 V 5%). At the same time, set the selection switch to GEN
(generation) position. At this time, the AC power supply is supplied from the
power supply socket.
Do not start more than two machines at the same time.
The machines should be started one by one. Do not
use the floodlight at the same time of using other
machines.
KDE180XW/EW/TW
60Hz 50Hz
Not exceeding
2000/2200W
Not exceeding
1000/1200W
400W or
250W3
3
4
3
3
Generator output
Welder output
CAUTION
Type
Load
Single phase
synchronizing
welder
Incandescence
lamp, household
electric device
Projector,
electric stove
Machines using
the rectifier type
motors
Drilling machines,
grinding machines
and etc.
Machines using the
induction type motors
(capacity start type)
Water pumps, air-compressor and etc.
Load
--

3.8 Braking the Welder and Generator Set
3.8.1. Remove the load of the welder and generator set.
3.8.2. Turn off the air switch of the welder and generator set.
3.8.3. Set the speed handle of the engine to RUN position. Carry out the unload
operation of the diesel engine for three minutes. Do not brake the diesel engine
suddenly because this may make that the temperature goes up abnormally to
cause the blocking-up of the oil nozzle and the damage of the diesel engine.
(1) Press the braking handle downwards.
(2) When using the electric starter, turn the key to OFF .
(3) Set the fuel switch handle to S position.
(4) Slowly draw out the recoil handle till you feel the pressure (i.e., at this point of
the compression stroke, the suction and exhaust valves are closed.). Stop the
handle at this position. In such a way, when the engine is not in use, the rusting
can be prevented.
1. When the speed handle is set at stop position and
the diesel engine is still in operation, it is possible to
stop the diesel engine either by setting the fuel switch
to OFF position or by unfastening the high pressure
oil pipe nut. Do not brake the diesel engine by using
the pressure reduction handle.
2. It is not allowed that the set stops with the load. It is
necessary to firstly remove the load and then to stop
the set.
CAUTION
Fuel Switch Unfasten this nut
(high pressure oil pipe nut)
--
(8) When the set is used only for the welding separately, the welding cable should
be removed or protected. When the set is used only for the welding separately,
the air switch should be turned off, or the power supply plug should unplugged to
avoid if from short-circuit.
(9) The reference for the current by using the electric welding rods in different
diameters
3.7.3 Charge
(1) For the set with the electric start, the set is equipped with a power supply 12V
DC. The battery is charged through a regulator. After the battery is connected into
the start circuit, and after starting the diesel engine and the set is turned into the
running state, at this time, 12V circuit will charge the battery automatically.
(2) If the set is not in use for a long time, it is necessary to remove the connection
lines of the battery to prevent the battery form the electric leakage.
(3) Never connect the positive pole of the battery with the negative pole each
other. Otherwise it will damage the battery and the motor.
(4) Do not misconnect the positive pole of the battery with the battery. Otherwise
it will damage the battery and the motor.
(5)The flammable gas will be produced while charging the battery. The spark,
flame and cigarette should not be approached to the place of charging the battery.
In order to avoid that there is any spark produced nearby, firstly connect the
battery with the charging conductor and then with the motor. At the time of
disconnection, firstly disconnect the motor cable.
Diameters of Electric
Welding Rods (mm)
Welding Power
Supply (A)
1.6
40-50
2.0
50-80
2.5
60-100
3.2
100-140
4
150-180
--

4. Maintenance of the Welder and Generator Set
4.1 Regular Maintenance
In order to keep that the welder and generator set is in a good state, the regular
inspection and maintenance is very important. The set is composed of the diesel
engine, welder generator, control cabinet, frame and so on. For the details about
the inspection and maintenance, please read the operation and maintenance
manual for each assembling section.
Before carrying out maintenance to the set, please turn off the diesel engine. If it is
necessary to run the diesel engine, its surrounding should be in good ventilation to
discharge the gas that contains the poison carbon monoxide.
After using the set, it is necessary to wipe off dirt by using a clean cloth to prevent
the corrosion and remove the sunk materials.
" " The chart above indicates which checks to make and when to make them, the mark ( )
indicates that special tools and skills one required, consult your dealer.
(Replace)
(Replace)
(1st time)
Item
Service period
regular
Check and replenish fuel
Drain fuel from F.O. tank
Check and replenish lube oil
Check for oil leakage
Chang lube oil
Clean oil filter
Air cleaner element replacement
Clean fuel filter
Check fuel injection pump
Check fuel injection nozzle
Check fuel pipe
Lap intake and exhaust valves
Replace piston rings
Check battery fluid
Check and tighten each parts engine
Adjust valve clearance for intake and exhaust valves
Check commutator brush and slip ring
Every year
or 1000 Hrs
Daily
check
First month
of 20 Hrs
Every 3 months
or 100 Hrs
Every 6 month
or 500 Hrs
(1st time)
(2nd and thereafter)
(Replace if necessary)
(Monthly)
(Service more frequently when used in dusty areas)
Tighten head bolts
--
3.9. KDE180 SET
3.9.1 The updated AVR technology and IGBT module control technology are
applied in KDE180 generators, which ensures stable welding current and
generating voltage. And there won't be any interference between the generating
and generating voltage. And there won't be any interference between the
generating and welding condition when they are used simultaneously. The unit
can be applied for welding and generating simultaneously, however, the total load
of the unit cannot surpass the rated load.
The welding current data table:
3.9.2 Choose the welding current with selection button and a regulating knob
according to the width of work piece and the diameter of the welding rod. When
the small current for thin steel piece is required, first turn the regulating knob to
LOW, and then choose the appropriate small current by regulating the regulation
knob. The regulation range for this work condition is 50-140A. When big current
for thick steel pieces is required, turn the regulating knob to HIGH. Then you can
choose a big current by regulating the regulating knob. Then regulation rage for
this work condition is 80-180A.
160 120
1
100
2
50
2.5
0
2.3/3
Supply little light
Weld current(A)
Generating power (KW)
--

4.1.5 Tightening cylinder head bolts (Refer to the manual of diesel engine)
requires a special tool. Don't try it yourself.
4.1.6 Checking the injection nozzle, injection pump, etc.
(1) Adjusting the valve head clearance for the intake and exhaust valves.
(2) Lapping of intake and exhaust valves.
(3) Replacing piston ring. All these require special tools and skills. Do not perform
the injection nozzle test near an open fire or any other kind of fire. The fuel spray
may ignite. Don not expose bare skin to the fuel spray. The fuel may penetrate
the skin and cause injury to the body. Always keep your body away from the
nozzle.
4.1.7 Checking and replenishing battery fluid and charging the battery.
This diesel engine uses a 12V battery. The battery fluid will be lost through
continuous charging and discharging. Before starting, check for physical damage
to the battery and also the electrolyte level, and replenish with distilled water up
to the upper mark if necessary. When actual damage is discovered, replace the
battery.
4.1.8 Frequent check of the contact between carbon brush and slip ring of
alternator, clock whether they are in good condition. If spark occurs they have to
be adjusted properly.
Every 3 months or 100 hours
Clean time
monthly
Battery fluid check
--
4.1.1 Changing engine oil (Every 100Hrs)
Remove the oil filler cap. Remove the drain plug and drain the old oil while the
engine is still warm. The plug is located on the bottom of the cylinder block.
Tighten the drain plug and refill with the recommended oil.
4.1.2 Cleaning the oil filter
4.1.3 Changing the air cleaner element
Do not wash the air cleaner element with detergent because this is a wet type
element.
Never start the engine without the element, or with a
defective element. Change the element in time.
4.1.4 Cleaning and replacing the fuel filter
The fuel filter also has to be cleaned regularly to insure maximum engine output.
(1) Drain the fuel oil from the fuel tank.
(2) Loosen the small screws of the fuel cock and pull out the filter from the F.O.
tank. Wash the filter thoroughly with diesel fuel.
Remove the lock nut, end cap and diffuser discs and clean the carbon deposit.
CAUTION
Replace if necessary
Clean Every 6 months or 500 hours
Every 6 months of 500 hours (or earlier if dirty)Change
Every year or 1000 hours
Clean
Replace
Every 6 months or 500 hours
Oil-Fitting Hole Cock
(Dipstick)
Oil Filter
Oil Drain Bolt
--

5.
Inspection, Repair and Trouble Shooting for the Welder and Generator Set
5.1 Maintenance and rimedy
The generator does not generate
the electricity, without welder voltage.
The diesel engine can no start
Remedy
Cause
Oil fuel is not enough
The switch is not at ON position
Check the level of lubricant
The oil nozzle has dirty
The battery has no electricity
Main switch (NFB) is not closed
The contact of socket is not good
AVR auto-voltage regulator is damaged
The pump of high pressure and oil nozzle
can not inject oil or the oil amount is not enough
The control lever of speed is not at RUN position
The speed and force to pull the recoil starter is not enough
The carbon brush of generator is not good
The rated speed of generator ban not be reached
The potentiometer for adjusting the welder current is damaged
Add oil fuel.
Turn it to ON position.
Put the control level to RUN position.
Clean the oil nozzle.
Charge it or replace it with a new one.
Put the main switch to the ON position.
Change the carbon brush.
Adjust the feet of socket.
Adjust if according to the requirements.
Change the AVR auto-voltage regulator.
Change the potentiometer.
Remove the oil nozzle out and repair it at test table.
The specified oil level should be between
upper level H and lower lever L
Start the diesel engine according to the
requirements of operating procedure of start.
If electricity is still not generated, take the generator to a our Dealer.
5.2 Question and problem
If you have any question or problem when you meet in your operation, please
contact with our company or our dealer and tell the following information:
(1) The type of diesel generator sets, the No. and type of diesel engine and the
No. and type of generator.
(2) Status
What problem had been taken place when operation and explain how much
speed it is operated.
(3) Time of operation
(4) The other cetailed conditions, for example, when the problem took and what
time, etc.
For details, please fill the sheet of soliciting opinions from the customers and
send it to our company.
--
4.2 Maintenance for a long time storage
If your generator should be storage in a long time, the following preparation
should be made:
4.2.1 Operate the diesel engine about 3 minutes, the stop it.
4.2.2 Close the diesel engine when the diesel engine is still hot, drain old
lubricate of diesel engine oil out, the refill new one.
4.2.3 Pull out the rubber plug at the cover of diesel engine and ass 2ml of
lubricate in cylinder, and finally put the plug on its original place.
4.2.4 Maintenance of starting position
(1) Manual starting
Press the pressure-reduce handle (non-compressin position), pull the recoil
handle 2~3 times. (Don't start the diesel engine).
(2) Electric starting
When the starting handle is in the position of non-compressing position, operate
the diesel engine 2~3 seconds. When the switch is in the position of istart, don't
start the diesel engine.
4.2.5 Pull the pressure-reduce handle out, pull the recoil starter slowly.
When fell it is fasten, then stop. (At this time the intake and drain valve is at the
status of close, it is suitable to prevent from rust).
4.2.6 Clean and store it in a dry place.
--

6.1 List for Tools, Accessories and Fittings with the Machine
6.2 Technical documentation
1
2
3
4
1
1
1
1
1
2
3
4
5
1
1
1
1
1
6. Appendixes
RemarksNo. Name Unit Quantity
Diesel welder and generator set
Tool bag
Plastics housing Piece
Power supply socket
Set
Piece
Set
Piece
Operation manual for the diesel welder and generator set
Operation manual for the diesel engine
Component diagram of the diesel engine
Certificate of quality
Packing list
Copy
Copy
Sheet
Sheet
Sheet
--
The choice of the electric cable depends on the allowable current of the cable
and the distance between the load and the generator. And the cable section
should be big enough.
If the current in the cable is bigger than the allowable current, it will become over
hot and the cable will be burnt. If the cable is long and thin, the input voltage of
the electric appliance will be not enough, causing that the generator doesn't start.
In the following formula, you can calculate the value of the potential "e".
The relations among of the allowable current, and length, section of the Insulating
cable (single core, multi-core) are as follow:
(Presume that the use voltage is 220V and the potential is below 10V.
2
The application of the single-core insulating cable section mm
2
The application of the multi-core insulating cable section mm
6.3 The choice of the electric cable
Potential (v) = Current (A) 3
Length
Section area
1
58
50A
100A
200A
300A
Current
Length
beneath
75m 125 20015050m 100m
8
22
60
100
14
30
60
100
38
60
125
200
22
38
60
100
22
50
80
125
30
50
100
150
50A
100A
200A
300A
Current
75m 125 20015050m 100m
14
38
38 2
60 2
14
38
38 2
60 2
22
38
38 2
60 2
22
50
50 2
60 2
30
50
50 2
80 2
38
60
50 2
100 2
Length
beneath
--

The conditions of generator rated output:
Altitude: 0 m Ambient temperature: 25 Relative humidity: 30%
Ambient modified coefficient: C (Relative humidity 30%)
Note: When the relative humidity is 60%, the modified coefficient is C-0.01
When the relative humidity is 80%, the modified coefficient is C-0.02
When the relative humidity is 90%, the modified coefficient is C-0.03
When the relative humidity is 100%, the modified coefficient is C-0.04
Counting example:
When the rated power of generator is P =5KW, altitude is 1000m, ambient
N
temperature is 35 , relative humidity is 80%, the rated power of generator is:
P=P (C-0.02) = 5 (0.82-0.02) = 4KW
N
6.4 Modified coefficient table of ambient condition power
Ambient temperature ( )
Altitude
(m)
0
500
1000
2000
3000
4000
25
1
0.93
0.87
0.75
0.64
0.54
30
0.98
0.91
0.85
0.73
0.62
0.52
35
0.96
0.89
0.82
0.71
0.6
0.5
40
0.93
0.87
0.80
0.69
0.58
0.48
45
0.90
0.84
0.78
0.66
0.56
0.46
--
This manual suits for next models
2
Table of contents
Other Kipor Welding System manuals