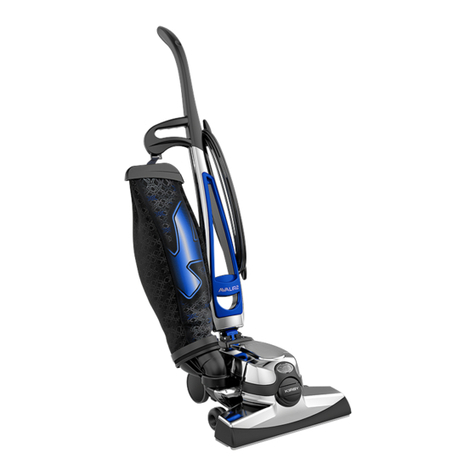
Kirby Sentria User manual

Congratulations
Kirby Sentria in Moscow - $2000 - Tel: (495) 506-9032
DearKirbyCustomer,
Congratulationsonyourpurchase.Younowowna superior,
completehomecaresystemdesignedtohelpmakeyourhome
andfurnishingslookbetterandlastlonger.Mostimportantly,
repeateduseofyourKirbySentria™systemwillgiveyouthe
typeofcleanin-homeenvironmentyouwantanddeserve.
Thisuseandcaremanualisdesignedtohelpyougetthemostout
ofyournewSentria homecaresystemandenjoyitsnumerousben-
efitsandfeatures.TheOwner'sDVD(whereavailable)willgiveyou
step-by-stepinstructionsonyourmachine'soperation.Yourlocal
distributorisavailableshouldyouhaveanyfurtherquestions.
TheKirbyCompany,thehallmarkofinnovationandqualityfor
over90years,sellsthroughthein-homesalesmethodinover70
countries.Wewantyoutoknowthateverycustomerisimportant
tousandthatwesincerelyappreciateyourbusiness.
PleaseenjoyyourSentria homecaresystemtoitsfullest!
ThismanualiswrittenforusewiththeKirby®Sentria™ homecaresystem.
Forassistance,contactyourlocalauthorizeddistributor.
TheKirbyCompany,1920West114thStreet,Cleveland,Ohio44102,U.S.A.
USAPartsandSupplies(1-800-437-7170),[email protected]m
USAConsumerRelations(1-800-494-8586),[email protected]m
www.kirby.com,Russia:www.kirby.by.ru
Kirby,MicronMagic,Splitsecond,Splitsecond2,Scuttle,Odorific,TechDrive,MiracleWaxer,Handi-BulterandMiniEm-Torare
registeredtrademarksofTheScottFetzerCompany.
Sentriaisa trademarkofTheScottFetzerCompany.
1

ImportantSafetyInstructions
WHENUSINGANELECTRICALAPPLIANCE,BASICPRECAUTIONS
SHOULDALWAYSBEFOLLOWED.
BEFAMILIARWITHALLTHEIMPORTANTSAFETYINSTRUCTIONS
BEFOREUSINGYOURSentria HOMECARESYSTEM.
WARNING
-Toreducetheriskoffire,electricshockorinjury:
•Donotleaveapplianceunattendedwhenrunningorpluggedin.Unplugfromoutlet when
notinuseandbeforeservicing.
•Donotuseoutdoors.UseonlyondrysurfacesorwiththeKirbyCarpetShampooSystem.
Donotexposetorain.Storeindoors.
•Donotallowtobeusedasa toy.Closeattentionisnecessarywhenusedbyornearchildren.
Donotletchildrenusethecleanerunattended.
•Useonlyasdescribedinthismanual.Useonlymanufacturer'srecommendedattachments.
•Donotusewithdamagedcordorplug.Ifapplianceisnotworkingasitshould,hasbeen
dropped,damaged,leftoutdoorsordroppedintowater,returnittoa factoryauthorized
distributororservicecenter.
•Donotpullorcarrybycord,usecordasa handle,closedoorsoncord,orpull cordaround
sharpedgesorcorners.Donotrunapplianceovercord.Keepcordawayfromheatedsurfaces.
•Donotunplugbypullingoncord.Tounplug,grasptheplug,notthecord.
•Donothandleplugorappliancewithwethands.
•Donotputanyobjectintoopenings.Donotusewithanyopeningblocked;keepopenings
freeofdust,lint,hairandanythingthatmayreduceairflow.
•Keephair,looseclothing,fingersandallpartsofbodyawayfromopeningsandmovingparts.
•Donotusetopickupanythingthatisburning,smolderingorsmoking,suchascigarettes,
matches,glowingparticlesorhotashes.
•Donotusetopickupcombustiblematerials.
•Donotusewithoutdustbagand/orfiltersinplace.
•TurnunitOFFbeforeunpluggingthecord.
•Useextracarewhencleaningonstairs.
•Donotusetopickupflammableorcombustibleliquids,suchasgasolineoruseinconfined
areaswhereflammableorcombustiblevaporsarepresent.
•WhenusingtheCarpetShampooSystem,donotuseflammableorcombustibleliquids to
cleancarpetorfloor.
•WhenusingtheFloorCareSystem,useonlygenuineKirby®cleaningproductsor
commerciallyavailablefloorcleanersorwaxesintendedformachineoperation.
•Unplugthecordfromthewalloutlet andletthemotorcometoa completestopbefore
attemptinganycleaning,serviceorchangingaccessories.
•ThisapplianceisprovidedwithDoubleInsulation.Itmustbeservicedbya factoryauthorized
distributororservicecenterusinggenuineKirbypartstomaintainsafetyandtoprotectyour
warranty.Seepage59.
•KeepallKirbychemicalsoutofthereachofchildren.Thesechemicalsmaycauseirritation
ordiscomfortifswallowedorplacedintheeyes.
•DonotuseflammableorcombustiblefluidinthePortableSprayer.
•DonotusepesticidesorchemicalproductsinthePortableSprayerthatmayaffectordamage
thehumanrespiratorysystem,eyesorskin.
•Toavoidirritationordamagetoeyesorears,keepthemassagecupandallotheraccessories
asafedistanceaway.
•Alwaysusesafetyglasseswhenturbosanding.
SAVETHESEINSTRUCTIONS
FORHOUSEHOLDUSEONLY
TheSentria™ModelG10DisListedandCertifiedbyUnderwritersLaboratoriesInc.
andCanadianStandardsAssociationasa doubleinsulatedappliance.TheModel293006
and295006CarpetShampooSystem,Model293106and295106FloorCareSystem,
Model293506Zippbrush,Model293206TurboAccessorySystemandModel298806
and298906Handl-Butler®ToolarealsoOptionalAccessoriesforusewiththisKirby®
model.OutsideNorthAmerica,the230/240VoltmodelG10E,andthe100Voltmodel
G10Jproductsareapprovedbynationaltestauthoritiesasappropriate.
2
TableofContents
ImportantSafetyInstructions
AboutthisManual
Kirby®MicronMagic®HEPAFiltration
Part1 - GettingStarted
MovingYourSystem/HandleTiltLatchLock/Toe-TouchControl7
PowerNozzleHeightAdjustment/TechDrive®PowerAssist8
Installing/ChangingDisposableFilterBags9
BagSupportStrap/MiniEm-Tor®Collector/TheBeltLifter10
Part2 — Upright& PortableCleaner
UprightCordManagement13
TheUprightCleaner14
StraightSuctionCleaner15
ThePortableCleaner16
Part3 — CanisterCleaner& Attachments
Convertingtoa CanisterCleaner/InstallingtheAttachmentHose19
ExtensionTubes/SurfaceNozzle/DusterBrush20
UpholsteryNozzle/CreviceTool/Wall& CeilingBrash21
MassageCup/SuctionControlGrip22
UsingYourSentria Systemasa Blower23
ThePortableSprayer25
ThePortableShampooer27
Part4 — OptionalAccessories
TheCarpetShampooSystem30
KirbyGuardCarpet& UpholsteryProtector 36
TheMiracleWaxer®- FloorPolisher37
TheFloorCareSystem- FloorBuffer39
TheFloorCareSystem- CarpetFluffer41
TheTurboAccessorySystem42
TheZippbrush45
TheHandi-Butler®Tool46
Part5 — Operating/MaintenanceTips
ChangingthePowerNozzleBelt55
AdjustingtheBrushRollHeight56
MiscellaneousPartsReplacement58
QuestionsandAnswers/Troubleshooting59
OtherFineKirby®CleaningProducts64
Index
ExpandedIllustrationoftheSentria model& Accessories
IfyouhaveanyquestionsregardingyourpurchaseortheoperationofyourKirbyHomeCare
System,pleasecontactyourlocalauthorizeddistributorship:
OR
YoumaycontactTheKirbyCompany'sConsumerRelationsDepartmentby:
e-mail[email protected]mmailConsumerRelations
telephone1-800-494-85861920West114thStreet
fax216-529-6146Cleveland,Ohio44102
Ourbusinesshoursare8:00a.m.to5:00p.m.EasternTime,U.S.A.MondaythroughFriday.
3
2
4
5
6
12
18
29
54
66
68

AboutThisManual
ThisOwner'sManualwasdesignedtobeeasytoreadandfollow.Ithasbeenorganizedin
sectionsbasedonthevariouswaysyoumayuseyournewKirby®Sentria™system.Within
eachsection,simplestep-by-stepillustrationswillhelpyoueasilyvisualizethestepsrequiredto
properlyoperateyournewSentria systemanditsmanyattachmentsandoptionalaccessories.
Pleasenote:IllustrationsanddescriptionsofeachpartofyournewSentria homecaresystem
canbefoundintherearofthemanual.Pleaserefertotheseillustrationsandcorresponding(#'s)
asyoureadthemanual.
InadditiontotheTableofContentsonpage3,youwillalsofindanIndexonpage66that
willreferyoutotheinformationyourequire.
WesincerelyhopethisOwner'sManualwillhelpyouobtainyearsofsatisfactoryworld-class
performancefromtheSentria homecaresystembyKirby.
4

MICRON
MAGIC®
•• • • HEPAFILTRATION
WithMicroAllergen Technology
Youboughtthebest;youexpectthebest.That'swhytheKirbyCompanydevelopedthe
MicronMagicHEPA(HighEfficiencyParticleArrest)FiltrationSystemfeaturingthelatest
incleanairtechnologywithoutsacrificingtremendousairflow.
YournewSentria™systemincludesourBESTfilters:
•Trapsover99%ofparticlesassmallas0.3microns
•RatedHEPA11
•Minimizesbagodor
So,whatdoesthismean?
Improved Indoor Air Quality!
Theseimprovementsarea partoftheKirbyCompany'spursuittorespondtoourcustomers'
needs.TheKirbyMicronMagicHEPAFiltrationSystemdemonstratesthequalityyouexpect
andtheperformanceyoudeserve.
ReordergenuineKirbyMicronMagicHEPAfilterbagswithMicroAllergenTechnologyfrom
yourlocalauthorized KirbyDistributor.
TheCarpetandRugInstitute(CRI)has
awardedtheKirbyhomecaresystem
its"GreenLabel"sealofapprovalfor
meetingtheorganization'srequirements
forsoilremoval,dustcontainmentand
appearanceretention.
For those who appreciate Quality, Reliability and Performance
5

GettingStarted
PARTONE
Thissectionoutlinesgeneralinformationyouwillneedas
youbeginusingyournewSentria™system.Itincludesinfor-
mationon:
MovingandCarryingYourSystem
UsingtheHandleTiltLatchLock
TheToe-TouchControl
ProperPowerNozzleHeight
UsingTechDrive®PowerAssist
Installing/ChangingDisposableFilterBags
EmptyingtheMiniEm-Tor®Collector
UnderstandingtheBeltLifter
Pleasereadthissection(aswellasallothersections)carefully
beforeusingyournewSentria homecaresystem.
6

GettingStarted
MOVINGYOURSYSTEM
YourSentria systemisequippedwithTechDrive®power
assist.In orderto pushyourunitwiththemotorOFF,the
TechDrivePedal(11)mustbeturnedOFF(disengaged).
TurnTechDrivepowerassistOFFbypushingdownonthe
gray"N"side(marked"N"forNeutral)oftheTechDriveN/
DPedal.(Seepage8 foradditionalinformation.)
CARRYINGYOURSYSTEM
NOTE:TheCarryingGrip(18)isdesignedforconveniencein
carryingyourSentria system.•
HANDLETILTLATCHLOCK
TheHandleTiltLatchLock(10)servestwopurposes:
1
ToallowyoutoliftthefrontoftheSentria systemover
doorthresholdsorthrowrugs.Todoso,movetheTilt
LatchLocktowardsthebag.Bydoingthis,thehandle
willonlylowerpartway.Thisallowsyoutopushdownonthe
lockedhandleandliftthefrontoftheunit.>
2ToallowyoutostoreyourSentria systemina
verticalpositionorcarryit.
Todothis,lowerthehandletoa horizontalpositionnearthe
floor.Whilepushingthehandledown,movetheTiltLatch
Lockawayfromthebagtolock thehandledown.Youcan
nowstandtheunitupontoitsbumperandleanitagainsta
wallforstorage.
Thisverticalpositionmayalsobeusefulincarryingtheunit.
Tolifttheunit,usetheCarryingGrip(18).•
TOE-TOUCHCONTROL
TheToe-TouchControl(8),(9), locatedoverthefront
wheel,raisesandlowersthefrontofyourSentria system.
StepdownontheToe-TouchControlBottomPedal(9)toraise
thefront.•
/!\CAUTION: NeverunlocktheHandleTiltLatchwithoutholdingontothehandle.The
handleisspring-loadedandcouldquicklypivotupwardwhenunlatched.
7

GettingStarted
POWERNOZZLEHEIGHTADJUSTMENT
WhenusingthePowerNozzle(25),itisimportanttoadjust
theheightproperly.StartbypressingtheToe-TouchControl
BottomPedal(9)allthewaydown,raisingthefrontofyour
systemallthewayup.
TheToe-TouchControladjuststhePowerNozzletoseven
differentheights.Thehighestfourpositionsareusedforattach-
ingaccessories.Positions#1-3areusedforcarpetandfloor
cleaning.Positions#1-3areindicatedwhenthenumbershows
directlyinfrontoftheToe-TouchControlUpperPedal(8).
TurntheunitonandpresstheToe-TouchControlupper
pedal4 times(onenotchata time)untilyouseethe#3in
frontoftheToe-TouchControlUpperPedal.Youarenowat
theHIGHESTfloorcleaningpositionusedforhigh-pileand
plushcarpets.
PressonemorenotchdownfortheMEDIUMposition
(untilyouseethe#2infrontoftheToe-TouchControlUpper
Pedal.)Thisisthemostwidelyusedpositionforall-type
carpets.PushonemorenotchdownforLOW(untilyousee
the#1infrontoftheToe-TouchControlupperpedal).Thisis
thelowestpositionforlowpilecarpetandhardfloorcleaning.
NOTE:Whenfinishedvacuuming,presstheToe-Touch
ControlBottomPedalallthewaydowntomoveyour
Sentria system.•
TECHDRIVE®POWERASSIST
YournewSentria systemisequippedwithTechDrivepower
assist.Thisinnovativefeatureeliminatesmostoftheeffort
requiredtomoveyourSentria systembackandforth.•
TURNINGTECHDRIVEPOWERASSIST
ON(DRIVE)
ToengageTechDrivepowerassistpushdownthered"D"
side(marked"D"forDrive)oftheTechDriveN/DPedal(12)
locatedjustbelowthePowerSwitch.(13)
YoumayuseyourSentria systemwithoutTechDrivepower
assistifdesired.SimplyputtheTechDrivepedalinNeutral.•
/!\IMPORTANT: Toavoidpossibledamagetosofttiles ormarkingofwaxedand
finishednon-carpetedfloors,disengagetheTechDrivepedal.
8

GettingStarted
TURNINGTECHDRIVEPOWERASSIST
OFF(NEUTRAL)
TomoveyourSentria™systemwiththemotorOFForto
vacuumwithoutpowerassist,TechDrivepowerassistmust
beputinNeutral.
ToplaceTechDrivepowerassistinNeutral,pushdownthe
gray"N"side(marked"N"forNeutral)oftheTechDrive
N/DPedal(11).•
INSTALLING/CHANGINGDISPOSABLE
FILTERBAGS
ADisposableFilterBagmustbeinstalledbeforeyoubegin
vacuuming.
Toinstalla newDisposableFilterBag,unziptheOuter
PermanentBag(1)andpullouttheDisposableFilter
BagalongwiththeTopAdaptor(5).>1
2Whennecessary,removetheusedDisposableFilterBag.
NOTE:AlwaysreplacetheDisposableFilterBag
whendirtreachesthe"FULL"lineonthebag.Failure
todosowill affectperformance.
FromtherearoftheDisposableBag,graspthecardboard
faceplate.HoldingtheTopAdaptorsteady,rotatethecardboard
faceplatetotheleft(counter-clockwise).Whenthelocktabson
theTopAdaptoralignwiththeslotsinthecardboardfaceplate,
gentlypullthebagoff.>
3
Toinstalla newDisposableFilterBag,graspthecard-
board faceplatefromtherearoftheDisposableFilter
bag.Aligntheslotsinthecardboardfaceplateonthe
DisposableFilterBagwiththelocktabsontheTopAdaptor.
ThenpushtheTopAdaptorintothebagopening.
HoldingtheTopAdaptorsteady,rotatethecardboardfaceplate
totheright(clockwise)tosecuretheDisposableFilterBag.
NOTE:Toavoidairleaks,makesurethecardboardfaceplate
issecurelypositionedupagainsttheflatportionoftheTop
Adaptor.>
/!\CAUTION: BeforechangingtheDisposableFilterBag,unplugthepowercord
fromthewalloutlet andbesurethatthemotorandfanhavestopped.
9

GettingStarted
BAGSUPPORTSTRAP
4ChecktomakesuretheBagSupportStrap(4)iscon-
nectedtotheTopAdaptor(5).TheBagSupportStrap
providesthesupportrequiredforproperoperationof
theDisposableFilterBag.
Ifitisnotconnected,threadthestrapthroughthesmallhole
oftheTopAdaptor.Thenplacetheholeinthestrapoverthe
studontheTopAdaptor.
Finally,inserttheadaptorandnewfilterbagintotheOuter
PermanentBag(1)andclosethezippercompletelyfor
maximumperformance.
NOTE:InorderfortheFiltrationSystemtoperformeffectively,
useonlyKirby®MicronMagic®HEPAFiltrationBags.Ifthe
outsidebagistornordamaged,pleasereplaceimmediately.•
EMPTYINGTHEMINIEM-TOR®COLLECTOR
TheMiniEm-Tor(6)collectorisdesignedtocollectlarge,
heavyparticleswhichcanbeemptiedbyremovingtheMini
Em-Torcollector.
1
2
Toremove,grasptheMiniEm-Torcollectorinthe
handholdprovidedandrotateitawayfromthebodyof
thesystemasfarasitwill go,thenliftitoff.
Thetopofthebagisreleasedfromthehandlebypressingthe
BagReleaseButton(16).AfterremovingtheMiniEm-Torcol-
lectorandtheentireBagAssembly,positionthefrontopening
oftheMiniEm-Torcollectorovera newspaperandshakeitto
removetheparticles.>
ToreplacetheMiniEm-Torcollector,re-attachtheentire
BagAssemblybyinsertingtheBagLatchTab(2)atthetop
ofthebagintotheslotundertheBagReleaseButton(16).
Finally,lineuptheraisedindicatorarrowoftheMiniEm-Tor
collectorwiththeindicatorarrowontheAirExhaustPort(19).
RotatetheMiniEm-TorcollectortowardstheSentria system
andlockitinplace.
NOTE:TheMiniEm-Torcollectormustbesecurelylocked
inplaceortheunitwill notoperate.•
USINGTHEBELTLIFTER
TheBeltLifter(20)onyourSentria systemisusedfortwo
purposes:
1)ToengageordisengagetheBrushRoll.WhentheBrushRoll
isdisengaged,theSentria systemcanbeusedasa straightsuc-
tioncleaner(page15),and;
2)ToallowremovalofthePowerNozzlewhenconverting
yourSentria systemforusewithvariousattachmentsand
optionalaccessories.
Toavoiddamagingthebelt,turntheSentria systemOFF
beforeusingtheBeltLifter.>
/!\CAUTION: Do not pick up heavy objects, such as coins, screws, rocks or similar
objects. This may damage the fan.
10

GettingStarted
USINGTHEBELTLIFTER(cont)
1
TousetheBeltLifter,youmustfirstraisetheHeadlight
Hood(21).>
2
FlipoutthehandleontheBeltLifter(20).Useittoturn
theBeltLifterfullytotheleft(counter-clockwise)until
itstopsandtheredarrowslineup.Thisstretchesthe
beltandliftsitoffthemotorshaft.Returnthehandleonthe
BeltLiftertoitsclosedposition.
IfyouareusingyourSentria™systemasa straightsuction
cleaner,simplylowertheHeadlightHood.TheBrushRollis
nowdisengagedandwill notrotatewhenthepowerswitchis
turnedON.>
3Thebeltwill bestretchedtothetopofthenozzleas
shown.>
4Tore-engagethebeltsotheBrushRollrotates,simply
raisetheHeadlightHoodandusethehandletoturnthe
BeltLifterfullytotheright(clockwise)untilthegreen
arrowslineup.ThenlowertheHeadlightHood.
TheBrashRollwill nowrotatewhenthePowerSwitchis
turnedON.
NOTE:Thebeltshouldnotbestretchedwhenstoredfor
anextendedperiod.Makesurethegreenarrowslineup
forstorage.>
5YourSentria systemisequippedwitha BrushRoll
PerformanceIndicatorLight(7),locatedonthetop
rightsideofthePowerNozzle.Thepurposeofthis
lightistoshowiftheBrushRollisrotatingproperly.
IftheBrushRollIndicatorLightflashesintermittentlyor
doesnotcomeonwhenusingthePowerNozzle,theBrush
RollBeltmaynotbeworkingproperly.EithertheBeltisnot
engagedormayneedtobereplaced.
ToreplacetheBrushRollBelt,alsocalledthePowerNozzle
Belt,seePage55.•
11

Upright& PortableCleaner
PARTTWO
YourSentria™homecaresystemisextremelyversatile.
Inthissection,wewill discussthefollowing:
UprightCordManagement
UsingyourSentria Systemasan
UprightCleaner
UsingyourUprightasa Straight
SuctionCleaner
CleaningHard-SurfaceFloors
UsingyourSentria Systemasa
PortableCleaner
CleaningMattressesandCarpetedStairs
12

Upright& PortableCleaner
UPRIGHTCORDMANAGEMENT
TheSentria systemUprighthandleincorporatesa seriesof
hooksandfastenerstokeepthecordoffthefloorandattached
totheuprighthandleforyourconvenience.
1
WhenusingyourSentria systemasanupright,snap
thepowercordintothetwocordholderslocatedonthe
backofthehandle.>
2
WiththeUpperCordHookintheupor12o'clock
position,routethecordtowardtherear oftheunitand
slidethecordintothec-shapedholderontheUpper
CordHook.ThecordcannowbewrappedaroundtheUpper
andLower CordHooksforstorage.Toquick-releasethe
cordforuse,rotatetheUpperCordHookdowntothe6
o'clockposition.Thec-shapedholderisdesignedtoholdthe
cordsecurelyinplaceandpreventthefirstloopfromdrop-
pingtothefloor.
NOTE:Thecordcanonlybe insertedor removedfromthe
c-shapedholderwhentheUpperCordHookisinthe12
o'clockposition.•
13

Upright& PortableCleaner
THEUPRIGHTCLEANER
Beforeyoubeginvacuuming,it'simportanttohavethePower
Nozzle(25)adjustedtotheproperheightsetting.Thisgivesyou
themostefficientcleaningaction.LoweringthePowerNozzle
toofarpreventspropercleaningandshortensbeltlife.
Theproperheightsettingcanbeachievedbydoing
thefollowing:>
1
BeforeyouturntheSentria™systemON,raisethe
PowerNozzlebysteppingontheToeTouchControl
BottomPedal(9)allthewaydown.>
2TurntheSentria systemONbypressingthePower
Switch(13).>
3
PresstheToe-TouchControlUpperPedal4 times.
YouarenowattheHIGHESTfloorcleaningposition
(indicatedbythe#3showinginfrontoftheToe-Touch
ControlUpperPedal).Pressthepedalagainformedium
carpets(indicatedbythe#2)andagainforlowpilecarpets
(indicatedbythe#1.)>
14

Upright& PortableCleaner
4Ifdesired,engageTechDrive®powerassistby
pushingdownthered"D"side(marked"D"forDrive)
oftheTechDriveN/DPedal(12)locatedjustbelowthe
PowerSwitch(13).>
5ToturnyourSentria™systemOFF,presstheToe-
TouchControlBottomPedal(9)allthewaydownuntil
nozzleisfullyraised.
DisengageTechDrivepowerassistbysteppingonthegray
"N"side(marked"N"forNeutral)oftheTechDriveN/D
Pedal(11).
TurntheSentria systemOFFbypressingthePowerSwitch
(13)andthenunplugging.•
STRAIGHTSUCTIONCLEANER
StraightSuctionCleaningallowsyoutovacuumhardfloors,
throwrugsanddelicatecarpetswithoutuseoftheBrushRoll.
NOTE:WhenusingStraightSuctionCleaningwithouttheHard
FloorPad,eitheroncarpetsorbarefloors,lowerthenozzleas
closeaspossibletothefloorwithouttouchingthefloor.
1
WiththeSentria systemturnedOFF,raisethe
HeadlightHood(21).>
2
FlipoutthehandleontheBeltLifter(20).Useittoturn
theBeltLifterallthewaytotheleft(counter-clock-
wise)untiltheredarrowslineup(seepage10).Return
thehandleontheBeltLiftertoitsclosedposition.
ThenlowertheHeadlightHood.
TheBrushRollisnowdisengagedandyourSentria system
willoperateasa StraightSuctionCleaner.•
/!\NOTICE:
Tech Drive pedal must be in neutral when using the cleaner on hard
surface floors.
15

Upright& PortableCleaner
THEHARDFLOORPAD(optional)
ByattachingtheoptionalHardFloorPadtoyourSentria™,
systemyoumaydustbarefloors.Whiletheunitisturned
OFF,raisethePowerNozzle(25)asfarasitwill gobypress-
ingtheToe-TouchControlBottomPedal(9).Attachthe
HardFloorPadontothenozzleopeningusingthespring
clipsontheplate.ThenlowerthePowerNozzlebypressing
theToe-TouchControlUpperPedal(8)onenotchata time
untilthebristlestouchthefloor.
NOTE:TheHardFloorPadshouldonlybeusedwhenthe
unitisintheStraightSuctionCleanermode.•
PORTABLECLEANERSET-UP
Besidesbeinga remarkableUprightCleaner,theSentria sys-
temcaneasilybeconvertedintoa portablecleanerformat-
tressesandcarpetedstairs.
1
ToconvertyourSentria systemtoa PortableCleaner,
makesuretheunitisturnedOFF,unplugged,andthe
TechDrive®pedalisinneutral.
ThenreleasetheOuterPermanentBagTopfromtheBag
SupportbypressingtheBagReleaseButton(16)andsliding
thebagtopoff.>
2Removethecordfromthehandle.WiththeUpright
Handle(17)intheverticalposition,pushtheHandle
ReleaseButton(14),locatedatthebaseofthehandle,
andpull thehandlestraightupandoutoftheslot.
(Bagnotshownforclarity.)>
3InsertthePortableHandle(15)intotheslotwherethe
UprightHandlewasconnected.PushthePortable
Handleintotheslotuntilitsnapsintoplace.>
/!\CAUTION: BeforeinstallingtheHardFloorPad,turnunitOFF,unplugthepowercord
fromthewalloutletandbesurethemotorandnozzlebrushhavestopped.
16

Upright& PortableCleaner
PORTABLECLEANERSET-UP(cont)
4
BendtheFiltrationBagAssembly(1)inhalfandinsert
theBagLatchTab(2)intotheslotonthePortable
Handleuntilitsnapsintoplace.
Youarenowreadyforportablepowercleaning.•
NOTE:Donotuseportablemodeonupholsteredfurniture.
CARPETEDSTAIRS
PlaceyourSentria™systemononeofthecarpetedsteps,while
supportingtherear.Turntheunitonafteritisinplaceandmake
suretheTechDrive®pedalisintheNeutralposition.
RollthecleanerbackandforthsothattheBrushRoll
agitatesthecarpetingandloosensthedirt.•
MATTRESSCLEANING
Cleaningmattresssurfacesisdonethesameascarpeted
stairs,exceptthatyouneedtodisengagetheBrushRoll.(If
yourmattresshastuftedbuttonsonthesurface,theBrush
Rollcouldpullthemloose.)
NOTE:Donotcarrytheportableunitwiththemotoron.Place
theunitonthesurfaceyouwishtocleanandthenturntheunit
on.Turntheunitofftomoveittoa newlocation.
Forstraightsuctioncleaning,raisetheHeadlightHood(21)
andflipoutthehandleontheBeltLifter(20).Useittoturn
theBeltLifterallthewaytotheleft(counter-clockwise)
untiltheredarrowslineup.Thiswill stoptheBrushRoll
fromturning.
ReturnthehandleontheBeltLiftertoitsclosedposition
andlowertheHeadlightHood.UsetheToe-TouchControl
toadjustthePowerNozzletoitslowestsetting.•
/!\CAUTION: Toreduceriskofinjuryintheportablemode,keephairandlooseclothing
awayfromtheSentria systemwhileinoperation.
AlsomakesureTechDrive®pedalisintheneutralpositionwhen
vacuumingstairsandmattresses.Inaddition,theBrushRollshould
bedisengagedwhenvacuumingmattresses.
17

CanisterCleaner& Attachments
PARTTHREE
YourKirby®Sentria™systemcomes witha widevariety
ofattachmentsforaddedversatility.Inthissection,wewill
discussthefollowing:
RemovingthePowerNozzletoConvert
toa CanisterCleaner
UsingtheAttachments
UsingtheSuctionControlGrip
Usingasa BlowerUnit
UsingthePortableSprayerandthe
PortableShampooer
18

CanisterCleaner& Attachments
CONVERTINGTOA CANISTERCLEANER/
INSTALLINGTHEATTACHMENTHOSE
Whenusingdifferentcleaningattachments,theAttachment
Hoseisconnectedtothefrontofthecleanerinplaceofthe
PowerNozzle(25).
NOTE:WhenconnectingtheAttachmentHose,youmay
choosebetweentheUprightHandle(17)orthePortable
Handle(15).ToinstallthePortableHandle,seepage16.
1
ToinstalltheAttachmentHose,youmustfirstconvert
toa CanisterbyremovingthePowerNozzle.Todoso,
presstheToe-TouchControlBottomPedal(9)allthe
waydownuntilnozzleisfullyraised.DisengageTechDrive®
powerassistbysteppingonthegray"N"side(marked"N"for
Neutral)oftheTechDriveN/DPedal(11).TurntheSentria™
systemOFFbypressingthePowerSwitch(13)andthen
unplugging.>
2
3
4
RaisetheHeadlightHood(21)andflipoutthehandle
ontheBeltLifter(20).UseittoturntheBeltLifterall
thewaytotheleft(counter-clockwise)untilthered-
arrowslineup.
UnlockthePowerNozzlebyturningtheAccessoryLock
(22)allthewaytotheleft(counter-clockwise).ThePower
Nozzleshouldtipforwardwhenitisreleased.Liftthe
nozzleawayfromtheSentria system.>
AttheconnectorendoftheAttachmentHose,youwill
noticetwohooks.Placethehooksovertheendsofthe
AttachingBar(24),thenpushtheopeningofthehose
upagainsttheSentria system.>
5
LocktheAttachmentHoseConnectorinplaceby
turningtheAccessoryLock(22)allthewaytothe
right(clockwise).(AccessoryLockwillclampthe
AttachmentHosetotheunit.)
WiththeAttachmentHoseinplace,theunitwill
automaticallyadjusttohighspeedforhoseoperation.
NOTE:IftheSentria systemwill notrunwhenthePower
SwitchisON,seepage59.•
/!\CAUTION: Innormaloperation,frictionbetweenthebeltandthemetalmotor
shaftmaycausethemetalmotorshafttobecomehottothetouch.
19

CanisterCleaner& Attachments
INSTALLINGATTACHMENTSONTHE
ATTACHMENTHOSE
Toattachtoolstothehose,pushlightlywhiletwistingthe
smallerendofthehoseintothetool.•
EXTENSIONTUBES
OneortwoExtensionTubescanbeattachedtotheendof
thehosetoextendyourreachandefficientlyusevarious
attachments.•
SURFACENOZZLE
UNDERLOWFURNITURE/BAREFLOORS
TheSurfaceNozzleshouldbeusedonbarefloorsorfor
surfacecleaningcarpetsandunderlowfurniture.
Rubberwheelsonthenozzleallowittoglidesilentlyonthe
surfaceofhardfloorswithoutscratchingandvacuumwith
maximumpower.•
DUSTERBRUSH
TheDusterBrushmaybeconnectedtotheAttachment
HoseortheExtensionTubestoremovedustfromany
surface,includingcontouredorirregularsurfaces.•
20
Table of contents
Other Kirby Vacuum Cleaner manuals

Kirby
Kirby 510 User manual

Kirby
Kirby 561 User manual

Kirby
Kirby G5 User manual

Kirby
Kirby Dual Sanitronic 80 User manual

Kirby
Kirby G Series User manual

Kirby
Kirby 508 User manual

Kirby
Kirby G4 User manual

Kirby
Kirby Heritage II system Installation instructions

Kirby
Kirby 518 Product information sheet

Kirby
Kirby Generation 3 G3D User manual