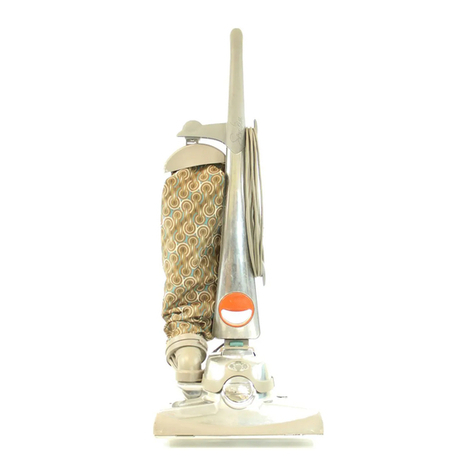
Kirby Heritage II system Installation instructions

Now 114k,
Available
On Video Cassette
See Back Cover for Dap
II 1
Use
•and
Care
5YEAR/2 YEAR
LIMITED WARRANTY
Your Promise of Excellence
SAVETHESE INSTRUCTIONS: Important: Read all Instructions, warnings and safeguards before using.

I
'Now Kirby Kaddy DA

KIRBY HERITAGE a
Parts List
and Controls
29
.1 Optional Reuseable
Bag System
2Disposable Paper Bag
3Nut
4Handle Bracket
5Handle Grip
6Upper Cord Hook
7Spring
8Screw
9Upright Handle
10 Power Cord
11 Cord Attaching Groove
12 Handle Pin
13 Power Plant
14 Attaching Bar
15 Rug Nozzle
16 Belt Lifter
17 Accessory Lock
18 Air Outlet
19 Headlight Hood
20 Sani Em-Torim
21 Bag Guard
22 Cloth Filter Bag and
Hanger
23 Suction Seal Ring
Gasket
1
/
24 Em-Tor Gasket
25 Power Shaft
26 Speed Selector
27 Bag Clip
28 Handle Stop Latch
29 Disposable Bag System
30 Toe -Touch Control
31 Foot Switch
32 Power On Light
33 Mini Em-Tor'""
34 Fill Tube Assembly
35 Brush Roll Performance Indicator
3

Standard Attachments
Here are the standard attachments for your Kirby. Each is
designed for specific household cleaning jobs. There are
detailed instructions for the use of each attachment in later
sections of this booklet. Clean each attachment after using
and keep brushes free from lint and fibers.
Standard attachments not shown here are: Inflator/Deflator,
Air Intake Guard, Utility Air Nozzle, Suds-C-Gun/Spray Gun and
Massage Cup.
Duster Brush
For end tables, shutters, lamp shades,
window moldings, cornices, door jams,
baseboards, books, picture frames,
air conditioning and heating duct
openings.
Crevice Tool
With removable brush. For crevices in furniture without
the brush, and for cleaning radiators and other hard-
to-dust places with the brush.
Utility Brush
Nozzle
For walls, bare floors, ceilings
and large, flat hard surfaces.
Extension Wands
Lightweight, yet strong. Locks securely together.
Contains safety air bleeder holes.
Hose
Lightweight, flexible, durable, easy-to-use.
Portable
Handle
With
Shoulder
Strap
Makes your Kirby more ver-
satile and easier to use in a
variety of places.
Surface Nozzle With
Swivel Attachment
With brush adjustment lever. For cleaning under low
objects, such as couches or television consoles.
Kirby Disposable Bags (two).
Spare Belt (one).
4

Congratulations
on becoming a Kirby owner.
With proper care your Kirby Cleaning System will
give you a lifetime of service. Because it was designed
and built using reliable, high-quality materials.
The Kirby cleaning system gets the cleaning Job
done faster and easier, leaving more time for yourself
or your family.
In the event you require service or information
about Kirby attachments and accessories, talk to your
authorized Independent Kirby Distributor. There's one
near you. Check your telephone Yellow Pages.
To fully appreciate the capabilities of the Kirby.
please read this Use and Care Booklet thoroughly.
The Information and specifications Included here
were in effect at the time of printing. The Kirby Com-
pany reserves the right, however, to discontinue or
change specifications or designs at any time without
notice and without incurring any liability whatsoever.
NOTE: The Inside cover provides a detailed drawing of the Kirby Heritage II", Unfold
to keep in front of you while following step-by-step instruction In this book,
Table of Contents
Parts List & Controls 3
Important Safeguards 6
Standard Attachments 4
VACUUM CLEANER BAGS.
Disposable Filter Bag System
Reusable Bag System
UPRIGHT CLEANER.
Carpet Vacuuming
Straight Suction Cleaning
BPI Brush Roll Performance Indicator
MATTRESS CLEANER.
Converting to a Mattress Cleaner 11
TANK CANISTER CLEANER.
Attaching the Hose 12
8
9
10
10
KIRBY CONVENIENCE GROUP
ATTACHMENTS.
Crevice Tool, Duster Brush, Utility Brush Nozzle,
Shoulder Strap and Flexible Hose, Extension Wands,
Surface Nozzle, Inflator/Deflator, Air Intake Guard,
7Utility Air Nozzle, Suds-O-Gun/Spray Gun,
Portable Handle, Massage Cup 14
Blower Attachments 16
Service Tips 18
BELT REPLACEMENT
Trouble-Shooting 20
OTHER EQUIPMENT.
Rug Renovator 21
Floor Polisher & Carpet Fluffier 27
Zippbrush 31
Turbo Sander 32
Limited Warranty 37
Fire Plan 38
5

Important Safeguards
Read All Instructions, Warnings, and Cautions Before Using!
The Kirby Heritage 2HD and 2HC are listed and
certified by Underwriters Laboratories, Inc., or Can-
adian Standards Association respectively as double-
insulated cleaners.
WARNING
11 To reduce risk of electric shock. do not use outdoors
or on wet surfaces.
+mow
These guidelines, and others found throughout this
book, are presented for your protection and con-
venience. Please read them carefully, since a failure
to heed these precautions could result in discomfort
or injury, When using electrical appliances, especially
when children are present, basic safety precautions
should always be followed.
ALWAYS BE SURE MOTOR AND FAN HAVE COME TO
COMPLETE STOP, BE CERTAIN "POWER ON LIGHT" IS
NOT LIT AND UNPLUG CORD FROM WALL SOCKET
BEFORE SERVICING OR CHANGING ACCESSORY UNITS
OR ATTACHMENTS.
DO NOT USE ANY ATTACHMENT NOT RECOMMENDED
OR SUPPLIED BY THE KIRBY COMPANY, AND USE ONLY
AS DECRIBED IN THIS MANUAL.
NEVER LEAVE CLEANER UNATTENDED WHEN IT IS RUN-
NING OR WHEN CORD IS PLUGGED IN.
WHEN CLEANER IS RUNNING, NEVER ALLOW FINGERS,
HAIR, FACE OR LOOSE CLOTHING TO COME NEAR IN-
TAKE SUCTION PORTS, NOZZLE OR REVOLVING BRUSHES.
REPLACE DAMAGED OR WORN PARTS WITH GENUINE
KIRBY PARTS IN ORDER TO MAINTAIN SAFETY AND TO
PROTECT YOUR WARRANTY.
Never vacuum hot fireplace ashes, cigar or cigar-
ette butts.
Never run cleaner over power cord or place sharp
objects on cord. Keep cord away from heated surfaces.
Don't close door on cord or snag it under furniture or
doors.
Never let invalids or children use or play with cleaner.
Use extra caution when cleaning on stairs.
Keep cleaner on floor — not on chairs, tables, etc.
When disconnecting power cord, grasp plug — not
cord. Do not use cord to pull cleaner around.
Store cleaner, attachment and accessory units
promptly after each use to prevent accidents caused
by tripping over power cord or equipment.
Don't use in an enclosed space where flammable,
explosive, gasoline, aerosol spray products or toxic
materials are stored or used or where vapors from such
materials may be present.
Don't use where oxygen or anesthetics are used.
Don't use cleaner to pick up hard or sharp items such
as coins, pins, nails, etc. They could damage the fan,
fan housing or bag.
Never drop or insert any object into any opening of
the cleaner.
Don't use cleaner, attachments or accessory units if
in poor condition. Have qualified service person in-
spect, replace or repair whenever necessary.
Don't plug cleaner into a table lamp or light fixture.
Don't move tables, lamps, etc., while holding onto
cleaner.
Check hose and cleaner suction seals and gaskets
regularly. Worn, damaged, loose or missing gaskets or
seals can be a safety hazard.
Keep hose and attachment suction openings away
from eyes, ears, mouth and other parts of body.
WARNING
To avoid electric shock Never vacuum liquids.
Never vacuum floors, rugs or carpeting that are
wet. Do not store outdoors. Replace worn or
frayed power cord Immediately,
Do not place or immerse cleaner in water or any
other liquids.
Do not reach for cleaner that has fallen into water.
Unplug cleaner Immediately from the wall socket.
Never handle cord or plug with wet hands.
WARNING
Use of the spray gun attachment as a paint
sprayer has not been evaluated, nor is it a part
of the CSA certification,
6
Vacuum Cleaner Bags
Disposable Filter Bag System The Kirby Heritage features two vacuum cleaner bag systems: the
standard disposable filter bag system and the optional reuseable bag system.
How to change bags.
CAUTION
Unplug the cord.
1Before you begin, unplug the
cleaner's electrical cord from the
wall outlet.
2Unzip the cloth bag at rear of
cleaner.
IMPORTANT
If fill tube is not connected
to bag hanger strap at top
Inside of cloth bag, proceed
as follows:
STUD
STRAP
TOP
ADAPTER
I
A. Slip the strap through the small
hole of the top adaptor at top of fill
tube.
STUD
B. Slide the strap "hole" onto the
stud of top adapter from one side
and attach onto the stud as
shown.
3To remove used bag, grip the
top tab on the cardboard plate,
pull back and lift out.
4To replace, slide new bag into
outer cloth bag, making sure the
cardboard plate faces the front of
the bag.
NOTE for best results: Do not over-
load bag past the fill tube bag re-
tainer. Never reuse filter bags—this
could damage the cleaner. Periodi-
cally check to make sure the air pas-
sage openings to the filter bag are
not blocked.
For peak efficiency and perform-
ance, use genuine Kirby replace-
ment parts.
5Hold the top tab on the card-
board plate while hooking the
bottom of the opening under the
lower lip of the bag retainer. Once
the bottom is secure, pull the top
tab up and over the upper lip of
retainer.
6Your bag should now be snap-
ped into place — check to make
sure the cardboard plate is fully on
the bag retainer.
7Zip the cloth bag closed,
(continued on Page 8)
7

After replacing the disposable fil-
ter bag on the Mini Em-Torim
(33) Model, any large particles vis-
able through the transparent side
of the Mini Ern-Tor" must be emp-
tied by removing the Mini Em-Tor"
from the Power Plant.
To remove Mini Em-Tor", twist up
and away from Power Plant as far
as It will go. Then, pull straight back.
The Mini Ern-Tor" with bag attach-
ed will separate from the Power
Plant (13).
NOTE: The tight seal of the
Mini Em-Torm air seal gasket
makes it necessary to give a
firm, strong tug to twist the
Mini Em-Tor'" outward away
from the Power Plant,
After removing the Mini Em-Tor"
Bag Assembly, point the front
opening down and shake to
remove any large particles.
If Mini Ern-Tor" is difficult to Install,
see your distributor for recom-
mended lubricant.
Vacuum Cleaner Bags
'I Spread newspa per on the floor
and place Kirby on it.
Reusable Bag System. (Optional)
The Sanl Em-Tort" (20) and Sanl- Pocket are patented Kirby features that
enable easy and efficient emptying of the reusable cloth filter bag.
Emptying The Permanent
Filter Bag.
2Unhook Bag Clip (27) on top
end of the bag from Handle Brack-
et (4). Tilt handle back slightly, Push
bag top toward handle and lift Bag
Clip out of bracket,
3Lower Rug Nozzle to lowest
position (as shown) and turn on
motor.
4Allow motor to run briefly and
then turn off. While bag Is still ex-
tended, shake it vigorously from
the top.
5Tilt Kirby slightly and rotate side
lever fully to release bottom cover
of Sani Ern-Tor". In the "open" posi-
tion, the lever will point to the rear of
the Kirby.
CAUTION
Unplug the cord.
6Swing cover out from under
Sani Em-Tor" and turn cover upside
down, emptying the dirt and lint
onto the paper,
7After all dirt has been removed,
swing cover back into place and
lock securely with locking lever.
Make sure that cover gasket is free
of dirt and that lever handle Is fully
rotated.
If excessive dirt and lint has
accumulated in the bag and does
not fall readily Into the Sani Em-
Tor", use the following procedure:
Open zipper at rear of bag and
place hand inside Sani-Pocket,
grasping Sani-Scraper at bottom.
Scrape sides of bag with Sani-
Scraper in downward strokes.
Using Sani-Scraper, push excess lint
and dirt into Sani Ern-Tor"
Empty as In 5 through 7 above.
8

Upright Cleaner
Carpet Vacuuming.
Cord Release.
To release cord, turn down the
Upper Cord Hook (6) on the han-
dle. Cord will drop free into your
hand.
Upright Cleaning,
It's Important to have the Rug
Nozzle height set properly to get
the most efficient cleaning action.
Start out with the Toe-Touch Con-
trol (30) adjusted to the full up
( number 8) position. Then, by press-
ing your toe downward on the
upper part of the Toe-Touch Con-
trol, lower the nozzle one step at a
time until you notice a change In
the sound of the Power Plant (13).
This indicates that the nozzle is In
contact with the rug and ready to
clean. Any position lower than this
will restrict proper air flow and
reduce belt life.
Handle Positions.
When the Handle Stop Latch (28)
is pushed to the leff, a pin extends.
This pin will stop the handle from
being lowered to the horizontal. It
will lock the handle in the horizon-
tal position for storage, If it is ex-
tended with the handle down.
Secondary Adjustment.
A Micro Mane^ adjustment is
provided for glue down "Kitchen"
carpet (low pile) and commercial
carpets and is used only in the
event that the unit is hard to push
on carpet. Should Micro MaticrM
adjustment be necessary:
1Be sure the unit is turned "Off."
2Turn the cleaner upside down.
3Using a small screwdriver, turn
the screw (found underneath the
Toe-Touch Control) (30) clockwise
one turn.
4Set the unit back on the surface
to be cleaned and try to push it.
5Proper cleaning and pushing
adjustment is determined by re-
peated turns of the screw,
NOTE: The Micro Motley' ad-
justment may also be used to
adjust the unit to skim, but
not touch, a hard surface
floor.
NOTE: Anozzle height setting
that Is too low for the carpet
pile will result In poor clean-
ing action.
When the pin is out and the handle
Is upright, pulling back on the
handle will cause the front of the
machine to tilt up so it can be
moved over obstacles such as
carpet strips or throw rugs.
9

Upright Cleaner
Sweeping Pattern.
For the best and easiest cleaning
action, push the machine straight
away from you and pull it straight
back. Change the direction of the
machine at the end of the pull
back and point it in the direction
of the next sweeping path. Con-
tinue to do this across the entire
rug with slow, gliding motions. Do
not jerk or tug the cleaner rapidly
on back stroke or when changing
directions.
Straight Suction
Cleaning.
By converting the Kirby upright
into a straight suction cleaner, you
can easily vacuum bare floors and
short pile carpeting.
Brush Roll Performance
Indicator
When cleaner is running, Indicator
light should be bright green. Indi-
cates brush roll is revolving properly
and belt is okay. If light is out see
page 20.
Converting To A Straight Suction Cleaner
Raise the Headlight Hood (19)
and turn the Belt Lifter (16) fully
counterclockwise. Check the instruc-
tion label on top of the Rug Nozzle
to be sure that the belt is dis-
engaged.
2Lower the Headlight Hood
against the Belt Lifter. With the belt
disengaged, the brush roll will not
turn and the Kirby becomes a
straight suction cleaner.
10

Mattress Cleaner
1Unhook Bag Clip (27) on top
end of the bag from Handle Brac-
ket (4). Tilt handle back slightly.
Push bag top toward handle and
lift Bag Clip out of bracket.
3Slide portable handle into the
handle channel on the Power
Plant (13). Push Handle Pin back
in tofasten the portable handle to
the Power Plant. Be sure pin goes
through the holes on both sides of
the portable handle.
Converting To A
Mattress Cleaner
It takes just a few steps to convert
your Kirby Heritage II'm into a hard-
working mattress cleaner.
WARNING
Before changing units or at-
tachments, unplug power
cord from wall outlet and be
sure motor and fan have
stopped,
4Slide Handle Stop Latch
(28) fully in direction of arrow to
lock portable handle in place.
5Position Bag Clip on portable
handle as shown.
WARNING
Failure to disengage brush
roll can be hazardous. Keep
hair, clothes, buttons, face
and fingers away from nozzle.
2Pull Handle Pin (12) all the
way out and lift handle off the
cleaner.
6Raise the Headlight Hood (19)
and turn the Belt Lifter (16) fully
counterclockwise. With the belt
disengaged the brush roll will not
turn and the Kirby becomes a
straight suction mattress cleaner.
11

Tank Canister Cleaner
Attaching The Hose
To use the above-the-floor tools,
the flexible hose must be attached
to the front of the Kirby.
Power On Light
The Power On Light (32) indicates
the Foot Switch (31) is on and
power is available for the cleaner or
accessories.
When changing accessory units or
attachments, make sure light is off
by pushing Foot Switch and unplug-
ging Power Cord (10) from wall
outlet.
WARNING
Before changing units and
attachments, always unplug
Power Cord from wall outlet
and be sure motor and fan
have come to a complete
stop. Keep hair and loose
clothing away from intake
ports, nozzle and Power Plant
(13).
Take extra precautions to
assure that hair or loose cloth-
ing do not come near intake
ports, nozzle, and Power
Plant. Check to see that Suc-
tion Seal Ring Gasket (23) is
not missing. Also do not use
hose if Hose Connector Suc-
tion Seal Ring Gasket is miss-
ing or damaged. (See 8,
Page 13.)
Move the Toe-Touch Control
(30) to the Number 8 position.
Then raise Headlight Hood (19).
3Unlock the Accessory Lock
(17) that's located under the hood
by moving it all the way to the left.
Rug Nozzle (15) should drop for-
ward slightly.
2Turn the Belt Lifter (16) counter-
clockwise, or all the way to the left
until it stops. (See instruction label
at top of nozzle under the Head-
light Hood.)
4Remove Rug Nozzle by lifting it
up slightly and pulling it toward
you. Now you are ready to install
the hose.
12

Tank Canister Cleaner
5Hook the attaching lugs of the
large coupling on the flexible hose
over the ends of the Attaching Bar
(14) on the Power Plant (13) and
swing the hose coupling end up
against the Power Plant,
HOSE CONNECTOR
SUCTION SEAL
RING GASKET
SUCTION
BLOWER
CONNECTOR
BLOWER
CONNECTOR
AIR SEAL
GASKET
8Note location of Hose Con-
nector Suction Seal Ring Gasket In
above drawing.
6Rotate the Accessory Lock
(17) to the right until hose con-
nector is tightly closed and sealed
against Power Plant, Close the
Headlight Hood (19).
The Kirby is now ready for above-
the-floor cleaning and is ready to
accept any of the hose attach-
ments that come with your Kirby.
WARNING
Take extra precautions to
assure that hair or loose cloth-
ing do not come near intake
ports, nozzle, and Power
Plant. Check to see that Suc-
tion Seal Ring Gasket (23) is
not missing. Also do not use
hose If Hose Connector Suc-
tion Seal Ring Gasket is miss-
ing. (See 8, Page 13.)
How To Attach Tools
To The Hose
7To attach tools, push lightly
while twisting the connection of
the smaller end of the hose into
desired tool.
Extension tubes and swivel elbow
are assembled in the same man-
ner. To avoid breakage, do not
Jam or force the coupling ends
into the attachments.
13

Kirby Convenience Group Attachments
The Crevice Tool
Without the removable brush, use
the crevice tools for deep clean-
ing in crevices, cracks, corners,
grooves, narrow openings and be-
hind seat cushions of upholstered
furniture.
With the removable brush placed
in the end of the crevice tool, you
have a cleaning tool that removes
dirt from corners, between radiator
coils, venetian blinds and sliding
window tracks.
Surface Nozzle With
Swivel Attachment
The Surface Nozzle with brush ex-
tended is for use on carpeted floor
areas. It has a lever on the front of
Its housing which allows you to
raise or lower the brush. The up
position of the brush is recom-
mended for the cleaning of deep
pile or loose throw rugs.
WARNING
Before changing units or
attachments, unplug Power
Cord (10) from outlet and be
sure motor and fan are stop-
ped.
Utility Air Nozzle
For surface cleaning of upholster-
ed furniture and fabrics.
Utility Brush Nozzle
Attach to end of extension tubes
and use for cleaning walls, ceiling
and large flat surfaces.
Storing The Flexible Hose
Never store the Flexible Hose near
aheat source, Keep it in a cool, dry
place and never hang it on a
sharp hook or nail. Store it in a
place where It will be readily
available.
14

Kirby Convenience Group Attachments
Extension Wands
Attaching the curved extension
tube to the hose, the straight exten-
sion tube to the curved tube, the
swivel tube to the straight tube,
and the surface nozzle to the
swivel gives you maximum reach,
Attaching the hose to the straight
tube and adding the curved exten-
sion tube on the straight extension
tube and utility brush nozzle makes
an effective wall, ceiling and base-
board cleaning arrangement,
Massage Cup
Use with flexible hose for invigor-
ating skin or scalp massage. Great
for pet grooming.
The Duster Brush
Attach the duster brush to the end
of the flexible hose or to the exten-
sion tubes and you can remove
dust from any surface, including
those with contours, such as mold-
ings or delicate lamp shades and
unusual shapes.
Inflator/Deflator
Inflates or deflates toys, air mat-
tresses, other low-pressure inflat-
a bles.
Portable Shoulder Strap
The shoulder portable is ideal for
cleaning in areas where consider-
able mobility and freedom of
hands is required.
Remove the carrying strap from
the attachment case and clip the
spring clip on each end into the
holes at front and back of the
portable handle.
Slide the adjusting buckle on the
strap so the portable cleaner rests
comfortable on your shoulder.
AirAir Intake Guard
Adapts your Kirby for use with air-
powered tools.
15

Blower Attachments
,\_i4lr'ed°4
1Unhook Bag Clip (27) on top
end of the bag from Handle Brac-
ket (4). Tilt handle back slightly,
Push bag top toward handle and
Ilft Bag Clip out of bracket.
Converting For Use With
Blower Attachments
To use the Suds-O-Gun or spray
gun or to use the Inflator/Deflator
as an inflator, the Kirby must be set
up for air pressure driven tools and
attachments. This Is done by remov-
ing the Mini Em-TorTM (33) from the
back of the Power Plant (13) and
replacing it with the flexible hose,
The air Intake guard is then att-
ached to the intake port on the
motor unit.
WARNING
Before changing units and at-
tachments, always unplug Pow-
er Cord (10) from wall outlet
and be sure motor and fan
have come to a complete
stop.
NOTE: The tight seal of the Em-
Tor air seal gasket makes it
necessary to give a firm, strong
tug to twist the Mini Ern-Toro
outward away from the Power
Plant.
2To remove the Mini Em-Torw,
twist up and away from the Power
Plant as far as It will go, then pull
straight back. The Mini Em-Tor m
with bag attached will separate
from the Power Plant.
Mounting The Flexible Hose For Air Blowing. One P.S.I. Only (pounds per square inch).
IIf the flexible hose Is attached
to the front of the Power Plant,
remove it by raising the Headlight
Hood (19), rotate the Accessory
Lock (17) to the left and swing the
hose connector out and down.
2Place the large end of the
hose over the Air Outlet (18) at the
back of the Power Plant. Be sure
that the grooves on the inside of
the large end of the hose match
the lugs on the outside of the
Power Plant outlet.
3Push the hose onto the Air
Outlet and turn the hose connec-
tor in the direction of the arrow in
the picture. The hose Is now set up
for air blowing.
16

Blower Attachments
4Place the attaching lugs of
the Air Intake Guard over the Att-
aching Bar (14) on the Power Plant.
Swing the guard up against the
Power Plant and rotate the Acces-
sory Lock (17) until it is tight.
Close the Headlight Hood (19).
WARNING
Before changing units and
attachments, always unplug
Power Cord (10) from wall
outlet and be sure motor and
fan have come to a com-
plete stop.
Do not use with flammable or
combustible liquids.
Inflator/Deflator
With the flexible hose hooked up
to the Power Plant outlet, attach-
ing the inflator/deflator tool to the
hose lets you Inflate toys, air mat-
tresses or any other low pressure
Inflatable items up to 1 p.s.i.
The Spray Gun
For proper sealing of contents
and to assure maximum spray
performance, assemble Spray
Gun Jar as follows:
(1) Position rubber gasket to
rest on lip of Spray Gun Jar,
as shown in "A."
(2) Insert square end of syphon
tube into opening on lid, so
that beveled end of
syphon tube enters Spray
Gun Jar, as shown In "B."
(3) Before spraying, make sure
lid Is securely screwed onto
Spray Gun Jar.
NOTE: The Kirby cannot be
used with air power tools un-
less the air intake guard or
other attachment is latched
onto the Attaching Bar (14)
over the intake port on the
front of the Power Plant (13).
Check seals and gaskets reg-
ularly,
Worn, damaged or missing
seals and gaskets could cause
asafely hazard and should
be kept In good repair or
replaced.
CAUTION
Refer to tag on article being
inflated for maximum allow-
able pressure.
Attach spray gun to end of flexible
hose.
Unscrew the Jar from the spray gun
and fill about three-quarters full of
the non-flammable liquid to be
sprayed. Replace the jar.
Hold the spray gun as nearly hori-
zontal as possible. Turn on the Pow-
er Plant and pull the spray gun
trigger. Use slow, sweeping motions.
Turn the spray adjustment clock-
wise to make the spray finer and
counterclockwise to make it
coarser.
When using Latex based or acrylic
water based paints, follow the manu-
facturer's instructions for spraying.
Sprayable water based paints must
be thinned with water to provide a
sprayable consistency.
If the spray gun must be tilted dur-
ing use, use less liquid in the jar to
WARNING
Use of the spray gun attach-
ment as a paint sprayer has
not been evaluated, nor Is It
apart of the CSA certifi-
cation.
17

Blower Attachments
avoid large droplets in the spray.
Clean the gun immediately after
use by filling jar with fresh water,
spray water with the gun. The air
valve in the gun can be removed
for cleaning if necessary by turning
the air adjusting knob counter-
clockwise and disengaging it from
the trigger.
Removal of the air adjusting knob
enables the valve seat trigger and
stem to be removed from the spray
gun body for separate cleaning.
Reassemble the gun by holding the
valve seat in place In the spray gun
body while screwing the air ad-
justing knob clockwise into place.
The spray gun is excellent for water-
ing large leaf house plants with a
fine spray, and spray painting with
non-flammable paints. Be sure flam-
mable materials are never used in
the gun.
Upholstery Cleaning With
The Suds-O-Gun.
BE CAREFUL. Try a test first on your
upholstery. Some fabrics will color
bleed or water spot. Some delicate
fabrics such as silk, brocade and
velvet cannot be shampooed. Ap-
ply a small patch of suds from the
Suds-O-Gun to an area which does
not show. Let it dry, then brush off
the residue and observe the results
before cleaning the rest of the
fabric.
1Use Kirby Instant Suds (option-
al) for best upholstery cleaning
results. Attach the Suds-O-Gun
cap to the end of the spray gun.
Attach the hose to the air blowing
outlet of the cleaner.
2Mix Kirby Instant Suds as direct-
ed on bottle and fill spray gun jar
about three-fourths full. Screw jar
tightly onto spray gun and attach
to end of flexible hose. Adjust spray
gun to a very fine spray by turning
air adjusting knob at rear of the
Service Tips
Headlight Bulb Replacement.
1Raise the Headlight Hood (19)
on the Power Plant (13). With a
Phillips head screwdriver, loosen
the two screws that hold the head-
light lens to the hood.
18
2Unplug the lens and socket
assembly from the terminal block.
Replace the bulb, plug in the lens
and socket assembly, and re-
tighten the screws.
spray gun clockwise, Turn motor
on and pull the trigger. A volume
of suds will be produced. Suds can
be spread directly on surface to
be cleaned, or gathered in a basin
or on several thicknesses of plain
paper.
3The suds should be worked
into the fabric surface with a soft
brush or sponge until they disap-
pear. Allow surface to dry thor-
oughly and then vacuum with
appropriate cleaning tool to re-
move the dry residue which now
contains grime and dirt loosened
from the fabric.
DANGER
Do not use with flammable
cleaning fluids.
WARNING
Before changing headlight
bulb always unplug Power
Cord (10) from outlet.
NOTE: Kirby Bulb Is a special
low voltage bulb not general-
ly available at Retail Stores.
See your authorized Kirby
Distributor.

Service Tips
Brush Cleaning of Rug
Nozzle.
Keep the brushes and belt track
clear of lint, string, hair and other
fibers. Pay particular attention to
keeping these fibers away from
the bearings at the ends of the
brush roll.
Troubleshooting
Many service calls are unneces-
sary. Checking a few simple things
can save a lot of cost, time and
trouble. Whenever your Kirby does
not perform properly, make these
checks first before calling author-
ized service personnel
If the motor does not start when
the motor ON-OFF switch is
pushed:
'I Make sure the Power Cord (10)
is plugged into an outlet and that
the outlet has power. (Check for
blown fuses, tripped circuit break-
er or power company trouble.)
2Makesure the cord plug is fully
Inserted Into the cleaner.
3Look for breaks in the Power
Cord insulation. If the cord is dam-
aged, get a new one. DO NOT
ATTEMPT TO REPAIR IT.
Use only genuine Kirby Power Cord.
Do not attempt to use standard
extension or Power Cord. See ad hor-
ized Kirby Distributor.
4Make sure that an attach-
ment or accessory is properly mount-
ed on the front of the Power Plant
(13).
If the Kirby does not pick up lint or
litter on the carpet:
Make sure that the belt is on
the brush roll and on the Power
Plant drive pulley.
2Make sure that the belt is not
broken or slipping. Replace if
necessary.
3Check Suction Seal Ring Gas-
ket (23) on front of cleaner to see
that it's not missing or damaged.
Do not use cleaner without the
gasket.
4If using hose and attach-
ments, check to see that Suction
Seal Ring Gasket is not missing in
the hose connector. Do not use if
the gasket is missing or damaged.
5Check to see if rug plate on
Rug Nozzle (15) is properly att-
ached and latched.
6Make sure that the Toe-Touch
Control (30) is adjusted to place
the nozzle in contact with the rug.
7Make sure the brush roll Is ad-
justed properly and the bristles are
not worn out. '/,o inch of tuft should
extend out of nozzle plate. Check
with ruler against nozzle. Replace
or adjust as required,
8Make sure bag is not full.
9Check to be certain that fill
tube and Mini Em-Torm(33) are
not clogged.
If the Mini Em-Tor .' or Sani Em-Tor"
is loose:
Make sure Mini Em-Torm or
Sani Ern-Tor" is locked in position.
2Make sure the rubber gasket
inside the collar of the Mini or Sani
Em-TorTM is properly in place; dirt
will blow out if it is not. Return to
Distributor for replacement.
If the brush roll in any accessory
does not turn:
Make sure the belt is not bro-
ken or worn out.
2Make sure the belt Is in place
around the brush roll and on the
Power Shaft (25).
3Check to see If brush roll can
be rotated.
If the Kirby is hard to push when
the Rug Nozzle is attached:
*I Make sure the nozzle is not set
too low. Raise the Toe-Touch Con-
trol one or two notches. If finer
adjustment is needed see page 9
for Micro Matic'N•' adjustment.
2Make sure that the belt is on
the brush roll and on the Power
Shaft.
3Make sure that the belt is not
broken or slipping. Replace if
necessary.
Brush adjustment of
Rug Nozzle.
After the rug nozzle has been in
use for some time, the brush bristles
may begin to wear. To adjust the
brush height, place the Rug Noz-
zle on a table. Place a straight
edge on the nozzle plate next to
brush tufts to see protrusion. Turn
both screws clockwise an equal
amount until the brushes protrude
about 116 inch past the rug plate.
One full turn of these screws moves
the brush out about1/32 inch. Make
certain brush roll is kept parallel
with rug plate or belt will not center
between tufts.
Your Kirby has been designed and
manufactured to give you many
years of normal in-house usage
with relatively little maintenance
required.
The Kirby motor has permanently
lubricated and sealed ball bear-
ings and will not need lubrication.
If bearings become noisy, repair of
the motor must be done only by
authorized qualified Kirby Service
personnel.
To maintain your Kirby in good,
serviceable condition, it should be
inspected periodically by an author-
ized Kirby service person.
19

Service Tips
Brush Roll Performance
Indicator
If green light does not light when
cleaner is running:
1. Check to see if belt lifter Is in
proper position for brush roll to
work. See page 10 #1 and #2.
2. Belt may not be on pulley. Re-
move nozzle from cleaner and
follow steps 5 and 6 on this page.
Replace nozzle, lock it on and
turn belt lifter clockwise.
3. Belt is broken or worn and no
longer can drive brush roller. Re-
place belt.
4. Possible brush roll problem. Con-
tact your authorized distributor
for service.
5. Brush roll is in backwards. See
note below to determine proper
assembly.
6. If everything is correct then the
indicator bulb has failed. Con-
tact your authorized distributor
for service.
NOTE: If the entire brush roll Is
removed, be careful to re-
place the brush roll exactly
as It came out. The silver end
of the brush roll is on your left
as you face the front of nozzle.
For superior performance use
only genuine Kirby parts,
Belt Replacement for Rug Nozzle
1To replace the belt in the Rug
Nozzle (15), remove the nozzle
from the motor and place the noz-
zle on a table.
3Pull up on rear of rug plate to
pull brush roll and plate out of
nozzle.
5Slide the belt off the brush roll
and slide on a new belt. The new
belt must be In the middle of the
brush roll. Place the brush roll back
into the end bracket with the screw
heads facing the openings in rug
plate.
2Turn the Belt Lifter (16) all the
way clockwise until the belt drops
off the finger Inside the nozzle, Turn
nozzle upside down. Unlock rug
plate by means of two latches on
rear of nozzle.
4Bend slightly one end bracket
of the rug plate away from one
end of brush.
6Hook rug plate on front of noz-
zle and rotate It back against noz-
zle opening and make certain It
fully closes against nozzle, Rotate
latches to lock plate in place and
center belt under rug plate center
rib, Turn the Belt Lifter counterclock-
wise until the finger in the nozzle
picks up the belt,
20
Other manuals for Heritage II system
1
This manual suits for next models
2
Table of contents
Other Kirby Vacuum Cleaner manuals

Kirby
Kirby G Series User manual

Kirby
Kirby Avalir User manual

Kirby
Kirby 510 User manual

Kirby
Kirby 518 Product information sheet

Kirby
Kirby Sentria II User manual

Kirby
Kirby 519 User manual

Kirby
Kirby 4C Installation instructions

Kirby
Kirby Dual Sanitronic 80 User manual

Kirby
Kirby G Six User manual

Kirby
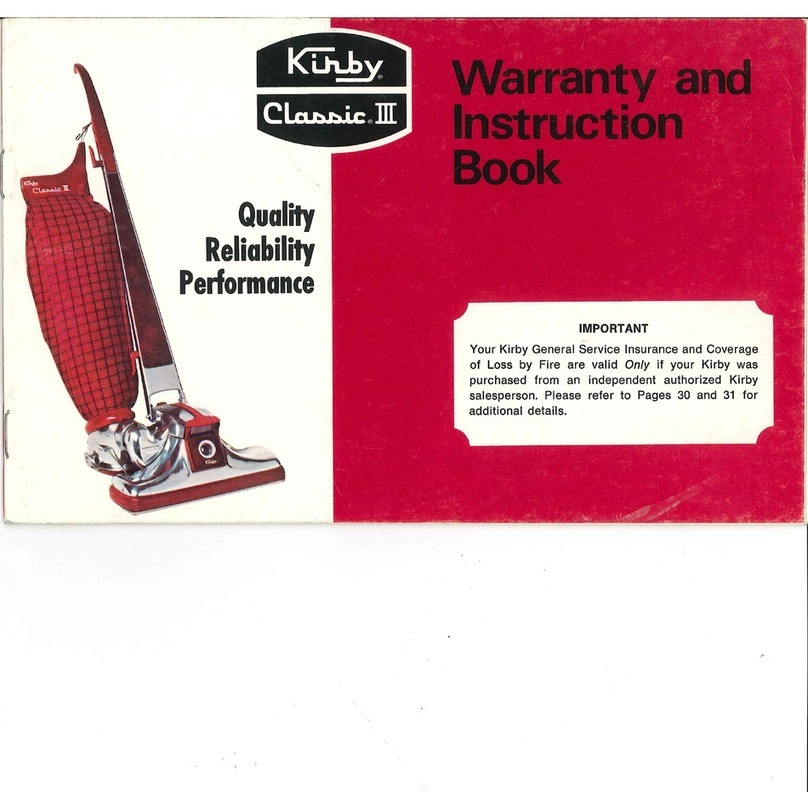
Kirby Classic III User manual