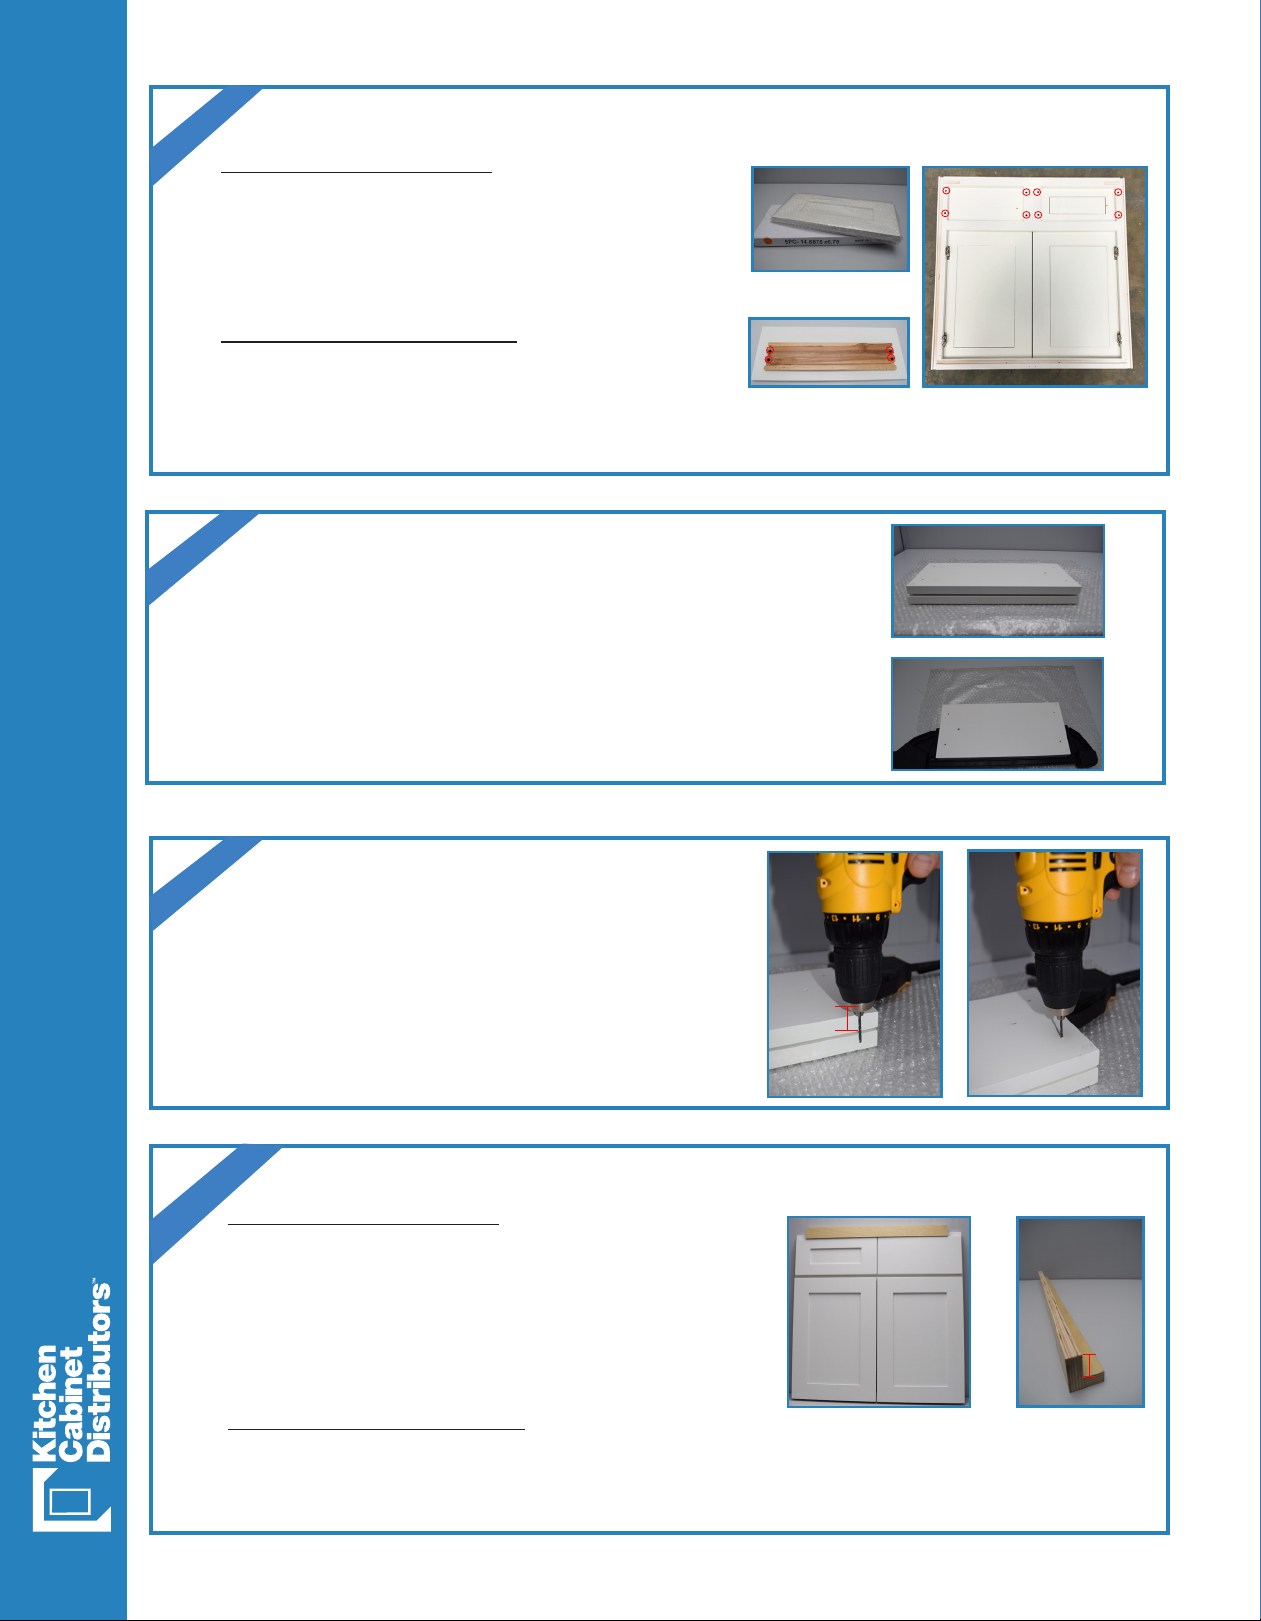
• Unpackage and remove existing face frame/
drawer head from box.
• Unscrew exisiting drawer head from face frame
by loosening all four screws. (NOTE: Keep
screws as they will be needed in Step 4)
STEP 1
• Place the 5-piece drawer head face down on a scratch
resistant surface.
• Place the slab drawer head face down on top of the
5-piece drawer head so that exisiting screw holes are
visible.
• Align all four sides of the 5-piece drawer head with slab
drawer head.
• Keeping the sides algined, clamp the two heads together.
STEP 4
Shaker Designer White 5-Piece Install Instructions
Standard Drawer Heads
False Front Drawer Heads
• Unpackage and remove slab drawer head from
box
• Place the slab drawer head face down and
remove the drawer box front by removing the
two screws on either side. (NOTE: Keep screws
as they will be needed in Step 4)
• Ensure there is a 1” space from the top of the
face frame to the top of the new drawer head.
• Align the screw holes and attach the 5-piece
drawer head to the face frame.
• Align the holes in the drawer box front with the
holes on the 5-piece drawer head that were
drilled in Step 3.
• Attach the drawer box front to the 5-piece drawer
front using the screws that were kept from Step 1
• Assemble the drawer box following our normal
assembly instructions.
Standard Drawer Heads
False Front Drawer Heads
• Using a 3/32” drill bit, drill through the
existing slab drawer head and screw holes into
the 5-piece drawer head.
*DO NOT DRILL ALL THE WAY THROUGH
THE NEW 5-PIECE DRAWER HEAD*
• Place clear bumpers onto the 5-piece drawer
head at all four corners.
STEP 3
1”
1”
Standard
Drawer Head
False Front
Drawer Head
A 1” marking jig can be constructed
using two pieces of scrap trim to
assist in aligning the drawer heads
STEP 2
Before beginning, use the second page of this instruction sheet to verify you
have the correct sizes of 5-piece drawer heads.


