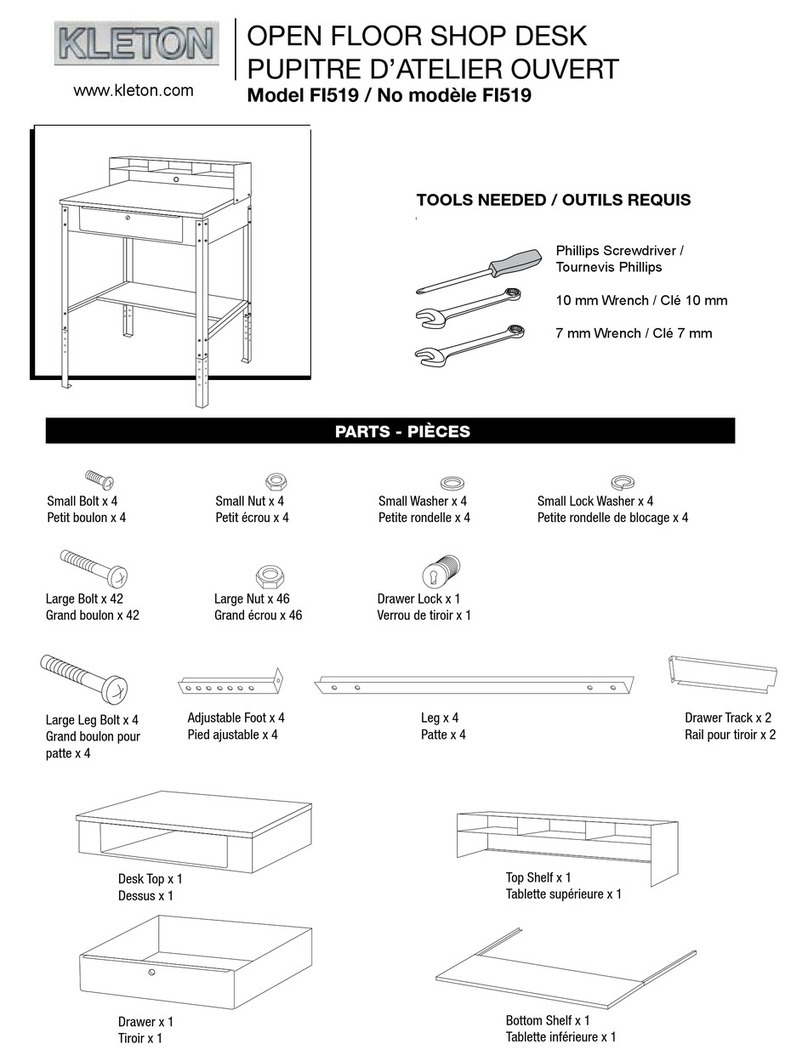
LEG ASSEMBLY
1. Place desk top on a smooth, non-marring surface
with top side facing down.
2. Attach legs using 4 large bolts and 4 large nuts on
each leg. (See Figure 1)
NOTE: Make sure all 4 leg holes are lined up
with desk top holes before assembling.
3. Attach adjustable feet to inside of legs at desired
height. Only bolt the top 2 holes on each leg using 2
large bolts and 2 large nuts. (See Figure 2)
4. Attach bottom shelf to legs. Bolt shelf to legs using
6 large bolts and 6 large nuts. (See Figure 3)
NOTE: Insert bolts through legs, adjustable feet,
and shelf. (See Figure 3, Inset A)
ASSEMBLY
Figure 1
Figure 2
Figure 3
Inset A
ASSEMBLY - ASSEMBLAGE
1. Place desk top on a smooth, non-marring surface with top side
facing down.
Déposez le dessus de pupitre sur une surface lisse et non
marquante, le dessus vers le bas.
2. Attach front legs using 4 large bolts and 4 large nuts on each leg.
(See Figure 1) Attach back legs using 4 large bolts and 4 large
nuts on each leg.
Fixez les pattes avant en utilisant 4 grands boulons et 4 grands
écrous pour chaque patte. (Voir la figure 1) Fixez les pattes arrière
en utilisant 4 grands boulons et 4 grands écrous pour
chaque patte.
NOTE: Door hinges must face inward when attaching front legs.
NOTE : Les charnières doivent faire face à l’intérieur lors de la
fixation des pattes avant.
DRAWER ASSEMBLY
ASSEMBLAGE DU TIROIR
1. Remove drawer slides from the outsides of the drawer. Press the
drawer slide release lever to remove slides completely.
(See Figure 2)
Retirer les glissières de tiroirs de l’extérieur du tiroir. Appuyez sur le
levier de relâchement pour retirer les glissières complètement.
(Voir la figure 2)
NOTE: Depending on the side, press release lever either down or up
to remove slides.
NOTE : Selon le côté, appuyez sur le levier de relâchement vers le
haut ou le bas pour retirer les glissières.
2. Attach drawer slides to drawer tracks using 2 small bolts,
washers, lock washers and nuts. Extend drawer slide completely
to attach to track. Insert center bolt first to align front bolt hole.
(See Figure 3)
Fixez les glissières de tiroir aux rails en utilisant 2 petits boulons,
des rondelles, des rondelles de blocage et des écrous. Allongez
complètement les glissières de tiroir pour les fixer aux rails.
Insérez le boulon du centre en premier pour aligner le trou
du boulon avant. (Voir la figure 3)
TOP SHELF ASSEMBLY
1. Set desk top assembly upright and recheck all bolts
and nuts for tightness.
2. Place top shelf on desk top and assemble with 6
large bolts and 6 large nuts. (See Figure 7)
3. Insert plastic cable ring and cover into the top shelf
from the front of the desk.
4. Insert drawer into desk top.
LOCK ASSEMBLY
1. Disassemble drawer lock and reassemble lock on
drawer. (See Figure 8)
ASSEMBLY CONTINUED
Figure 7
Figure 8
www.kleton.com
LEG ASSEMBLY
1. Place desk top on a smooth, non-marring surface
with top side facing down.
2. Attach front legs using 4 large bolts and 4 large nuts
on each leg. (See Figure 1) Attach back legs using 4
large bolts and 4 large nuts on each leg.
NOTE: Door hinges must face inward when
attaching front legs.
DRAWER ASSEMBLY
1. Remove drawer slides from the outsides of the
drawer. Press the drawer slide release lever to
remove slides completely. (See Figure 2)
NOTE: Depending on the side, press release
lever either down or up to remove slides.
2. Attach drawer slides to drawer tracks using 2 small
bolts, washers, lock washers and nuts. Extend drawer
slide completely to attach to track. Insert center bolt
first to align front bolt hole. (See Figure 3)
ASSEMBLY
Figure 1
Figure 2
Figure 3
RELEASE LEVER
DRAWER TRACK
RELEASE LEVER
LEVIER DE RELÂCHEMENT
DRAWER TRACK
RAIL DE TIROIR


