- 5 -
Audio frequency
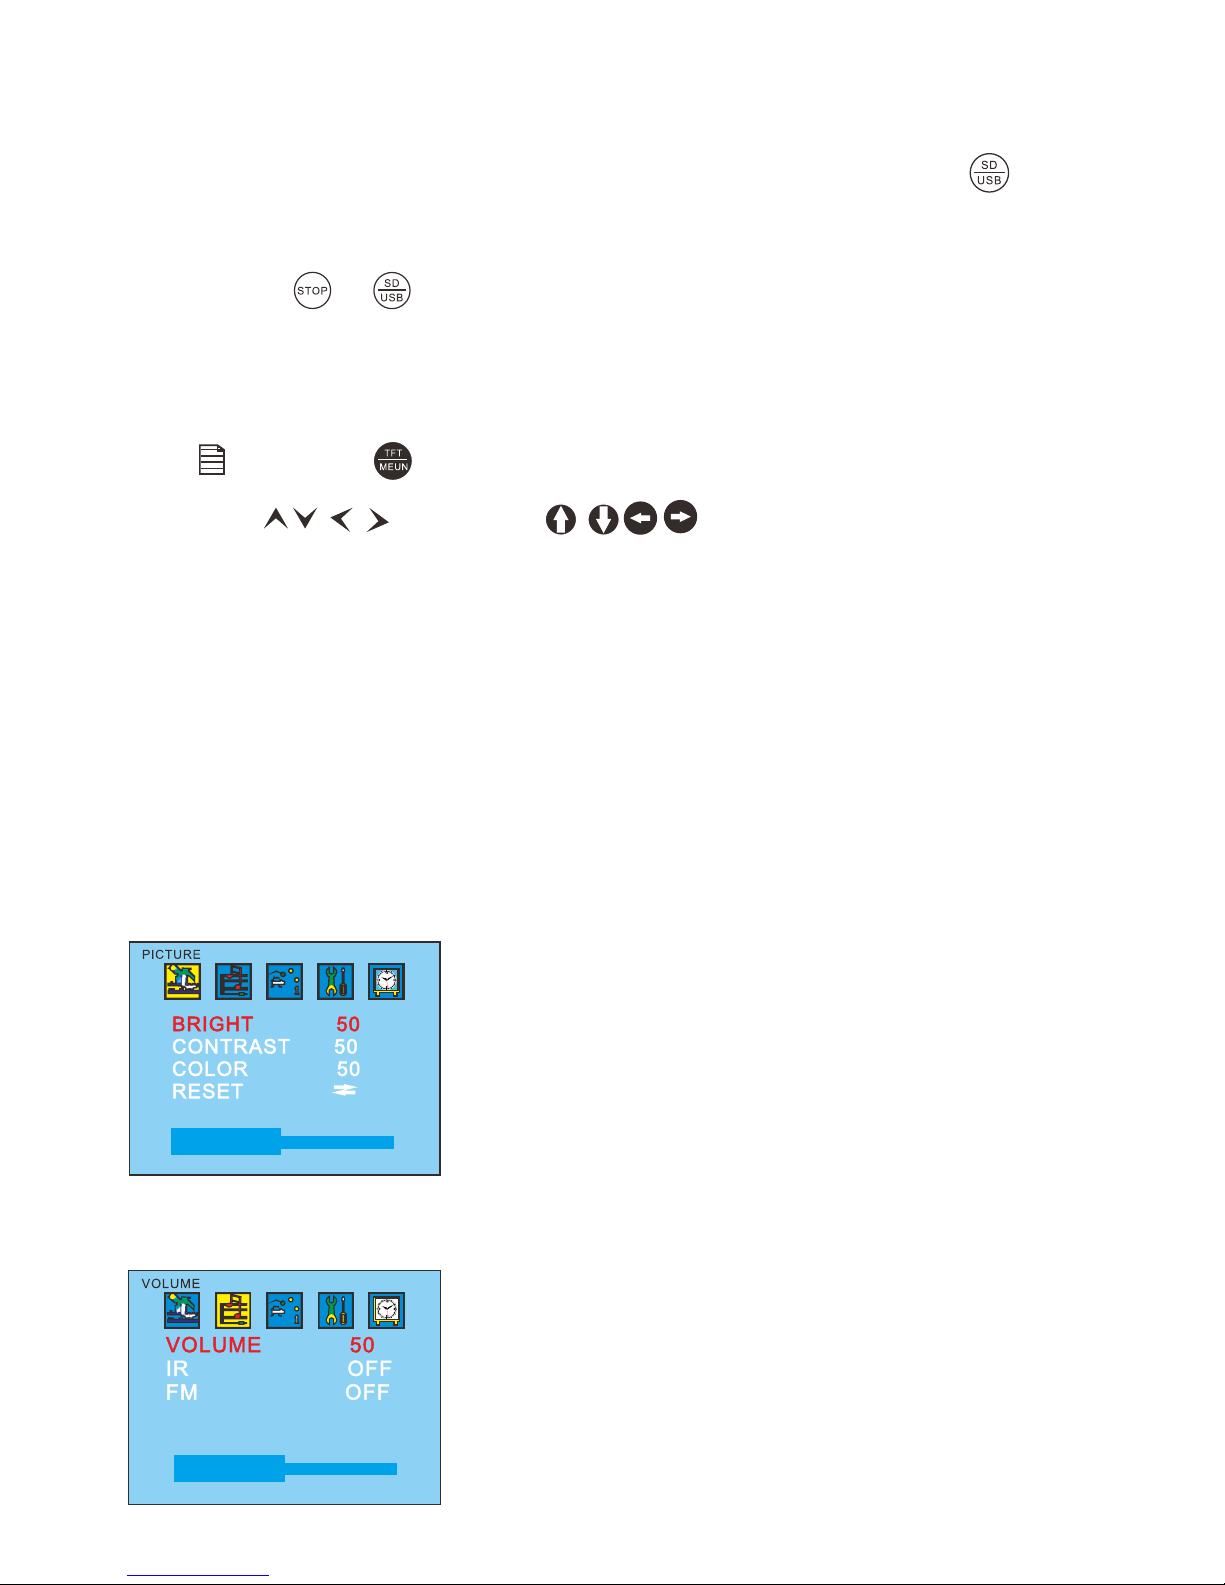
Press on panel or on remote control and the screen displays
menu, then press on panel or on remote control to select accordingly.
Volume
Audio control, (you can choose infrared/speaker/radio/speaker, speaker/radio,
infrared/speaker/radio, radio, infrared, infrared/speaker, infrared/radio)
Functions
Press on panel or on remote control and the screen displays below
menu pictures, then press on panel or on remote control to set
accordingly.
TROUBLESHOOTING ISSUES
Issue Possible Reason
No sound and image Power is disconnected; the machine is not turned on
No image Standby switch is pressed down; disc is scratched; signal
wire is disconnected
No sound Volume too low or the volume setup is not correct
Black screen Incorrect setup of image luminance and contrast; check
power supply
Blurring and unstable image Disc is scratched; media device is damaged
Image skipping Check disc or media device
Colour Function menu setup is incorrect;
No power Check power supply; check internal fuse
No image after loading the disc Only audio frequency for the disc has been set; disc is
scratched; disc format is not supported
Unstable sound caused by vibration DVD or media device is dirty or seriously damaged
Unstable sound with no vibration Disc is dirty or scratched; clean or replace the disc