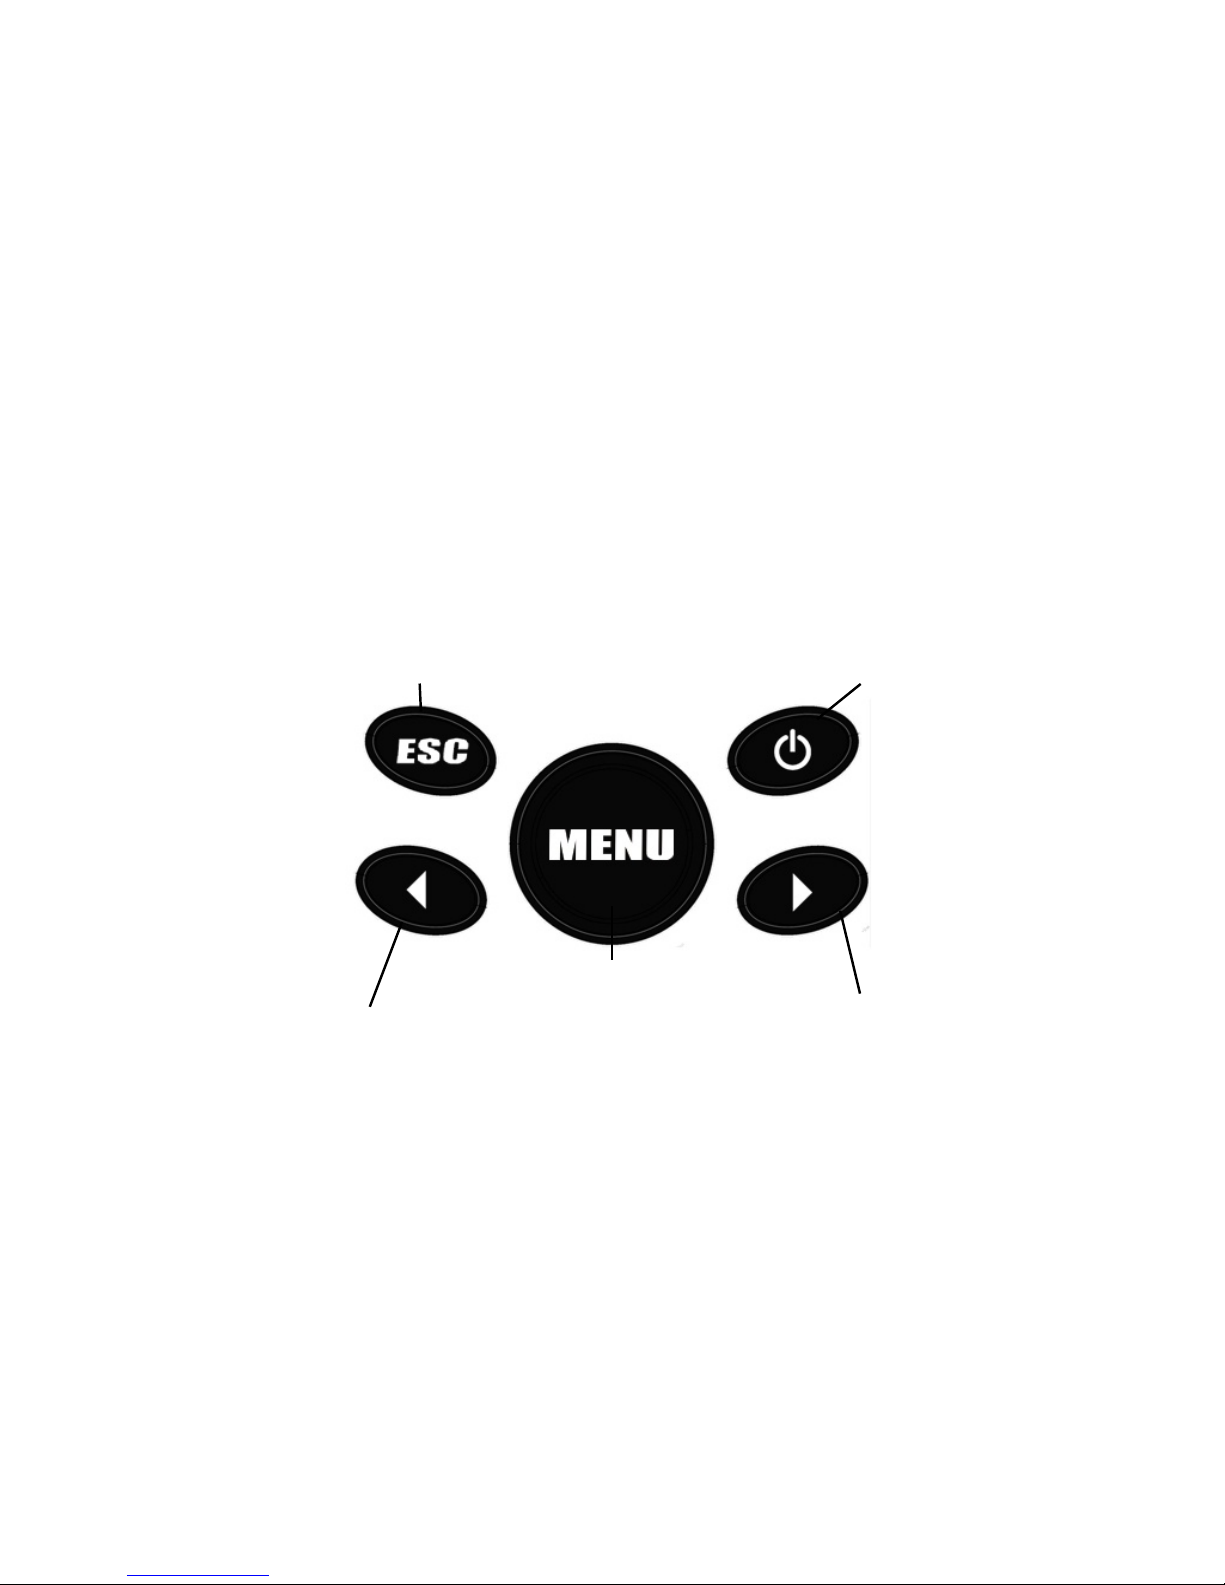
Accessing Menu Features
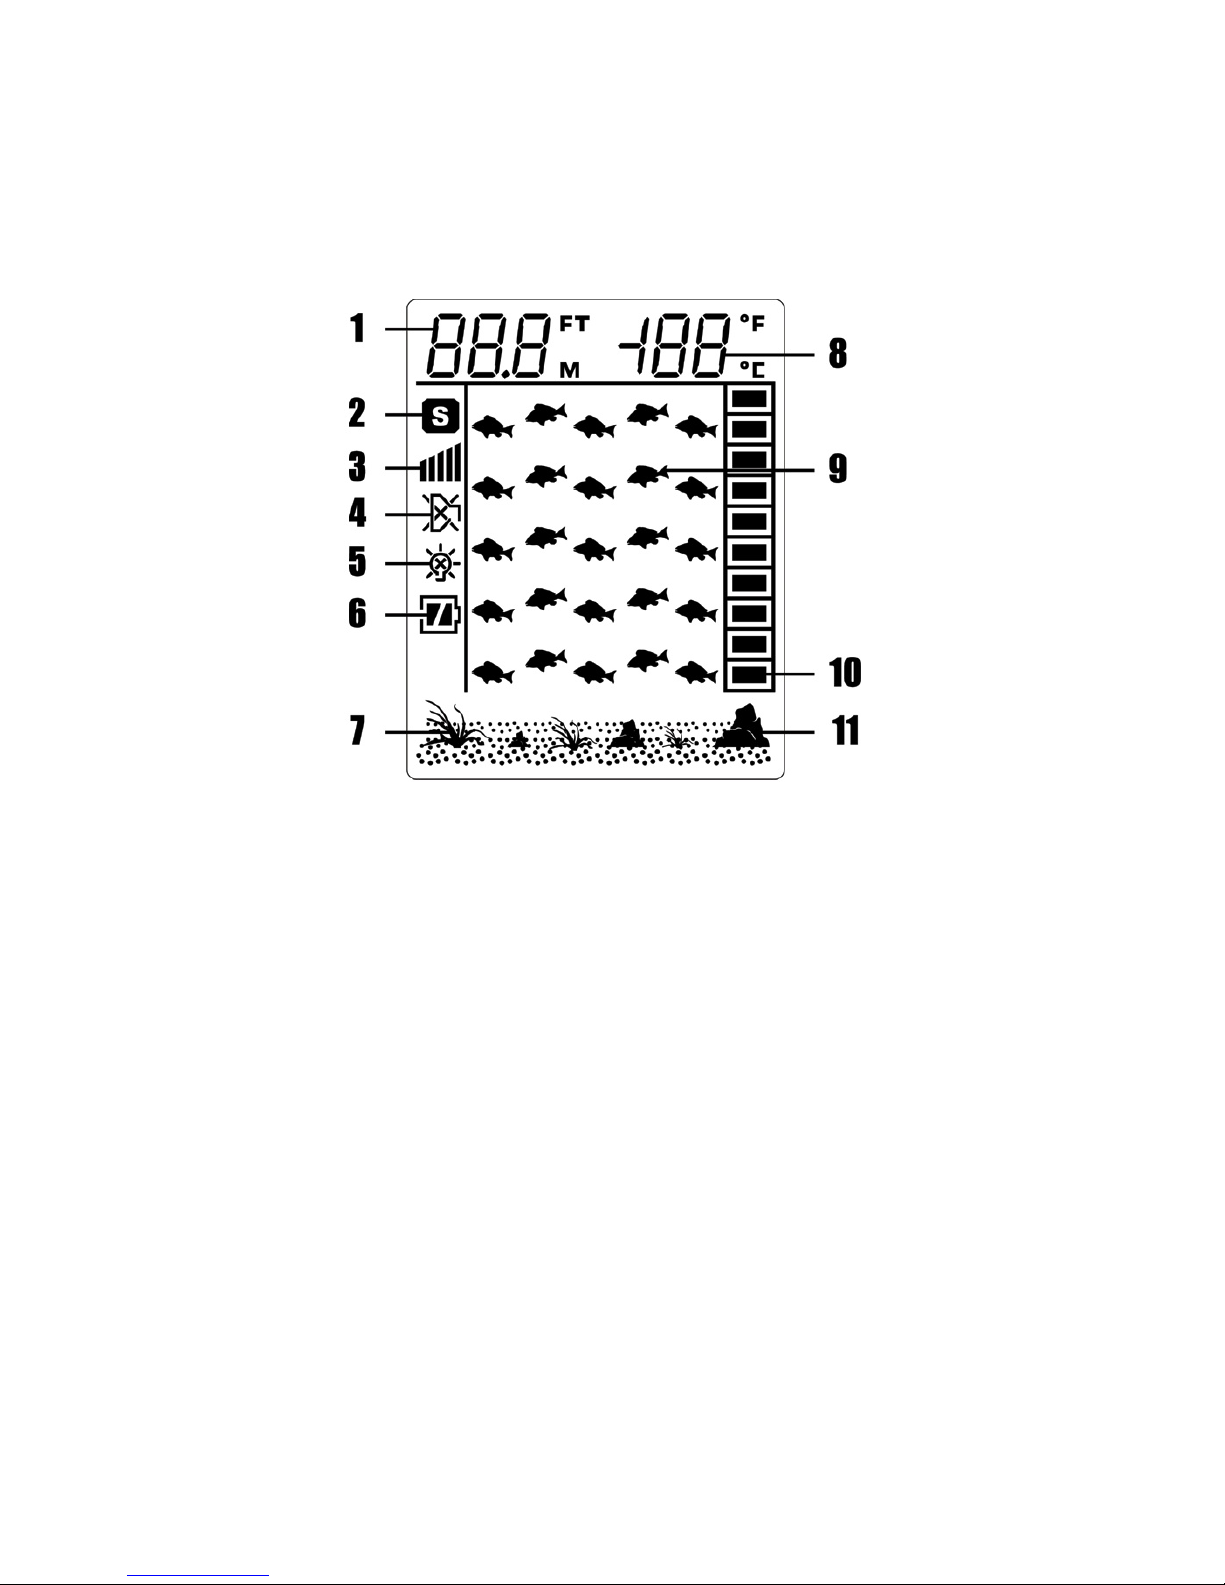
Sensitivity Indicator
Fish Alarm Indicator
Depth Unit Indicator
Temperature Unit Indicator
6
The unit is now in Simulation mode and must
be turned off to enter normal operation.
A simple menu system accesses unit's
adjustable features.
Backlight Indicator
Press Menu Key and release, the "Sensitivity
ndicator" will blink, press the right or left
arrow keys to adjust the menu settings; then
pressing the Menu key again and again, the
"Alarms ndicator" "Backlight ndicator"
"Depth Unit ndicator" "Temperature Unit
ndicator" will blink from the current feature to
be set.
Press ESC key to exit the menu settings.