10
5 -- How to Play Game
This machine gives a lively entertainment of a soldier gun-shooting simulation game,
which can be competed by a maximum of 2 players at a time. By having shot down a
particular enemy, the player can get another weapon item, which allows for different
types of weapons depending on the battle situation and for other broader ways of
enjoying the game. The player can reload the handgun by directing it to the outside of the
screen and pulling the trigger. Similarly, by firing the gun to the outside of the screen, a
shield appears in front of the player by which he or she can protect against attack from
the enemy.
Find out the enemy and recapture the territory that has been occupied once the enemy, in
various ways of attack and defense.
SHow to Play ---------------------------------------------------------
1. Put coins(s) in the slot, press the start button, and the start demonstration appears
and “Posture-for Fire System Explanation” starts. Up to 2 persons can
simultaneously enjoy themselves in playing the game. In addition, another player
can join in and play the game during a current game.
2. Then, “Nickname Selection” starts. From the nicknames displayed on the screen,
aim at and shoot a desired nickname with the gun to select your nickname.
3. After the selection of a nickname, the “Operations Explanation” starts. The player
is given the knowledge about all the stages and the rules of the game as well as
the details of the operation.
4. After the explanation of the operations, the “Start Demo” appears and then the
game begins.
•One life point is lost whenever a soldier is attacked by the enemy. In
addition, one life point for all soldiers participating in the combat will be
lost unless the operations are executed successfully within the preset time
for each stage.
•If the player achieves exceptional results in the combat, he or she can be
promoted to a higher rank.
•If a soldier is wounded by a bullet from the enemy, one life point is lost
and at the same time the player is demoted down by one rank.
•When the operations for each stage have been executed completely, the
score of the game currently in progress is displayed. If 2 players
participate in the game, the higher ranking player is given the life point
bonus.
•If a bullet hits the “Enemy”, “Combat Vehicle”, or “Enemy Shell”, score
is added. (COMBO Points)
•If the player successfully hits enemies continuously, additional scores are
accumulated. (Great Shot)
•If the player hits an enemy in the head, he or she can gain additional score.
•When a particular enemy has been shot down, “Weapon Item” and “Life-
up” comes out. The player can obtain the items when he or she shoots
them.
19
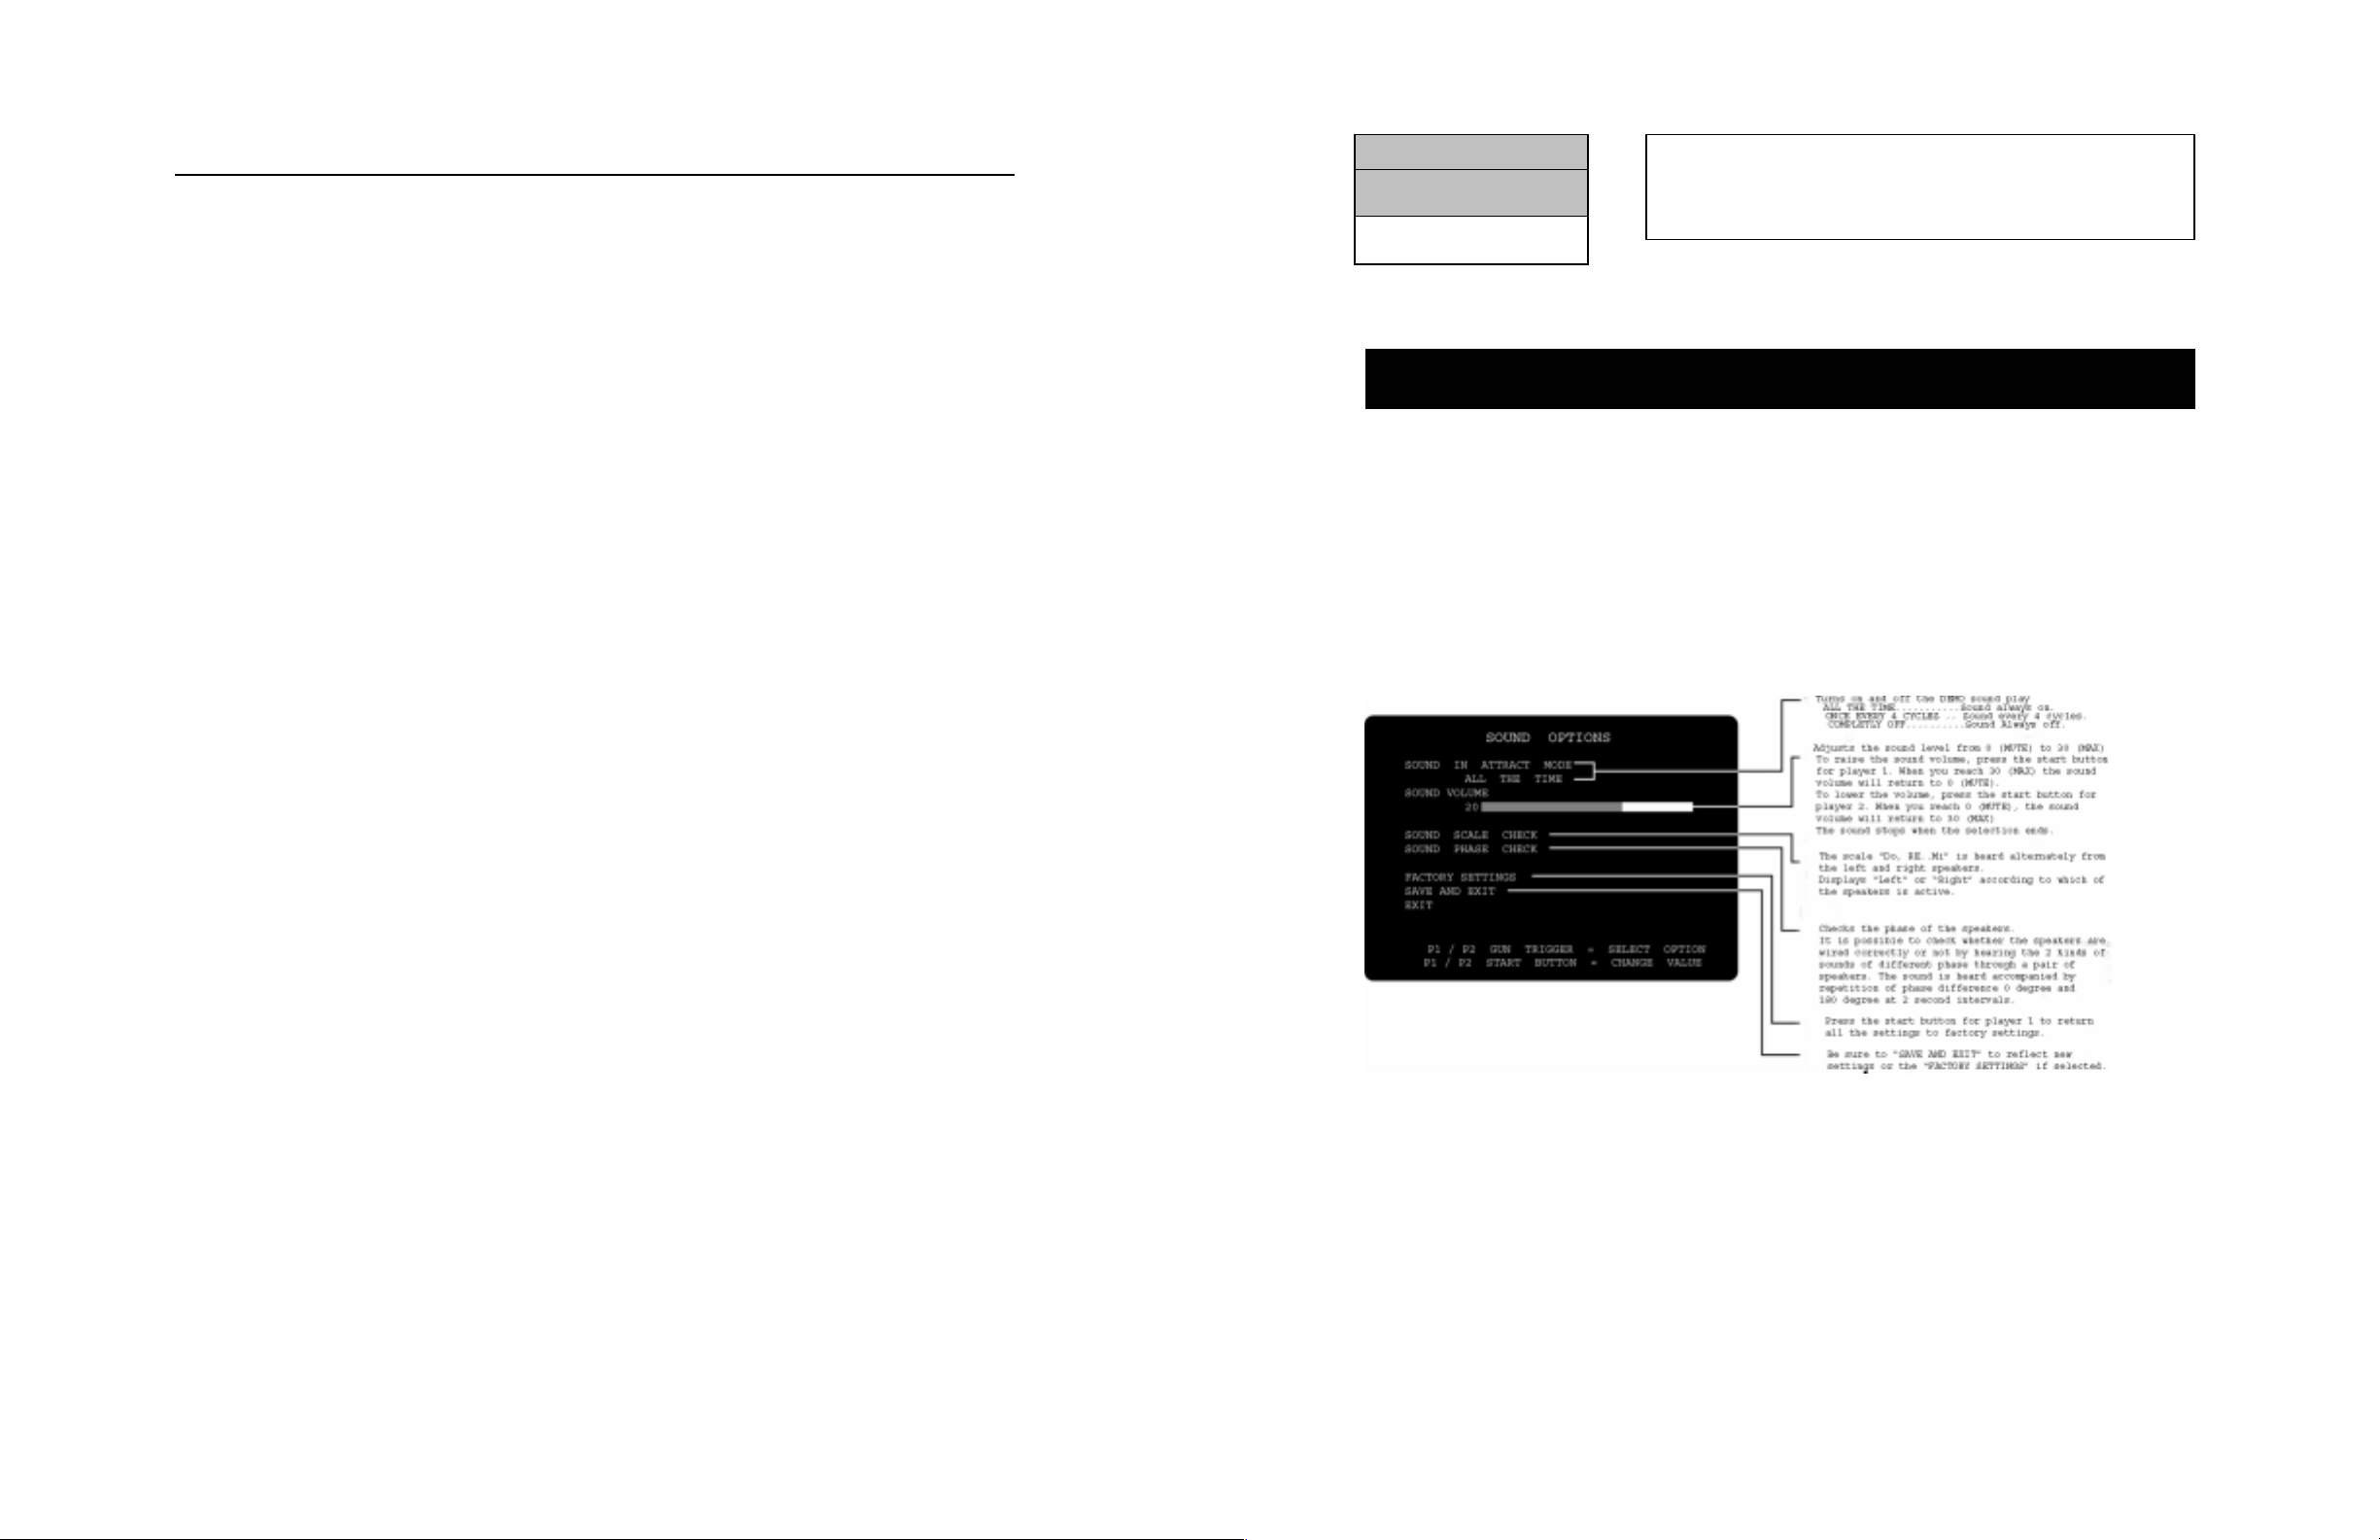
SMode for setting and checking the sound options.
Pull the gun trigger for the player 1 or player 2 gun to select the desired item and
press the start button for player 1 or player 2.
To return to the “MAIN MENU” screen, select “SAVE AND EXIT” or “EXIT” and
then press the player 1 start button.
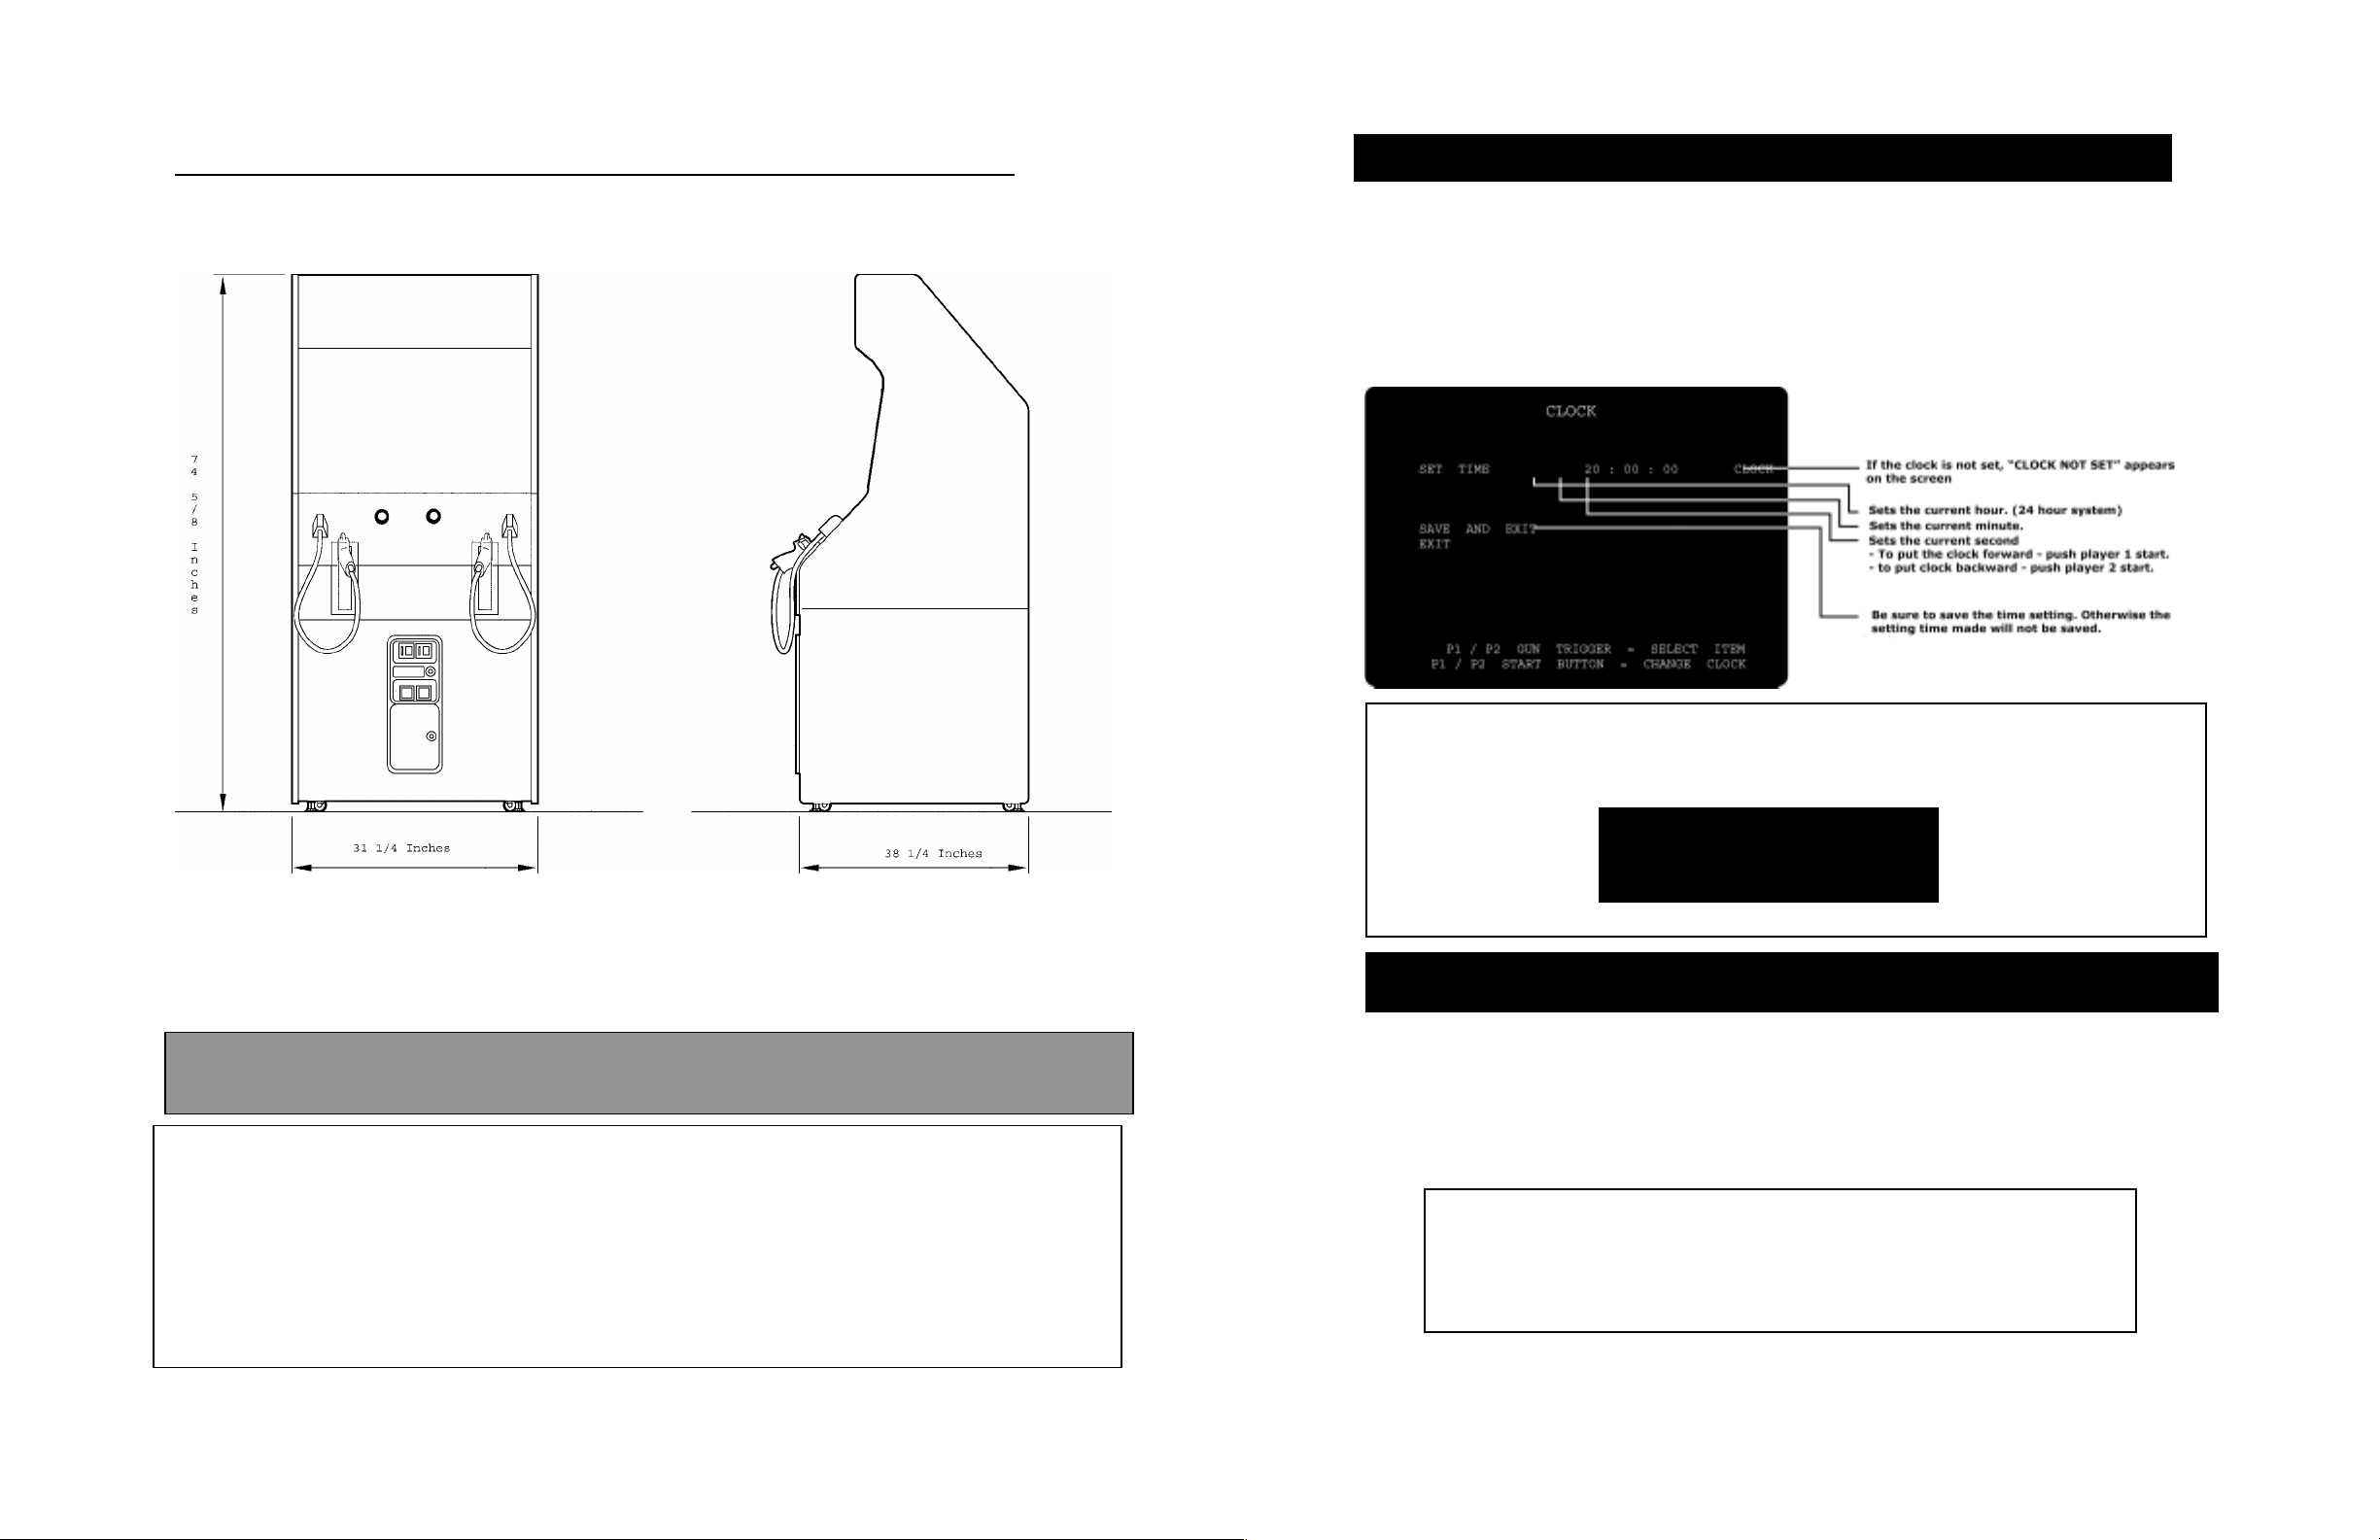
Di
1 2 3 4
OFF OFF ON ON
Be sure to set the DIP switches as shown in the figure
to the left. Otherwise, the machine will fail to function
correctly.
SOUND OPTIONS