manuals.online logo
Brands
  1. Home
  2. •
  3. Brands
  4. •
  5. Konica Minolta
  6. •
  7. All In One Printer
  8. •
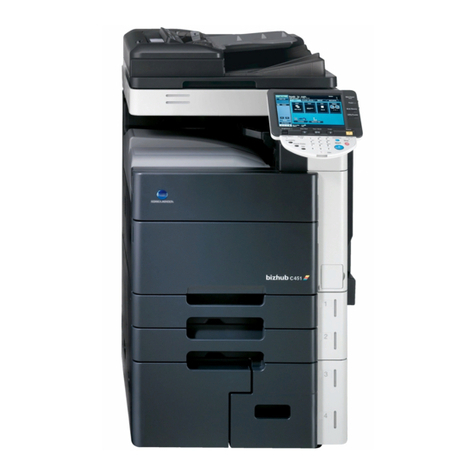
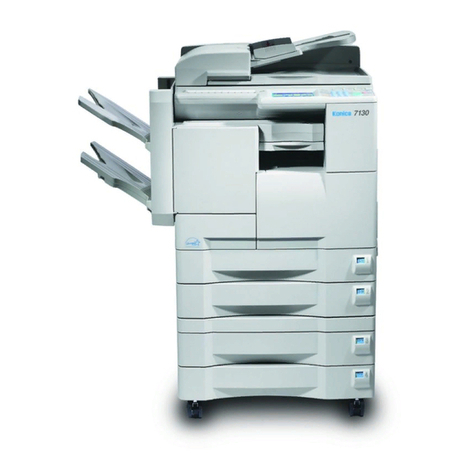
  9. Konica Minolta DF-601 User manual

Konica Minolta DF-601 User manual

E-1
DF-601 Automatic Document Feeder
4582-7701-03
INSTALLATION MANUAL
Applied Machine: C250
COLOR MFP 25 ppm
for Product Code 4038
I. Accessory parts II. Installation procedures
1. Turn off the machine and unplug the power cord
from the power outlet.
2. Remove the two hinge covers at two places
(one screw each).
Note:
When the spacer is mounted, remove the spacer.
3. Screw the shoulder screws furnished with the
Automatic Document Feeder into the holes in the
rear (one screw each).
No. Name Shape Q’ty
1. Shoulder screw
2
2. Mounting screw
2
3. Chart
1
4. Installation
Manual
1
set
After unpacking, be sure to get rid of the
packaging materials and keep them out of
the reach of children.
Putting your head in the wrapper involves
danger of suffocation.
4582U010AA
4582U011AA
4980IXC019DA
4582IXC002DB
Spacer
4582IXC001DA
E-2
4. Place the Automatic Document Feeder in posi-
tion.
Note:
When installing the Automatic Document Feeder,
hold onto the upper and lower ends of the Auto-
matic Document Feeder in the vertical position as
shown on the left.
5. Using the two mounting screws furnished with
the Automatic Document Feeder, tighten the
hinges to secure the Automatic Document
Feeder in position.
Note:
Check that the shoulder screws are fully tight-
ened.
6. Remove the plastic bag of the hookup cable.
7. Connect the hookup cable to the machine.
III. Adjusting the Document Feeding Tray
Width
1. Plug the power cord into the power outlet and
turn on the machine.
2. Widen the width across the edge guides by slid-
ing them to their maximum width.
3. Display the Service Mode screen.
(For details of how to display the Service Mode
screen, see the Service Manual.)
4. Touch “ADF.”
5. Touch “Original Tray Width.”
C4652U012AA
4582U001AD
4582U018AA
4582U013AA
4037IXE295DA
4582IXE508DA
E-3
6. Touch “Max. Width” and then press the Start key.
Check that “Adjustment Result” is “OK.”
7. Narrow the width across the edge guides by slid-
ing them to their minimum width.
8. Touch “Min. Width” and then press the Start key.
Check that “Adjustment Result” is “OK.”
9. Touch “END.”
10.Touch “Exit” on the Service Mode screen.
IV. Checking and Adjusting Document
Skew
1. Place the chart in the document feeding tray (with
the side having an arrow facing up).
2. Set up the following functions:
• Select the tray in which A4 crosswise or Letter
crosswise paper is loaded.
• 1-sided original 1-side copy
3. Press the Start key.
4. Check in which direction, A or B, the image tilts
on the copy fed out of the machine.
Specifications: Tilt 3 mm max.
* If the image tilts more than the specifications, per-
form the following steps to make the adjustment.
4582IXE509DA
4582U014AA
4582IXE510DA
4582U003AA
▲
4582U006AC
E-4
5. Loosen the two front screws on the right hinge.
If the gap A is wider than gap B, move the Auto-
matic Document Feeder toward the front.
If the gap B is wider than gap A, move the Auto-
matic Document Feeder toward the rear.
Note:
Do not move the Automatic Document Feeder to
the frontmost or leftmost position.
6. Tighten the two screws.
7. Make the copy and check again.
V. Checking and Adjusting the Document
Feeding Tray Reference Position
1. Place the chart in the document feeding tray
(with the side having an arrow facing up).
2. Set up the following functions:
• Select the tray in which A4 crosswise or Letter
crosswise paper is loaded.
• 1-sided original 1-side copy
3. Press the Start key.
4. Fold the copy in half.
5. With reference to the crease, check to see if the
arrow is on the side of A or B.
Specifications: ± 2 mm from the center
* If the deviation falls outside the specified range,
use the following procedure to make an adjust-
ment.
4582U007AC
4582U003AA
▲
A
B
<Metric Areas for standard line>
A
B
<Inch Areas for standard line>
E-5
6. Loosen the screw (two on the front side and three
on the backside) on the document feeding tray.
If the crease deviates on the side of A, move the
tray to the front.
If the crease deviates on the side of B, move the
tray to the rear.
7. Tighten the five screws.
8. Make the copy and check again.
VI. Adjusting the Document Stop Position
1. Display the Service Mode screen.
(For details of how to display the Service Mode
screen, see the Service Manual.)
2. Touch “ADF.”
3. Touch “Auto Stop Position Adjustment.”
4. Touch “Sub Scanning Direction 1-Side.”
4582U005AC 4037IXE295DA
4582IXE508DA
4582IXE003DA
E-6
5. Place the chart in the document feeding tray
(with the side having an arrow facing up).
6. Press the Start key.
7. Make sure that “Adjustment Result” is “OK.”
Then, touch “SET.”
8. Touch “Sub Scanning Direction 2-Side.”
9. Place the chart in the document feeding tray.
Note:
Make sure that the blank surface of the chart
faces up.
10.Press the Start key.
11.Check that “Adjustment Result” is “OK” and then
touch “SET.”
12.Touch “Main Scanning Direction.”
13.Place the chart in the document feeding tray
(with the side having an arrow facing up).
14.Press the Start key.
15.Check that “Adjustment Result” is “OK” and then
touch “SET.”
16.Touch “END.”
17.Touch “Exit” on the Service Mode screen.
18.Turn OFF and ON the Main Power Switch.
Note:
When displayed the Service Mode screen, be
sure to turn off the main power after exiting the
Service Mode screen and wait for 10 seconds or
more before turning on.
VII. Fixing the Stoppers
Loosen the stopper screws (two each on the right
and left). Then, with the stoppers raised, tighten the
screws.
4582U003AA
4582IXE512DA
4582IXE513DA
4582IXE514DA
4582U009AB
4582U008AB

Other Konica Minolta All In One Printer manuals
Konica Minolta bizhub C257i User manual

Konica Minolta

Konica Minolta bizhub C257i User manual

Konica Minolta bizhub C654 User manual

Konica Minolta

Konica Minolta bizhub C654 User manual

Konica Minolta bizhub 223 User manual

Konica Minolta

Konica Minolta bizhub 223 User manual

Konica Minolta PagePro 1390 MF User manual

Konica Minolta

Konica Minolta PagePro 1390 MF User manual

Konica Minolta AD-504 User manual

Konica Minolta

Konica Minolta AD-504 User manual

Konica Minolta Bizhub 362 User manual

Konica Minolta

Konica Minolta Bizhub 362 User manual
Konica Minolta Magicolor 4650EN User manual

Konica Minolta

Konica Minolta Magicolor 4650EN User manual

Konica Minolta bizhub C650 Series User manual

Konica Minolta

Konica Minolta bizhub C650 Series User manual

Konica Minolta bizhub 42 User manual

Konica Minolta

Konica Minolta bizhub 42 User manual

Konica Minolta bizhub C353 Series User manual

Konica Minolta

Konica Minolta bizhub C353 Series User manual

Konica Minolta Magicolor 2300 DL User manual

Konica Minolta

Konica Minolta Magicolor 2300 DL User manual

Konica Minolta BIZHUB 558 User manual

Konica Minolta

Konica Minolta BIZHUB 558 User manual

Konica Minolta bizhub C654 User manual

Konica Minolta

Konica Minolta bizhub C654 User manual

Konica Minolta bizhub 215 User manual

Konica Minolta

Konica Minolta bizhub 215 User manual

Konica Minolta BIZHUB C450P User manual

Konica Minolta

Konica Minolta BIZHUB C450P User manual

Konica Minolta bizhub C350 User manual

Konica Minolta

Konica Minolta bizhub C350 User manual

Konica Minolta bizhub 215 User manual

Konica Minolta

Konica Minolta bizhub 215 User manual

Konica Minolta bizhub C652 Series Guide

Konica Minolta

Konica Minolta bizhub C652 Series Guide

Konica Minolta BIZHUB 600 User manual

Konica Minolta

Konica Minolta BIZHUB 600 User manual

Konica Minolta bizhub pro 1100 Original instructions

Konica Minolta

Konica Minolta bizhub pro 1100 Original instructions

Konica Minolta bizhub 361 User manual

Konica Minolta

Konica Minolta bizhub 361 User manual

Konica Minolta bizhub C452 Series User manual

Konica Minolta

Konica Minolta bizhub C452 Series User manual

Konica Minolta bizhub press c1070p User manual

Konica Minolta

Konica Minolta bizhub press c1070p User manual

Konica Minolta bizhub 554E User manual

Konica Minolta

Konica Minolta bizhub 554E User manual

Popular All In One Printer manuals by other brands

Brother 8085DN - DCP B/W Laser user guide

Brother

Brother 8085DN - DCP B/W Laser user guide

Epson Expression ET-2700 EcoTank user guide

Epson

Epson Expression ET-2700 EcoTank user guide

Ricoh PRSPC342DN1 user manual

Ricoh

Ricoh PRSPC342DN1 user manual

Fuji Xerox DocuCentre-III 2007 Administrator's guide

Fuji Xerox

Fuji Xerox DocuCentre-III 2007 Administrator's guide

Minolta Di152 user manual

Minolta

Minolta Di152 user manual

Epson AcuLaser CX11 Series Basic operation gude

Epson

Epson AcuLaser CX11 Series Basic operation gude

Toshiba GA-1201 quick start guide

Toshiba

Toshiba GA-1201 quick start guide

Pantum M6503 Series user guide

Pantum

Pantum M6503 Series user guide

Ricoh Aficio MP C4500 Facsimile Reference

Ricoh

Ricoh Aficio MP C4500 Facsimile Reference

Xerox Phaser 6128 MFP user guide

Xerox

Xerox Phaser 6128 MFP user guide

Brother Airprint MFC-J485DW Web connect guide

Brother

Brother Airprint MFC-J485DW Web connect guide

Oce im2330 Operator's manual

Oce

Oce im2330 Operator's manual

Ricoh TC-IIR Brochure & specs

Ricoh

Ricoh TC-IIR Brochure & specs

Triumph Adler 256ci user manual

Triumph Adler

Triumph Adler 256ci user manual

Canon MultiPASS C555 user manual

Canon

Canon MultiPASS C555 user manual

Sharp FO-DC550 Facsimile operation manual

Sharp

Sharp FO-DC550 Facsimile operation manual

Epson WF-2530 quick guide

Epson

Epson WF-2530 quick guide

Epson Stylus SX215 Fact sheet

Epson

Epson Stylus SX215 Fact sheet

manuals.online logo
manuals.online logoBrands
  • About & Mission
  • Contact us
  • Privacy Policy
  • Terms and Conditions

Copyright 2025 Manuals.Online. All Rights Reserved.