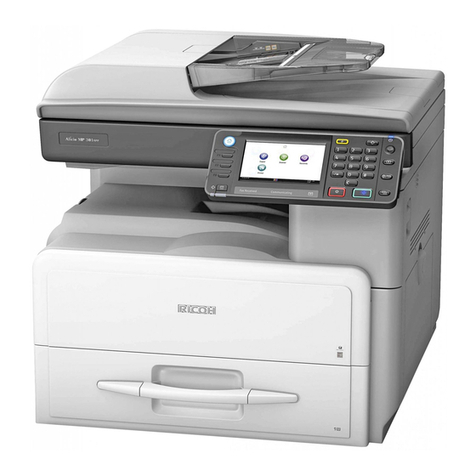
Aficio 200 User manual

Available Options
• Automatic Document Feeder (ADF)
• Internal 1-binTray (internal tray 2)
• Memory Card (2MB or 4MB)
• 400 dpi High Resolution Card
• Function Upgrade Card
• Hard Disk (80MB)
• ISDN Unit

Caution
Useofcontrols,adjustmentsorperformance
of procedures other than those specified
hereinmay result in hazardous radiationex-
posure.
Shielded interconnect cables must be em-
ployedwiththisequipmenttoensurecompli-
ance with the pertinent RF emission limits
governingthisdevice.
CE168X
"TheISDNkitcomplieswiththe requirements
ofCommissionDecision 94/797/EC"
94/797/EC:
* ComissionDecision of 18 November 1994
on a common technical regulation for the
pan-European integrated service digital
network (ISDN) basic access.
Althoughthis equipment can use eitherloop
disconnectorDTMFsignalling,only theper-
formance of the DTMF signalling is subject
toregulatoryrequirementsforcorrectopera-
tion.Itisthereforestronglyrecommended that
theequipment is set touse DTMF signalling
for access to public or private emergency
services. DTMF signalling also provides
fastercall set up.
Note
Some illustrations may be slightly different
fromyour machine.
Certainoptions may notbeavailablein some
countries. For details, please contact your
localdealer.

NOTICE TO USERS (Great Britain)
Thismodel is designed andapproved forconnection tothe followingcircuits.
BritishTelecomPublic SwitchedTelephone Network
HullPublic SwitchedTelephoneNetwork
PABXExtensions
MercuryCommunications Limited Public SwitchedTelephoneNetwork.
CONNECTIONTO THE PSTN ORA PABX EXTENSION
If there is a line jack socket already installed, you may connect this model using the line lead
supplied. If you require a socket to be fitted, complete the attached from and send it to your local
telephonemanager’soffice.
IMPORTANT NOTICE
1. Theconnection to theBT networkmust beunplugged before theearth isdisconnected.
2. The connection to the BT network must not be hard wired.
3. Please ensure that connection to the mains supply (240Vac) is correctly made and that the
power is switched on before use.
4. The apparatus is suitable for direct connection to exclusive lines of a Public Switched Tele-
phone Network, and for connection to compatible PABX’s (consult your authorised dealer for
thelist of compatible PABX’sand for installation thereon), orvia anRBS.
ThedefinitionofanRBS(Relevant Branch System) for PSTN lines, is given in BS6789 section
6.1,clause 2.4.
5. When idle, this model allows normal use of an associated approved main telephone, which
mustbe plugged into the BS6312compatible series connector, providedfor connectionto the
telephoneline. Only one suchconnection may bemade.
6. The apparatus must be connected to PSTN line which use the loop disconnect or DTMF sig-
naling.
7. Themachine is not suitable as an extension to payphone,foruseonsharedservicelines,oron
1-1 carrier systems.
8. TheTerminaloperates in mode 1 (autodialing).
9. The user is advised to check all numbers stored in the register before making a call.
10. The approval of this terminal for connection to the British telecom public switched telephone
networkisINVALIDATEDif the apparatus is subject to any modification in any material way not
authorised by BABT or it is used with, or connected to:
a) Internalsoftware thathas not beenformally acceptedBABT.
b) External control software or external control apparatus which causes the operation of the
terminal or associated call set-up equipment to contravene the requirements of the ap-
proval.
Allapparatus connected to this terminaland thereby connecteddirectly tothe BritishTelecom
publicswitched telephone network must be approved apparatus as defined in Section 22 of the
BritishTelecommunication ACT1984.
11. This apparatus hasbeen approvedfor the useof thefollowing facilities:
Storage ofTelephone Number forRetrieval by Predetermined Code
AutomaticCallInitiation
Operationin theAbsence of Proceed Indication(Although not Detected)
AutomaticDialingFacilities
Auto-CallingFacility
LoudspeakingFacility
SeriesConnectionFacility
AutomaticStorage of Last Number Dialed
ToneDetection-BusyTone
RepeatAttemptFacilities:Multiple(Automatic)
AutoClear form Call Originating End
IntegralModem
Any other usage will invalidate the approval of the apparatus if, as a result, it then ceased to
conformto the standard againstwhich approval wasgranted.
12. Connection to a PBX -it cannot be guaranteed that the apparatus will operate correctly under
all possible conditions connection to compatible PBX’s.Any cases of difficulty should be re-
ferredin the first instanceto thesupplier ofthe telephoneapparatus.
13. Thisapparatus provides an off hook detectorand switching ofthe line betweenthe telephone
and modem.The voltage drop introduced by this apparatus into the loop connectionbetween
the main telephone and the network at a current of 10 ma d.c. is 0.3 volts.
14. Onlyapparatusconformingwith BS 6301 or EN 41003 may be connectedto the series socket.
Anyinterconnectionbetweentheabovesocketandotherconnections,directlyorbythewayof
otherapparatus, may produce hazardous conditionson the BTnetwork.
Adviceshould be obtained froma competent engineerbefore anysuch connectionis made.
15. With reference to EN41003 cl 4.1.3 the apparatus is supplied with a connection to the public
switched telephone network, which is referred to as TNV circuit. There is also an optional
printer port that may by fitted, which is referred to as a SELV circuit. Please ensure that the
TNV circuit is only connected to another TNV circuit and that the SELV circuit is only con-
nected to other SELV circuits.
16. Theapparatus does not recognize asecondary proceed indication.
Declaration of Conformity
“The Product complies with the requirements of the EMC Directive
89/336/EEC and the Low Voltage Directive 73/23/EEC.”

SAFETY
i
SAFETY
Important Safety Instructions
In addition to the warnings and cautions included in the text of this manual,
please read and observe the following safety instructions.
1. Read all of these instructions.
2. Save these instructions for later use.
3. Follow all warnings and cautions marked on the product.
4. Unplug this product from the wall outlet before cleaning. Do not use liquid
cleaners or aerosol cleaners. Use a damp cloth for cleaning.
5. Do not use this product near water.
6. Do not place this product on an unstable cart, stand, or table. The product
may fall, causing serious damage to the product or injuring the user.
7. Slots and openings in the cabinet and the back or bottom are provided for
ventilation; to ensure reliable operation of the product and to protect it
from overheating, these openings must not be blocked or covered. The
openings should never be blocked by placing the product on a bed, sofa,
rug, or other similar surface. This product should not be placed in a built-
in installation unless proper ventilation is provided.
8. This product should be operated from the type of power source indicated
on the marking label. If you are not sure of the type of power available,
consult an authorized sales person or your local power company.
9. This product is equipped with a 3-wire grounding type plug, a plug having
a third (grounding) pin. This plug will only fit into a grounding-type power
outlet. This is a safety feature. If you are unable to insert the plug into the
outlet, contact your electrician to replace your obsolete outlet. Do not
defeat the purpose of the grounding type plug. (This does not apply in
countries in which the 2-wire, non-grounded type of plug is used.)
10.Do not allow anything to rest on the power cord. Do not locate this prod-
uct where persons will walk on the cord.
11.If an extension cord is used with this product, make sure that the total of
the ampere ratings on the products plugged into the extension cord does
not exceed the extension cord ampere rating. Also, make sure that the
total of all products plugged into the wall outlet does not exceed 15 am-
peres.

ii
12.Never push objects of any kind into this product through cabinet slots as
they may touch dangerous voltage points or short out parts that could
result in a risk of fire or electric shock. Never spill liquid of any kind on the
product.
13.Do not attempt to service this product yourself, as opening or removing
covers may expose you to dangerous voltage points or other risks. Refer
all servicing to qualified service personnel.
Please read the "SAFETY INFORMATION" section in the "General Refer-
ence" before using this machine.

SAFETY
iii
Grounding
Ground the machine and the lightning protection circuit in accordance with
regulations. Do not ground to gas or water pipes, or to a telephone ground
plug. Proper grounding is to the ground terminal of the power outlet. Be sure
that the ground terminal of the power outlet is properly grounded.
The lightning protection circuit for the machine requires the machine to be
properly grounded. If proper grounding is provided, about 90% of lightning
damage can be prevented. For safety, be sure to connect the machine to a
three-prug grounded outlet.
Cold Weather Power-up
Avoid raising the room temperature abruptly when it is below 57°F(14°C), or
condensation may form inside the machine.
1. Raise the room temperature to 68°F(20°C) at less than 18°F(10°C) per
hour.
2. Wait for 30 to 60 minutes.
3. Turn the power on.
4. Do not use the machine near a humidifier.
Thunderstorms
With proper grounding, about 90% of lightning damage can be prevented.
However, if possible, during severe electric storms turn the power switch off
and disconnect the power cord and telephone line cord.
General
1. Since some parts of the machine are supplied with high voltage, make
sure that you do not attempt any repairs or attempt to access any part of
the machine except those described in this manual.
2. Do not makemodifications or replacements otherthan those mentioned in
this manual.
3. When not using the machine for a long period, disconnect the power cord.

iv

BASIC
1
SYMBOLS AND CONVENTIONS
Conventions
IMPORTANT
Instructions designed to prevent paper jams, damage to originals, or loss of
data. Be sure to read this information.
Before operation
Tips on what to do before you start.
HINT
Advice about a particular operation or how to correct a mistake.
Restriction
Numerical limits, functions that cannot be combined or conditions in which a
particular function is disabled.
Cross-reference
Tells you where you can find related information.
[Exit]
Words enclosed in square brackets refer to the four buttons at the base of
the display. For example “Press [Exit]” means press the button directly below
the word “Exit” on the display.
Boldface
Boldface is used to refer to keys on the operation panel (except for the four
keys under the display).

2
FUNCTION MAP

BASIC
3

4
TABLE OF CONTENTS
SYMBOLS AND CONVENTIONS.................................................................1
Conventions .........................................................................................1
FUNCTION MAP .........................................................................................2
Getting Started
GUIDE TO COMPONENTS ........................................................................10
OPERATION PANEL ...................................................................................12
READING THE DISPLAY .............................................................................14
USEFUL FUNCTIONS ..................................................................................16
Auto Power-On Reception..................................................................16
Transmission With Image Rotation ....................................................17
ACCEPTABLE TYPES OF ORIGINALS ........................................................18
HOW TO SET AN ORIGINAL ..................................................................... 21
Sending a Fax Message
Overview ............................................................................................26
MEMORY TRANSMISSION ........................................................................27
IMMEDIATE TRANSMISSION .....................................................................34
On-hook Dial (not available in some countries)..................................37
Manual Dial (external handset option required)..................................38
SCAN SETTINGS........................................................................................39
Resolution ..........................................................................................39
Original Type ......................................................................................40
Image Density (Contrast) ...................................................................41
Mixing Scan Settings InA Multiple Page Original...............................42
CHANGING LINE TYPE (OPTIONAL ISDN UNIT REQUIRED) ....................43
DIALING....................................................................................................45
Number Keys .....................................................................................45
Quick Dial...........................................................................................50
Speed Dial..........................................................................................51
Groups ...............................................................................................54
Optional Group Dial (Function Upgrade Card Required)....................55
Redial .................................................................................................56

BASIC
5
TRANSMISSION FEATURES ........................................................................58
Stamp.................................................................................................58
ID Transmission .................................................................................59
Receiving a Fax Message
IMMEDIATE RECEPTION ...........................................................................62
MEMORY RECEPTION...............................................................................63
Substitute Reception ..........................................................................64
SELECTING THE RECEPTION MODE .........................................................66
Fax Mode (Auto Reception Mode) .....................................................66
Telephone Mode.................................................................................66
RECEPTION FUNCTIONS...........................................................................67
Transfer Station..................................................................................67
ID Reception ......................................................................................68
PRINTING FUNCTIONS .............................................................................69
Print Completion Beep .......................................................................69
Checkered Mark.................................................................................69
Center Mark .......................................................................................70
Reception Time ..................................................................................70
Multi-copy Reception (Memory Card Or Hard Disk Option Required) .........71
2-Sided Printing (Optional Duplex Tray And Memory Card
Or Harddisk Required) .......................................................................71
Image Rotation...................................................................................72
Two In One.........................................................................................72
Page Separation and Length Reduction
(not available in some countries)........................................................73
Reverse Order Printing.......................................................................73
Page Reduction..................................................................................74
TSI Print.............................................................................................74
CIL/TID Print (ISDN unit required) ....................................................74
When There Is No Paper Of The Correct Size...................................75
Advanced Transmission Features
SEND LATER ...............................................................................................78
CONFIDENTIAL TRANSMISSION ..............................................................80
PERSONAL CODE TRANSMISSION...........................................................83

6
SENDING AN AUTO DOCUMENT.............................................................85
BOOK FAX ................................................................................................87
CHOOSING THE AREA TO BE SCANNED YOURSELF
(IRREGULAR SCAN AREA) .......................................................................89
TRANSMISSION DEADLINE (TRD) .............................................................91
POLLING TRANSMISSION.........................................................................93
POLLING RECEPTION ............................................................................... 97
TRANSFER REQUEST ............................................................................... 101
TRANSMISSION OPTIONS ..................................................................... 105
Communication Information
CHECKING AND CANCELING TRANSMISSION FILES.......................... 110
Canceling ATransmission ................................................................ 110
Printing A File ................................................................................... 111
CheckingAnd Editing A File ............................................................. 112
PRINTING A LIST OF FILES IN MEMORY (PRINT TX FILE LIST)................ 116
CHECKING THE TRANSMISSION RESULT (TX FILE STATUS) ................... 117
CHECKING THE RECEPTION RESULT (RX FILE STATUS) ......................... 118
PRINTING A CONFIDENTIAL MESSAGE
(MEMORY CARD OR HARD DISK REQUIRED) ...................................... 119
PRINTING A FILE RECEIVED WITH MEMORY LOCK
(MEMORY CARD OR HARD DISK OPTION REQUIRED) ........................ 121
PRINTING THE JOURNAL ....................................................................... 123
DISPLAYING THE MEMORY STATUS ....................................................... 125
Troubleshooting
ERROR MESSAGES AND THEIR MEANINGS.......................................... 128
SOLVING PROBLEMS ............................................................................. 130
INDICATORS .......................................................................................... 131
When The Receive File Indicator Is Lit Or Flashing .........................131
When The i(Confidential Reception) Indicator Is Lit.....................132
When The Fax Error Indicator Is Lit .................................................132
WHEN AN ERROR REPORT IS PRINTED .................................................. 133
WHEN POWER IS TURNED OFF OR FAILS............................................... 133

BASIC
7
User Tools
ACCESSING THE USER TOOLS .............................................................. 136
REGISTER/DELETE MENU........................................................................ 138
Registering Quick Dials....................................................................138
Deleting Quick Dials.........................................................................140
Registering Groups ..........................................................................141
Deleting Groups ...............................................................................144
Registering Optional Groups
(Function Upgrade Card Option Rrequired) .....................................145
Deleting Optional Groups .................................................................148
Registering Speed Dials...................................................................149
Deleting Speed Dials........................................................................151
Storing Keystroke Programs ............................................................152
DeletingA Keystroke Program .........................................................155
RegisteringAuto Documents ............................................................157
DeletingAn Auto Document .............................................................159
Registering IrregularArea ................................................................160
DeletingAn Irregular Area ................................................................162
REPORTS/LISTS ....................................................................................... 164
INITIAL SETUP TX .................................................................................... 165
INITIAL SETUP RX ................................................................................... 166
ASSIGNING USER FUNCTION KEYS ...................................................... 167
KEY OPERATOR SETTINGS ..................................................................... 169
Personal Codes................................................................................169
ECM .................................................................................................174
Memory Lock (Memory Card or Hard disk option required) .............174
Multistep Transfer (Optional Memory card orHard disk requireed)...175
Forwarding .......................................................................................177
Receiving FromThe Senders To Treat Differently(Special RX Nos.) ........183
Authorized Reception.......................................................................188
Monitor Volume ................................................................................192
RTI/TTI.............................................................................................193
Registering The Economy Transmission Time .................................195
ID Code ............................................................................................196
G3 Analog Line.................................................................................197
G3 Digital Line..................................................................................199
G4 Digital Line..................................................................................200

8
Changeing The User Parameters.....................................................203
Printing The User Parameter List.....................................................207
Date/Time.........................................................................................207
Summer Time ...................................................................................209
Counters...........................................................................................209
Paper Feed Selection.......................................................................209
RDS (Remote Diagnostic System)...................................................209
Entering Text
ENTERING AND MODIFYING TEXT........................................................ 212
Available Characters ........................................................................212
Keys.................................................................................................212
How To Enter Text ............................................................................214
Maintaining Your Machine
CONNECTING THE MACHINE TO A TELEPHONE LINE AND TELEPHONE .... 218
Connecting The Telephone Line .......................................................218
Connecting The Machine To The ISDN ............................................219
REPLACING THE STAMP CARTRIDGE .................................................... 220
Appendix
OPTIONAL EQUIPMENT ......................................................................... A-3
Memory Card ...................................................................................A-3
Function Upgrade Card....................................................................A-3
400dpi High Resolution Card............................................................ A-3
ISDN Unit ......................................................................................... A-3
SPECIFICATIONS ................................................................................... A-4
FUNCTION LIST ...................................................................................... A-5
INDEX................................................................................................... A-10

Getting Started
9
Getting Started

10
GUIDE TO COMPONENTS
a. ADF /Platen Cover
Holds down the original placed on
the exposure glass.
b. Main Switch ∗∗
∗∗
∗1
Use to turn the machine on or off.
⇒See “Auto Power-On Reception”
on page 16.
⇒See “When Power is Turned Off”
on page 133.
c. Internal 1-bin Tray (internal tray
2)
Usually received fax messages are
printed to the Internal Tray 1.
Other tray can also be selected for
other prints or copies.
⇒See “CHANGING MACHINE
SETTINGS” in the General
Reference.
d. External Tray
e. Internal Tray 1
f
bc
d
e
i
a

Getting Started
11
f. Exposure Glass
Place the original aligning its upper
left corner with the reference mark
at the upper left corner of the
exposure glass.
g. Bypass Tray
Select this tray to use non-standard
size paper.
⇒See “Setting Originals” in the
Copy Reference.
h. Line Connectors
i. AC Switch ∗∗
∗∗
∗1 ∗∗
∗∗
∗2
Do not touch this switch. It should
only be used by a service engineer.
h
g
∗1 If the main switch is on and there is still no power, turn on the AC switch.
∗2 If you leave the AC switch off for more than about an hour without optional
hard disk, all files in memory are lost.

12
OPERATION PANEL
a. User Tools
Press to enter User Tools mode. These tools
allow you to customize the default settings.
b. Communicating Indicator
Lights during transmission or reception.
c. Receive File Indicator
Lights to tell you a message has been
received into memory. Blinks when a
Memory Lock file has been stored in
memory. Note that this indicator does not
inform you of a Confidential reception.
d. Facsimile Error Indicator
Lights if the optional Facsimile unit has
problem, there is a communication error or
there is no paper in the cassette (see page
132).
e. ii
ii
i(Confidential Reception) Indicator
Lights when a message has been received
into memory with Confidential Reception
(see page 119, 132).
f. Stamp key
Press to turn the stamp feature on or off..
g. Transmission Mode key
Press to toggle between MemoryTransmis-
sion and ImmediateTransmission modes.
h. Resolution key
Press to switch between Standard, Detail
and Super Fine (optional high resolution card
required).
i. User Function keys
Each of these can be programmed for rapid
access to frequently used features.
Features Programmed by Default
Key Standard With G4 option
F1 Start Manual RX ←
F2 TEL Mode ←
F3 Transmission
Result Display ←
F4 − G4 selection
j. Quick Dial keys
Use to dial numbers at a single touch or to
enter letters and symbols. Also use for
Group Dial, Keystroke Program andAuto
Document features.
Quick Dial Flip Plate
Flip this plate down to access Quick Dial
keys 01 through 28, flip up to access keys
29 through 56.
k. Original Type key
Use when sending a halftone image such as
a photograph or a color original.
j
a
i
fghbc ed
Commu-
nicating Receive
File
Facsimile
Error
F1 F2 F3 F4 Stamp
Immediate
Trans.
Memory
Trans.
Standard
Detail
Super Fine
A B C D E F G
H I J K L M N
OP QR S TU
VWXYZ
123
aa
User Tools Printer
Error
Start
Manual
RX
TX Files
Status
TEL
Mode
Table of contents
Other Aficio All In One Printer manuals

Aficio
Aficio MP C2551 User manual

Aficio
Aficio SPC210SF User manual

Aficio
Aficio MP 171SPF User manual

Aficio
Aficio SP C231SF User manual

Aficio
Aficio MP 301spf User manual

Aficio
Aficio MP 2352 User manual

Aficio
Aficio SP 5100N User manual

Aficio
Aficio cl7300 User manual

Aficio
Aficio C6055 User manual

Aficio
Aficio nashuatec DSc328 User manual