manuals.online logo
Brands
  1. Home
  2. •
  3. Brands
  4. •
  5. Konica Minolta
  6. •
  7. Digital Camera
  8. •
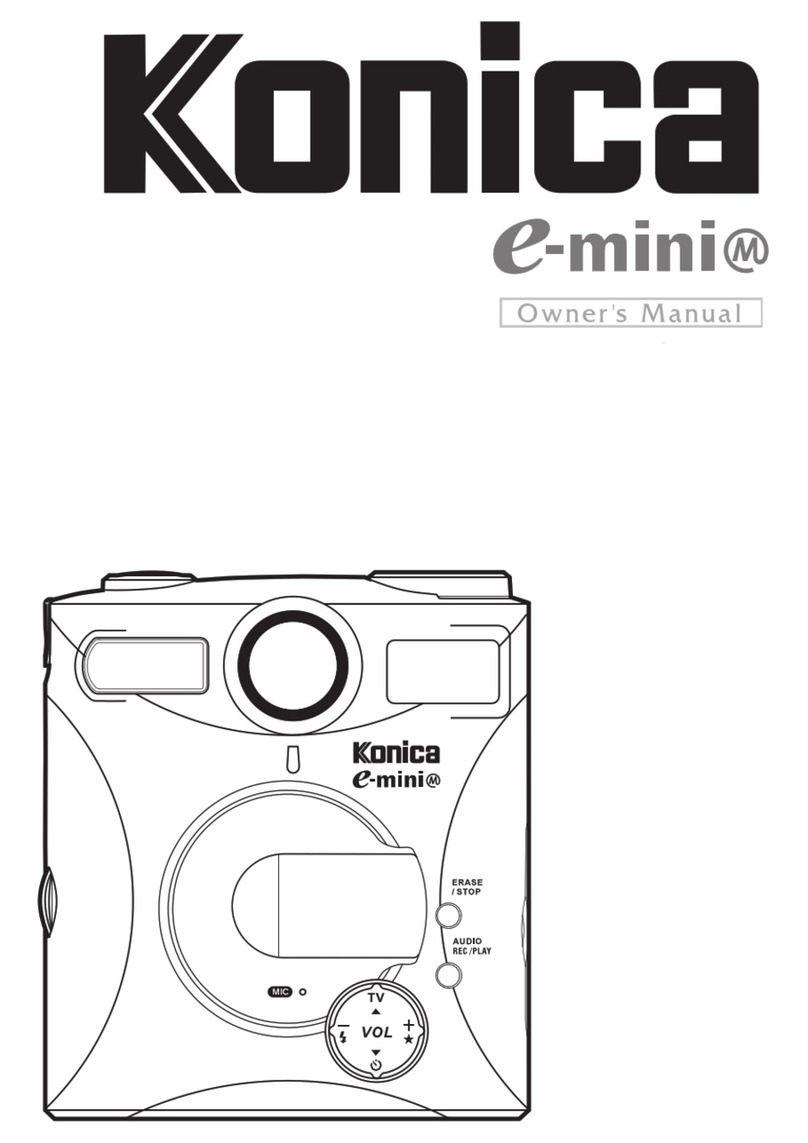
  9. Konica Minolta E-Mini-M E-Mini-Multi-Media Camera User manual

Konica Minolta E-Mini-M E-Mini-Multi-Media Camera User manual

This manual suits for next models

1

Other Konica Minolta Digital Camera manuals

Konica Minolta DiMAGE A200 User manual

Konica Minolta

Konica Minolta DiMAGE A200 User manual

Konica Minolta DiMAGE G600 User manual

Konica Minolta

Konica Minolta DiMAGE G600 User manual

Konica Minolta DiMAGE X31 User manual

Konica Minolta

Konica Minolta DiMAGE X31 User manual

Konica Minolta MAXXUM 5D User manual

Konica Minolta

Konica Minolta MAXXUM 5D User manual

Konica Minolta Digital Revio KD-210Z User manual

Konica Minolta

Konica Minolta Digital Revio KD-210Z User manual

Konica Minolta Q-M200 User manual

Konica Minolta

Konica Minolta Q-M200 User manual

Konica Minolta DiMAGE Z20 User manual

Konica Minolta

Konica Minolta DiMAGE Z20 User manual

Konica Minolta Revio KD-410Z User manual

Konica Minolta

Konica Minolta Revio KD-410Z User manual

Konica Minolta DiMAGE X21 User manual

Konica Minolta

Konica Minolta DiMAGE X21 User manual

Konica Minolta DiMAGE X31 User manual

Konica Minolta

Konica Minolta DiMAGE X31 User manual

Konica Minolta Digital Revio KD-500Z User manual

Konica Minolta

Konica Minolta Digital Revio KD-500Z User manual

Konica Minolta DiMAGE E50 User manual

Konica Minolta

Konica Minolta DiMAGE E50 User manual

Konica Minolta Dynax DYNAX 5D Manual

Konica Minolta

Konica Minolta Dynax DYNAX 5D Manual

Konica Minolta DiMAGE Xg User manual

Konica Minolta

Konica Minolta DiMAGE Xg User manual

Konica Minolta DiMAGE X1 User manual

Konica Minolta

Konica Minolta DiMAGE X1 User manual

Konica Minolta Revio KD-510Z User manual

Konica Minolta

Konica Minolta Revio KD-510Z User manual

Konica Minolta Q-mini K-QM-3501E User manual

Konica Minolta

Konica Minolta Q-mini K-QM-3501E User manual

Konica Minolta KD-25 User manual

Konica Minolta

Konica Minolta KD-25 User manual

Konica Minolta DiMAGE G400 User manual

Konica Minolta

Konica Minolta DiMAGE G400 User manual

Konica Minolta MAXXUM 5D User manual

Konica Minolta

Konica Minolta MAXXUM 5D User manual

Konica Minolta Q-Mini User manual

Konica Minolta

Konica Minolta Q-Mini User manual

Konica Minolta DiMAGE X50 User manual

Konica Minolta

Konica Minolta DiMAGE X50 User manual

Konica Minolta DYNAX40M User manual

Konica Minolta

Konica Minolta DYNAX40M User manual

Konica Minolta DiMAGE X1 Mounting instructions

Konica Minolta

Konica Minolta DiMAGE X1 Mounting instructions

Popular Digital Camera manuals by other brands

Canon WP-DC35 user guide

Canon

Canon WP-DC35 user guide

Xiaomi 70mai Dash Cam Lite user manual

Xiaomi

Xiaomi 70mai Dash Cam Lite user manual

Samsung PL70 Quick start manual

Samsung

Samsung PL70 Quick start manual

GE E1680W user manual

GE

GE E1680W user manual

Canon EOS 1200D instruction manual

Canon

Canon EOS 1200D instruction manual

Tevion MD 86497 user guide

Tevion

Tevion MD 86497 user guide

Exakta VX Features

Exakta

Exakta VX Features

Kodak Digital Science DC120 user guide

Kodak

Kodak Digital Science DC120 user guide

Nikon FM3A Specifications

Nikon

Nikon FM3A Specifications

Vectra Fitness H1 Quick reference guide

Vectra Fitness

Vectra Fitness H1 Quick reference guide

Nikon COOLPIX 775 quick start guide

Nikon

Nikon COOLPIX 775 quick start guide

Olympus IR 500 - 4MP Digital Solutions Camera Manuel de Référence

Olympus

Olympus IR 500 - 4MP Digital Solutions Camera Manuel de Référence

Samsung EC-L100ZBBA brochure

Samsung

Samsung EC-L100ZBBA brochure

FujiFilm FINEPIX BL01124-201 owner's manual

FujiFilm

FujiFilm FINEPIX BL01124-201 owner's manual

Panasonic DMC-L10KPP Service manual

Panasonic

Panasonic DMC-L10KPP Service manual

Hyundai Electric HYU-CC-CHBF12001 Quick installation guide

Hyundai Electric

Hyundai Electric HYU-CC-CHBF12001 Quick installation guide

Sony DSC-WX80 specification

Sony

Sony DSC-WX80 specification

Nikon Nuvis S - Point & Shoot instruction manual

Nikon

Nikon Nuvis S - Point & Shoot instruction manual

manuals.online logo
manuals.online logoBrands
  • About & Mission
  • Contact us
  • Privacy Policy
  • Terms and Conditions

Copyright 2025 Manuals.Online. All Rights Reserved.

English
1
FCC Notice
This equipment has been tested and found to comply with the limits for a Class B digi-
tal device, pursuant to part 15 of the FCC ules. These limits are designed to provide
reasonable protection against harmful interference in commerical installation. This equip-
ment generates, uses and can radiate radio frequency energy and if not installed and
used in accordance with the instructions, may cause harmful interference to radio
communications. However, there is no guarentee that interference will not occur in a
particular installation. If this equipment does cause harmful interferece to radio or tele-
vision reception, detectable by turning the equipment in question off and on, the user is
encouraged to try to correct the intereference by one or more of the following measures:
eorient or relocate the receiving antenna; Increase the distance between the equip-
ment and the receiver; Connect the equipment to an outlet on a different circuit than
that which the receiver is connected to; Or consult the dealer or an experienced radio/
TV technician for help.
English
2
Do not place this camera in a damp or dusty location.
This may cause a fire or electric shock.
CAUTION
Do not place this camera in a location affected by oil fumes or
steam, such as near a cooking stove or humidifier. This may cause
a fire or electric shock.
Do not leave this camera in places subject to extremely high
temperatures, such as in a sealed vehicle or in direct sunlight.
Exposure to high temperatures may adversely affect the camera
case and internal components and cause a fire.
Do not cover or wrap the camera or the A power adapter with a
cloth or quilt. This may cause heat to build up and distort the
case or cause a fire. Always use the camera and its accessories
in well-ventilated locations.
While it is switched on do not move the camera after transferring
images to P . (if you are using the A power adapter, unplug the
adapter from the A power outlet after you have switched off
the camera.) Ensure that any connector cords or cables to other
devices are disconnected before moving the camera. Failure to
do so may damage the cords or cables and cause a fire or electric
shock.
Take care that the camera is not bumped when it is being moved.
This may cause the camera to malfunction.
When handling the camera, always unplug it from the power
source (batteries or A power adapter) for safety. (If you are not
going to use the A power adapter, unplug the adapter from the
A power outlet after you have disconnected the camera.) Failure
to do so could result in an electric shock.
English
3
When leaving the camera unused for long periods, such as
during a vacation, always unplug the camera from the power
source (batteries or A power adapter ) for safety.
(If you are not going to use the A power adapter, unplug the
adapter from the A power outlet after you have disconnected
the camera.)
Failure to do so could result in a fire.
CAUTION
ontact your dealer or local authorized service facility to
request cleaning of the interior of the camera every two years.
Allowing dust to accumulate in the camera for long periods
without cleaning the camera interior may cause a fire or electric
shock.
leaning is best performed prior to seasonal periods of high
humidity.
onsult with your dealer or local authorized service facility for
information on the cost of cleaning your camera.
Do not use batteries other than those specified for use
with your camera.
The use of unsuitable batteries may result in the batteries
splitting or leaking and causing a fire, injury or corrosion of the
battery compartment.
When fitting a battery into the camera, check the polarity
markings on the battery ( and )to ensure that you insert the
battery correctly.
Incorrect battery polarity may result in the batteries splitting
or leaking and causing a fire, injury or corrosion of the battery
compartment.
Remove the batteries if the camera will not be used for an
extended period of time. The batteries may leak and cause a
fire, injury or soiling of the battery compartment. If the
batteries leak, clean and wipe the battery compartment
carefully and install new batteries. Wash your hands carefully
if you touch the battery fluid.
+
English
4
Do not use the camera if any water has entered the camera.
Switch the camera off, and then disconnect the power source
(batteries or A power adapter). (If you are using the A power
adapter, unplug the adapter from the A power outlet after you
have disconnected the camera.) Then contact your dealer or
your local authorized service facility. Do not continue to use
the camera as this may cause a fire or electric shock.
Do not use the camera if any foreign objects have entered the
camera. Turn the camera off, and then disconnect the power
source (batteries or A power adapter). (If you are using the
A power adapter, unplug the adapter from the A power outlet
after you have disconnected the camera.) Then contact your
dealer or your local authorized service facility. Do not continue
to use the camera as this may cause a fire or electric shock.
If the camera has been dropped or the camera case has been
damaged, switch the camera off, and then disconnect the power
source (batteries or A power adapter). (If you are using the A
power adapter, unplug the adapter from the A power outlet
after you have disconnected the camera.) Then contact your
dealer or your local authorized service facility. Do not continue
to use the camera as this may cause a fire or electric shock.
Do not use this camera when it is emitting smoke, is unusually
hot to the touch, is emitting any unusual odor or noise, or is in
any other abnormal state. Use of the camera in any of these
situations may cause a fire or electric shock. Stop using the
camera immediately, turn the camera off, and then disconnect
the power source (batteries or A power adapter). (If you are
using the A power adapter, unplug the adapter from the A
power outlet after you have disconnected the camera.) After
checking that smoke is no longer being emitted, contact your
dealer or your local authorized service facility and request
repairs. Never attempt to repair this camera yourself as this is
dangerous.
WARNING
Unplug from
power socket.
English
5
Do not place the camera in unstable locations such as on a
wobbly table or sloping surface where the camera may fall or
tip over and cause injury.
WARNING
Take care that the camera is not exposed to moisture and that
water does not get into the camera. Take particular care when
it is raining or snowing or when you are using the camera at the
beach or near water.
Water in the camera may cause a fire or electric shock.
Do not insert or drop metallic or inflammable foreign objects
into the camera through access points such as the ompact
Flash card slot.
This may cause a fire or electric shock.
Do not attempt to modify this camera. This may cause a fire or
electric shock.
Do not remove the camera casing. This may cause an electric
shock. Internal inspection, maintenance and repairs should be
carried out by your dealer or local authorized service facility.
Do not use this camera in the bathroom. This may cause a fire
or electric shock.
Do not touch the power plug during a thunderstorm if you are
using the A power adapter.
This may cause an electric shock.
Do not disassemble
Do not use in wet areas.
Do not touch
English
6
Do not attempt to charge the alkaline battery.
This may cause the battery to split or leak, causing fire or injury.
Never use this camera, look through the viewfinder, or watch
the L D (liquid crystal display)while you are operating a moving
car, motorcycle or bicycle.
This may cause a traffic accident.
WARNING
Do not carry or store a battery with objects such as metal pens,
necklaces, coins or hairpins. This could short circuit the positive
and negative poles of the battery.
This may cause the battery to split or leak, resulting in fire or
injury.
Do not heat or attempt to disassemble a battery, and do not
place a battery in water or in a fire.
Any of these may cause the battery to split or leak, cause fire
or injury.
Do not subject a battery to strong impacts, such as hitting it
with a hammer, stepping on it or dropping it. Any of these may
cause the battery to split or leak, cause fire or injury.
+
Use only the specified batteries or A power adapter specified
for use with this camera.
The use of other power sources may cause a fire.
English
Table of Contents
Introduction ............................................................................... 8
Overview ............................................................................................................................................ 8
What’s included in the package ....................................................................................... 8
System equirements (Windows) ................................................................................ 8
Getting to Know your camera ........................................................................................... 9
Getting Started ........................................................................ 10
Inserting Batteries ...................................................................................................................... 10
Using the Power Adapter (Optional Accessory) ............................................... 11
Attaching the Strap ................................................................................................................... 11
Using a Compact Flash Card (Optional Accessory) ........................................ 12
Operating the Camera ............................................................................................................. 12
Using e-mini M as a Digital amera ............................... 14
Taking Pictures ................................................................................................................................14
Camera Funtion Controls....................................................................................................... 15
Viewing Pictures ...................................................................... 16
Downloading Pictures into your P ............................... 18
Using e-mini M as an MP3 Player .................................... 20
Where to get MP3 music files ......................................................................................... 20
Transferring MP3 files into e-mini M ........................................................................... 20
MP3 Playback Controls .......................................................................................................... 21
Playing MP3 Music...................................................................................................................... 21
Using e-mini M as an Audio Recorder .......................... 22
ecording Controls .................................................................................................................... 23
ecording Audio ........................................................................................................................... 23
Playing ecorded Audio ......................................................................................................... 24
Transferring ecorded Audio into your PC ............................................................. 24
Erasing ontents from e-mini M ..................................... 25
Erasing a Single Picture, MP3 Song or ecorded Audio ............................. 25
Erasing All Pictures, MP3 Songs or ecorded Audio Tracks ................... 26
Using e-mini M as a P amera........................................ 27
Appendix 1 : L D Icons .........................................................27
Appendix 2 : Specifications ..............................................28
English
8
Introduction
Overview
Digital Camera, MP3 Player, Digital Audio ecorder, and PC Camera in One!
Thank you for purchasing the e-mini M, which is the most incredible camera ever
developed. This portable digital camera not only takes pictures, but also features a built-
in MP3 player, audio recorder, and PC camera in the same camera unit.
The e-mini M is equipped with 2MB built-in memory. In addition, it provides a memory
card slot which can be inserted with a (Type I) Compact Flash Card. To download digital
pictures and audio from the camera into your PC, a USB cable connection is all that is
required. This single USB connection also allows you to transfer MP3 songs into the
camera. When you use it as a PC camera, you can videoconference over the Internet.
See and talk to people on the internet face-to-face.
What’s Included in the Package
● e-mini M unit
● USB cable
● Video cable
● Earphone
● 2 x AA alkaline batteries
● Software CD- OM
● Quick start guide
● Owner’s Manual
● Pouch and Strap
CD- OM content :CD- OM content :
CD- OM content :
Disk 1 : MGI Photosuite SE, Multimedia Camera Manager, MP3 trial software
Disk 2 : MGI Video Wave SE+
Optional accessories :Optional accessories :
Optional accessories :
Compact Flash Card
AC Adapter
System Requirements (Windows)
Personal computer with minimum Pentium 166 MHz with graphic card
Microsoft windows 98/98SE/2000/ME operating system
32 MB or more of AM
80 MB of hard disk space available
Available USB, and CD- OM drive
Color Display (800x600 24 bit or higher recommended)
English
Getting to Know your Camera
Before you start using camera, try to familiarize first with its various controls. This sec-
tion shows the different parts of the camera in detail.
A. Power Button
B. Shutter elease
C. eady LED
D. Mode Dial
E. Lens
F. Viewfinder Window
G. Flash
H. Compact Flash
Card slot
I. Self-Timer LED
J. Stop/Erase Button
K. Audio ecord /
Play Mode Selection
Button
L. Microphone
M. 4-Way Toggle Control
N. Earphone Jack
O. DC IN 5V port
P. Video port
Q. USB port
. Battery door
S. Viewfinder
T. LCD
A
BC
D
G
H
I
J
T
K
N
O
P
Q
R
S
LM
E
F
DCIN
5V
VIDEO
9