rrul
@
o@ @
r-fir-"-rr.-tT-t
lt;)l ,).1l,l ,
tAtA__n-,,_l
Deutsch
Verwendungeiner Lithiumbatterie CR123A,
DLl23A (3V). Die Kamera funktioniert
nur bei eingelegter Batterie.
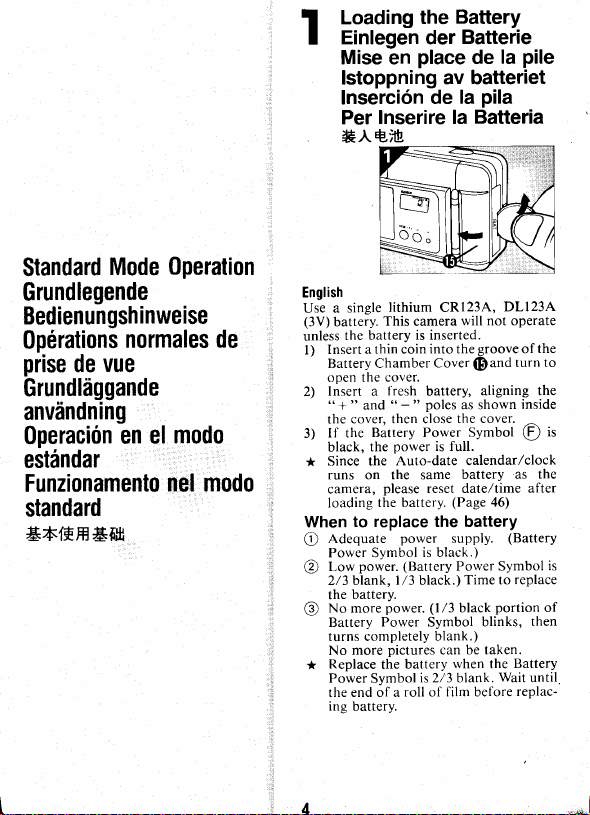
l) FlacheMiinze gemdB
Abbildung in die
Kerbe frihren. und Batteriefachdeckel
@ offnen.
2\ Frische Batterie einlegen, und Deckel
schlieBen.
(Auf Korrekte Ausrichtung
der
Pole
"*" und "-" achten.)
3) Bei frischer Ratterie erscheintdasBat-
teriesvmbol(F) schwarz.
* Die (alenderTUhr-Anzeige wird mit
derselben Batterie gespeist wie die
Kamera selbst.
Nach Batteriewechsel
miissen
daherdie
Datenneu
eingestellt
werden. (Seite
47)
Batteriespannung
prtifenund
Batteriewechsel
@ Batterieleistung
ausreichend.
(Batterie-
symbol vollstdndigschwarz.)
@ Iiatterieleistung ihwach. (Batterie-
symbol ein Drittel schwarz.) Batterie
wechseln.
@ Batterieleistung erschcipft. (Das
schwarze
Drittel des Batteriesymbols
blinkt; verschwindet vollstdndig.)
KeineAufnahmen mehr moglich.
* Frische Batterie einlegen, wenn das
Batteriesymbol nur noch ein Drittel
schwarz angezeigt wird. Batterie
erst nach Entnahme eines Films
auswechseln.
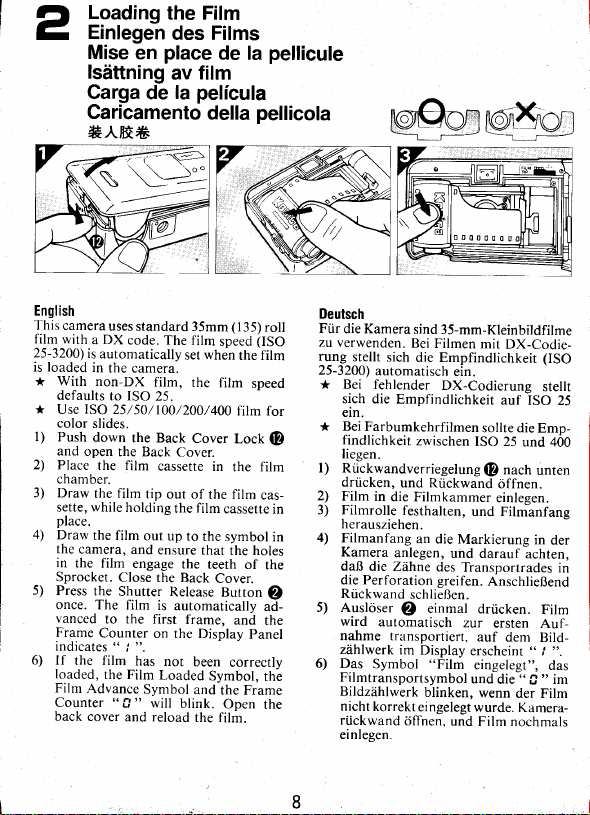
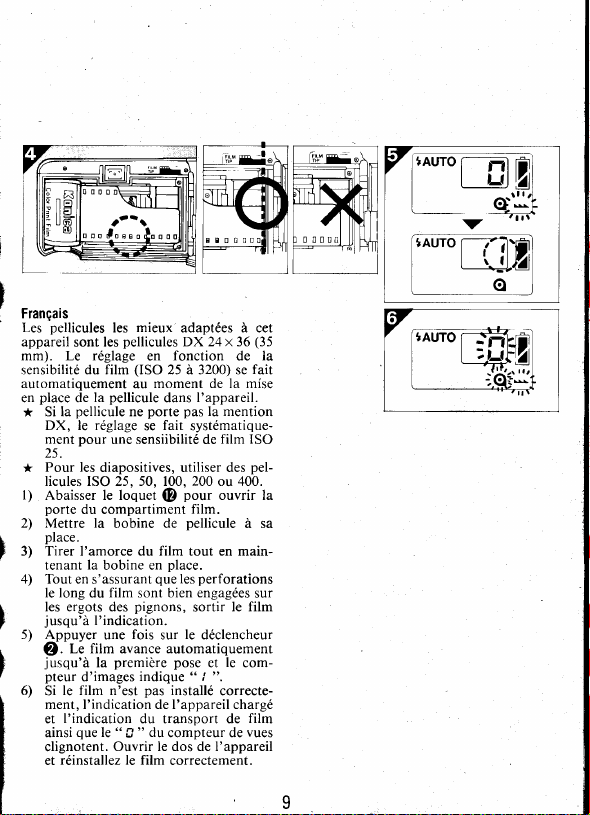
Frangais
Utiliier une pile au lithium CRl23A,
DLl23A (3V). Cet appareil ne peut
fonctionner sanspile.
l) Ins6rezune piice de monnaie dansla
rainure m6nae6e sur le couvercle du
logement a pile (D et tournez la pidce
pour ouvrir le couvercle.
2) Mettez une pile neuveen respectantles
indications
"+" et "-" appos6es
d
I'int€rieur du couvercle et refermez le
couvercle.
3) Si I'indication de la pile f) estnoire,
c'est que la pile dst si-ffisammeni
charg6e.
* Etant donn€ que la pile qui fait fonc-
tionner I'appareil alimente dgalement
I'horodateur, n'oubliez pasde corriger
l'heure ou la date quand vous changez
la pile. (cf. page
47)
Remplacementde la pile
@ flte suffisamment chargee (Le sym-
bole dechargement dela pile estnoir).
@ eite p.esquJ 6puis6e (Le symbole cie
chargement de la pile est2i3 blanc et
l/3 noir). Il esttempsde remplacerla
pile.
@ Pile completementd6charg6e
(la par-
tie noire (1/3) du symbolede charge-
ment de pile clignote, puis devient
blanche). Aucune photo ne peut Ctre
prlse.
* Remplacer la pile lorsque le symbole
de chargement de la pile est au 2/3
blanc. Finir le rouleau de pelliculese
trouvant dans l'appareil avant de
remplacer
la pile.