KONWA KW-316 User manual

KONWA®
KW-316
GRAVITY FEED STEAM IRON
C/W TELFON SHOE
INSTRUCTION MANUAL
&
PARTS LIST

INSTRUCTIONS
1. Hang water bottle one meter above
ironing surface (Refer Bottle Hanging
Instruction).
2. Connect one end of the hose (black
colour) to the iron and the other end to
the bottle.
. Fill in bottle with tap water only.
4. Tie the electrical cord and hose
together.
5. Plug in the iron cord into a grounded
electrical outlet.
6. Set the temperature dial at No.4 and
let the iron heat up for ten minutes.
7. Open the bottle valve and allow the
hose to fill with water by pressing the
steam switch. The iron is now ready for
use.
8. When not using, place the iron on
the supplied iron rest.
9. Always unplug the iron when
unattended or not in use.
IMPORTANT
Do not stand iron on its back.

EXPLODED VIEW
NO. PARTS NO. DESCRIPTION NO. PARTS NO. DESCRIPTION
1 19047/19117 SILICONE IRON REST E 8-6 14011 VALVE SPRING
2 1 8200/1 8 00 BASE ASSY 120V 8-7 1410 VALVE BODY
1 9200/1 9100 BASE ASSY 120V 8-8 54001 VALVE NAME PLATE
19816/198 5 COVER 8-9 140 9 COIL COVER
4 118000 RUBBER HANDLE SET 8-10 14501/14502 VALVE COIL 120V
4-1 1180 HANDLE 8-11 140 8 COIL WASHER
4-2 11801 HANDLE MTG. BRACKET 8-12 14019 LOCKING NUT
4- 198 8 WASHER 9 151505/151504 HT-577 THERMOSTAT
ASSY
4-4 11006 NUT (7/16) 10 18904/18905 LINE CORD 120V
5 124401 MAIN SWITCH ASSY (G) 11 190 8 BOLT HANDLE MTG.
BRACKET
5-1 12091 ON OFF SWITCH 12 190 7 MTG. BRACKER WASHER
6 19815 THERMO SHIELED 1 190 7 MTG. BRACKET WASHER
7 118001 HANDLE CAP SET 14 19817 TAP TITE SCREW
(M6X1.0P)
7-1 17100 STEAM SWITCH 15 19827 MTG. BRACKET WASHER
7-2 11802 HANDLE CAP 1 16 161000 WATER BOTTLE ASSY
7- 198 7 HANDLE CAP 2 16-1 16009 HANGER WATER
BOTTLE
7-4 198 9 SWITCH BUTTON 16-2 1610 FILTER
8 145100/1452 0 SOL. VALVE ASSY. 120V 16- 16010 WATER BOTTLE
145110/145210 SOL. VALVE ASSY. 120V 16-4 16107 WATER VALVE
8-1 14005 HOSE BARB NUT 17 16108 SILICONE HOSE SET
8-2 14001 HOSE BARB SOLENOID 17-1 16018 FILTER
8- 14004 VALVE O-RING 17-2 160 1 SILICONE HOSE
8-4 14007 RUBBER PACKING 17- 1600 SILICONE HOSE SPRING
8-5 14101 VALVE PIN

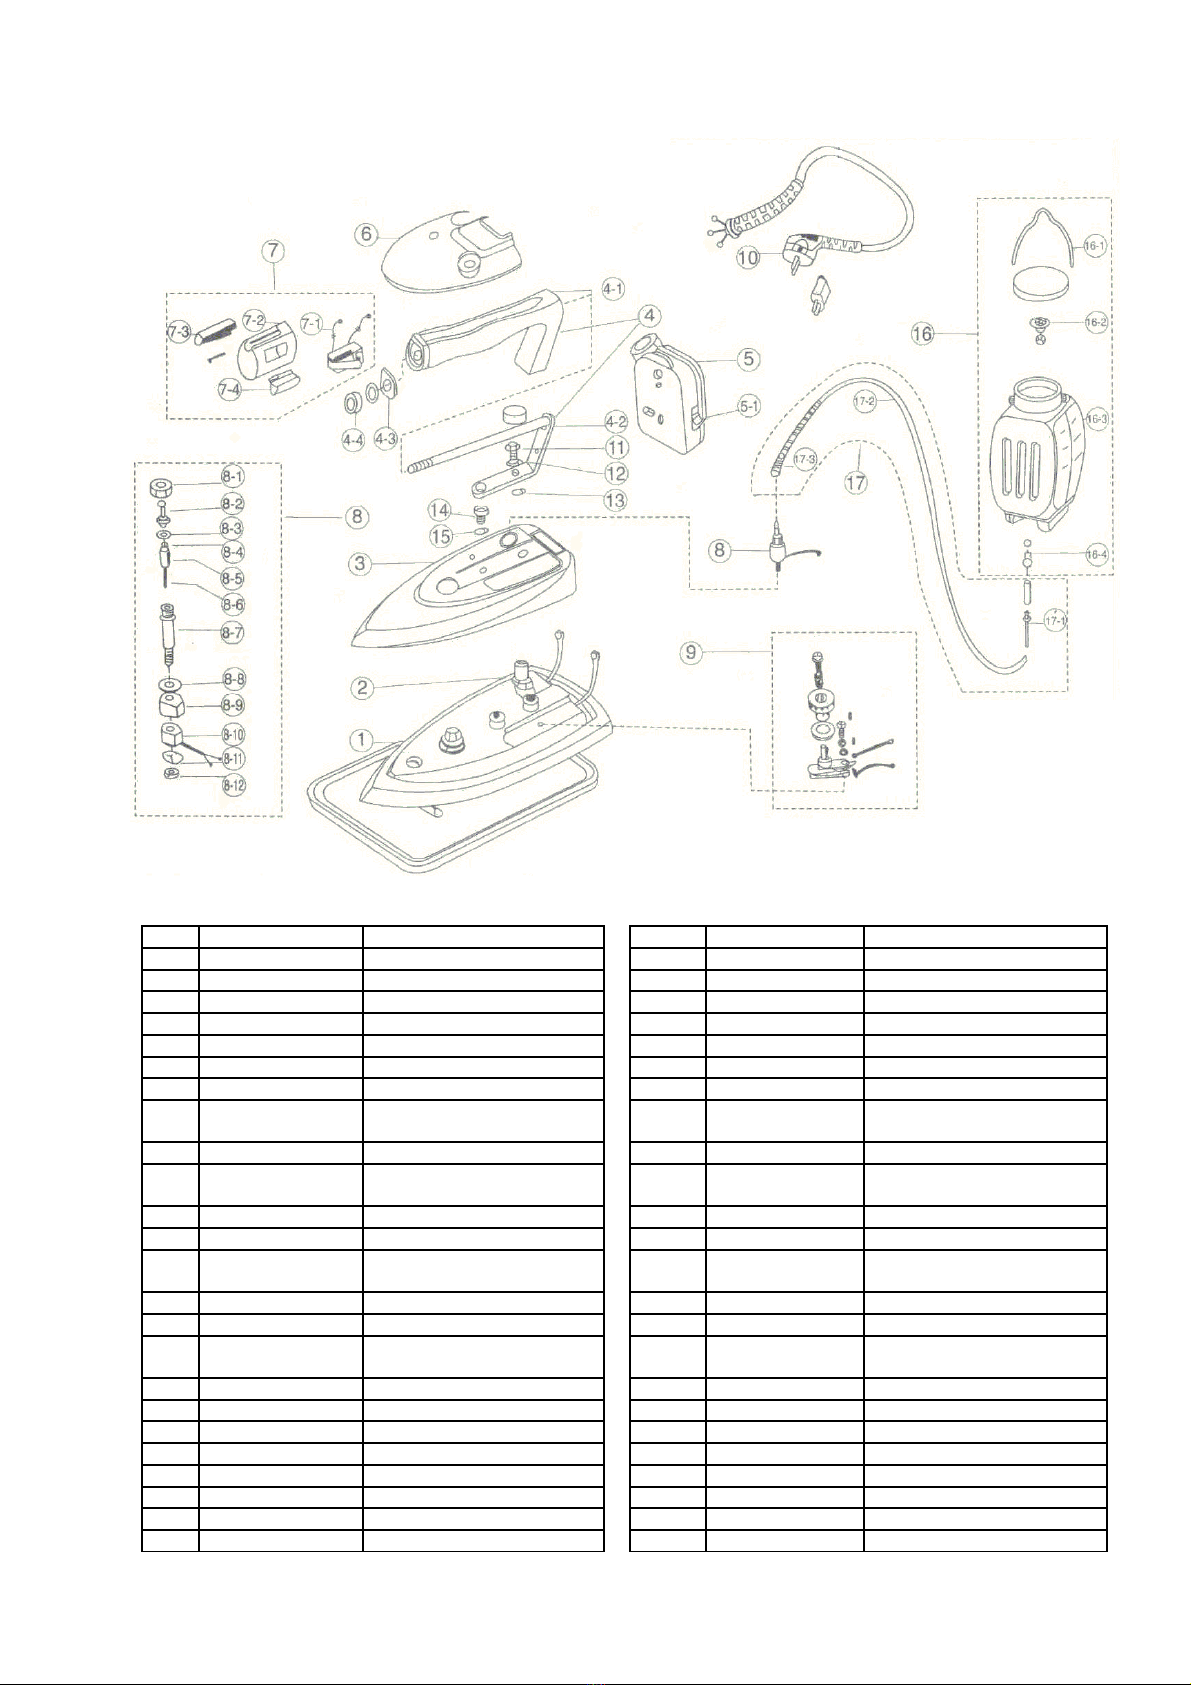
Tips for ironing with professional results :-
Initially, to allow water to enter into the hose and iron, press the steam switch. This may take a few
seconds, then you will see the seam come out.
Begin to iron.
For best results, it is only necessary to press the steam switch for a few seconds at a time. It is not
necessary to activate the steam switch continuously.
There are several settings on your temperature dial. Recommended temperature settings are as
follows :-
#1, 2 – Preheat
# – Silk and delicate fabrics (low temperature)
#4 – Cotton and wool (medium temperature)
#5 – Linen (high temperature)
A telfon shoe is recommended to prevent garment shine and starch built-up.
When unattended or not in use, always turn off and unplug your iron.
TROUBLE SHOOTING GUIDE
PROBLEM PROBABLE CAUSE SUGGESTED REMEDY
Iron does not heat. No power to iron. Check electric outlet.
Temperature dial is in “OFF”
position.
Set temperature dial to No. , 4
or 5.
Temperature dial is set on No.
1 or 2.
Set temperature dial to No. , 4
or 5.
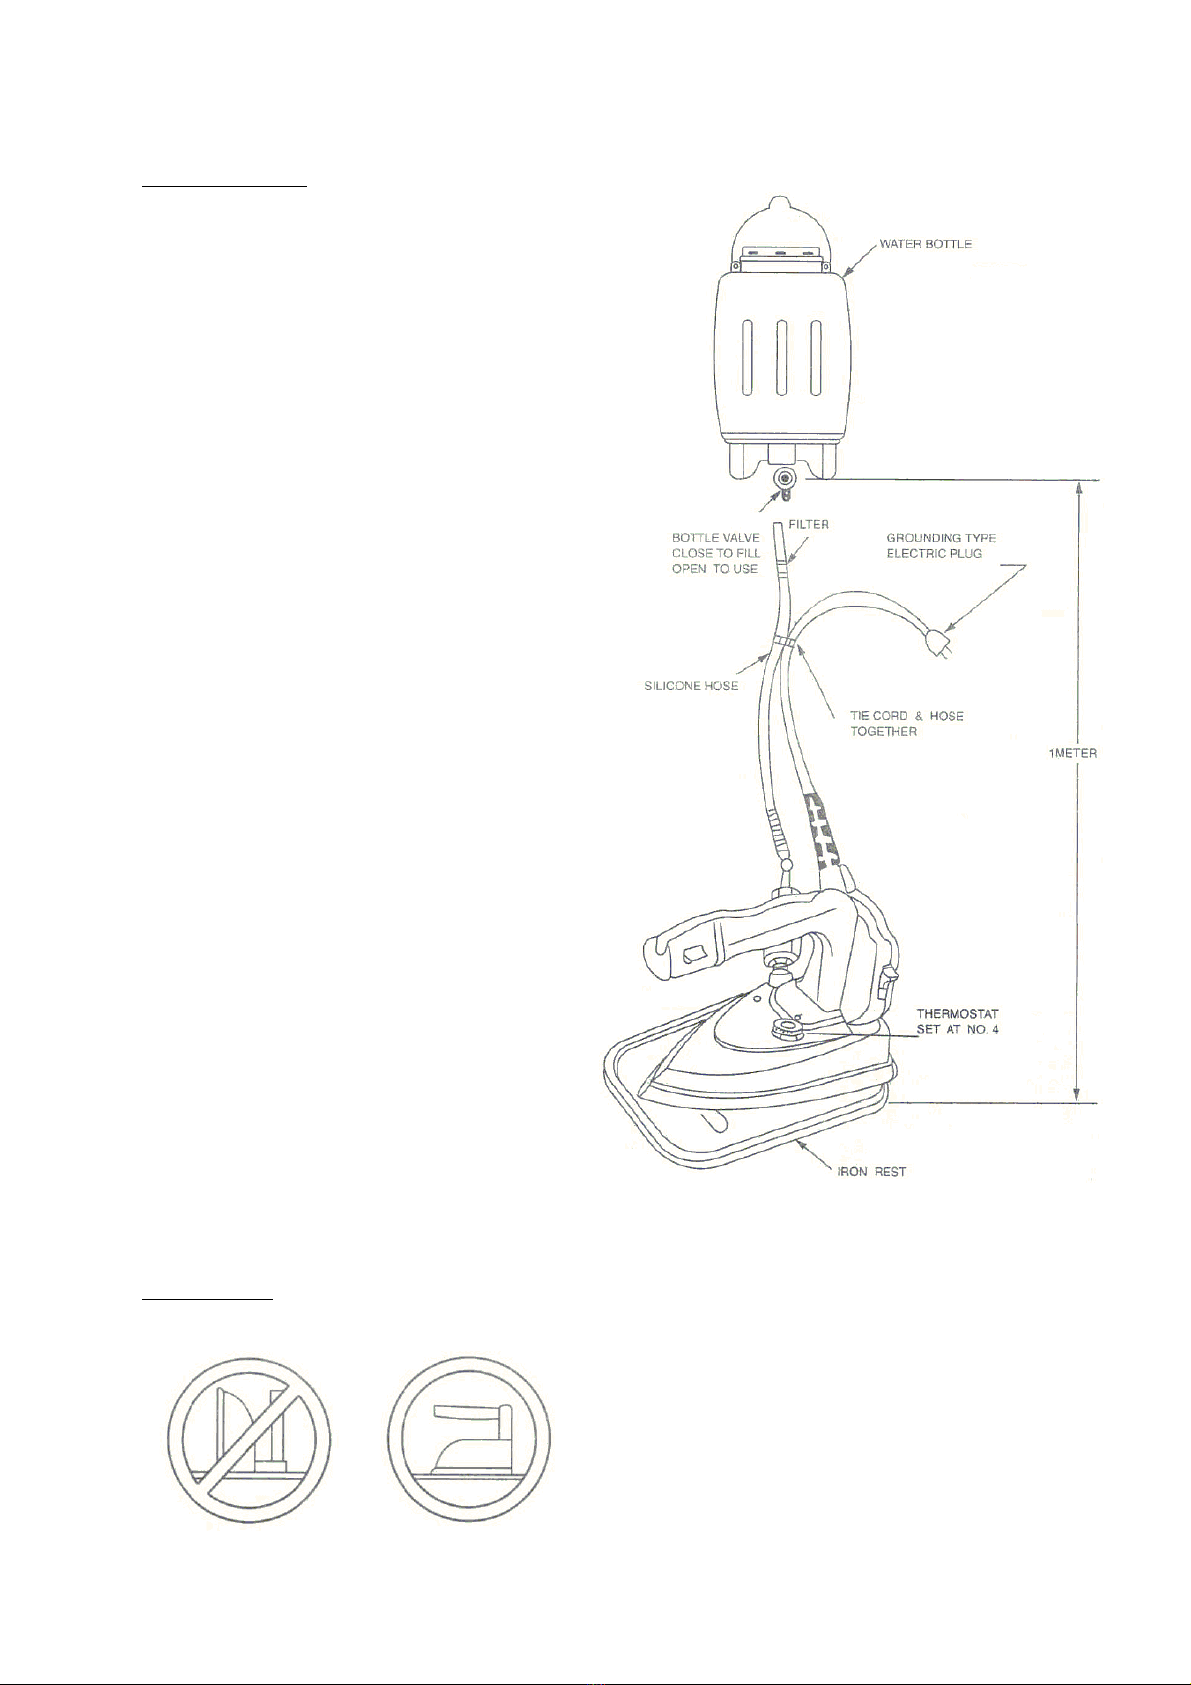
No steam or very little steam. Little or no water in the bottle. Fill water with bottle.
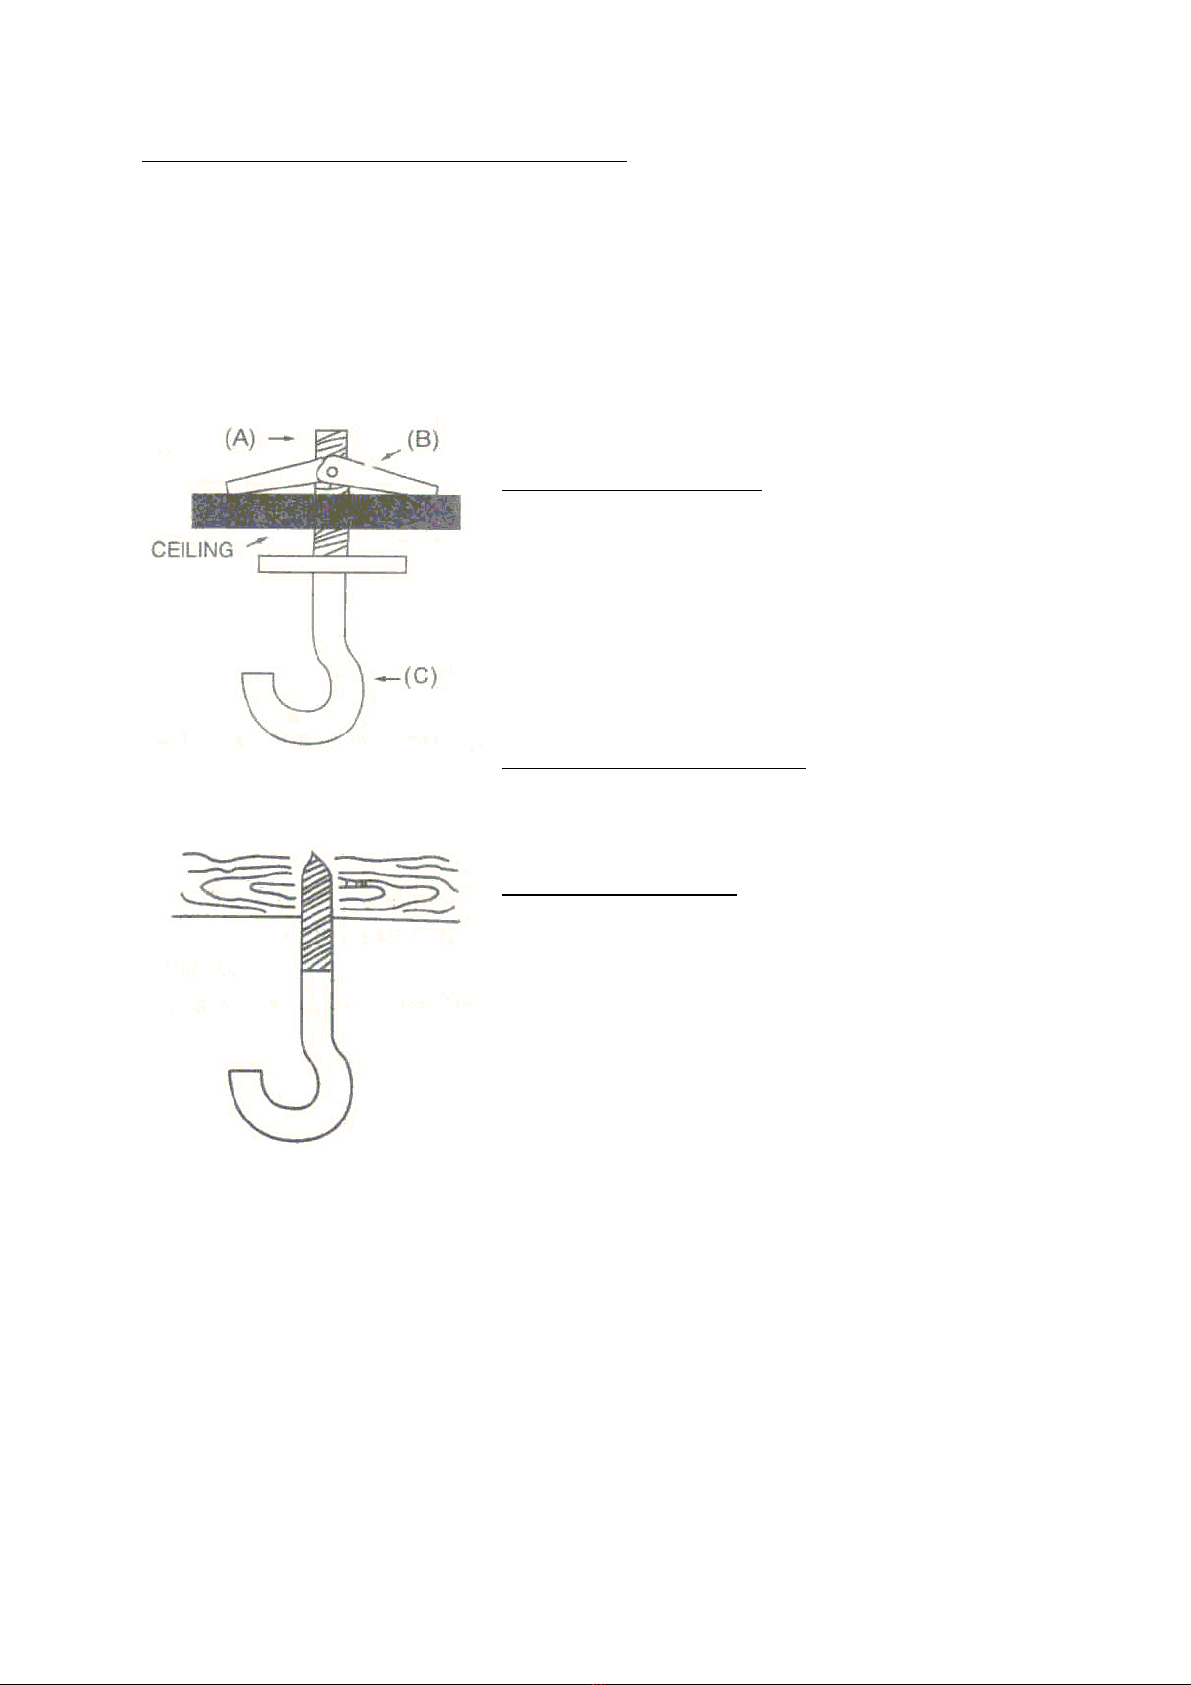
Bottle not high enough. Bottle must be 6” above the
ironing surface.
Clogged filters. Remove and rinse filter under
water faucet.
Clogged steam holes. Clear holes with straightened
paper clip.
Iron spits water. Iron is not hot enough. Turn temperature dial up
(clockwise). Let iron heat up.
Steam switch held down too
long.
Release steam switch and let
iron heat up.
Iron too hot. Temperature dial is set too
high.
Turn thermostat dial down
(counter clockwise).
Iron not enough hot. Temperature dial is set too
low.
Turn thermostat dial up
(clockwise).

CEILING HOOK INSTALLATION INSTRUCTION
IMPORTANT – DO NOT SLIDE ELECTRICAL WIRE OR WATER HOSE OVER HOOK. SLIDE
CHAIN LINK ONLY OVER HOOK.
CAUTION – Injury to persons or damage to the ceiling may result if the bottle or mounting
hardware is pulled from the ceiling. To avoid such injury, mount only to ceiling member that are
structurally sound.
FOR HOLLOW CEILINGS
Drill 5/8” diameter hole in the ceiling at desired hook location.
Assemble toggle bolt by screwing bolt (A) into toggle (B).
Insert flaps and bolt assembly (A / B) hinge up into ceiling
hole with the bolt (A) protruding through ceiling. Lock
assembly by turning hook (C) clockwise until firmly seated.
FOR WOOD BEAM CEILINGS
Screw hook clockwise into ceiling until firmly seated.
FOR EITHER METHOD
Hang the bottle assembly by a chain from the hook so that
the bottom of the bottle is 1 meter (1 yardstick) from the water
inlet on the iron.

KONWA®
KONWA INDUSTRIAL SEWING MACHINE (M) SDN BHD (124740-M)
Head Office: Lot 11 & 1 , Jalan 51/201, Off Jalan Tandang, Seksyen 51, 46050 Petaling Jaya,
Selangor Darul Ehsan, Malaysia.
Tel: +60 -7788 1111 Fax: +60 -7788 5555
E-mail: [email protected] URL: www.konwa.com.my
Table of contents