manuals.online logo
Brands
  1. Home
  2. •
  3. Brands
  4. •
  5. Koolatron
  6. •
  7. Freezer
  8. •
  9. Koolatron PB6500 User manual

Koolatron PB6500 User manual

Warranty / Garantie
This KOOLATRO product is warranted to the retail
customer for 1 year from date of retail purchase,
against defects in material and workmanship.
WHAT IS CO ERED
• Replacement parts and labour.
• Transportation charges to customer for the repaired
product.
WHAT IS NOT CO ERED
• Damage caused by abuse, accident, misuse, or
neglect.
• Transportation of the unit or component from the
customer to Koolatron.
IMPLIED WARRANTIES
Any implied warranties, including the implied
warranty of merchantability are also limited to the
duration of 1 year from the date of retail purchase.
WARRANTY REGISTRATION
Register on-line at www.koolatron.com A D keep the
original, dated, sales receipt with this manual.
WARRANTY AND SER ICE PROCEDURE
If you have a problem with your THERMOELECTRIC
COOLER, or require replacement parts, please
telephone the following number for assistance:
North America 1-800-265-8456
The Service Advisors will advise you on the best course
of action. Koolatron has Master Service Centres at
these locations:
Koolatron U.S.A.
4330 Commerce Dr.
Batavia, Y 14020-4102 U.S.A.
Koolatron Canada
27 Catharine Ave.
Brantford, O 3T 1X5 Canada
A Koolatron Master Service Centre must perform all
warranty work.
Cet appareil KOOLATRO est garanti à l’acheteur
au détail pendant 1 an à compter de sa date d’achat
contre tous défauts de pièces et de fabrication.
CE QUE COU RE LA GARANTIE
• Pièces de rechange et main d’œuvre.
• Frais d’expédition du produit réparé de Koolatron à
l’adresse du client.
CE QUE LA GARANTIE NE COU RE PAS
• Tous dégâts causés par un abus, un accident, une
mauvaise utilisation ou une négligence.
• Frais d’expédition de l’appareil ou de la pièce
du client à Koolatron.
GARANTIES IMPLICITES
Toutes garanties implicites, y compris celle de
qualité marchande, se limitent également à 1 an à
compter de la date d’achat.
ENREGISTREMENT DE LA GARANTIE
Inscrivez-vous en ligne à www.koolatron.com et
conservez le reçu de caisse daté d’origine avec ce
manuel.
PRISE EN CHARGE DE LA GARANTIE ET
PROCÉDURES DE RÉPARATION
Si vous avez un problème avec votre GLACIÈRE
THERMOÉLECTRIQUE ou si vous avez besoin de pièces
de rechange, veuillez téléphoner au numéro suivante
pour assistance :
Amérique du Nord 1-800-265-8456
Les conseillers du service après-vente vous
indiqueront la meilleure marche à suivre. Koolatron
dispose de centres principaux de réparations à ces
adresses :
Koolatron U.S.A.
4330 Commerce Dr.
Batavia, Y 14020-4102 U.S.A.
Koolatron Canada
27 Catharine Ave.
Brantford, O 3T 1X5 Canada
Les réparations sous garantie doivent être
effectuées par un centre principal de réparations
Koolatron.
www.koola ron.com
©2007 Koola ron, Inc. All righ s reserved. Tous droi s réservés.
All specification are subject to change without notice. Toutes spécificationssont sujettes à changement sans préavis.
Made in Canada / Fabriqué en Canada 09/2007-v1A55683
Please Read These Instructions Carefull Before Use!
S.V.P., lire attentivement les instructions avant l’utilisation !
PB6500
Owner’s Manual
Manuel du propriétaire
12 VOLT THERMOELECTRIC
COOLER/WARMER
12 VOLTS REFROIDISSEUR / RÉCHAUFFEUR
THERMOÉLECTRIQUE
FEATURES
• This cooler mploys thermoelectric technology using the latest Peltier devices.
• Environmentally friendly. Does not contain any CFC’s or polluting coolants.
• High performance with low power draw. Cools to approximately 40°F/22°C below outside temperature. Heats
to approximately 135°F/57°C inside.
• Reliable and virtually wear free. Apart from the fan, the thermoelectric cooling unit does not have any moving
parts.
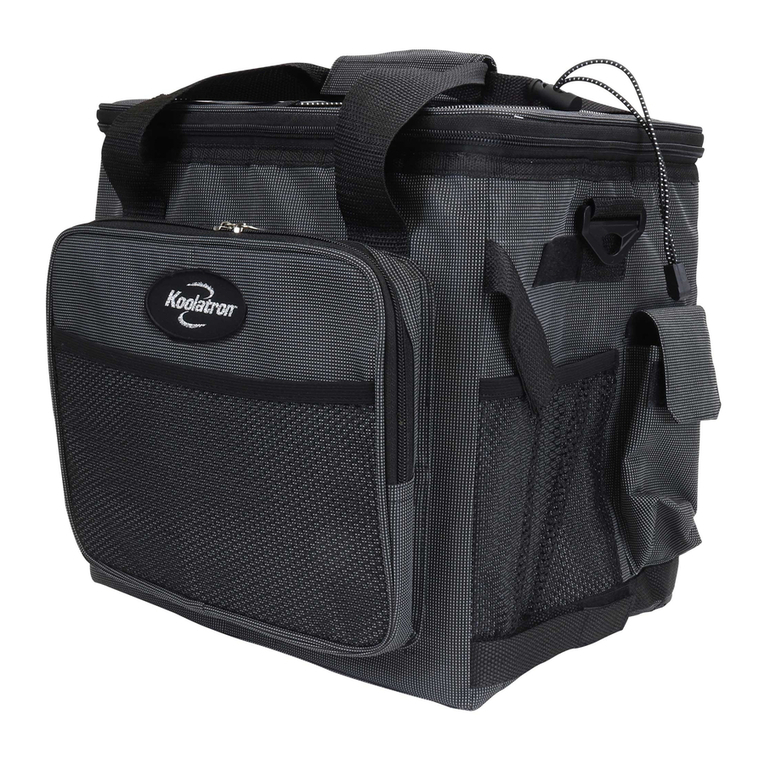
• The PB6500 cooler is designed to improve the portability of a thermoelectric cooler by providing a built-in
battery that can provide up to four hours of run time.
• Optional Koolatron PowerPack permits use of cooler in your house or hotel, from any 110/120 volt AC wall
outlet.
• A pocket is provided to store the power cord when not in use.
OPERATING INSTRUCTIONS
• There is a two-position, "O /OFF", switch located on the base. This switch is used to turn O (lighted) or turn
OFF (not lighted) the system. When you are using the cooler this switch must be in the O position to enable
running the cooler off of an external source, charging of the battery, and to enable the cooler to operate off of
the battery if no external source is present. Whenever you are not using the cooler, this switch must be in the
OFF position to ensure the battery is not discharged.
• The charging circuit acts to permit an external source to power the cooler and also charge the battery. If an
external source is not present the battery then powers the cooler.
• The battery can be recharged without operating the cooler by plugging the cord into an external source with
the switch in the OFF position.
• The short cord attached to the power lid is normally connected to the receptacle on the side of the box case.
o operation, and both heating and cooling operations can be selected by disconnecting or by selectively
choosing the orientation of the cord in the receptacle.
• Just plug your cooler into the 12 volt cigarette lighter receptacle in your vehicle. The current consumed is about
5 amps. When your vehicle is running and the electrical system is operating properly, your cooler will operate
continuously without discharging the car’s battery. When the battery is not being charged, the cooler should not
be operated for more than 4 hours.
• The cooler can be operated continuously from a 110/120 volt AC wall outlet using the optional Koolatron Power
Pack.
• For best results, precool your unit and the food and beverages before placing them in your cooler. If the cooler
is loaded with warm material, it will require at least 12 hours to cool the contents.
• The cooler can be operated in the heating mode, by reversing the polarity of the power cord attached to the lid
of the cooler. This can easily be done by gently pulling out the power cord from the cooler, reversing the bi-pin
plug and pushing it back in. ote the arrow on the side of the plug, and the red and blue dots on the side of the
receptacle.
NOTE: When the arrow is aligned with the red dot the unit is in heat mode. When the arrow is aligned with the
blue dot the unit is in cooling mode. Do not operate your cooler in the heating mode for longer than 45 minutes
continuously. Excessive temperatures in the unit may cause bulging of the liner.
CHARACTÉRISTIQUE
MODE D’EMPLOI
• Il y a un à deux positions, ""marche/arrêt"", commutateur situé sur la base. Ce commutateur est utilisé pour
allumer (allumé) ou pour arrêter (non allumé) le système. Quand vous employez le refroidisseur ce commuta-
teur doit être dans la position de fonctionnement pour permettre courir le refroidisseur au loin d'une source
extérieure, remplissage de la batterie, et pour permettre au refroidisseur de fonctionner au loin de la batterie si
aucune source extérieure n'est présente. Toutes les fois que vous n'employez pas le refroidisseur, ce commuta-
teur doit être dans la position de repos pour assurer la batterie n'est pas déchargé.
• Les actes de remplissage de circuit pour permettre à une source extérieure d'actionner le refroidisseur et de
charger également la batterie. Si une source extérieure n'est pas présent la batterie actionne alors le refroidis-
seur.
• La batterie peut être rechargée sans actionner le refroidisseur en branchant la corde à une source extérieure
avec le commutateur dans la position de repos.
• La corde courte fixée au couvercle de puissance est normalement reliée au réceptacle du côté de la caisse de
boîte. Aucune opération, et chauffage et opérations de refroidissement ne peut être choisie en débranchant ou
en choisissant sélectivement l'orientation de la corde dans le réceptacle.
• Il suffit de brancher le refroidisseur dans l’allume-cigarettes de 12 volts du véhicule. La cosommation du
courant est d’environ 5 ampères. Lorsque votre véhicule est en marche et que le circuit électrique opère nor-
malement, le refroidisseur fonctionnera continuellement sans décharger la batterie. Lorsque la voiture n’est pas
en marche, le refroidisseur ne doit pas être branchée plus de 4 heures.
• Le refroidisseur peut fonctionner continuellement en la branchant dans la prise murale d’un circuit électrique
alternatif de 110/120 volts avec uniquement l’adaptateur “Power Pack” Koolatron.
• Pour obtenir les meilleurs résultats, faites refroidir le refroidisseur, les aliments et les breuvages avant de les
placer à l’intérieur de le refroidisseur. Si celle-ci est remplie d’articles de chaleur tiède, elle nécessitera au
moins 12 heures de fonctionnement pour en refroidir le contenu.
• Le refroidisseur peut fonctionner en mode “chauffage” en inversant la polarité de l’alimentation électrique de le
refroidisseur. Cela peut être facilement effectué en débranchant le cordon d’alimentation de le refroidisseur,
inverser la prise et la rebrancher. otez la flèche du côté de la prise, et les points rouges et bleus du côté du
réceptacle.
• Le refroidisseur peut fonctionner en mode “chauffage” en inversant la polarité du cordon d’alimentation fixé au
couvercle du refroidisseur. Cela peut être facilement effectué en débranchant le cordon d’alimentation du
refroidisseur, inverser la fiche bi-goupille et la rebrancher. otez la flèche du côté de la fiche de courant et les
points rouges et bleus du côté de la prise.
OTE : Quand la flèche est alignée avec le point rouge, la refroidisseur réchauffe et quand la flèche est alignée
avec le point bleu, elle refroidit. e pas utiliser la refroidisseur Koolatron en mode “chauffage” pour une période
de plus de 45 minutes continuelles. Les températures excessives peuvent causer un gondolement de la paroi
intérieure.
• Cet appareil utilise une technologie thermoélectrique selon les plus récents dispositifs de Peltier.
• Il est sans danger pour l’environnement. Il ne contient aucun CFC (chloro-fluor-carbures) ni de liquides de
refroidissement polluants.
• Performance élevée avec une consommation de 4,5 ampères. Refroidit à une température approximative de
40°F/22°C et chauffe à une température approximative de 135°F/57°C.
• Fiable et pratiquement inusable. À part du ventilateur, l’unité de refroidissement thermoélectrique ne comporte
aucune pièce mobile.
• Le refroidisseur PB6500 est conçu pour améliorer la portabilité d'un refroidisseur thermoélectrique en fournissant
construit dans la batterie qui peut fournir jusqu'à quatre heures de temps d'exécution.
• L’adaptateur “Power Pack” Koolatron proposé en option permet l’utilisation de le refroidisseur à domicile ou à
l’hôtel en la branchant dans une prise murale d’un circuit électrique alternatif de 110/120 volts.
• Une douille accessoire est fournie pour permettre à de bas dispositifs de puissance, tels que des téléphones de
cellules, pour être reliée.
PRECAUTIONS
• The cooler is designed to operate on 12 volts direct current only. Do not attempt to connect the cooler directly
to 110/120 volt AC wall socket without using the optional Koolatron Power Pack.
• Do not use the cooler with any other AC adapter device other than the optional Koolatron Power Pack. Failure to
do so may invalidate warranty and pose a hazard.
• Do not operate the cooler in direct sunlight or in hot enclosed areas such as automobile trunks. The cooler
generates heat and must have free air circulation to perform properly.
• Do not block the ventilation area of the control panel. Free flow of air is necessary for effective heat transfer.
Regularly check the panel for dirty or clogged vents.
• The aluminum fins in the cooler will be hot when used in the heating mode. Exercise care to avoid injury. The
aluminum fins in the control panel area will be hot after extended use in the cold mode. Allow time for cooling
before removing panel.
• For safe handling of food, the cooler should not be used as a food warmer for extended periods of time.
• Ensure that the cigarette lighter socket is clean and safeguarded by a correctly fused circuit.
• Push the plug firmly into the lighter socket to ensure a good contact.
MAINTENANCE
• Keep cords and cigarette lighter sockets clean at all times. Small tobacco or dirt particles in the socket or the
plug may affect performance.
• The motor, fan and control panel vents should be cleaned periodically. While the unit is unplugged, clean the fan
blades and motor shaft using a paint brush or other soft bristled brush. Remove all hair, dirt, or dust that may
have accumulated.
• To clean, wipe the inside with a warm damp cloth or sponge. Do not use harsh or abrasive cleaners. A mild
soap should be sufficient, but if stains or odours remain, household bleach or baking soda may be added to the
washing solution. Keep the lid open for several hours after cleaning to allow the interior to thoroughly dry and
to prevent odours from forming in the cooler.
PRECAUTIONS
• La refroidisseur est conçue pour fonctionner sur courant continu de 12 volts seulement. Il ne faut pas brancher
la refroidisseur directement dans une source de courant alternatif de 110/120 volts sans utiliser uniquement
l’adaptateur “Power Pack” Koolatron proposé en option.
• e pas utiliser le refroidisseur avec un adaptateur autre que l’adaptateur “Power Pack” de Koolatron pour
obtenir une alimentation dans une source de courant alternatif. Une utilisation non-conforme aura pour effet
d’annuler la garantie en plus de créer un risque.
• e pas utiliser le refroidisseur à la lumière directe du soleil ou dans un endroit clos comme celui d’un coffre
d’automobile. Le refroidisseur génère de la chaleur et cela nécessite une ventilation d’air libre adéquate pour le
bon fonctionnement.
• e pas obstruer les fentes de ventilation du panneau de commande. Une bonne ventilation d’air est nécessaire
pour assurer un transfert de chaleur efficace. Vérifier régulièrement les devants du panneau pour enlever
saletés et obstructions.
• Lorsqu’utilisée en mode “chauffage”, les ailettes d’aluminium de le refroidisseur Koolatron seront chaudes.
Prendre des précautions afin d’éviter des blessures. Ces mêmes ailettes seront également chaudes après une
utilisation prolongée du mode “refroidissement”. Les laisser refroidir avant de manipuler le panneau.
• Pour s’assurer que la qualité des aliments demeure intacte, le refroidisseur ne doit pas être utilisée comme
réchaud pour une longue période de temps. ous conseillons moins de 2 heures.
• S’assurer que l’orifice de l’allume-cigarettes est propre et que le circuit est protégé par la fusible recommandée.
• S’assurer que la fiche soit bien enfoncée dans l’allume-cigarettes afin d’en obtenir le meilleur contact.
ENTRETIEN
• S’assurer que les fils et l’orifice de l’allume-cigarettes soient toujours propres. Des particules de tabac ou des
saletés dans l’orifice ou sur la prise peuvent affecter la performance de l’appareil.
• Le moteur, le ventilateur et les fentes du panneau de commande doivent être nettoyés périodiquement. Lorsque
l’appareil est débranché, nettoyer les pales du ventilateur et l’arbre du moteur à l’aide d’un pinceau ou toute
autre brosse à poils doux. Enlever toute accumulation de saletés, de poussière ou de cheveux.
• Pour le nettoyage, essuyer l’intérieur avec un linge humide tiède ou une éponge. e pas utiliser des nettoyants
puissants ou abrasifs. Une solution savonneuse devrait suffire mais si les odeurs persistent, ajouter un javellisant
domestique ou du bicarbonate de soude à la solution de lavage. Laisser le couvercle ouvert pendant plusieurs
heures après le nettoyage pour permettre que l’intérieur sèche bien et pour éviter des odeurs dans la refroidisseur.
BATTERY CHARGING
• Every battery recharge should be 24 hours.
• The battery is recharged whenever the power cord is connected to an external power source. Typical external
power sources would be automobiles or the optional AC power adapter. Basically, any 12-volt DC source with at
least 5 amps current output can be used.
• The charging circuit protects both the internal battery and an external battery from over-discharge by shutting
off the circuits when the voltage falls below safe limits. The charging circuit also controls the charging voltage
and current to the internal battery to ensure optimum charging conditions.
• The cord connecting the power lid to the box is used to turn off the cooling system when it is not needed, or to
select the cooling and heating options.
REMPLISSAGE DE BATTERIE
• Recharger la batterie devrait se faire à tous les 24 heures.
• La batterie est rechargée toutes les fois que le cordon de secteur est relié à une source d’énergie externe et le
commutateur 1 est dans la position de fonctionnement. Les sources d’énergie externe typiques seraient les
automobiles ou l’adapteur facultatif de courant alternatif. Fondamentalement, n’importe quelle source de C.C
12-volt avec au moins 5 ampères de rendement courant peut être employée.
• Le refroidisseur peut être employé tandis que la batterie charge, ou pour le mouvement plus rapidement
de recharge commutez 2 à la position ‘II ‘. La position ‘II ‘débranche le refroidisseur. Alternativement, la corde
du couvercle de puissance dans la boîte peut être débranchée pour arrêter l’opération et la batterie peut être
chargée en position de ‘I ‘.
• Le circuit de remplissage protège la batterie interne et une batterie externe de au-dessus-déchargent en cou-
pant les circuits quand la tension tombe au-dessous des limites sûres. Le circuit de remplissage commande
également la tension et le courant de charge à la batterie interne pour assurer des conditions de remplissage
d’optimum excepté en la position ‘II ‘.
• La corde reliant le couvercle de puissance dans la boîte est employée pour arrêter le système de refroidissement
quand elle n’est pas nécessaire, ou pour choisir les options de refroidissement et de chauffage.
STORAGE
• Clean and dry the inside of the cooler.
• For long periods of storage, a small container of baking soda or charcoal, placed inside, will eliminate
objectionable odours.
• Recharging the battery once per month during storage will prolong the life of the battery.
STOCKAGE
• Propre et séchez l’intérieur du refroidisseur.
• Pour le rangement à long terme, placer un petit contenant rempli de bicarbonate de soude ou de charbon à
l’intérieur afin d’absorber les odeurs désagréables.
• Rechargez la batterie entièrement, avec le commutateur 2 dans le ‘II ‘placent, durant la nuit. Mettez alors le
commutateur 1 dans ‘OFF ‘de la position.
• La recharge de la batterie une fois par mois pendant le stockage prolongera la vie de la batterie.

Other Koolatron Freezer manuals

Koolatron KTUF196 User manual

Koolatron

Koolatron KTUF196 User manual

Koolatron Coca-Cola CCPC-50-A User manual

Koolatron

Koolatron Coca-Cola CCPC-50-A User manual

Koolatron KTCF99 User manual

Koolatron

Koolatron KTCF99 User manual

Koolatron Corona COR-06 User manual

Koolatron

Koolatron Corona COR-06 User manual

Koolatron KTCF155 User manual

Koolatron

Koolatron KTCF155 User manual

Koolatron KTUF160 User manual

Koolatron

Koolatron KTUF160 User manual

Koolatron P-25 FUN KOOL User manual

Koolatron

Koolatron P-25 FUN KOOL User manual

Koolatron Coca-Cola CC06 User manual

Koolatron

Koolatron Coca-Cola CC06 User manual

Koolatron KTUF34 User manual

Koolatron

Koolatron KTUF34 User manual

Koolatron KDC4-LOVE User manual

Koolatron

Koolatron KDC4-LOVE User manual

Koolatron KWC-4 B User manual

Koolatron

Koolatron KWC-4 B User manual

Koolatron CERVEZA Modelo MOD04 User manual

Koolatron

Koolatron CERVEZA Modelo MOD04 User manual

Koolatron KTCF99 User manual

Koolatron

Koolatron KTCF99 User manual

Koolatron CocaCola KDC4-PEACE User manual

Koolatron

Koolatron CocaCola KDC4-PEACE User manual

Koolatron Coors Light Installation guide

Koolatron

Koolatron Coors Light Installation guide

Koolatron D25 User manual

Koolatron

Koolatron D25 User manual

Koolatron KTUF88 User manual

Koolatron

Koolatron KTUF88 User manual

Popular Freezer manuals by other brands

HELLER WFC5 user manual

HELLER

HELLER WFC5 user manual

Zanussi ZFC627WAP user manual

Zanussi

Zanussi ZFC627WAP user manual

AEG Arctis 1516 UGS operating instructions

AEG

AEG Arctis 1516 UGS operating instructions

Electrolux CI1301 user manual

Electrolux

Electrolux CI1301 user manual

Tricity Bendix BF413W OPERATING AND INSTALLATION Manual

Tricity Bendix

Tricity Bendix BF413W OPERATING AND INSTALLATION Manual

Radio Shack 64-4321 Material safety data sheet

Radio Shack

Radio Shack 64-4321 Material safety data sheet

ARCTIC WIND AUFW138 user manual

ARCTIC WIND

ARCTIC WIND AUFW138 user manual

Fisherbrand Isotemp 333773H01 Installation and operation manual

Fisherbrand

Fisherbrand Isotemp 333773H01 Installation and operation manual

True TUC-27FG Installation & operation instructions

True

True TUC-27FG Installation & operation instructions

Vestfrost MF214 Instructions for use

Vestfrost

Vestfrost MF214 Instructions for use

Frigidaire FFC09K0BW0 Factory parts catalog

Frigidaire

Frigidaire FFC09K0BW0 Factory parts catalog

LG GC-Q22FTBKL owner's manual

LG

LG GC-Q22FTBKL owner's manual

AEG Electrolux ARCT IS 82968- G A1 operating instructions

AEG Electrolux

AEG Electrolux ARCT IS 82968- G A1 operating instructions

LG GML8031ST owner's manual

LG

LG GML8031ST owner's manual

Sanyo MDF-U5486S instruction manual

Sanyo

Sanyo MDF-U5486S instruction manual

Nordfrost GF222 Instructions for installation, use, maintenance

Nordfrost

Nordfrost GF222 Instructions for installation, use, maintenance

Summit SCFM62 owner's manual

Summit

Summit SCFM62 owner's manual

LG GCB247SEDC owner's manual

LG

LG GCB247SEDC owner's manual

manuals.online logo
manuals.online logoBrands
  • About & Mission
  • Contact us
  • Privacy Policy
  • Terms and Conditions

Copyright 2025 Manuals.Online. All Rights Reserved.