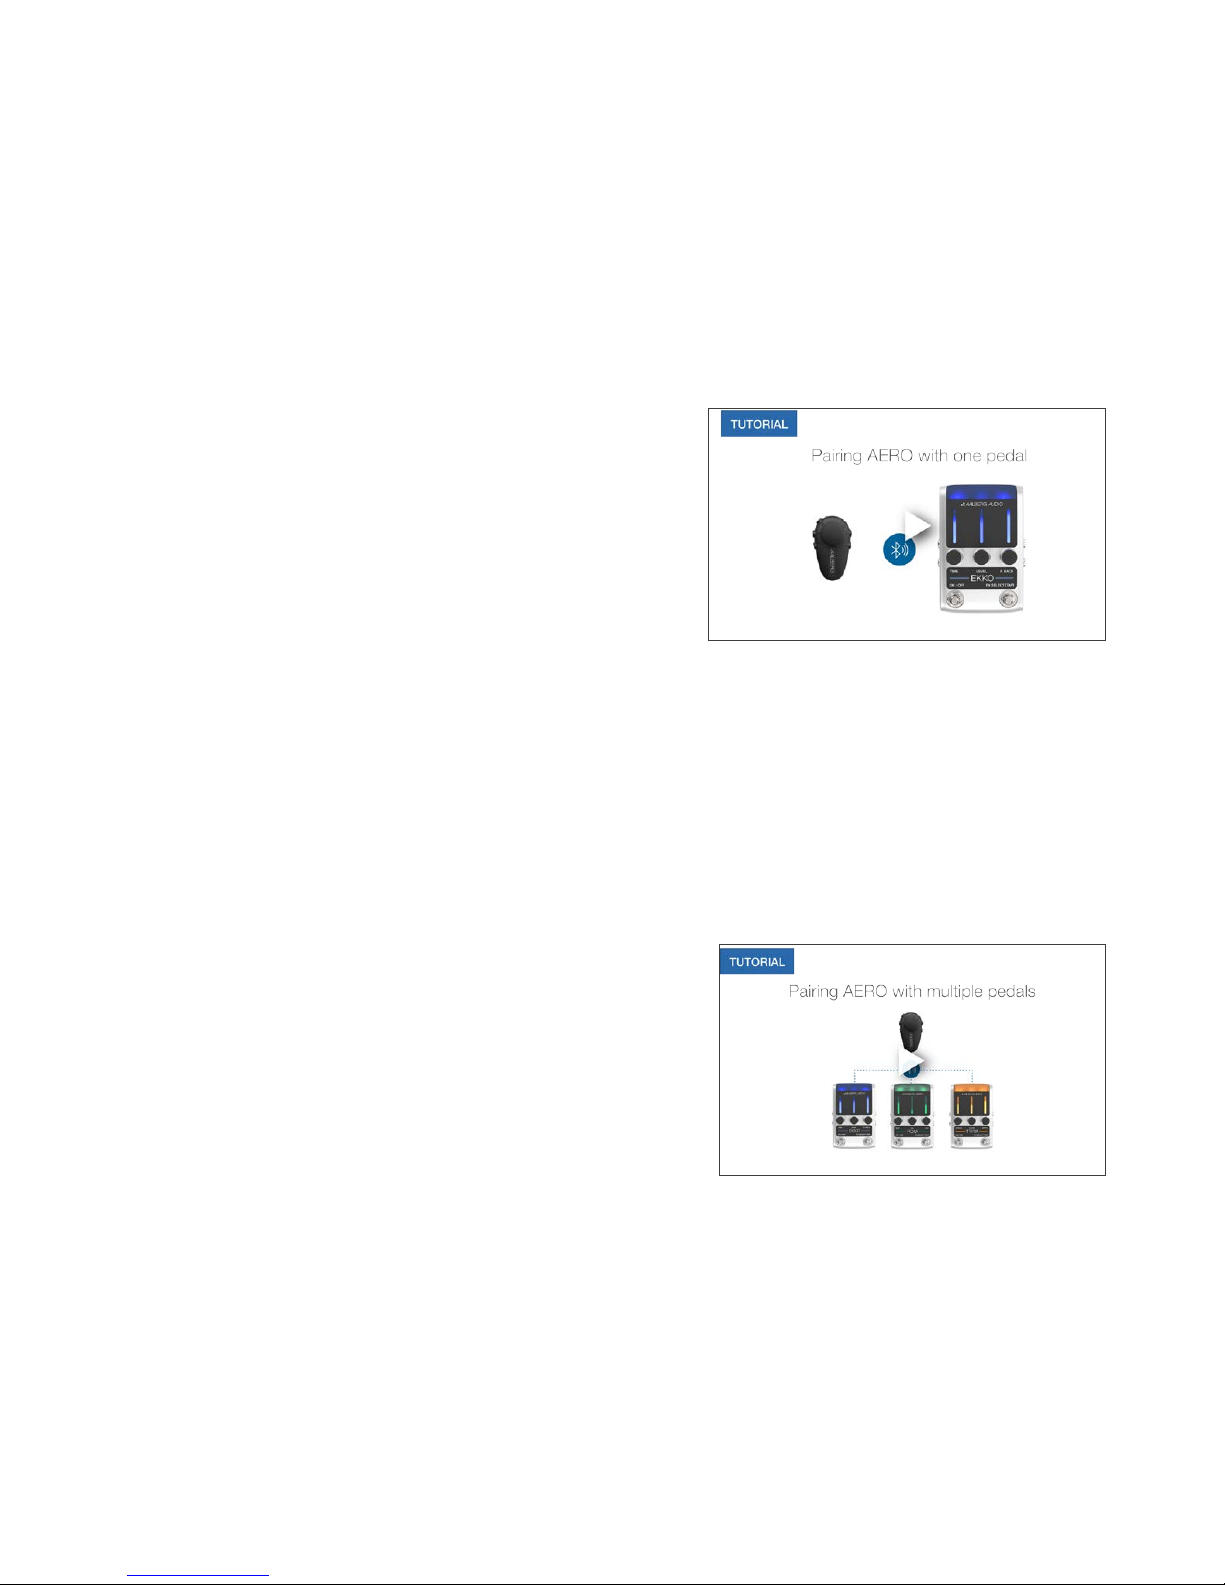
WIRELESS CONTROL - PAIRING
Before you can control your AALBERG pedal(s) with the AERO Wireless Controller,
you need to pair the devices.
NB! For availability of Option B, make sure you have the latest software update.
A) One AERO Wireless Controller to one Aalberg Effects Pedal
1. AERO: Turn off (slide switch set to ‘0’)
2. Effects pedal: Unplug power adaptor
3. Effects pedal: Press and hold FX-SELECT
footswitch while plugging in the power (LEDs
will start blinking)
4. AERO: Press and hold left button and knob
button while simultaneously turning the unit on
(slide switch set to ‘1’).
5. AERO: Press and hold the AERO knob button
for 2 seconds then release it. To confirm
syncing turn the AERO off and on. Pairing complete!
B) One AERO to several Aalberg Effects Pedals*
1. AERO: Turn off (slide switch set to ‘0’)
2. Effects pedals: Unplug power adaptor for all
pedals to be paired.
3. AERO: Press and hold left button and knob
button while simultaneously turning the unit on
(slide switch set to ‘1’)
4. Effects pedals: Leftmost pedal: Press and hold
FX-SELECT footswitch while plugging in the
power (LEDs will start blinking)
5. Effects pedals: repeat step 4) for the rest of the pedals from left to right
6. AERO: Press and hold the AERO knob button for 2 seconds then release it.To
confirm syncing turn the AERO off and on. Voilà: Pairing complete!
*Eight pedals maximum