Kowa Optics HD-01 User manual

0
HD-01 High Definition
Beauty Scope
Version 1, February of 2014
SKIN & HAIR ANALYSER
USER’S MANUAL

1
* The unique feature of HD-01 -----
UVC (USB Video Class) camera, plug & play,
no USB Driver needed.
USER’S MANUAL
Congratulations on your purchase of this High Definition UVC (USB Video
Class) Microscope with multi-applications.
We believe the versatility and ease of use of this product will lead you to
obtain more success in business deals and create more profit for you.
The High Definition UVC Microscope is guided cool light surrounding the
lens and automatically provides the best illumination to enable you to obtain
the perfect optimum viewing angle and color of the target object on the color
monitor.
HD-01 provides high resolution images for both 640x480 VGA mode or
1280x720 HD mode switchable. You can even enjoy the best high
clarity especially under 1280 x 720 HD mode.
.
We offer 2 image programs for free gifts for facilitating you to
make: 1 / 2 / 4 frames freeze function or before / after comparison
& image store.

2
ITEM DESCRIPTION
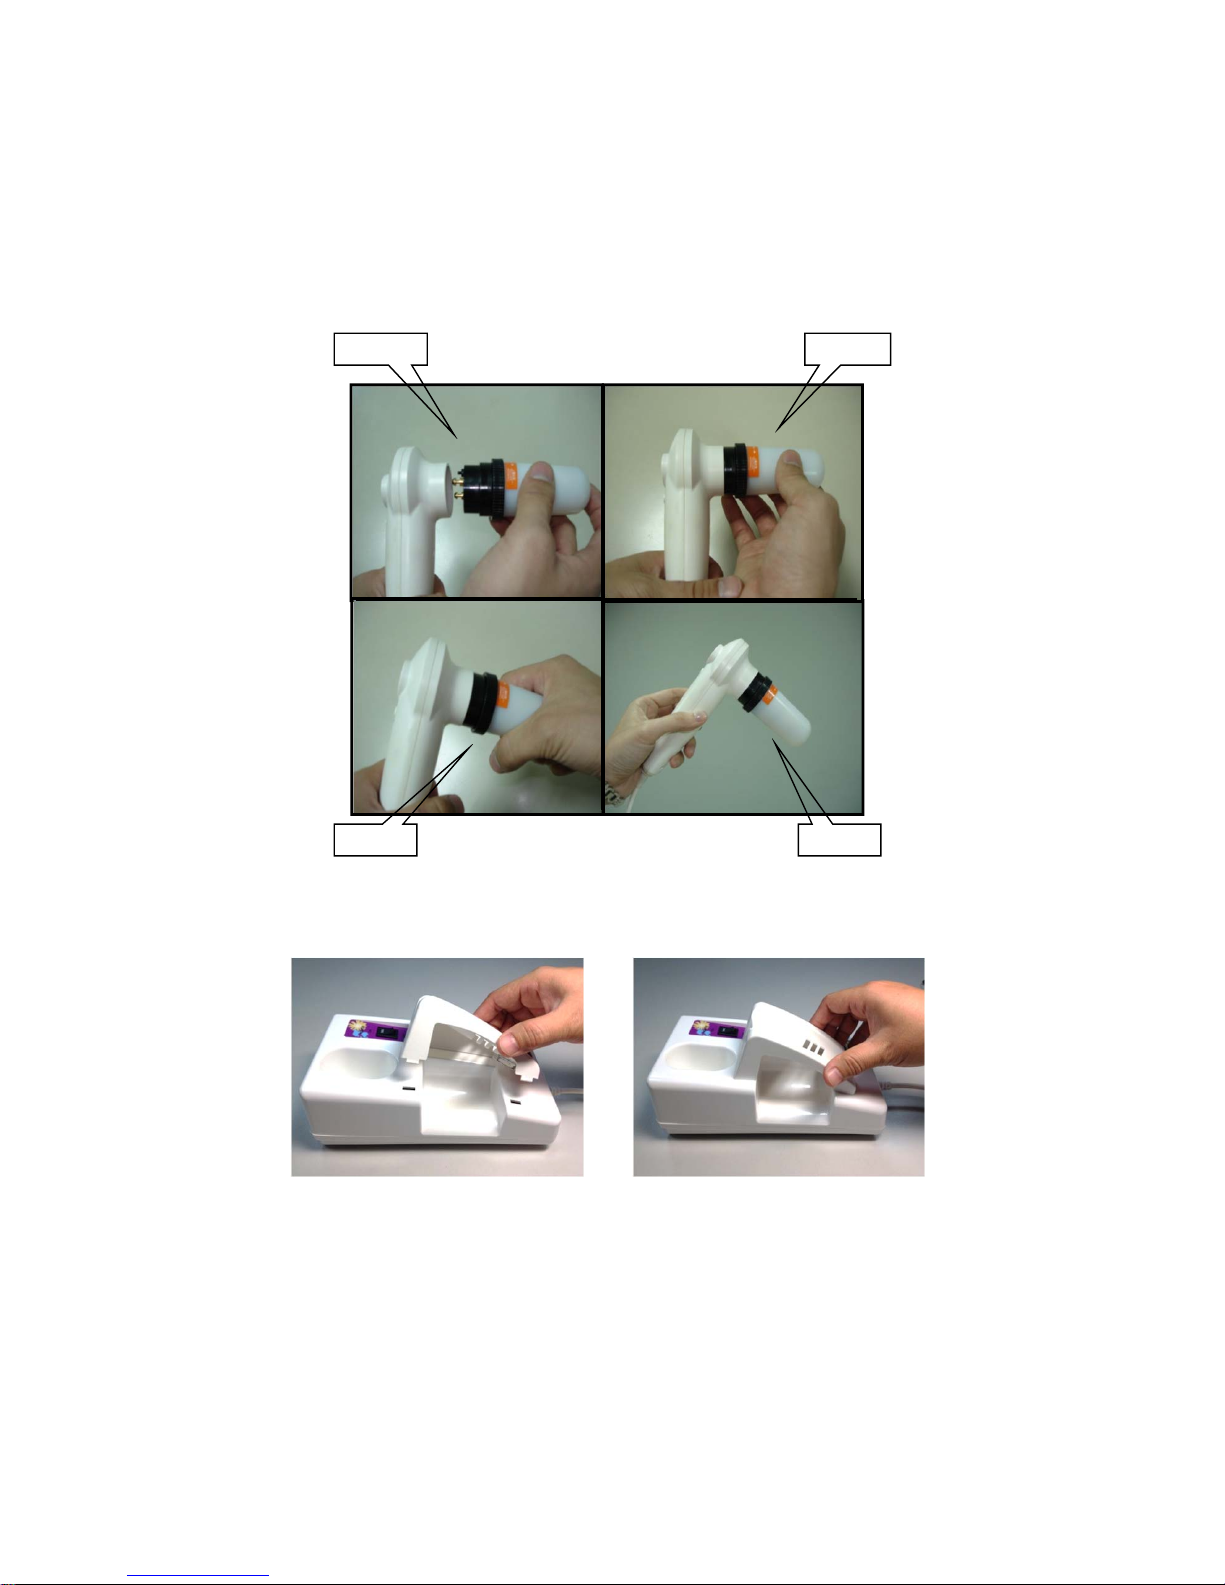
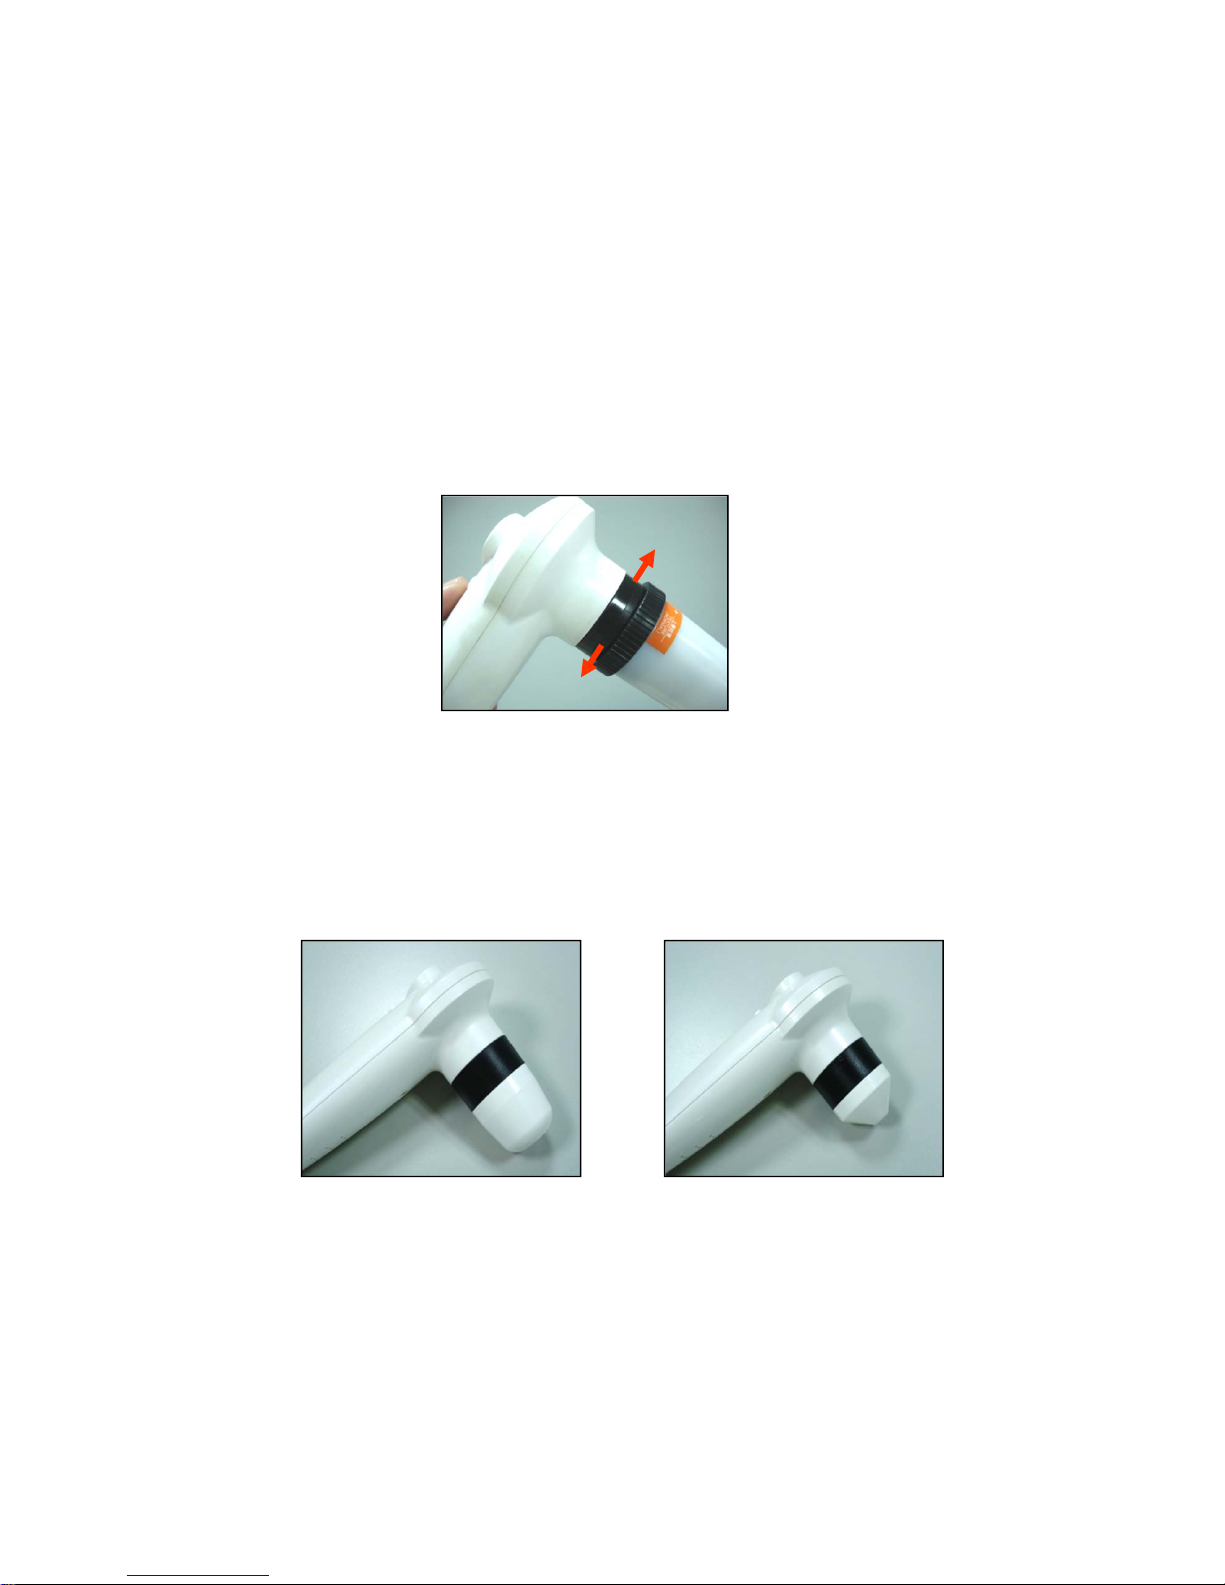
1HD-1X ADJ. :Lens 1x focus adjustable
(for full face/body, half body, partial face)
2HD-50 : Lens 50x (for skin inspection)
3HD-50RN : Lens 50x polarized (for surface/deeper layer skin check)
4HD-200 : Lens 200x (for hair, scalp inspection)
5HD-650 : Lens 650x (for hair cuticle inspection)
6HD-Iris : Iridology Lens (for iridology analysis)
7HD-320 : Microcirculation lens
8HD-50RN(UV): 50x UV lighting polarized lens (for acne inspection)
9BX003 : Carrying case
10 HD-S.M.E.P Simple software --- offers 4 in 1 (sebum / moisture /
elasticity / pigment) skin diagnosis auto analysis, test result saving only)
11 HD-S.M.E.P.+CMS (Customer Management System) software ---
offers 4 in 1 (sebum/moisture/elasticity/pigment) skin diagnosis auto
analysis, client data set-up, skin care products or treatment
recommendation, history comparison, data printing
12 HD-MA software --- for skin/ hair / iris image store (left/right 6 images
each side), before / after comparison & customer management system
13 HD-Pro Capture software --- for history / skin / hair / microcirculation /
iris database comparison & customer management system)
14 HD-Pro Video Master software --- for skin / hair / acne / microcirculation
image store (left/right 6 images each side) / video recording, comparison &
customer management system)
ITEM DESCRIPTION
1HD-01 High definition UVC (USB Video Class) Beauty Scope + Handy
probe * 640x480 VGA mode or 1280 x 720 HD mode switchable
2Probe stand
3USB cable
42 image programs for free:
a. ”HD-01 Capture” --- image capture & store, before / after comparison
b. My Capture Pro. 1/2/4 --- 1 / 2 / 4 frames freeze & store
5AC/DC Adaptor (Input: 100V ~ 240V, Output: DC5V, 2.0A)
6User’s manual
1-1 Standard accessories:
1. ACCESSORIES
1-2 Optional accessories:

3
2. SYSTEM BLOCK DIAGRAM
* Suggestion: optimum screen resolution ” 1366 x 768 (or up)
Power adaptor
for connecting
to Control box
USB cable for
connection both
control box &
computer

4
3. FRONT / REAR PANEL & PROBE
Mode push button:
640x480 VGA mode or
1280x720 HD mode switchable
Freeze button
Probe stand
Space to additional
lens keeping
Power switch
* Suggestion: optimum screen resolution” 1366 x 768 (or up)
(FRONT PANEL )
(REAR PANEL)
DC input USB output

5
4. ATTACHING LENS TO HANDY PROBE
(3) Look at the front side of handy probe, you will find there’s a “︵” shape slot.
(4) Match (plug in) the post to the “︵” shape slot to ensure they are fully
combined. Turn clockwise to screw on the lens, anti-clockwise to screw
off the lens.
(2) Find the short post on the lens.
4-1 ATTACHING LENS TO HANDY PROBE
(1) Take off the anti-dust cover of the handy probe.
Short post
“︵” slot

6
4-2 Place the probe stand on the control box.
Step 1
Step 3 Step 4
Step 2

7
5. OPERATION OF OPTIONAL LENSES
(2) Normal 50x and 200x lens
The lens has been well adjusted the focus. You can slightly contact
skin or hair for image capture.
50x 200x
(1) 50x Polarized lens
You can rotate the black rubber ring anti-clockwise to make surface skin
inspection; rotate the black ring clockwise you can make deeper layer skin
inspection.
Polarized inspection
Surface inspection

8
(3) 1x focus adjustable lens (for styling purpose)
The focus range for this lens is adjustable. You can rotate the black
ring clockwise or anti-clockwise to get the right focus of full face/body, half
body, or partial face).
*This lens does not consist any inside LED lamp, therefore getting enough
environmental outer light source is required.
(4) 650x lens (for hair cuticle inspection)
The focus for this lens is adjustable. You can rotate the black ring clockwise
or anti-clockwise to get the right focus to inspect the hair cuticle.

9
(5) 50RN(UV) lens
This lens is specially designed for ACNE inspection. It needs to be applied
under ”HD-Pro Video Master” software.
*Under the UV light of 50RN(UV) lens, the acne will appear in fluorescent
brown or red color. It is very useful in observation.
(6) Iris lens (for iridology analysis)
The focus range for this lens is adjustable. You can rotate the black ring
clockwise or anti-clockwise to get the right focus of the iris image.
Anti-infection cap, please attach
it on the top side of the lens. The operation of iris diagnosis.

10
(7) Microcirculation lens --- for observing the thickness, shape of the blood
vessels, the speed of blood flow of the nail-tip.
(a) Suggested test part: left ring finger, see the picture for available area.
(b) Operation method:
Please apply penetrating oil (vegetable oil) on the test part in order to
get clearer image.
Available test area
Method 1: Hand hold operation
You can hold the handy probe,
contact the lens to the available
area of left ring finger
(Refer to operation in next page)
Method 2: Easy stand operation
You can also fix the handy probe
on a stand, adjust the working
distance to get right focus & clear
image.

320x Microcirculation Lens Application
(1) (2) (3)
(4)
1. Standard package
2. Usage of Finger supporter
5. Put the handy probe back to probe stand
(1) Finger supporter (Probe stand) 1 pc
(2) 320x Microcirculation lens1 pc
(3) Empty bottle 1 pc
(Please add vegetable oil)
(4) Slope plate to adjust finger height 4 pcs
※Optional: “HD-Pro Video Master program”
which gives good image capture & video
recording for microcirculation condition
observation
Put the
testing finger
inside the
supporter
Please insert the slope plate in the supporter
(If the finger is thicker, the slope plate might
be unnecessary.)
You can move the testing finger backward &
forward to find the best view position.
(Ref: 3. Operation of microcirculation
inspection)
3. Operation of Microcirculation Inspection
Please apply vegetable oil on the
finger (suggested test part: left ring
finger, just near to the nailfold), oil
applied area about 1cm2.
Hold the HD-01 handy probe
with 320x lens, contact the lens
to the applied area.
You can get right focus & clear
image by adjusting the probe in
a slight slope or moving finger
backward & forward
Please hold the handy probe in a parallel direction of
the tested finger, then the microcirculation image will
be in forward direction to facilitate the microcirculation
shape and dynamic observation.
4. The operating position between the operator & the tested

12
HD-01 provides UVC (USB Video Class) camera, USB plug &
play”, no USB driver needed!
*System requirement: a. IBM compatible PC
b. CPU: P4 with 40G HDD 1.6GHz or up
c. RAM: 512M or above
*Required OS: Windows XP or Windows VISTA or WIN 7 & 8
*Remark: HD-01 is with 640x480 VGA mode or 1280x720 HD mode
switchable function, we strongly suggest your computer screen
resolution to be” 1366 x 768 (or up)
6. Connection to PC --- 2 free Capture programs
6-1 Power on your IBM compatible computer. Insert “HD-01 Beauty Scope”
CD-R into the CD-ROM drive.
6-2 The CD-R will auto-run or click “My computer” / CD-ROM / “Setup.exe to
show the page as below:
* If your OS is Windows XP, please refer to the instructions
page 33-37 to install the supplementary components firstly.

13
6-3 The CD contents include:
(3) If your OS is Windows XP, please refer to the instructions page 31-35 to
install the supplementary components.
(4) User’s Manual
(1) “HD-01 Capture” program (Refer to instructions: P.14-22):
This program assists you to get instant image freeze, store and also
assists history image comparison.
Click ”HD-01 Capture”, according to
your Windows OS, choose the correct
version to install. And “HD-01 Capture”
icon will be automatically
installed on computer desktop.
(2) “My Capture Pro. 1/2/4” ” program (Refer to instructions: P.23-31):
This program assists you to make single / 2 splits (left & right) / 4 splits
frame freeze & store function.
Click “My Capture Pro. 1/2/4” Program,
choose the language you need and “1-2-4
CAPTURE” icon will be automatically
installed on computer desktop.
(All Windows OS are available.)

14
7-1 HD-01 Capture operation
(1) Complete the installation in accordance with the system block diagram and
fix the lens. Turn on the switches of both the unit and your computer.
(2) Double click “HD-01 Capture” icon on computer desktop to enter the program.
(3) Lens with a contact type illumination head is intended to be placed on or held
just above the viewing object, Then you will get a vivid image on the screen.
* If your OS is Windows XP/Vista, the icon name will
be “XP Vista HD Capture”;
* If your OS is Windows 7, the icon name will be
“Win 7 HD Capture”;
* If your OS is Windows 8, the icon name will be
“Win 8 HD Capture”.
7. “HD-01 Capture” Program application

15
(4) Mode switch
Power on both the unit and your computer and
enter “HD-01 Capture” program, the default
window is in 640x480 VGA mode. If your computer
screen resolution is with 1366 x 768 (or up), you
can press “MODE” switch to 1280 X 720 HD mode
(16:9 Wide screen) for enjoying the image in best
high clarity.
640 X 480 VGA mode (4:3 Tranditional screen)
1280 X 720 HD mode (16:9 Wide screen)

16
(5) Color adjustment
“HD-01 Capture” can offer color adjustment. If you want to adjust the color
by yourself. click the icon from the upper left window, you can change
the brightness, contrast, hue, saturation, etc. to your desirable value.
Click “Apply” to get your desirable color image.
If you want to change back to the original color setting, you can just click
“Default” to get the original color image.
(6) FREEZE / RELEASE function
In “HD-01 Capture” the image freeze / release are all controlled by “Frame
Freeze” button on the handy probe. Its procedures are as below:
Freeze Freeze
2nd press
…………..
Live image Frozen image
Freeze
Freeze
Freeze
Frozen image to be
moved to Data window
3rd press
4th press 5th press
Mainwindow Datawindow
111
11
222
1st press the
freeze button
New frozen image to be
moved to Data window
New frozen image
New live image
Mainwindow Datawindow

17
7-2-1 Image Capture / save procedures (640 x 480 VGA mode)
7-2. “HD-01 Capture” Operation / Application
(1) Double click “HD-01 Capture” icon on computer desktop to enter the program.
Press “Frame Freeze” button to capture the image from the live window.
(2) Press again “Frame Freeze” button and the image will be moved from the
left Main window to the right side Data window. Now, you can save the
image by clicking icon on upper left Data window . Please find the
folder you want to save, input the file name and press “Save”. Then this
image will be saved in “.bmp” type.
(* HD-01 Capture” default path is: C:\ WIN 8 (or WIN 7 or WIN XP) Capture \
Pictures. You can also path & save to your desirable folder.)
(3) If you will continue capturing images, press “Frame Freeze” button to
release the frozen image (make Main window live), press again to freeze
new image and press again to move it the right Data window. Then you can
save this new frozen image.
Main window Datawindow
640 x 480 VGA (4:3) mode

18
(4) When you are operating in “1280x720 HD mode”, since the image is nearly
occupied the full screen, you can mouse the data window a little left in order to
have facilitated observation or image save.
Procedures:
Press “MODE” switch on control
box to 1280 X 720 HD mode (16:9
wide screen) and enter the live
window.
Freeze the image under the
live window.
Press again “Frame Freeze” button
the frozen image is moving to right
Data window.
Please use your mouse to move the
Data window a little left and then
click icon to save image.
1280 x 720 HD (16:9) mode

19
Image save --- please find the
folder you want to save, input the
file name and press “Save”. Then
this image will be saved as “.bmp”
type.
If you will continue capturing
images, press “Frame Freeze”
button to release the frozen
image (make Main window
live). frozen image.
Press again “Frame Freeze” button
to freeze new image and press
again to move it the right Data
window. Then you can save this
new frozen image.
Table of contents
Other Kowa Optics Microscope manuals
Popular Microscope manuals by other brands

premiere
premiere Vetlab 125 user manual

Ken A Vision
Ken A Vision TRIG X-1000-1 instruction manual

Lumenera
Lumenera INFINITYHD quick start guide

Richter Optica
Richter Optica HS-2M instructions

Bresser
Bresser Advance ICD instruction manual

OPTIKA MICROSCOPES
OPTIKA MICROSCOPES B-190 Series instruction manual