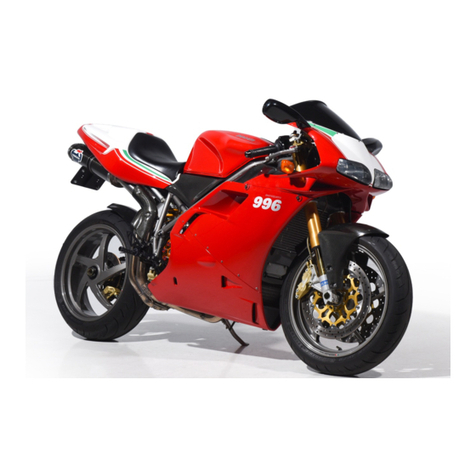
KTM 1190 RC8 EU 2008 Operating instructions

REPAIR MANUAL 2008
1190 RC8 EU
1190 RC8 AUS/UK
1190 RC8 FR
1190 RC8 JP
Article no. 3206057en


INTRODUCTION 1
INTRODUCTION
Read this repair manual carefully and thoroughly before beginning work.
Only use ORGINAL KTM SPARE PARTS.
The vehicle will only be able to meet the demands placed on it if the specified service work is performed regularly and properly.
This repair manual was written to correspond to the latest state of this series. We reserve the right to make changes in the interest of
technical advancement without at the same time updating this manual.
We shall not provide a description of general workshop methods. Likewise, safety rules that apply in a workshop will not be specified
here. It is assumed that the repair work will be performed by a fully trained mechanic.
All specifications are non-binding. KTM Sportmotorcycle AG specifically reserves the right to modify or delete technical specifica-
tions, prices, colors, forms, materials, services, designs, equipment, etc., without prior notice and without specifying reasons, to adapt
these to local conditions, as well as to stop production of a particular model without prior notice. KTM accepts no liability for delivery
options, deviations from illustrations and descriptions, as well as printing and other errors. The models portrayed partly contain special
equipment that does not belong to the regular scope of delivery.
© 2008 by KTM-Sportmotorcycle AG, Mattighofen Austria
All rights reserved
Reproduction, even in part, is permitted only with the express written permission of the copyright owner.
ISO 9001(12 100 6061)
Within the meaning of the international quality management standard ISO 9001, KTM uses quality assurance processes
that lead to the maximum possible quality of the products.
Issued by: TÜV Management Service
KTM-Sportmotorcycle AG
5230 Mattighofen, Austria

CONTENTS 2
CONTENTS
MEANS OF REPRESENTATION ............................................ 5
IMPORTANT NOTES............................................................ 6
LOCATION OF SERIAL NUMBERS ........................................ 7
Chassis number/type label................................................ 7
Key number .................................................................... 7
Engine number................................................................ 7
Fork part number............................................................. 7
Shock absorber part number............................................. 7
Steering damper part number ........................................... 8
MOTORCYCLE..................................................................... 9
Jacking up motorcycle front.............................................. 9
Taking front of motorcycle off work stand........................... 9
Jacking up motorcycle rear ............................................... 9
Taking rear of motorcycle off work stand ............................ 9
Starting ........................................................................ 10
01/FORK, TRIPLE CLAMP.................................................. 11
Adjusting compression damping of fork ........................... 11
Adjusting rebound damping of fork.................................. 11
Adjusting spring preload of fork ...................................... 12
bleeding fork legs .......................................................... 12
Vehicle level ................................................................. 13
Adjusting front vehicle level............................................ 13
02/HANDLEBAR, CONTROLS AND INSTRUMENTS.............. 15
Adjusting basic position of clutch lever............................ 15
Adjusting the steering damper ........................................ 15
Adjusting the handlebar height ....................................... 15
Adjusting gas Bowden cable ........................................... 16
03/FRAME........................................................................ 17
Footrest position............................................................ 17
Adjusting footrest position.............................................. 17
Rear frame position ....................................................... 18
Adjusting the rear frame position .................................... 18
04/SHOCK ABSORBER, SWINGARM................................... 21
Adjusting the low-speed compression damping of the
shock absorber .............................................................. 21
Adjusting high-speed compression damping of the shock
absorber ....................................................................... 21
Adjusting rebound damping of the shock absorber ............ 22
Adjusting spring preload of shock absorber ...................... 22
Adjusting the vehicle level at the rear .............................. 23
05/EXHAUST .................................................................... 24
Removing the exhaust cover completely........................... 24
Installing the exhaust cover completely............................ 24
Removing the exhaust system ......................................... 24
Installing the exhaust system.......................................... 26
06/AIR FILTER.................................................................. 28
Removing the air filter ................................................... 28
Installing the air filter .................................................... 28
Removing the filter box bottom ....................................... 28
Installing the filter box bottom........................................ 30
07/FUEL TANK, SEAT, TRIM.............................................. 32
Removing the seat......................................................... 32
Fitting the seat.............................................................. 32
Removing passenger seat ............................................... 32
Fitting the passenger seat .............................................. 32
Dismounting the fuel tank .............................................. 32
Installing the fuel tank................................................... 33
Removing the fuel tank guard ......................................... 34
Installing the fuel tank guard.......................................... 35
08/MASK, FENDER, DECAL ............................................... 36
Removing the side covers ............................................... 36
Installing the side covers................................................ 36
Removing the inside cover.............................................. 36
Installing the inside cover .............................................. 37
09/FRONT WHEEL ............................................................ 38
Removing front wheel .................................................... 38
Fitting front wheel ......................................................... 38
Tire condition checking.................................................. 39
Checking tire air pressure............................................... 39
Checking the front brake discs........................................ 40
10/REAR WHEEL .............................................................. 41
Removing rear wheel...................................................... 41
Installing the rear wheel................................................. 41
Installing the rear wheel - when installing the engine ........ 42
Tire condition checking.................................................. 44
Checking tire air pressure............................................... 44
Checking the rear brake disc........................................... 45
Checking for chain dirt................................................... 45
Cleaning the chain......................................................... 45
Checking the chain tension ............................................ 45
Adjusting the chain tension ............................................ 46
Checking rear sprocket / engine sprocket for wear ............. 47
Checking chain wear...................................................... 47
Checking chain sliding guard.......................................... 47
Checking rear hub shock absorbers ................................. 47
11/WIRING HARNESS, BATTERY ....................................... 49
Removing the battery..................................................... 49
Installing the battery...................................................... 49
Recharging the battery ................................................... 50
Changing the main fuse ................................................. 51
Changing the fuses of individual power consumers............ 52
13/BRAKE SYSTEM........................................................... 53
Brake linings................................................................. 53
Checking the front brake linings...................................... 53
Checking brake fluid level of front brake .......................... 53
Topping up brake fluid of front brake............................... 54
Adjusting the basic position of the handbrake lever........... 54
Checking the rear brake linings....................................... 54
Checking rear brake fluid level........................................ 55
Topping up rear brake fluid ............................................ 55
Adjusting the footbrake pedal stub .................................. 56
Adjusting the footbrake pedal ......................................... 56
Removing the rear brake system...................................... 57
Installing the rear brake system ...................................... 57
14/LIGHT SYSTEM, INSTRUMENTS ................................... 58
Activating/deactivating ignition key ................................. 58
Setting ROAD or RACE mode.......................................... 59
Setting the clock with SET CLOCK .................................. 60
Adjusting shift speed RPM1/2 ........................................ 60
Setting the blank time of the LAP button LAP BLANK T.... 61
Setting number of laps SET NUM LAPS........................... 61
Setting fuel reserve display TRIPF RESET........................ 62
Setting kilometers/miles SET KM/MILES.......................... 62
Setting temperature unit SET °C/°F ................................. 63
Switching external temperature display on/off................... 63
Resetting the Service display.......................................... 63
Checking headlight adjustment....................................... 64
Adjusting headlamp range .............................................. 64
Changing the parking light bulb ...................................... 65
Changing the low beam bulb........................................... 66
Change the high beam bulb............................................ 67
30/ENGINE....................................................................... 70
Removing the engine ..................................................... 70


CONTENTS 3
Preparing the engine for installation ................................ 72
Installing the engine ...................................................... 72
Setting the engine to ignition top dead center of the rear
cylinder ........................................................................ 76
Setting the engine to ignition top dead center of the front
cylinder ........................................................................ 76
30/DISASSEMBLING THE ENGINE..................................... 77
Clamping the engine into the engine work stand............... 77
Draining the engine oil................................................... 77
Removing the front valve cover ....................................... 77
Removing the rear valve cover......................................... 77
Setting the engine to ignition top dead center of the rear
cylinder ........................................................................ 78
Removing the starter motor ............................................ 78
Removing the oil filler tube ............................................ 78
Removing the heat exchanger ......................................... 79
Removing the rear timing chain tensioner ........................ 79
Removing the rear camshaft ........................................... 79
Removing the rear cylinder head ..................................... 80
Removing the rear piston................................................ 80
Setting the engine to ignition top dead center of the front
cylinder ........................................................................ 80
Removing the front timing chain tensioner....................... 80
Removing the front camshafts ........................................ 81
Removing the front cylinder head.................................... 81
Removing the front piston .............................................. 81
Removing the generator cover ......................................... 82
Removing the ignition pulse generator ............................. 82
Removing the torque limiter and idler.............................. 82
Removing the rotor ........................................................ 82
Removing the idler and timing chain on the left ............... 83
Removing the oil filter.................................................... 84
Removing the balancer shaft .......................................... 84
Removing the drive wheel of the balancer shaft ................ 84
Removing the gear position sensor .................................. 84
Removing the left suction pump ..................................... 85
Removing the water pump wheel..................................... 86
Removing the clutch cover ............................................. 86
Removing the idler and timing chain on the right.............. 86
Removing the clutch facing ............................................ 87
Removing the outer clutch hub ....................................... 87
Removing the primary gear ............................................. 88
Removing the force pump .............................................. 88
Removing the shift shaft ................................................ 89
Removing the shift drum locating.................................... 89
Removing the locking lever............................................. 89
Removing the left engine case ........................................ 90
Removing the crankshaft................................................ 90
Removing the middle suction pump ................................ 90
Removing the transmission shaft..................................... 91
Removing the oil spray tube ........................................... 92
Removing the timing chain rails of the right engine case
section ......................................................................... 92
Removing the timing chain rails of the left engine case
section ......................................................................... 92
30/ENGINE - WORK ON INDIVIDUAL PARTS....................... 93
Work on the right section of the engine case .................... 93
Removing the main bearing of the right engine case
section ......................................................................... 94
Selecting the main bearing shells.................................... 95
Installing the right main bearing ..................................... 95
Work on the left section of the engine case ...................... 96
Removing the left main bearing ...................................... 98
Installing the left main bearing ....................................... 98
Changing the conrod bearing .......................................... 99
Work on the clutch cover.............................................. 100
Changing the step bearing of the crankshaft................... 101
Checking the radial clearance of the bottom connecting
rod bearing ................................................................. 102
Checking/measuring the cylinder................................... 102
Checking/measuring the piston ..................................... 103
Checking the piston ring end gap .................................. 104
Checking the piston/cylinder mounting clearance............ 104
Work on the cylinder head ............................................ 104
Checking the cylinder head .......................................... 107
Work on the right idler ................................................. 108
Checking the timing assembly ...................................... 109
Preparing the timing chain tensioner for installation ....... 109
Checking the oil pressure regulator valve........................ 110
Checking the oil pumps................................................ 110
Checking the clutch..................................................... 111
Checking the shift mechanism...................................... 112
Preassembling the shift shaft........................................ 113
Dismantling the main shaft .......................................... 113
Dismantling the countershaft........................................ 114
Checking the transmission............................................ 115
Assembling the main shaft ........................................... 116
Assembling the countershaft......................................... 116
30/ASSEMBLING THE ENGINE ........................................ 118
Installing the timing chain rails of the left engine case
section ....................................................................... 118
Installing the timing chain rails of the right engine case
section ....................................................................... 118
Installing the oil spray tube .......................................... 119
Installing the transmission shaft ................................... 119
Installing the middle suction pump ............................... 120
Installing the crankshaft............................................... 120
Installing the left engine case....................................... 121
Installing the locking lever............................................ 122
Installing the shift drum locating .................................. 122
Installing the shift shaft ............................................... 122
Installing the force pump ............................................. 123
Installing the left suction pump .................................... 124
Setting the engine to ignition top dead center of the
rear cylinder................................................................ 124
Installing the primary gear............................................ 125
Installing the outer clutch hub...................................... 125
Installing the clutch facing........................................... 126
Installing the idler and timing chain on the right ............ 127
Installing the clutch cover ............................................ 127
Installing the water pump wheel ................................... 128
Installing the gear position sensor ................................. 128
Installing the drive wheel of the balancer shaft............... 128
Installing the balancer shaft ......................................... 129
Installing the idler and timing chain on the left .............. 129
Installing the oil filter .................................................. 130
Installing the rotor....................................................... 130
Installing the torque limiter and idler ............................ 131
Installing the ignition pulse generator............................ 131
Installing the generator cover........................................ 131
Installing the oil drain plug........................................... 131
Installing the rear piston .............................................. 132
Installing the rear cylinder head.................................... 133
Installing the rear camshaft.......................................... 134

CONTENTS 4
Installing the rear timing chain tensioner....................... 134
Setting the engine to ignition top dead center of the
front cylinder .............................................................. 135
Installing the front piston ............................................. 135
Installing the front cylinder head................................... 137
Installing the front camshafts ....................................... 137
Installing the front timing chain tensioner...................... 138
Installing the heat exchanger........................................ 138
Installing the oil filler tube ........................................... 139
Installing the starter motor ........................................... 139
Checking the rear valve clearance ................................. 139
Adjusting the rear valve clearance ................................. 140
Checking the front valve clearance ................................ 140
Adjusting the front valve clearance................................ 140
Installing the front valve cover ...................................... 141
Installing the rear valve cover ....................................... 141
32/CLUTCH .................................................................... 142
Checking fluid level of hydraulic clutch ......................... 142
Correcting fluid level of hydraulic clutch........................ 142
34/SHIFT MECHANISM ................................................... 143
Adjusting shift lever stub.............................................. 143
Adjusting shift lever..................................................... 143
35/WATER PUMP, COOLING SYSTEM .............................. 145
Checking the coolant level............................................ 145
Checking the antifreeze................................................ 145
Removing the radiator.................................................. 146
Installing the radiator................................................... 146
Adding coolant/bleeding the cooling system ................... 147
Filling the cooling system compensating tank................. 148
36/CYLINDER HEAD........................................................ 149
Checking the valve clearance........................................ 149
Adjusting the rear valve clearance ................................. 150
Adjusting the front valve clearance................................ 150
Removing the rear camshaft ......................................... 151
Installing the rear camshaft.......................................... 151
Removing the front camshafts ...................................... 152
Installing the front camshafts ....................................... 152
Removing the rear timing chain tensioner ...................... 152
Installing the rear timing chain tensioner....................... 153
Removing the front timing chain tensioner..................... 153
Installing the front timing chain tensioner...................... 153
38/LUBRICATION SYSTEM .............................................. 154
Oil circuit ................................................................... 154
Checking engine oil level.............................................. 155
Changing engine oil and filter, cleaning oil screen .......... 155
Draining engine oil, cleaning oil screens ........................ 155
Removing oil filter ....................................................... 157
Fitting oil filter............................................................ 158
Filling up with engine oil.............................................. 158
Topping up engine oil .................................................. 159
IMMOBILIZER FLASH CODE ............................................ 160
ENGINE CONTROL ERROR CODE..................................... 161
TECHNICAL DATA - ENGINE............................................ 163
Capacity- engine oil ..................................................... 163
Capacity - coolant........................................................ 163
TECHNICAL DATA - TOLERANCE, WEAR LIMITS OF
ENGINE ......................................................................... 164
TECHNICAL DATA - ENGINE TIGHTENING TORQUES........ 166
TECHNICAL DATA - CHASSIS .......................................... 168
Lighting equipment ..................................................... 169
Capacity - fuel............................................................. 169
TECHNICAL DATA - FORK................................................ 170
TECHNICAL DATA - SHOCK ABSORBER ........................... 171
TECHNICAL DATA - CHASSIS TIGHTENING TORQUES ...... 172
CLEANING/CONSERVATION............................................. 174
Cleaning motorcycle .................................................... 174
Conservation for winter operation .................................. 174
STORAGE ....................................................................... 175
Storage....................................................................... 175
Putting into operation after storage ............................... 175
GREASING AND SERVICE TABLE ..................................... 176
Important service tasks to be carried out by an
authorized KTM-RC8 workshop. .................................... 176
Important service tasks to be carried out by an
authorized KTM-RC8 workshop. (as additional job) ......... 177
WIRING DIAGRAM .......................................................... 178
1 of 3......................................................................... 178
2 of 3......................................................................... 182
3 of 3......................................................................... 188
SUBSTANCES................................................................. 192
AUXILIARY SUBSTANCES................................................ 194
SPECIAL TOOLS.............................................................. 195
STANDARDS................................................................... 203
INDEX ............................................................................ 204

MEANS OF REPRESENTATION 5
1MEANS OF REPRESENTAT ION
Symbols used
The following explains the meaning of specific symbols.
Identifies an expected reaction (e.g., of an operation or a function).
Identifies an unexpected reaction (e.g., of an operation or a function).
Identifies a page reference (more information is provided on the specified page).
Formats used
The type formats used are explained here.
Specific name Identifies a name.
Name®Identifies a protected name.
Brand™ Identifies a trademark.

IMPORTANT NOTES 6
2IMPORTANT NOTES
Warranty
The maintenance work described in the greasing and service table must be carried out exclusively in an authorized KTM-RC8 work-
shop and confirmed in the service record, since otherwise any warranty claim is meaningless. No warranty claim can be met for dam-
age resulting from manipulation and/or other changes to the vehicle.
Materials
The fuels, lubricants and other materials named in this repair manual must be used according to specifications.
Spare parts, accessories
Only use spare parts and accessories approved and/or recommended by KTM. KTM accepts no liability for other products and any
resulting damage.
You will find the current KTM PowerParts for your vehicle on the KTM website.
International KTM Website: http://www.ktm.com
Work rules
During assembly, non-reusable parts (e.g. self-locking screws and nuts, seals and seal rings, O-rings, pins, lock washers) must be
replaced by new parts.
If a thread lock (e.g. Loctite®) is used for screw connections, be sure to comply with the manufacturer's specific advice on its usage.
Parts that you want to reuse following repairs and servicing should be cleaned and checked for damage and wear. Change damaged or
worn parts.
Following servicing, the vehicle must be checked for roadworthiness.
Notes/warnings
Be sure to pay attention to the notes and warnings given here.
Info
Various notes and warning stickers are attached to the vehicle. Do not remove any notes and warning stickers. If they are miss-
ing, you or others may not recognize dangers and may therefore be injured.
Grades of risks
Danger
Danger that leads immediately and certainly to severe and permanent injury or death.
Warning
Danger that will probably lead to severe and permanent injury or death.
Note
Danger of serious damage to machine or material.
Warning
Risk of environmental damage.
Repair manual
–Read this repair manual carefully and thoroughly before beginning work. It contains useful information and tips that will help you
repair and service your motorcycle.
–This manual assumes that the necessary special KTM tools and workplace and workshop equipment are available.

LOCATION OF SERIAL NUMBERS 7
3LOCATION OF SERIAL NU MBERS
3.1Chassis number/type label
700231-01
The chassis number is stamped on the frame behind the steering head on the right.
The type label is on the frame above the chassis number.
3.2Key number
700222-01
The key number Code number can be found on the KEYCODECARD.
Info
You need the key number to order a spare key. Keep the KEYCODECARD in a safe
place.
Use the orange programming key to activate and deactivate the black ignition
key. Keep the orange programming key in a safe place: it must only be used for
learning and programming functions.
3.3Engine number
700223-01
The engine number is stamped on the right side of the engine.
3.4Fork part number
700224-01
The fork part number is stamped on the inner side of the fork stub.
3.5Shock absorber part number
700225-01
The shock absorber part number is stamped on the upper part of the shock absorber
above the adjusting ring towards the rear.

LOCATION OF SERIAL NUMBERS 8
3.6Steering damper part number
700226-01
The steering damper part number is stamped on the top of the steering damper.

MOTORCYCLE 9
4MOTORCYCLE
4.1Jacking up motorcycle front
Note
Danger of damage Danger of damage by the vehicle running away or falling over.
–Always place the vehicle on a firm and even surface.
–Jack up the motorcycle rear end. ( p. 9)
700250-01
–Move the handlebar to the straight-ahead position. Align the work stand at the front
with the adapters to the fork legs.
Work stand front (61029055300) ( p. 198)
Info
Always jack up the rear of the motorcycle first.
–Jack up the motorcycle at the front.
4.2Taking front of motorcycle off work stand
Note
Danger of damage Danger of damage by the vehicle running away or falling over.
–Always place the vehicle on a firm and even surface.
–Secure the motorcycle against falling over.
–Remove the work stand from the front.
4.3Jacking up motorcycle rear
Note
Danger of damage Danger of damage by the vehicle running away or falling over.
–Always place the vehicle on a firm and even surface.
700251-01
–Insert the work stand adapter in the rear of the work stand.
Work stand adapter (61029055120) ( p. 197)
Work stand rear (61029055100) ( p. 197)
–Stand the motorcycle upright, align the work stand to the link fork and the
adapters, and jack up the motorcycle.
4.4Taking rear of motorcycle off work stand
Note
Danger of damage Danger of damage by the vehicle running away or falling over.
–Always place the vehicle on a firm and even surface.
–Secure the motorcycle against falling over.
–Remove the work stand from the rear and lean the vehicle on the sidestand.

MOTORCYCLE 10
4.5Starting
Danger
Danger of poisoning Exhaust gases are poisonous and can result in unconsciousness and/or death.
–When running the engine, always make sure there is sufficient ventilation, and do not start or run the engine in a closed
space.
Note
Engine failure High engine speeds in cold engines have a negative effect on the service life of the engine.
–Always warm up the engine at low engine speeds.
700248-01
–Press the emergency OFF switch into the position .
–Switch on the ignition by turning the black ignition key to the position .
When you switch on the ignition, you hear the fuel pump working for about 2
seconds. At the same time, the function test of the combination instrument is
run.
–Shift into neutral.
The green idling speed indicator lamp Nlights up.
–Press the electric starter button .
Info
Do not press the electric starter button until the combination instrument
function test finishes.
Do not open the throttle to start. If you open the throttle during starting, the
engine management does not supply any fuel, so the engine cannot start.
Press the starter for a maximum of 5 seconds without a break. Wait at least
5 seconds before trying to start again.
This motorcycle is equipped with a safety start system. The engine will only
start if in neutral or, if a gear is engaged, when the clutch lever is pulled. If
the sidestand is out and the machine is in gear and you release the clutch
lever, the engine stops.
–Take the weight off the side stand and swing it upwards with your foot as far as it
will go.

01/FORK, TRIPLE CLAMP 11
501/FORK, TRIPLE CLAMP
5.1Adjusting compression damping of fork
Info
The hydraulic compression damping determines the fork suspension behavior.
An optimally adjusted compression damping ensures that the fork does not compress too far and fast when you brake hard or
when the load shifts very fast. It gives the rider good feedback about the road conditions.
700253-01
–Turn adjusting screws clockwise until they stop.
Info
The adjusting screws are located at the bottom end of the fork legs.
Make the same adjustment on both fork legs.
–Turn back counterclockwise the number of clicks corresponding to the fork type.
Guideline
Compression damping
Comfort 15 clicks
Standard 10 clicks
Sport 5 clicks
full payload 5 clicks
Info
Turn clockwise to increase damping, turn counterclockwise to reduce sus-
pension damping.
5.2Adjusting rebound damping of fork
Info
The hydraulic rebound damping determines the fork suspension behavior.
An optimally adjusted rebound damping brakes the springing energy and enables a fast, vibration-free resetting of the fork to
the zero position.
700347-01
–Turn adjusting screws clockwise until they stop.
Info
The adjusting screws are located at the top end of the fork legs.
Make the same adjustment on both fork legs.
–Turn back counterclockwise the number of clicks corresponding to the fork type.
Guideline
Rebound damping
Comfort 15 clicks
Standard 10 clicks
Sport 5 clicks
Full payload 5 clicks
Info
Turn clockwise to increase damping, turn counterclockwise to reduce sus-
pension damping.

01/FORK, TRIPLE CLAMP 12
5.3Adjusting spring preload of fork
Info
The spring preload defines the initial situation of the spring process of the fork.
An optimally adjusted spring preload is adapted to the rider's weight and ensures a compromise between easy handling and
stability.
700348-01
–Turn the adjusting spindles clockwise until they stop.
Info
The adjusting spindles are located at the top end of the fork legs.
Make the same adjustment on both fork legs.
–Turn back counterclockwise the number of turns corresponding to the fork type.
Guideline
Spring preload - Preload Adjuster
Comfort 5 turns
Standard 5 turns
Sport 3 turns
full payload 3 turns
Info
Turn clockwise to increase preload, turn counterclockwise to reduce spring
preload.
Changing the spring preload has no influence on the rebound damping
although the adjusting screws turn during the adjustment work. However,
you should also adjust the rebound damping when you alter the spring
preload.
5.4bleeding fork legs
–Lean the motorcycle on the side stand.
700259-01
–Remove bleeder screws briefly.
Any excess pressure escapes from the interior of the fork.
–Mount and tighten bleeder screws.
Info
Perform this action on both fork legs.

01/FORK, TRIPLE CLAMP 13
5.5Vehicle level
700333-01
Warning
Danger of accidents Modifications to the chassis can seriously alter the vehi-
cle's handling characteristics.
–Following modifications, ride slowly at first to get the feel of the new han-
dling characteristics.
The vehicle level can be adjusted at the front by means of the fork leg clamp and at
the rear by the eccentric shaft.
The fork legs can be clamped at three positions in the triple clamps.
Upper triple clamp flush
with upper edge of fork legs
0 mm (0 in)
Upper triple clamp flush
with 1st ring of fork legs
2.5 mm (0.098 in)
Upper triple clamp flush
with 2nd ring of fork legs
(standard)
5 mm (0.2 in)
The chassis height can be adjusted steplessly by turning the eccentric shaft.
Chassis height difference
HIGH -LOW
7 mm (0.28 in)
Maximum adjustment range
between HIGH -LOW
180°
5.6Adjusting front vehicle level
Warning
Danger of accidents Modifications to the chassis can seriously alter the vehicle's handling characteristics.
–Following modifications, ride slowly at first to get the feel of the new handling characteristics.
700352-01
–Loosen screws on the lower triple clamp.
–Loosen screw on the upper triple clamp.
–Loosen screw of the handlebar stub.
Info
Loosen the screws far enough to prevent damage to the lacquer when the
fork legs are moved.
Make the adjustments first on one fork leg and then on the other. When the
screws of both fork legs are loosened, the vehicle sags toward the front.
700353-01
–Align the fork leg in the desired position by means of the fork rings.
Guideline
Upper triple clamp flush with upper
edge of fork legs
0 mm (0 in)
Upper triple clamp flush with 1st ring
of fork legs
2.5 mm (0.098 in)
Upper triple clamp flush with 2nd ring
of fork legs (standard)
5 mm (0.2 in)
Info
The standard adjustment is the setting that provides the best vehicle han-
dling. When the fork is compressed, the chassis setting changes, causing
the vehicle to become more stable but also more difficult to handle.

01/FORK, TRIPLE CLAMP 14
700352-10
–Tighten screw .
Guideline
Screw, top triple clamp M8 17 Nm
(12.5 lbf ft)
–Tighten screws .
Guideline
Screw, bottom triple clamp M8 15 Nm
(11.1 lbf ft)
–Tighten screw .
Guideline
Screw, handlebar stub M8 20 Nm
(14.8 lbf ft)
–Repeat the adjustment on the other fork leg.
Info
The setting of the vehicle level via the fork legs must be identical on both
fork legs.

02/HANDLEBAR, CONTROLS AND INSTRUMENTS 15
602/HANDLEBAR, CONT ROLS AND INSTRUMENTS
6.1Adjusting basic position of clutch lever
700227-10
–Adjust the basic setting of the clutch lever to your hand size by turning adjusting
screw .
Info
Turn the adjusting screw clockwise to increase the distance between the
clutch lever and the handlebar.
Turn the adjusting screw counterclockwise to decrease the distance between
the clutch lever and the handlebar.
The range of adjustment is limited.
Turn the adjusting screw by hand only, and do not apply any force.
Do not make any adjustments while riding!
6.2Adjusting the steering damper
Info
The hydraulic steering damper stabilizes the steering if the front wheel is raised off the ground or carries no load.
In contrast to other damping elements, the steering damper is adjusted with the damping element open.
700339-10
–Turn the adjusting screw anticlockwise towards "–" as far as the last perceptible
click.
–Adjust the steering damper according to your riding style and the road conditions
by turning the adjust screw clockwise towards "+".
Guideline
Steering damper adjustment range 1… 32 clicks
Recommended range for use 1… 20 clicks
Standard 1 click
Info
Do not change the adjustment of the steering damper during the journey!
After adjusting the steering damper, check the steering for smooth oper-
ation, making sure that the handlebar can be moved from extreme left to
extreme right without a tendency to lock.
6.3Adjusting the handlebar height
Info
The handlebar stub position must be identical on the left and right of the vehicle.
700318-01
Adjusting the high position of the handlebar stubs:
–Loosen screw .
Info
Loosen the screw several turns to prevent damage to the fork lacquer
when moving the handlebar stub.
–Remove screw .
700319-01
–Remove distance sleeve .
–All cables routed under the upper triple clamp must now be routed under the
handlebar stub.
–Push the handlebar stub carefully up to the upper triple clamp.
–Position the distance sleeve above the triple clamp.
–Mount and tighten the screw.
Guideline
Remaining chassis screws M5 5 Nm (3.7 lbf ft)

02/HANDLEBAR, CONTROLS AND INSTRUMENTS 16
700320-01
–Tighten the screw.
Guideline
Screw, handlebar stub M8 20 Nm
(14.8 lbf ft)
–Repeat the adjustments on the other handlebar stub.
–Move the handlebar to and fro over the entire steering range.
» If the cables restrict the freedom of movement of the steering:
–Correct the cable routing.
700320-11
Adjusting the low position of the handlebar stubs:
–Loosen screw .
Info
Loosen the screw several turns to prevent damage to the fork lacquer
when moving the handlebar stub.
700319-11
–Remove screw with distance sleeve .
–Carefully shift the handlebar stub by the length of the distance sleeve.
Guideline
Long distance sleeve 15 mm (0.59 in)
–Lay all cables between the upper triple clamp and the handlebar stub.
–Position the distance sleeves.
–Mount and tighten the screw.
Guideline
Remaining chassis screws M5 5 Nm (3.7 lbf ft)
700362-01
–Tighten the screw.
Guideline
Screw, handlebar stub M8 20 Nm
(14.8 lbf ft)
–Repeat the adjustments on the other handlebar stub.
–Move the handlebar to and fro over the entire steering range.
» If the cables restrict the freedom of movement of the steering:
–Correct the cable routing.
6.4Adjusting gas Bowden cable
700317-01
–Move the handlebar to the straight-ahead position.
–With the diagnostics tool KTM DIA, place the control motor for the throttle valve
position into the neutral position.
–Loosen the counter nut .
–Adjust the gas Bowden cable with the adjusting screw .
Guideline
Play in gas Bowden cable 3… 5 mm (0.12… 0.2 in)
–Tighten the counter nut .

03/FRAME 17
703/FRAME
7.1Footrest position
700328-01
The adjustable footrest system enables an individual setting of the footrest height and
an individual adjustment of the operating elements.
The lower footrest position enables a more comfortable knee angle, the upper footrest
position a sporting sitting position and more forward-leaning freedom for use in racing.
7.2Adjusting footrest position
Info
The footrest position must be identical on the left and the right.
700307-01
–Remove screws .
700308-01
–Position the footrest bracket with spacers and screws.
Guideline
Standard Lower position
Info
The adjustable footrest bracket enables a more comfortable lower footrest
position or a sporting upper footrest position.
700306-01
–Mount and tighten screws.
Guideline
Screw, front footrest
bracket
M8 25 Nm
(18.4 lbf ft)
Loctite®243™
700309-01
–Repeat adjustment work on the footrest bracket on the other side.
–Adjust the shift lever. ( p. 143)
–Adjust the footbrake pedal. ( p. 56)

03/FRAME 18
7.3Rear frame position
400439-10
The frame rear height can be set to two different positions, enabling ergonomic adjust-
ment of the seat height.
Seat height (standard) 805 mm (31.69 in)
Seat height 825 mm (32.48 in)
7.4Adjusting the rear frame position
Warning
Danger of accidents Modifications to the chassis can seriously alter the vehicle's handling characteristics.
–Following modifications, ride slowly at first to get the feel of the new handling characteristics.
–Remove the seat. ( p. 32)
700363-01
–Remove screws with the bushings.
700327-10
Setting a higher seat position:
–Remove screw with washer on the left and right sides of the vehicle.
–Push the rear end down until the drill holes of the frame are level with the
lower front drill holes of the rear.
700329-01
–Mount the screw and washer on the left and right sides of the vehicle, but do
not tighten.
700327-11
–Remove screw with washer on the left and right sides of the vehicle.
–Push the rear end up until the drill holes of the frame are level with the lower
rear drill holes of the rear.
–Mount the screw and washer on the left and right sides of the vehicle, and
tighten.
Guideline
Screw, subframe M8 25 Nm
(18.4 lbf ft)
Loctite®243™
Other manuals for 1190 RC8 EU 2008
1
This manual suits for next models
3
Table of contents
Other KTM Motorcycle manuals

KTM
KTM 125 DUKE 2022 Manual

KTM
KTM 1290 Super Duke GT 2018 Manual

KTM
KTM 950 SUPERMOTO R User manual

KTM
KTM 125 SX 2020 User manual

KTM
KTM 690 DUKE R EU User manual

KTM
KTM 390 Adventure 2020 User manual

KTM
KTM 350 XCF-W 2022 User manual

KTM
KTM 50 SX PRO SENIOR LC User manual

KTM
KTM 450 EXC-F 2021 Manual

KTM
KTM 690 Enduro R User manual

KTM
KTM 125 Duke 2017 User manual

KTM
KTM 950 SUPERMOTO 2007 User manual

KTM
KTM 450 EXC-F 2018 Manual

KTM
KTM 125 Duke 2016 Manual

KTM
KTM 3213459en Manual

KTM
KTM 125 Duke EU MY 2014 Manual

KTM
KTM 690 DUKE R EU User manual

KTM
KTM 2010 1190 RC8 R AUS User manual

KTM
KTM 890 DUKE R User manual

KTM
KTM 250 EXC User manual