Kuassa Caliburn User manual

A M P L I F I K A T I O N

In the history of music, British made amplifiers has undeniable influence to the
evolution of rock music. The loud, chimey clean, and thick crunchy mids of those
amps were popularized by big acts such as Jimi Hendrix, Led Zeppelin, and The
Who. It is the sound of rock music that lasts through generations until today. If
there was only one name that represents the sound of rock music, it’s absolutely
this one: Marshall* Amplifiers. Founded by Jim Marshall in 1962, Marshall*
amplifiers have taken the lead to be the top choice of many guitarists, such as
Jeff Beck, Tom Morello, Andy Summers, Slash, Angus Young, Yngwie Malmsteen,
to Kerry King of Slayer.
Following our extensive experimentation and never-ending quest to be the
prominent guitar amplifier on your PC, now you can have the famous “British
crunch” right from your personal computer. Powered by the 3rd generation of
our research and development, Kuassa Amplifikation Caliburn brings the soul of
the iconic sound to your desktop.
Thank you for choosing a product from Kuassa!
We encourage you to take the time to read this User Manual thoroughly
to ensure trouble free and proper operation of the software.
*Disclaimer :
All trademarks are the property of their respective owners which are in no way associated or affiliated with Kuassa. The manufacturer names and
model designations are used solely to identify the products whose tonal and sound characteristics were studied during development.

System Requirements
Windows:
Windows XP or Later (32/64 bit)
Intel Pentium 4, or AMD Athlon XP or better (Core2 Duo, Athlon64, or
better is recommended) with 512MB minimum RAM
VST or VST3 compatible host/DAW
Pro Tools 10 or later for AAX format
Macintosh:
Mac OSX 10.6 or later (32/64 bit)
Intel Pentium 4, or AMD Athlon XP or better (Core2 Duo or Athlon64
recommended) with 512MB minimum RAM
VST, VST3, or Audio Units compatible host/DAW
Pro Tools 10 or later for AAX format
Propellerhead Reason 7.1 or later for Rack Extension format
Key Features:
• 3 amp types, inspired by Marshall* JTM45, JCM800, and JCM900 Master Volume.
• 2 channels for each amp : Clean and Lead.
• NEW! Power amp Bias and Sag feature.
• NEW! Five types of cabinets with Celestion* speakers: G12T, Vintage 30,
Greenback.
• NEW! Seven types of workhorse mics: Shure* SM57, Sennheiser* MD421,
Sennheiser* MD441, C&T* Naked Eye, Royer* 121, AKG* C414, Neumann* TLM103.
• NEW! High pass and low pass filters.
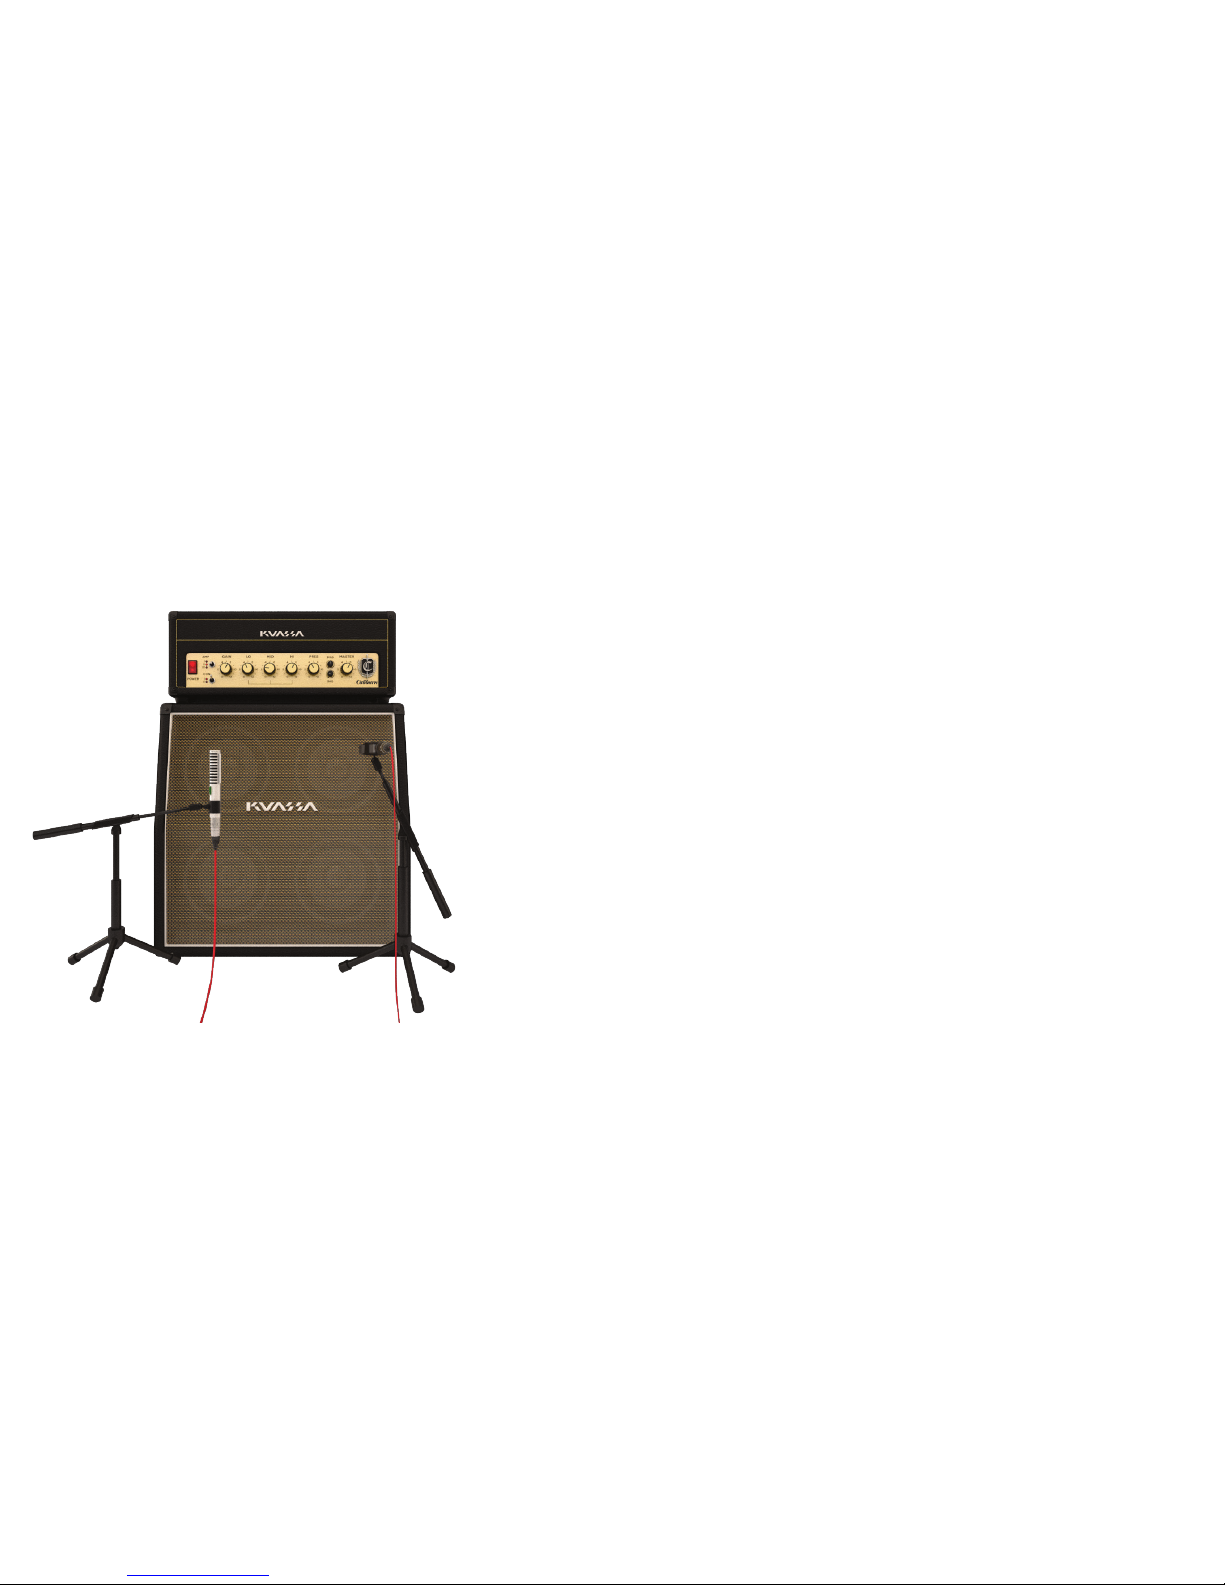
• Freely adjustable dual-miking configurations with mono/stereo configurations
just like a real-life guitar recording session with mix option.
• Built-in Noise Gate and Limiter.
• Photorealistic graphics for lifelike guitar playing experience.
• Straightforward and easy to use interface.
• Support up to 8x oversampling.

Mac OSX 10.6 or later
Note for MacOS X users: you must be logged in to a user account with administrator privileges to run the installer.
For Mac installer(.pkg) format, double-click the installer and follow the instructions. The installer automatically poin to your
Mac’s default VST/VST3/AU/AAX plug-ins path (see below). Alternatively you can customize the installation target to
specific folder.
Here is the list of default folder installation path for each of our supported platforms in Mac OSX:
• Mac Audio Unit (AmplifikationCaliburn.component) : Library/Audio/Plug-Ins/Components
• Mac VST (AmplifikationCaliburn.vst) : Library/Audio/Plug-Ins/VST/Kuassa
• Mac VST3 (AmplifikationCaliburn.vst3) : Library/Audio/Plug-Ins/VST3
• Mac AAX (AmplifikationCaliburn.aaxplugin) : Library/Application Support/Avid/Audio/Plug-Ins
Windows XP or later
Note for Windows Vista, 7, or later: We recommend installation with Administrator rights using “Run as Administrator” for
both Kuassa Installer and DAW installer.
For Windows Installer (.exe), double-click the installer and follow the instructions. The installer automatically point to your
system's default plugins path (see below). Alternatively you can point the installation target to specific folder. Most VST
host already have a “Plugins” or “VSTplugins” folder inside its installation directory, or you can point the host to read any
folder you choose.
Here is the list of default folder installation path for each of our supported platforms:
• Windows 32-bit VST (AmplifikationCaliburn.dll) : C:\Program Files(x86)\Steinberg\VstPlugins\Kuassa
• Windows 64-bit VST (AmplifikationCaliburn.dll) : C:\Program Files\Steinberg\VstPlugins\Kuassa
• Windows 32-bit VST3 (AmplifikationCaliburn.vst3) : C:\Program Files (x86)\Common Files\VST3
• Windows 64-bit VST3 (AmplifikationCaliburn.vst3) : C:\Program Files\Common Files\VST3
• Windows 32-bit AAX (AmplifikationCaliburn.aaxplugin) : C:\Program Files (x86)\Common Files\Avid\Audio\Plug-Ins
• Windows 64-bit AAX (AmplifikationCaliburn.aaxplugin) : C:\Program Files\Common Files\Avid\Audio\Plug-Ins
Installation

UNINSTALLATION
Mac OSX 10.6 or later
To uninstall from OS X, simply delete the plug-in located on the Plug-ins folder, and delete other file resources located at:
/Users/[YourName]/Music/Audio Music Apps/Kuassa/*/*
Windows XP or Later
Use “Add/Remove programs” or “Programs and Features” from the Windows Control Panel. If Kuassa Amplifikation Caliburn
were not listed, delete the .dll/.vst3/.aaxplugin file from your its installation folder (refer to previous section).
Also delete other Amplifikation Caliburn file resources at ~\Documents\Kuassa\*\*

AUThORIZATION
On evaluation mode, you will
see this pop-up window when
you first starting
Amplifikation Caliburn.
To start the authorization process,
click the [File] button on the
top-left of Amplifikation Caliburn
Interface, there, you will find a
selection box titled [Import
License].
Locate the License File
[AmplifikationCaliburn.kuassa]
obtained from the confirmation
e-mail sent to you after you
purchase Amplifikation Caliburn
from our web store.
Note that the License File
contains your personal
information used to authorize
Amplifikation Caliburn.
1 2 3

Right after you locate the License
File, a pop-up box will appear
confirming that you have
successfully authorize your copy
of Amplifikation Caliburn.
To check if you have completed
the authorization process, just
simply load the About Box by
clicking the Kuassa logo on the
bottom-left corner.
If you’re authorization is
successful, either your name or
your e-mail address will be
shown on the About Box.
You will also notice that the
generated noise on the
Evaluation Version is now gone.
AUThORIZATION (Cont’d)
4 5

Preset Management (1/3)
To save a preset, set your
plugin to the desired
parameter settings, then
select:
• “Save Preset”: Overwrites
currently active preset.
• “Save Preset As”: Saves
current settings into a new
preset file (*.kclp for Amplifikation
Caliburn).
Presets for Amplifikation Caliburn Plug-in(s) are located in the following
folders*:
• Mac: Users/[YourName]/Music/Audio MusicApps/Kuassa/Presets/
AmplifikationCaliburn
• Win: ~\Documents\Kuassa\Presets\AmplifikationCaliburn
All presets inside these folders will be recognized by the plugin as
individual presets, you can also create a folder to group the preset(s).
They will thus be shown on the Amplifikation Caliburn Plug-in’s preset
selector.
1 2

Preset Management (2/3)
When you create a new preset
using “Save Preset As...”, make
sure that you have chosen the
correct preset folder as
aforementioned on point 1
above to make sure that it will be
recognized automatically by
Amplifikation Caliburn plug-ins.
3

Preset Management (3/3)
To add new additional preset
banks, create a new folder by
clicking “New Folder” button and
rename it.
Sub-folders are also recognized to
manage presets into groups,
useful to manage additional
preset bank, or grouping presets
based by their use.
4

1. INPUT CHANNEL SWITCH : Click here to switch incoming input signal channel from your soundcard. L, R, Stereo, or Sum L+R
can be selected.
2. INPUT LEVEL : Controls the level of incoming signal. You may turn it to the maximum without worrying of overloading the
amp.
3. INPUT METER : Show the level from your incoming signal.
4. SAVE PRESETS : Press to save your settings. The name of active preset will be displayed, and (*) symbol will appear when edited.
Please refer to Preset Management section for more detailed how-to on preset.
5. PRESET SELECTOR
6. A-B COMPARE : Compare two different settings of the Amp.
7. COPY A to B : Copy settings from the “A” state to “B” state, and vice-versa.
8. NOISE GATE PARAMETERS :
• ON/OFF Switch : Enables or disables the noise gate.
• THRESHOLD : Sets the minimum level where the Noise Gate will do its job. If the input signal level is below threshold,
the noise gate will kick in by reducing the signal according to the Attack & Decay settings.
• ATTACK : Controls how quickly the gate will open when the signal is above the threshold level.
• DECAY : Determines how quick the gate closes once the signal has fallen below the threshold level.
9. CAB SETTINGS : Hide/Unhide Cabinet Section Parameters. Useful for distraction-free recording.
10. OVERSAMPLING : Increases the internal sampling frequency to reduce aliasing artefacts at the cost of higher CPU usage.
11. PLUGIN BYPASS BUTTON : Turns on or off the whole plugin.
INPUT FUNCTIONS
1 2 3 4 5 6 7 8 9 10 11

1. POWER : Turns the amp On or Off. If the amp is Off, the signal will be routed directly to the cabinets.
2. AMP TYPE A. JTM45 : Big, crunchy, and chimey.
B. JCM800 : Bold, fat, but still clear.
C. JCM900 : Heavy and dirty with long sustain.
3. CHANNEL : Select between Clean and Lead channel.
4. GAIN : Sets the input gain and the amount of distortion. Rotate clockwise for more distortion.
5. LOW : Adjusts the low frequency tone.
6. MID : Adjusts the middle frequency tone.
7. HIGH : Adjusts the high frequency tone.
8. PRESENCE : Adjusts the presence level of the amp.
9. BIAS : Sets the operating voltage of the power amplifier section.
10. SAG : Controls the amount of dropout/compression when a large signal and fast transient hits the power amp section.
11. MASTER : Adjusts the output level from the amplifier.
AMP FUNCTIONS
1
2
3
4 5 6 7 8
9
10 11

CABINET FUNCTIONS
1. CABINET ON/OFF BUTTON : Enables or disables the particular cabinet.
2. PHASE BUTTON : Inverts the waveform polarity.
3. MIC ANGLE : Switches between straight or angled miking.
4. MONO/STEREO SELECTOR : Use this to toggle between mono or stereo cabinet modes.
5. CABINET SELECTOR : Choose from 5 models of speaker cabinets.
6. MIC SELECTOR : Provides 7 types of microphone to use.
7. MIC POSITION : Indicates the position of the microphone. Move it freely with your mouse. Double-click to reset to center
position.
8. CABINET VOLUME KNOB ( Mode) : To adjust the volume of the corresponding cabinet. Parameter only shown in stereo
mode.
9. CABINET PAN ( Mode) : To adjust the panning position of the corresponding cabinet. Parameter only shown in stereo
mode.
10. CABINET MIX BALANCE ( Mode) : Adjusts mix volume balance between the left and right cabinets. Double-click on the
slider to reset to center position.
1
2
3
4
5
6
7
10
89

CABINET FUNCTIONS
1. KUASSA LOGO : Clicking on the logo will show the About box.
2. RES : Impulse Response RESAMPLE. When turned on, the loaded IRs will be matched to the host’s sample rate.
3. LOAD IR : Browse into your IR (Impulse Response) Folder.
4. REMOVE IR : Remove or unload IR.
5. IR TITLE : Click this to open a list of available IRs on the a folder.
6. IR NAVIGATION : Navigate available IRs on a same folder.
7. Filter : Turn the filters On or Off.
8. HP (One pole High Pass) : Sets the center frequency of the high pass filter.
9. LP (One pole Low Pass) : Sets the center frequency of the low pass filter.
10. OUTPUT LIMITER : Enable or Disable the output limiter function. This will compress the sound to prevent overloading.
11. OVERLOAD INDICATOR : Will light up red when the audio signal overloads. Turn the OUT volume down, or enable the Limiter.
12. GLOBAL OUTPUT VOLUME : Adjusts the overall output volume from the plugin.
12
109
8 11
5 6 74
3
21

Rack Extension
Rack Extension Renders by Mikko Niiranen

1. PLUGIN BYPASS BUTTON : Turns on, off or bypass the rack extension device.
2. INPUT LEVEL : Controls the level of incoming signal. You may turn it to the maximum without worrying of overloading the amp.
3. INPUT METER : Shows the level of incoming signal. For optimal result, make sure the level reaches about 70-80% just before red
indicator starting to light up.
4. PRESET BROWSER
5. PRESET NAME DISPLAY
6. NOISE GATE ON/OFF : Enables or disables the noise gate utility.
7. NOISE GATE PARAMETERS :
• THRESHOLD : Sets the minimum level where the Noise Gate will do its job. If the input signal level is below threshold, the
noise gate will kick in by reducing the signal according to the Attack & Decay settings.
• ATTACK : This controls the time how quickly the gate will open when the signal is above the threshold level.
• DECAY : Determines how quick the gate closes once the signal has fallen below the threshold level.
8. FILTER ON/OFF : Turn the filters On or Off.
9. FILTER KNOB PARAMETER :
• HP (One Pole High pass) : Sets the center frequency of the high pass filter.
• LP (One Pole Low pass) : Sets the center frequency of the low pass filter.
10. OUTPUT LIMITER : Enable or Disable the output limiter function. This will compress the sound to prevent overloading.
11. OVERLOAD INDICATOR : Will light up red when the audio signal overloads. Turn the output volume down, or enable the
output limiter.
12. GLOBAL OUTPUT VOLUME : Adjusts the overall master volume from the plugin.
128
3 4 5 6 7 910
11
12
TOP PANEL FUNCTIONS

1. POWER : Turns the amp On or Off. If the amp is Off, the sound will go directly to the cabinets.
2. AMP TYPE A. JTM45 : Big, crunchy, and chimey.
B. JCM800 : Bold, fat, but still clear.
C. JCM900 : Heavy and dirty with long sustain.
3. GAIN : Sets the input gain & the amount of distortion. Rotate clockwise for more distortion.
4. LOW : Adjusts the low frequency tone.
5. MID : Adjusts the middle frequency tone.
6. HIGH : Adjusts the high frequency tone.
7. PRESENCE : Adjusts the presence level of the amp.
8. CHANNEL : Select between Clean and Lead channel.
9. BIAS : Sets the operating voltage of the power amplifier section.
10. SAG : Controls the amount of dropout/compression when a large signal and fast transient hits the power amp section.
11. MASTER : Adjusts the output level from this amplifier.
128
3 4 5 6 7 910 11
AMP FUNCTIONS

1. DEVICE NAME
2. CABINET ON/OFF BUTTON : Enables or disables each particular cabinet, A and B.
3. CABINET SELECTOR : Choose from 5 models of speaker cabinets.
4. PHASE BUTTON : Inverts the waveform polarity.
5. MIC SELECTOR : Provides 7 types of microphones to use.
6. MIC ANGLE : Switches between straight or angled miking.
7. MIC AXIS : Rotate clockwise to move mic position to edge of cabinet speaker, counter-clockwise to center.
8. MIC DISTANCE : Rotate clockwise to move mic position further from cabinet speaker, counter-clockwise for closer mic
position.
9. CABINET PAN : Adjust the panning position of the corresponding cabinet.
10. CABINET VOLUME KNOB : Adjust the volume of the corresponding cabinet.
CABINET FUNCTIONS
1
2
8
3
4 5 6
7910
6
2
4
3
5

1. DEVICE NAME
2. CV INPUTS :
• CV Input Socket : Receive incoming CV message for controlling each of Amplifikation Caliburn’s CV control enabled
parameters from another device’s CV output.
• CV Input Trim : Turn counter-clockwise for each corresponding input to trim or reduce the intensity of incoming CV
message.
3. OVERSAMPLING : Increases the internal sampling frequency to reduce aliasing artefacts at the cost of higher CPU usage.
4. Audio input and output sockets. Please note that Amplifikation Caliburn Rack Extension is an “Effect” type unit, and should
always be added as an Effect device instead of instrument.
BACK PANEL FUNCTIONS
1
23
4

Input
[128] = "/custom_properties/inputVolume",
Noise Gate
[129] = "/custom_properties/gateOn",
[130] = "/custom_properties/gateThr",
[131] = "/custom_properties/gateAtt",
[132] = "/custom_properties/gateDec",
Amp
[132] = "/custom_properties/ampOn",
[133] = "/custom_properties/ampType",
[134] = "/custom_properties/ampChannel",
[135] = "/custom_properties/ampGain",
[136] = "/custom_properties/ampLow",
[137] = "/custom_properties/ampMid",
[138] = "/custom_properties/ampHigh",
[139] = "/custom_properties/ampPresence",
[140] = "/custom_properties/ampBias",
[141] = "/custom_properties/ampSag",
[142] = "/custom_properties/ampMaster",
Cab A
[143] = "/custom_properties/cabOnA",
[144] = "/custom_properties/cabTypeA",
[145] = "/custom_properties/micTypeA",
[146] = "/custom_properties/micPhaseOnA",
[147] = "/custom_properties/micAngledOnA",
[148] = "/custom_properties/micAxisA",
[149] = "/custom_properties/micDistanceA",
[150] = "/custom_properties/micPanningA",
[151] = "/custom_properties/micVolumeA",
Cab B
[152] = "/custom_properties/cabOnB",
[153] = "/custom_properties/cabTypeB",
[154] = "/custom_properties/micTypeB",
[155] = "/custom_properties/micPhaseOnB",
[156] = "/custom_properties/micAngledOnB",
[157] = "/custom_properties/micAxisB",
[158] = "/custom_properties/micDistanceB",
[159] = "/custom_properties/micPanningB",
[160] = "/custom_properties/micVolumeB",
Output
[161] = "/custom_properties/outputFilterOn",
[162] = "/custom_properties/outputHighpass",
[163] = "/custom_properties/outputLowpass",
[164] = "/custom_properties/outputVolume",
[165] = "/custom_properties/limiterOn",
MIDI CC NAMES (Rack Extension)
Table of contents
Other Kuassa Musical Instrument Amplifier manuals