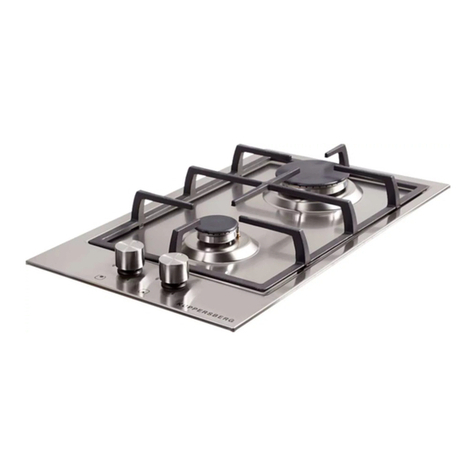
Kuppersberg SA3VT02 Installation and maintenance instructions

TECHNICAL PASSPORT
ПАСПОРТ ТЕХНИЧЕСКОГО ИЗДЕЛИЯ
ELECTRIC COOKING SURFACES
ЭЛЕКТРИЧЕСКИЕ ВАРОЧНЫЕ ПОВЕРХНОСТИ
SA3VT02

2
TECHNICAL PASSPORT ENGLISH
Electric Hob
1.APPEAL TO THE CUSTOMER.......................................................................................... 3
2. CHILDREN’S SAFETY.......................................................................................................... 3
3. IMPORTANT SAFETY INSTRUCTION......................................................................... 3
4. ENVIRONMENTAL PROTECTION................................................................................. 4
5. BEFORE USING YOUR APPLIANCE FOR THE FIRST......................................... 4
6. MAINTENANCE AND INSTALLATION MANUAL.................................................. 5
6.1. SAFETY INSTALLATION......................................................................................... 5
6.2. INSTALLING THE APPLIANCE............................................................................ 6
6.3. ELECTRICAL CONNECTION.................................................................................. 6
6.4. STARTING THE APPLIANCE ................................................................................. 8
6.5.TECHNICAL DRAWINGS.......................................................................................... 9
6.6.TECHNICAL CHARACTERISTICS........................................................................ 10
7. CONTROL TYPES AND USE ............................................................................................. 11
7.1. CONTROL PANEL........................................................................................................ 11
7.2. BASIC SETTINGS ........................................................................................................ 12
7.3. BASIC FUNCTION....................................................................................................... 13
8. MAINTENANCE AND CLEANINGS............................................................................... 14
9.TROUBLESHOOTING.......................................................................................................... 15
CONTENTS

3
ENGLISH TECHNICAL PASSPORT
Electric Hob
1.APPEAL TO THE
CUSTOMER
Dear Customer,
Thank you for having purchased one
of our products.
We are certain that this new, modern,
functional and practical appliance, built
with the very highest quality materials,
will meet your requirements in the
best possible way. This appliance is
easy to use. it is, however, important to
thoroughly read the instructions in this
handbook in order to obtain the best
results.
The manufacturer shall not be
held responsible for any damages to
persons or property caused by incorrect
installation or use of the appliance .
The manufacturer is not responsible
for any transcription errors or misprints
contained in this handbook and,
furthermore, reserves the right to make
any modifi cation on the products, which
might be deemed necessary or usefull,
this being in the user’s interest, without
altering their basic operating or safety
features.
2. CHILDREN’S SAFETY
ÂDo not allow children to
approach the oven while it is in use, as
high temperatures can be reached.
ÂDuring the catalytic self-cleaning
process, which is carried out at a high
temperature, the outer surfaces may
become hotter than normal and children
should be kept away from the oven.
ÂMost models have a door
temperature of below 60 K. lf your
oven has a higher temperature, you can
obtain a special door from the Technical
Service Department that will stabilise
the door temperature. Refer to the
features list.
3. IMPORTANT SAFETY
INSTRUCTION
WARNINGS:
BSwitch on the electricity
only after having placed the pot on the
cooking zone.
BUse pots and pans with at
solid bottoms.
BUse pots with the same
diameter of the cooking zones.
BDry the bottom of the pot
before put in on the cooking zones.
BDo not scrape the pot against
the glass so to not damage it
BDuring the use of the cooking
zones, please, keep the ehi/dren away
from the hot plates. Make sure that
the handles of the pots are placed in
the right way towards the interior. Be
aware that overheated fats and oils may
become in amed.
BCooking zones after using
remain warm; don’t leave objects, don’t
lean your hands so to avoid bums, till
the indicator light is off.
Blf the glass cracks, please,
disconnect the appliance.

4
TECHNICAL PASSPORT ENGLISH
Electric Hob
BDon’t use plastic pots or
alluminium sheets.
BDon’t use hob as a
supplementary surface.
lf one or several cooking zones
shall not be swithched of by mistake,
the control is automabcly set out of
operation after a certain time.(see table)
Power setting
Limitation
operation timein
min.
1-2 6
3-4 5
5 4
6-9 1.5
When the safety switch off has
responded, it appears «H» on the
display.ln order to resel the limitation
of the operation time of the indivudual
cooking zones,either the select key or
+/- key of the coressponding cooking
zone has to be actuated.
4. ENVIRONMENTAL
PROTECTION
The symbol on the product
or its packaging means that this
product cannot be treated like ordinary
household waste. This product must be
taken to a recycling collec-tion point for
electrical and electronic appliances. By
ensuring that this product is disposed
of correctly, you will avoid harming
the environment and public health,
which could happen if this product
is not handled properly. For more
detailed information about recycling
this product, please contact your local
authority, household waste service or
the store where you pur-chased the
product.
This symbol indicates that the unit
should not be disposed as domestic
waste rather it should be returned
to some electronic wastes collection
center. The disposal of the product
should be conducted as per the local
environmental legislation. You may
obtain detail information on disposal,
reuse and recycling of the product.
5. BEFORE USING YOUR
APPLIANCE FOR
THE FIRST TIME
ÂCarefully read this lnstruction
Manual to achieve the best results from
your cooktop.
ÂDue to the manufacturing
process there may be residues of grease
and other substances. To eliminate
these, proceed as follows:
ÂRemove all the packaging
material, including the protective
plastic, if included.To cool the oven
open the door to allow ventilation and
odours to escape from inside.
ÂAfter cooling, clean the oven and
the accessories.

5
ENGLISH TECHNICAL PASSPORT
Electric Hob
ÂDuring the fi rst use, fumes and
odours may occur and the kitchen
should therefore be well ventilated.
ÂThe equipment and its accessible
parts are hot during use.
ÂCooktop with vegetable oil or fat
without required care may be dangerous
and may cause fi re.
6. MAINTENANCE AND
INSTALLATION MANUAL
Technical insstruction
for the installer
Installation, transformations and
maintenances below listed, may only be
carried out by a competent technician.
A wrong installation may provoke
damages to persons, animals or things,
for which the builder can not be
responsible.
During the life of the unit, the
automatic safety or regulating devices
on the appliance may only be modifi ed
by the manufacturer or by his duly
authorized dealer.
INSERTING
After having cleared out all the
packing components, make sure of the
integrity of the appliance. In case of
doubt, do not use the appliance and
contact qualifi ed personnel.
Please keep children away from all
packing elements ( carton, polystyrene,
nails,..).
Make a cutout in the worktop,
according to the dimensions indicated
in Fig.6.
COMPLY WITH THE
DIMENSIONS (in mm)
6.1. SAFETY INSTALLATION
COMPLY WITH THE DIMENSIONS (in
mm)
MODEL Overal
dimensions of
hob
Gut out
dimensions of
kitchen unit
A in
mm
B in
mm
Cin
mm
(+0
-0,5)
D in
mm
(+0
-0,5)
FQ3VT 300 500 285 490

6
TECHNICAL PASSPORT ENGLISH
Electric Hob
6.2. INSTALLING THE
APPLIANCE
Technical insstruction
for the installer
lnstallation, transformations and
maintenances below listed, may only be
c a rried out by a competent technician.
A wrong installation may provoke
damages to persons, animals or things,
tor which the builder can not be
responsible.
During the life of the unit, the
automatic safety or regulating devices
on the appliance may only be modifi ed
by the manufacturer or by his duly
authorized dealer.
INSERTING
After having clearedoutall the
packing components, make sure of the
integrity of the appliance. In case of
doubt, do not use the appliance and
contact qualifi ed personnel.
Please keep children away from all
packing elements (carton, polystyrene,
nails, .. ).
Make a cutout in the worktop,
according to the dimensions indicated
in fi g. 6; make sure that will be re specte
d the critical dimensions between the
hob, the lateral walls, the back and the
superior walls (see fi g. 6 and 7).
6.3. ELECTRICAL CONNECTION
The electrical connection has to be
done in acordance with all electrical
and installation requirement:s of the
Regulation.
Before proceding with the
connection, please, verify that:
BThe power of the electrical
system and the power of the outlets is
adequate to the maximum pover of the
appliance (see the identifıcation label
in the lower part of the body).
BThe outelets and all the
electrical system has an effi cient
connection to the «earth» acording
with the Regulation. We disclaim all
responsabilities for not observing such
points.
BIf the appliance is not
equipped with an input cable, connect
to the dump with an adequate section
cable (see table paragraph 5) keeping
the «earth» conductor longer than
«live» ones, following the scheme of
Fig.13 and 14.
When the connection to the input
system has ben done through a outJet:
BApply to the input cable,
if unprovided, a normalized plug,
adequate to the load indicated in

7
ENGLISH TECHNICAL PASSPORT
Electric Hob
the identifi cation label. Connect the
cables according to the scheme of
Fig.13, making sure to respect the
undermentioned respondences:
Letter L (live) = cable brown colour;
Letter N (Neutral) = cable blue
colour;
Symbol (Earth) = cable gren-
yellow colour.
Our hobs can also operate with
three phase power carry out the relative
respondences. Connect the cables
acording to the scheme of Fig.14,making
sure to respect the undermentioned
respondences:
Leter L1 (live) = cable brown colour;
Leter L2 (live) = cable black colour;
Leter L3 (live) = cable black colour;
Leter N (Neutral) = cable blue colour;
Symbol (Earth) = cable green-
yellow colour.
BThe input cable has to be
located so that never reach the over
temperature of 100 C.
BPlease do not use in the
connection any reduction, adaptation
that may provoke a false contact with
following dangerous overheatings.
BThe outlet must be acresible
after the built-in.

8
TECHNICAL PASSPORT ENGLISH
Electric Hob
When the connection has been done directly to the input system:
BInterpose between the appliance and the system an onnipolar switch,adequate
to the load of the appliance, with a minimum nose betwen the contacts of 3 mm.
BKeep in mind that the «earth» cable does not have to be interrupted by the switch.
BIn an alternative solution the electrical connection can also be protected by
a diferential switch with high sensitivity.
We recommend to fi x the earth coloured cable to an appropriate earth installation.
WARNINGS:
All our products are projected and built according with the European Norms EN
60 335-1 and EN 60 335-2-6 and relative amendments.
The appliance has been produced according with the European Directives:
– 2004 / 108 / EC concerning the compatibility electromagnetic.
– 2006 / 95 / EC concerning the electrical security.
6.4 STARTING TO APPLIANCE
Switching the system off
ÂPress «0/1» button and keep pressed for 2 seconds, a signal will sound and
the display disappears or shows a constant “H”.
ÂSwitching off is always possible, regardless of the pre-selected setting.
Special points
ÂThe functioning of the «0/1» button is always guaranteed if two buttons are
pressed.
ÂIf all cooking levels are in position“0”,the controls will switch off automatically
after 5 seconds.
ÂIf a button is pressed for more than 30 seconds, the controls will switch off
automatically and an alarm sounds every 30 seconds, for as long as a button is
pressed. The interlocking remains in force.

9
ENGLISH TECHNICAL PASSPORT
Electric Hob
6.5. TECHNICAL DRAWINGS

10
TECHNICAL PASSPORT ENGLISH
Electric Hob
FQ3VT01 (2 «Hi-light» heating elements)
Voltage 220 - 240 V~
Frequency 50/60 Hz
Tot. Rating 2400 W
FQ3VT02 2 «Hi-light» heating elements
Voltage 220 - 240 V~
Frequency 50/60 Hz
Tot. Rating 3000 W
FQ3VT03 (1 «Hi-light» heating el. + 1 circ. conc. 180/120 )
Voltage 220 - 240 V~
Frequency 50/60 Hz
Tot. Rating 2900W
FQ3VT04 (1 «Hi-light» oval heating el.,)
Voltage 220 - 240 V~
Frequency 50/60 Hz
Tot. Rating 1700W
FQ3VT05 (1 «Hi-light» heating el.,)
Voltage 220 - 240 V~
Frequency 50/60 Hz
Tot. Rating 1800 W
FQ3VT06 (1 dual «Hi-light» heating el.,)
Voltage 220 - 240 V~
Frequency 50/60 Hz
Tot. Rating 1700W
6.6. TECHNICAL CHARACTERISTICS

11
ENGLISH TECHNICAL PASSPORT
Electric Hob
7. CONTROL TYPES AND USES
TABLE 1
Power and dimensions of the cooking zones
Position for
regulation
Touch control
Possible cookings
Zone
no
Diameter
en mm.
Heating
elements
Power W
1 140 Radiant
«Hi-light»
1200 1 To melt butter, chocolate and else.
2 180 Radiant
«Hi-light»
1800 1 - 3 To heat small quantities of liquid and
to keep dishes warm.
3 180/120
or
210/120
Halogen
Conc.
«Hi-light»
1200
(2200 if
210/120)
3-4 To heat foods, thaw deep-frozen
foods, to cook fruits and pulses.
4 -5 To heat foods, thaw deep-frozen
foods, to cook fruits and pulses.
5 140/250 Radiant
Oval «Hi-
light»
1800 5 - 6 To cook meat, fi sh, pulses with sauce.
6 -7 To cook roast of meat, fi sh; to cook
steaks and eggs.
7 - 9 To fry with oil and to heat big
quantities of water.
7. 1. CONTROL PANELS

12
TECHNICAL PASSPORT ENGLISH
Electric Hob
7.2. BASIC SETTINGS
1 Switching on
ÂPress «0/1» button and keep
pressed for 2 seconds, and a signal will
sound. All digits will show «0».
2 Raising / lowering / resetting
cooking level
ÂPress «+» button to raise the
cooking level to maximum level 9.
ÂPress and «+» button
simultaneously to reset to level «0».
ÂWhen the appropriate button is
kept held down, the cooking level will
be raised/lowered automatically after
0,5 sec.
ÂA short signal noise will sound
for each change of the cooking level.
3 Select / cancel double zone
function
ÂPress double zone button, double
zone LED at the top of the Touch Control
radiant heater symbol will appear.
ÂPress double zone button again
double zone LED at the top of the Touch
Control will switch off.
4 Set power boost function
ÂPress «+» key in cooking level
«9» position, the decimal point of the
appropriate radiant heater digit will
light up.
ÂPower boost cannot be set in the
«0» position.
ÂIf the cooking level is changed
during power boost function, the power
boost time is actuated for the new
cooking level.
ÂAfter the power boost time has
elapsed, the control switches over to
continuous cooking, a short signal
sounds and the decimal point of the
appropriate radiant heater digit will
disappear.
5 Cancelling boiling
(prematurely)
ÂPress key, the decimal point
of the corresponding radiant heater
disappears and the cooking level is
lowered.
6 Switching interlocking on
(blocking keyboard)
ÂPress the «interlocking» key for
2 seconds, the «interlocking» LED will
light up.
ÂThe «interlocking» key can be
actuated in the switched on state with
the radiant heater activated or when
switched off.
ÂWarning: the stove cannot be
switched on in the interlocked state.
7 Switching interlocking off
(releasing keyboard)
ÂPress the «interlocking» key for
2 seconds, the «interlocking» LED will
disappear.
ÂThe general OFF button is always
working. it is overwriting the interlock
state.
8 Residual heat indication
ÂIn the switched off state, the
residual heat is shown by a static «H» in
the appropriate digit.

13
ENGLISH TECHNICAL PASSPORT
Electric Hob
ÂIn the activated state, if cooking
level «O» is pre-selected, there is a
changeover between «O» and «H» in
the appropriate digit.
ÂThe duration of the»H» in the
display depends on the cooking level
and the duration of cooking.
9 Switch-off safety feature |
ÂIf a radiant heater is on and the
energy level is not changed for a certain
time, the concerned radiant heater will
be switched off. The switch-off time
depends on the cooking level.
10 Switching the system off
ÂPress «0/1» button and keep
pressed for 2 seconds, a signal will
sound and the display disappears or
shows a constant «H».
ÂSwitching off is always possible,
regardless of the pre-selected setting.
11 Special points
ÂIf more than one IR button is
pressed simultaneously, the keyboard is
locked.
ÂThe functioning of the «0/1»
button is always guaranteed if two
buttons are pressed.
ÂIf all cooking levels are in
position «O», the controls will switch off
automatically after 5 seconds.
ÂIf a button is pressed for more
than 30 seconds, the controls will
switch off automatically and an alarm
sounds every 30 seconds, for as long
as a button is pressed. The interlocking
remains in force.
7.3. BASIC FUNCTION
Actuating timer
BPress time key ‘+’ -> a signal
noise will sound,‘00’ will appear on the
timer display, or
BPress timer key ‘-’-> a signal
noise will sound,‘99’ will appear on the
timer display.
Cancelling timer
Press timer keys ‘+’ and ‘-’
simultaneously -> a signal noise will
sound,the timer display will go out.
Setting timer time
BPress timer key ‘+’ -> timer
time is raised Press timer key -> timer
time is lowered
BIf a key remains pressed for
more than 2 seconds, there will be
quick setting
Timer alarm function with load
shedding
BSelect cooking stage of the
timer cooking position, then actuate
timer and set timer time-> ‘00’ appears
on timer display
BAfter the set time has elapsed,
an alarm sounds for 60 seconds, the
display will ash and the timer cooking
position is switched off.
Timer alarm function without
load shedding
Actuate timer and set timer time,
then select timer cooking position ->
‘00’ appears on timer display.
BAfter the set time has elapsed,
an alarm sounds for 60 seconds, the

14
TECHNICAL PASSPORT ENGLISH
Electric Hob
display will wink, the setting of the
timer cooking positi on will remain.
Cancelling timer alarm
BPress any key and the alarm
and timer display go out.
Changing allocation timer
cooking position
The cooking position allocated to
the timer can be selected by Diehl.
8. MAINTENANCE AND
CLEANINGS
Before doing any action, disconnect
the appliance from the input power.
COMPONENTS SUBSTITUTION
To replace the components lodged in
the internal part, is necessary to lake the
appliance up from the furniture, overturn
it, loosen the screws and lake away the
bottom.
After these actions is possible to work
on the plates, commutators and clamps.
For the maintenance of the cable it’s
necessary overturn the hob.
Denominations W
Radiant electric heating element «Hi-
light»
Ø 145 mm
1200
Radiant electric heating element «Hi-
light»
Ø 180 mm
1800
Radiant electric heating element «Hi-
light» double cooktop zone (conc.)
Ø 180/120 mm
1700
Radiant electric heating element «Hi-
light» double cooktop zone (conc.)
Ø 210/120 mm
2200
Radiant electric heating element «Hi-
light»
Ø 21O mm
2300
Radiant electric heating element «Hi-
light» double cooktop zone (oval)
Ø 145/250 mm
1800
TYPE AND SECTION OF THE
POWER CABLES
Cable
type
Single
phase
power 228
- 240 V~
Three
phase
power
220 - 415
V 3N ~
Three
phase
power 220-
415 V 2N~
Rubber
H05
RR-F
3 X 1 .5
mm2(*)
(*) keeping in mind the contemporaneousness factor
Before any cleaning operation,
disconnect the appliance from
the electric circuit.
If you want to preserve the surface
clean and bright, we recommend you
to use a silicone conditioner. The use of
this conditioners, prior to jam-making,
helps to protect the surface of the hob.
It is very important to clean the
surface soon after every use, when the
glass is stili tepici.
Do not use metallic sponges,powder
abrasives or corrosive sprays.
Depending on the dirty level we
recommend:
BSlights stains: it is enought
the use of a moist clean rag.
BBurnt or soiling may be
removed with a special razor scraper
(fi g. 4); be aware that the razor can
cause wounds.
BMarks of liquid, over owed
from the pot, can be removed using
vinegar or lemon.
BPay attention to not Jet fail
sugar or element with sugar. in this
case turn the switch off and clean the
surface with hot water and the razor
blade scraper.

15
ENGLISH TECHNICAL PASSPORT
Electric Hob
BAfter a period of time may
appear metal re ex and scratches (fi g.
5) due to the wrong cleaning and the
wrong use of the pots.The scratches are
diffi cultly removable, but they do not
compromise the good working of the
hob. Steam cleaner is not to be used.
The heating Indicator light does
not work
Select a temperature.
Select a setting.
It should only light up while the
oven is heating up to its set working
temperature.
Smoke is given off while the
oven is working
This is normal during its fi rst use.
Periodically clean the oven.
Reduce the amount of grease or oil
added to the tray.
Do not use higher temperature
settings than those in the cooking
tables.
Expected cooktop results are
not achieved
Review the cooking tables to obtain
guidance on the working of your oven.
If, despite these
recommendations, the problem
continues, contact our Technical
Assistance Service.
9. TROUBLE SHOOTING
The cooktop does not work
Check the connection to the
electrical circuit. Check the fuses and
current limiter of your installation.
Ensure the clock is in the manual or
programmed mode. Check the position
of the function and temperature
selectors.
The inside light of the oven
does not work
Change the bulb.
Check its assembly in accordance
with the instruction manual.

16
ПАСПОРТ ТЕХНИЧЕСКОГО ИЗДЕЛИЯ РУССКИЙ
Электрическая варочная панель
1. ОБРАЩЕНИЕ К ПОКУПАТЕЛЯМ................................................................................. 17
2. ОБЕСПЕЧЕНИЕ БЕЗОПАСНОСТИ ДЕТЕЙ............................................................. 17
3. ОСНОВНЫЕ ТРЕБОВАНИЯ БЕЗОПАСНОСТИ..................................................... 17
4. ЗАЩИТА ОКРУЖАЮЩЕЙ СРЕДЫ............................................................................. 18
5. ПЕРЕД ПЕРВЫМ ИСПОЛЬЗОВАНИЕМ ПРИБОРА............................................ 19
6. ИНСТРУКЦИЯ ПО УСТАНОВКЕ
И ТЕХНИЧЕСКОМУ ОБСЛУЖИВАНИЮ ...................................................................... 19
6.1. БЕЗОПАСНОСТЬ УСТАНОВКИ........................................................................... 20
6.2. УСТАНОВКА ПРИБОРА........................................................................................... 20
6.3. ПОДКЛЮЧЕНИЕ К СЕТИ ЭЛЕКТРОПИТАНИЯ........................................ 21
6.4. НАЧАЛО РАБОТЫ С ПРИБОРОМ...................................................................... 23
6.5. ТЕХНИЧЕСКИЕ ЧЕРТЕЖИ ................................................................................... 24
6.6. ТЕХНИЧЕСКИЕ ХАРАКТЕРИСТИКИ.............................................................. 25
7. ЭЛЕМЕНТЫ ИНДИКАЦИИ И УПРАВЛЕНИЯ........................................................ 26
7.1. ПАНЕЛЬ УПРАВЛЕНИЯ........................................................................................... 26
7.2. ОСНОВНЫЕ НАСТРОЙКИ..................................................................................... 27
7.3. ОСНОВНЫЕ ФУНКЦИИ.......................................................................................... 28
8. ОБСЛУЖИВАНИЕ И ЧИСТКА........................................................................................ 29
9. ПОИСК И УСТРАНЕНИЕ НЕИСПРАВНОСТЕЙ................................................... 31

17
РУССКИЙ ПАСПОРТ ТЕХНИЧЕСКОГО ИЗДЕЛИЯ
Электрическая варочная панель
Благодарим вас за приобретение
нашей продукции.
Мы уверены, что этот новый, со-
временный, функциональный и прак-
тичный прибор, изготовленный из
высококачественных материалов, в
максимальной мере будет отвечать
всем вашим требованиям. Данный
прибор очень прост в использовании,
тем не менее, вам необходимо внима-
тельно изучить содержание настоящей
инструкции, что позволит вам обеспе-
чить максимальную эффективность
работы с ним.
Компания-изготовитель не несет
никакой ответственность за любой
ущерб людям, животным или иму-
ществу, который может быть нанесен
вследствие неправильной установки
или эксплуатации прибора.
Компания-изготовитель не несет
никакой ответственности за любые
неточности, которые могут содер-
жаться в данной инструкции в связи
с возможными ошибками в процессе
печати или набора текста. Кроме того,
компания-изготовитель оставляет за
собой право вносить любые измене-
ния в конструкцию или технические
характеристики изделия, которые она
посчитает необходимыми или полез-
ными, в том числе в интересах поль-
зователей, без ущерба для основной
функциональности и безопасности са-
мого изделия.
B Не разрешайте детям под-
ходить к работающему духовому шка-
фу, так как его части могут нагреваться
до высокой температуры.
B Во время процесса ката-
литической самоочистки, который
осуществляется при высокой темпе-
ратуре, наружные поверхности могут
становиться горячее, чем при нор-
мальном режиме работы, поэтому в
таких случаях также не следует подпу-
скать детей близко к духовому шкафу.
B У большинства моделей
температура дверцы не нагревается
выше 600С. Если духовой шкаф имеет
более высокую температуру, вы може-
те приобрести в отделе технического
обслуживания специальную дверцу,
которая обеспечит стабилизацию тем-
пературы. См. перечень дополнитель-
ных компонентов.
B Включайте конфорку только
после того, как нее помещена кастрю-
ля.
B Используйте кастрюли и
сковороды с плоским толстым дном.
B Используйте кастрюли, раз-
мер которых соответствует диаметру
конфорки.

18
ПАСПОРТ ТЕХНИЧЕСКОГО ИЗДЕЛИЯ РУССКИЙ
Электрическая варочная панель
Настройка мощности Предельное время
работы, мин.
1-2 6
3-4 5
5 4
6-9 1,5
B Перед помещением на кон-
форку насухо вытирайте дно кастрю-
ли.
B Не двигайте кастрюлю по
стеклу — это может его повредить.
B Не позволяйте детям под-
ходить к варочной панели во время
использования конфорок. Следите за
тем, чтобы ручки посуды были направ-
лены внутрь варочной панели. Не за-
бывайте о том, что перегретые масло
и жиры могут воспламениться.
B После использования кон-
форки остаются некоторое время го-
рячими; поэтому до тех пор пока не
погаснет световой индикатор, не по-
мещайте на них посторонние пред-
меты и не опирайтесь на них руками,
чтобы не обжечься.
B При обнаружении трещин в
стеклянном покрытии необходимо от-
ключить прибор от сети.
B Не используйте пластико-
вую посуду и посуду из алюминиевой
фольги.
B Не используйте варочную
панель в качестве рабочего стола.
Если по какой-либо причине одна
или несколько конфорок длительное
время работают непрерывно, то по
прошествии некоторого заданного на
заводе времени происходит автомати-
ческое отключение (см. таблицу ниже).
После срабатывания функции за-
щитного отключения на индикато-
ре высвечивается H. Чтобы сбросить
таймер ограничения времени работы
, нажмите кнопку выбора или +/- соот-
ветствующей конфорки.
Наличие на изделии или его
упаковке этого символа означает, что
данное изделие не может быть утили-
зировано вместе с бытовыми отходами.
По окончании срока службы такое из-
делие следует передать в специальный
пункт приема, занимающийся сбором
и переработкой электрических и элек-
тронных приборов.
Обеспечивая правильную утилиза-
цию данного изделия, вы предотвра-
щаете нанесения вреда окружающей
среде и здоровью людей, что могло бы
случиться при несоблюдении правил
обращения с отходами. Для получения
дополнительной подробной информа-
ции по утилизации данного изделия вы
можете обратиться в местные органы
власти, службу утилизации отходов или
магазин, в котором оно было приобре-
тено.
Этот символ обозначает, что при-
бор не следует выбрасывать вме-
сте с бытовыми отходами, и его
необходимо сдать в специализирован-

19
РУССКИЙ ПАСПОРТ ТЕХНИЧЕСКОГО ИЗДЕЛИЯ
Электрическая варочная панель
ный пункт приема электронных отхо-
дов. Утилизация прибора должна быть
проведена в соответствии с требова-
ниями местного природоохранного
законодательства. Более подробную
информацию об утилизации, повтор-
ном использовании и переработке
отходов вы можете получить, обратив-
шись в соответствующие организации.
 Внимательно изучите данную
инструкцию — это позволит Вам обе-
спечить максимальную эффективность
при использовании варочной панели.
 После изготовления и сбор-
ки прибора на его деталях могут со-
храняться остатки смазки и других
веществ. Чтобы удалить посторонние
вещества, выполните следующие дей-
ствия:
 Полностью освободите при-
бор от всего упаковочного материала,
включая защитные пластиковые де-
тали (при наличии). Чтобы охладить
духовой шкаф, откройте дверцу, при
этом включится вентилятор, который
обеспечит воздушное охлаждение
внутреннего пространства.
 После остывания выполните
чистку духового шкафа и дополни-
тельных принадлежностей.
 Во время первого использова-
ния могут выделяться посторонние за-
пахи и дым, поэтому следует обеспе-
чить хорошую вентиляцию кухонного
помещения.
 Прибор и его части, к которым
возможно прикосновение, нагревают-
ся в процессе работы.
 Приготовление на варочной
панели пищи с использованием рас-
тительного масла или жира без со-
блюдения должной предосторожности
может быть опасно и в некоторых слу-
чаях даже приводить к пожару.
Все перечисленные ниже работы
по установке, настройке и обслужи-
ванию прибора могут осуществляться
только квалифицированными техни-
ческими специалистами.
Компания-изготовитель не несет
ответственность за ущерб людям, жи-
вотным или имуществу, который может
быть нанесен вследствие неправиль-
ной установки прибора.
На протяжении всего срока службы
прибора внесение изменений в кон-
струкцию автоматических защитных и
регулирующих устройств допускается
только специалистами компании-изго-
товителя или ее официального дилера.

20
ПАСПОРТ ТЕХНИЧЕСКОГО ИЗДЕЛИЯ РУССКИЙ
Электрическая варочная панель
РИС. 6
После полной распаковки прибора
проверьте его целостность. В случае
возникновения каких-либо сомнений
в работоспособности прибора не ис-
пользуйте его и обратитесь за помо-
щью к квалифицированным специ-
алистам.
Сделайте вырез в столешнице, ру-
ководствуясь размерами, указанными
на рисунках ниже.
* От 30 до 50 мм
A, мм B, мм C, мм
(+0 -0,5)
D, мм
(+0 -0,5)
FQ3VT 300 500 285 490
Все перечисленные ниже работы
по установке, настройке и обслужи-
ванию прибора должны выполняться
только квалифицированными техни-
ческими специалистами.
Компания-изготовитель не несет
ответственность за ущерб людям, жи-
вотным или имуществу, который может
быть нанесен вследствие неправиль-
ной установки прибора.
На протяжении всего срока служ-
бы прибора внесение изменений
Other manuals for SA3VT02
1
Table of contents
Languages:
Other Kuppersberg Cooktop manuals
Popular Cooktop manuals by other brands

thermo mate
thermo mate IHTB774C Instruction & installation manual

Magic Chef
Magic Chef 86HS-1 Use and care

German pool
German pool GID-RS22T-S user manual

ProLite
ProLite LD1 Installation, servicing and user instructions

Fisher & Paykel
Fisher & Paykel CG905DWLPFCX3 manual

Electrolux
Electrolux 318201432 installation instructions