manuals.online logo
Brands
  1. Home
  2. •
  3. Brands
  4. •
  5. Kuppersbusch
  6. •
  7. Hob
  8. •
  9. Kuppersbusch EKE 605.2F Quick setup guide

Kuppersbusch EKE 605.2F Quick setup guide

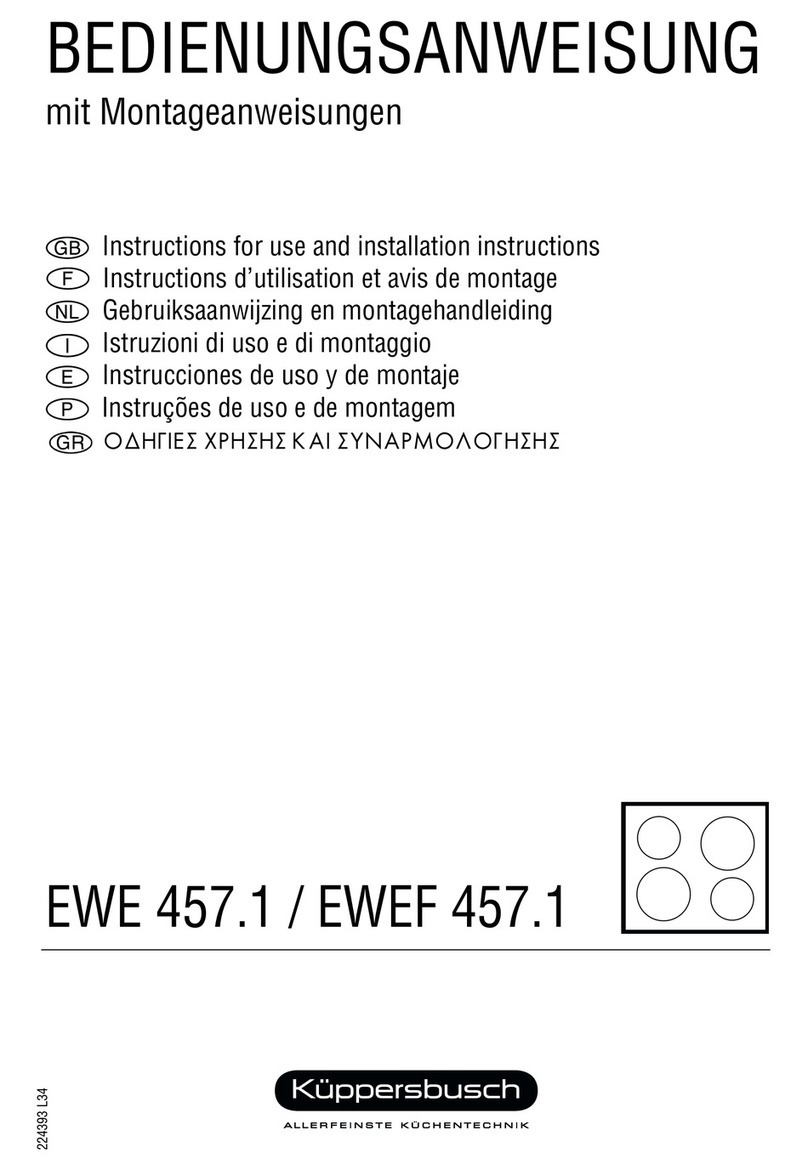
BEDIENUNGSANWEISUNG
mit Montageanweisungen
Instructions for use and installation instructions
Instructions d’utilisation et avis de montage
Gebruiksaanwijzing en montagehandleiding
Istruzioni di uso e di montaggio
Instrucciones de uso y de montaje
Instruções de uso e de montagem
Ðtv³wuÒ xvÒvÒ ÊËw Ò´ÎËxÑÐÌгvÒvÒ
EKE 605.2F / 905.2F
224049 L11
12 EKE 605.2F / 905.2F
Conditions of guarantee
The c nditi ns f guarantee applicable f r this pr duct are subject t th se
published by the representative in the relevant c untry. Details regarding same
may be btained fr m the dealer fr m wh m the appliance was purchased.
F r claims under guarantee the sales receipt must be pr duced.
For your information
Please read the instructi ns in this b klet carefully as it c ntains imp rtant
inf rmati n c ncerning the safety, the installati n, the use and the mainte-
nance f y ur appliance.
The appliance sh uld nly be used f r c king in the h useh ld.
Keep the perati n instructi ns in a safe place.
Notes on disposal
Disposing of the packaging
The transp rt packaging c nsists f the f ll wing materials: C rrugated card-
b ard, cardb ard, styr f am (CFC-free), P lyethylen-f il.
D n t put these materials in the h useh ld rubbish, but ask y ur l cal au-
th rity t give y u the adress f the m st c nvenient c llecti n p int.
What to do if you happen to have an old appliance
Old appliances c ntain many materials which can be recycled. F r this reas n
y u sh uld n t simply put y ur ld appliance n the rubbish tip, but ask y ur
l cal auth rity h w it might be recycled.
Contents
Your appliance at a glance. . . . . . . . . . . . . . . . . . . . . . . . 13
Safety instructions . . . . . . . . . . . . . . . . . . . . . . . . . . . . . 14
f r c nnecti n and functi n
f r the c king area
Before first use . . . . . . . . . . . . . . . . . . . . . . . . . . . . . . . 14
Use of the cooking zones. . . . . . . . . . . . . . . . . . . . . . . . . 14
Switch n the c king area
The c king setting
The aut matic b st functi n
C king z ne heating indicat r
Multi-circuit c king z nes
Using a frying pan ( nly EKE 905.2F)
S me instructi ns n c kware
The rapid switch- ff functi n
Child pr f l ck (sens r-l ck)
Time limit functi n (h liday functi n)
Other functi ns
What to do if there is a fault . . . . . . . . . . . . . . . . . . . . . . 17
Cleaning and care. . . . . . . . . . . . . . . . . . . . . . . . . . . . . . 18
Installation. . . . . . . . . . . . . . . . . . . . . . . . . . . . . . . . . . . 18
Please n te
N tes f r fitting
Installati n f glass-ceramic c king areas
Electrical c nnecti n
EKE 605.2F / 905.2F 13
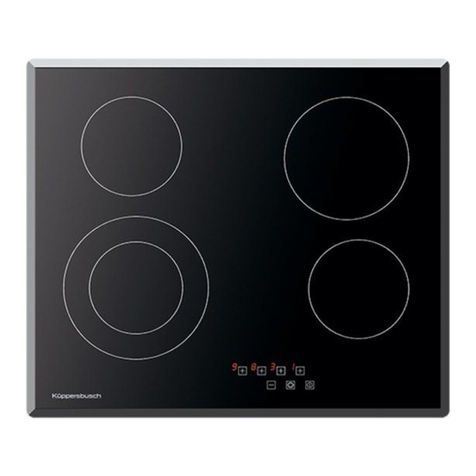
Your appliance at a glance
1 Triple-circuit c king z ne
2 Sens r butt ns f r c king settings
3Off-sensr
4 Stand-by sens r
5 Child pr f l ck (sens r-l ck)
6Frying zne
EKE 605.2F
EKE 905.2F
14 EKE 605.2F / 905.2F
Safety instructions
f r c nnecti n and functi n
■ The mains c nnecti n, maintenance and repair j bs sh uld nly be carried
ut by an auth rised technician in acc rdance with the applicable safety
standards. W rk which has been impr perly carried ut can endanger y ur
safety.
■ The surfaces f heating- and c king z nes bec me h t during perati n.
Theref re: Always keep children away.
f r the c king area
■ Overheated fats and ils may sp ntane usly ignite. Y u sh uld theref re
c k f d inv lving the use f fats and ils, e.g. chipped p tat es, nly un-
der supervisi n. Never extinguish fats r ils with water! Place a lid n the
pan, switch ff the c king z ne and take the pan ff the h t c king z ne.
■ If cracks, fractures, r any ther defects appear in y ur glass-ceramic c k-
ing area, d n t use y ur appliance. Unplug r therwise disc nnect y ur
appliance fr m the mains supply and call ur service centre.
■ If the c king area cann t be switched ff due t a defect in the sens r
c ntr l immediately disc nnect y ur appliance and call the service centre.
■ Be careful when w rking with additi nal appliances! The c nnecti n leads
must n t c me int c ntact with the h t c king z nes.
■ The glass ceramic c king area sh uld n t be used as a st rage area.
■ D n t place c mbustible r inflammable bjects up n the c king t p
which might be danger us in case f unintenti nal switching n.
■ D n t place any inflammable r c mbustible items n the h b since there
is a risk f burns r damage if the h b is switched n unintenti nally.
■ Never use the c king z nes with ut c kware. Never use the appliance t
heat r ms!
■ Never put aluminium f il r plastic n t p f the c king z nes. Substances
that melt, f r example plastic, f ils and especially sugar and f d with a
high sugar c ntent are t be kept away fr m the h t c king z ne. In rder
t av id damaging, sugar, while still h t, sh uld immediately be scraped ff
the c king area with a scraper.
■ Av id repeated burning f stains and b iling ver.
■ Chalk dep sits may damage the c king area.
■ If y u have pets in y ur flat, wh might reach the c king t p, activate the
child-pr f unit.
Before first use
Rem ve packaging and m ving parts. Bef re first use the c king area sh uld
be cleaned with a damp cl th and a little washing-up liquid.
The c king area is insensitive t temperature sh cks (c ld and h t) and als
extremely r bust.
■ Av id dr pping sharp bjects nt the c king area. P inted bjects falling
nt y ur c king area might break it.
■ Please read thr ugh the cleaning and care instructi ns. Be especially careful
t keep the sens r keys clean since s iling c uld be mistaken f r finger
c ntact by the appliance. Never put anything (pans, tea t wels etc.) nt
the sens r keys! If f d b ils ver nt the sens r keys, we advice y u t
activate the emergency switch.
■ Y u might hear a humming s und fr m the heating when switching n the
appliance. This is due t technical reas ns and has n influence n quality
and functi ning f y ur appliance.
■ H t pans sh uld n t c ver the the sens r keys, therwise the appliance
switches itself ff aut matically.
Use of the cooking zones
Read the safety instructions!
After initial c nnecti n and after a p wer failure the abbreviati ns “CAL” ap-
pears briefly in the LED displays. Then r tating circles are displayed. This
means that the sens rs are being checked in a self-test and at the same time
the butt n sensitivity reset.
Ackn wledge this display by t uching the Off-sens r. Pr vided that n bjects
are lying n he sens rs, these symb ls are switched ff immediately. Other-
wise rem ve bjects, switch ff lighting (if n) and disc nnect the c king z ne
again briefly fr m the mains (fuse).
Important:
There must be n bjects n the sens rs while the sens r sensitivity is being
set. Extreme lighting shining n the butt ns, such as direct sunlight r bright
hal gen lights, is t be av ided.
Switch n the c king area
Press the sens r-butt n f r ap-
pr x. 2 sec nds. The LED-display
ab ve the sens r lights up and the
appliance is in perati n (stand-by
m de).
The stand-by m de aut matically switches itself ff,
– if n c king z ne is activated within 20 minutes (after 10 sec nds an
acustic signal indicates that the appliance switches itself ff after
an ther 10 sec nds)
or
– if the appliance is n t used 1 minute after starting perati n.
EKE 605.2F / 905.2F 15
The c king setting
Y u have 9 c king settings available.
Select the required c king setting with the plus- r minus-sens r. It will be
indicated in the display.
The “0” p siti n is visible f r ab ut 2 sec nds after the appliance switches ff.
When pressing the plus-sens r the
c king z ne starts at c king set-
ting 5, with ut b st.
When pressing the minus sens r
the c king z ne starts at c king
setting 9.
This aut matically starts the aut -
matic b st.
Switching ff the c king z ne:
Press the plus- and minus-sens r at the same time.
The aut matic b st functi n
All c king z nes are equipped with an aut matic b st functi n. Maximum
p wer is used f r the b st. The time peri d f the b st depends n the
selected c king setting. After the elapsed time the c king z ne aut matically
switches back t the selected c king setting.
When selecting the respective
c king setting by pressing the
minus-sens r, the b st functi n
switches n aut matically.
During aut matic perati n a "A"
lights up in the display alternately
with the selected c king setting.
When selecting the required c k-
ing setting by pressing the plus-
sens r, it is necessary t press the
plus-sens r again after reaching
c king setting 9 if the aut matic
b st functi n is t be activated.
Select the required c king set-
ting.
“A” lights up in the display alter-
nately with the selected c king
setting.
C king z ne heating indicat r
As l ng as the c king z ne is still
h t, an “H” will appear in the dis-
play when the c king z ne has
been switched ff.
C king setting Suitable f r
1-3 Heating, warming
creeing, defr sting
4-5 Steaming, p aching
b iling
6-8 r asting, deep-frying
9 Heating large quantities
or
and
2 X
16 EKE 605.2F / 905.2F
Multi-circuit c king z nes
As a standard, the smallest c king z ne diameter is heated up.
F r large p ts r frying pans, switch n the uter c king z ne circuit as well.
Dual-circuit cooking zones and frying zones
Press the c king z ne symb l next t the
plus/minus sens r.
A d t at the b tt m right f the display f r
the c king level indicates that the func-
ti n has been switched n.
Pressing the c king z ne symb l nce
again deactivates the dual circuit c king
z ne r frying z ne.
Triple-circuit cooking zones
T uch the triple-circuit c king z ne sym-
b l next t the plus/minus sens rs. The
middle c king z ne will be switched n
as well and this will be indicated by means
f a blinking light n the b tt m right f
the c king level display.
T uch the c king z ne symb l nce
again. The uter c king z ne will be
switched n as well and this will be indi-
cated by means f a light n the b tt m
right f the c king level display.
B th f the uter c king z nes will be
switched ff simultane usly if the c king
z ne symb l is t uched again.
Using a frying pan ( nly EKE 905.2F)
T heat a frying pan y u can use the tw small, cl sely adjacent c king z nes.
The temperature is c ntr lled via the setting c ntr ls f r b th c king z nes.
S me instructi ns n c kware
Only use pans with even and flat bottoms.
Uneven pan b tt ms pr l ng the b st times and increase the p wer require-
ment. R ugh pan b tt ms scratch the glass-ceramic area when shifted ab ut.
When using firepr f glass r p rcelain c kware, please f ll w the manufac-
turers instructi ns.
Choose a pan with a diameter at least as large as the cooking zone.
Y u will thereby save energy and c king time. Y u will als av id verheating
f the c king area.
Wherever possible, place a lid on the pan.
Y u will save a l t f energy by c king in a cl sed pan. Liquids and f ds
will nly b il ver if the temperature is t high. F r the c king z nes, y u
can precisely set the temperature required. With a little practice, y u will read-
ily make the c rrect ch ice f c king settings s that n thing b ils ver even
when a lid is in place.
The rapid switch- ff functi n
All the c king z nes can be
switched ff quickly with the OFF-
sens r.
Child pr f l ck (sens r-l ck)
Operating the sens r-l ck detains unauth rised pers ns fr m using the appli-
ance. In rder t activate this l ck the c king area has t be in perati n.
Activating child proof lock:
Press the sens r-l ck (2 sec nds).
The child pr f l ck can be activat-
ed if the c king area is in pera-
ti n. In this case y u can nly
ch se a l wer c king setting r
switch ff.
The l ck is indicated by 3 flashing c ntr l indicat rs.
Be careful: Switching ff the c king area d es n t deactivate the l ck!
Deactivating the child proof lock:
Press the sens rs under the tw left flasing c ntr l indicat rs at nce.
After n t m re than 3 sec nds press the sens r under the flashing c ntr l
indicat r n the right.
Note: When the p wer supply has been interrupted the child pr f l ck is n
l nger active.
at once, after max. 3 Sek.
EKE 605.2F / 905.2F 17
Time limit functi n (h liday functi n)
The appliance is equipped with an aut matic time limit functi n. This functi n
makes sure that the appliance is n t in perati n f r a l ng time. The time
peri d f the time limit depends n the selected c king setting, eg.: The high-
er the selected c king setting, the faster the appliance is switched ff.
The functi n t limit perati n time w rks separately f r each c king z ne.
Other functi ns
■ If pressing tw r m re sens r keys – at the same time e.g. when a pan
is mistakenly put nt the sens r key n functi n is activated. An audible
signal s unds after 10 sec nds. The appliance switches ff aut matically
after 20 sec nds.
Exceptions:
– Deactivati n f the child pr f l ck
– Switching ff the c king z nes
■ If y u c ntinue t press a sens r butt n even after having set the highest
c king setting, an audible signal s unds after 10 sec nds. After 20 sec-
nds the appliance switches ff aut matically.
■ In case f a break d wn f the mains supply the appliance d es n t aut -
matically switch n again. If the child pr f l ck was activated bef re the
p wer failure, this is n w deactivated.
■ If the electr nics verheat, the h b will switch ff. All 4 LED indicat rs will
flash and a cyclical signal will be heard.
What to do if there is a fault
Unplug the appliance befor repair!
Check carefully t make sure that the fault is n t due t mis perati n. Y u
can rectify many faults y urself.
Important note:
Repairs sh uld nly be carried ut by an auth rised technician! Even during
the guarantee peri d repairs will n t be free f charge if due t inc rrect p-
erati n r t n n-adherence t ur instructi ns given under “What t d if
there is a fault”.
Y u sh uld always give the data n the rating plate t y ur service centre in
case y u have enquiries r want t rder spare parts. The rating plate is l -
cated underneath the c king area. The rating label is l cated at the b tt m
side f the h b. It is als stuck nt the c ver page f this perating manual.
C king setting Switching ff time after
9
8
7
6
2 h urs
53 h urs
44 h urs
3
25 h urs
110 h urs
Fault Cause Remedy
Circulating dash
symb ls n all 4
LED displays.
N faults; n rmal
display after p wer
interrupti n.
If n bjects have been lying n
r bstructing the sens rs, c n-
firm this by pressing the “Off”-
sens r.
H riz ntal dashes
that are sh wn n
the display running
fr m t p t b tt m.
Failure f electr nic
c mp nent.
Switch ff c ker fuse in fuse-
b x. Call service centre.
N t p ssible t
switch ff c king
area.
Failure f electr nic
c mp nent.
Switch ff c ker fuse in fuse-
b x, Call service centre.
The LED indicat r f r
the c king level r
heat indicat r d es
n t light up r nly
partly lights up.
LED indicat r defec-
tive.
Call Cust mer Service. There is
a danger f being burned as the
temperature warning is n t
reliable.
C king area d es
n t heat.
Fuse is defective. Check r replace c ker fuse in
fuse b x.
Child pr f l ck
activated.
Deactivate child pr f l ck.
C king area is
defective.
Call service centre.
Inner circuit f the
dual-circuit z ne is
defective.
D n t perate the functi ning
uter circle. Immediately call
service centre.
Individual / all sen-
s rs d n t react t
t uch.
Sudden change in
heat radiati n.
Rem ve the s urce f heat.
Disc nnect the h b fr m the
mains (via the fuses).
18 EKE 605.2F / 905.2F
Cleaning and care
[Never clean the glass ceramic h b with a steam cleaner r similar ap-
pliance!
■ Never use sharp r abrasive agents!
It is sufficient t clean with a damp
cl th and a little washing-up liquid
after usage. Wipe dry.
■ Incrustati n due t b ilied ver f ds
are best pres ftened with a wet
cl th. Then rem ve them with a glass
scraper. Sugar and melted plastic
sh uld be rem ved while the c king
area is still h t.
■ Clean the glass-ceramic c king area after every use. Always keep the sen-
s r keys clean, since s iling c uld be detected as finger c ntact by the
aplliance. Immediately rem ve s iling. Never put anything (pans, tea-t wels
etc.) n the sens r keys! If f d b ils ver nt the sens r butt ns, we ad-
vise y u t activate the emergency switch.
■ Care f r y ur glass-ceramic c king area nce a week. Regular care builds
up a pr tective layer and als eases day t day cleaning. Please f ll w the
instructi ns f the cleaner r cleanser manufacturer c ncerned. Even heavy
s iling can be cleaned with a cleanser and en ugh water. Wipe dry with a
cl th.
Installation
Please n te
KÜPPERSBUSCH built-in c king z nes may be c mbined nly with KÜPPERS-
BUSCH built-in vens with c ling fan. The use f any ther make f ven
shall exempt Küppersbusch fr m all liability. Failure to observe this requi-
rement will invalidate all granted certificates and labels of approval.
N tes f r fitting
■ The w rkt p must have a width f 40 mm. It is abs lutely essential that the
w rkt p is aligned h riz ntally and that a clean cut is made int it!
■ The fr nt, rear and lateral clearances ar und the h b unit must be main-
tained in acc rdance with the dimensi nal drawing. A c rner m ulding f
s lid w d may be fitted t the w rkt p at the back f the c king area
pr vided that the minimum clearances are maintained. F r practical reas ns
the lateral clearance between the appliance and an adjacent tall cupb ard
unit must measure at least 300 mm.
■ Make sure that there is sufficient clearance underneath the cut- ut. Any fur-
niture battens must be cut away t leave an area which is at least the same
size as the cut- ut itself.
■ Make a p int f ensuring
that the plastic laminate
r w d veneer n y ur
furniture surr und has
been applied by means f
a heat-resistant adhesive
(100 °C).
■ Any c ker h ds r wall
cupb ards must have a
vertical clearance f at
least 650 mm fr m the
c king area.
It will be expedient t seal built-in sinks and ther built-in appliances in the
w rkt p in the same way (pr tecti n against ingress f water).
In the case f ceramic-tiled w rkt ps it is necessary t pr vide an additi nal
seal with the aid f a permanently elastic sealing c mp und. Such sealing
c mp und can be purchased as KÜPPERSBUSCH spare part N . 53 55 69.
– Clean the surfaces t be sealed in acc rdance with the manufacturer's in-
structi ns n the cartridge. Apply the c mp und in a c ntinu us strip,
pressing it firmly against the gap t be sealed.
– Cut away any surplus sealing c mp und with a sharp knife and clean the
sealed j int with water.
EKE 605.2F / 905.2F 19
Installati n f glass-ceramic c king areas
■ Always lift the c king area by h lding it at the sides. D n t lift it by the
fr nt bar.
■ Be extremely careful when installing! D n t place r dr p any sharp r
p inted t ls (screwdrivers etc.) n the glass surface!
■ The glass-ceramic c king area must have a level and flush bearing. Any
dist rti n may lead t fracture f the glass panel.
– First f all make a clean cut int the w rkt p.
– Install the m unting panel in acc rdance with the illustrati n.

– Stick n the encl sed sealing f r the h b and check t see that it is p si-
ti ned c rrectly and adheres perfectly.
If the w rkt ps are uneven (tiles, etc.) d n t use the sealing encl sed. Ap-
ply a sealing c mp und which is unaffected by changes in temperature.
– Put the h b int the w rkt p cut- ut and align it.
– Screw the h b t the assembly panel fr m the b tt m.
Minimum distance t adjacent walls
Cut- ut dimensi ns
Exteri r h b dimensi ns
20 EKE 605.2F / 905.2F
Electrical c nnecti n
■ The built-in cooking area must be connected to the mains supply by
a qualified electrician who is authorized to carry out such work.
■ B th legal wiring regulati ns and the requirements f y ur l cal electricity
supply b ard must be fully c mplied with.
■ When c nnecting the h b, a device must be pr vided which enables all-
p le disc nnecti n f the h b fr m the supply with a gap c nstructi n f at
least 3 mm. Circuit breakers, fuses and c ntact rs are c nsidered t be
suitable disc nnecting units.
■ When c nnecting and repairing the appliance disc nnect it fr m the elec-
tricity supply with ne f these devices.
■ Overall pr tecti n against electric sh ck must be ensured by the installati n.
■ The earthed c nduct r lead must be sufficiently l ng s that, in the event
f failure f the strain relief, it is n t subjected t strain until after the live
wires f the c nnecti n cable.
■ Any superflu us cable must be rem ved fr m the installati n area beneath
the appliance.
At the fact ry the electr nic h b has been equipped with a temperature-pr f
cable with a c nnecting b x f r the ven c nnecti n cable.
The c nnecting b x is fastened t the kitchen wall behind the built-in furniture.
If there is n built-in ven bel w the h b, the c nnecting b x can als be fas-
tened t the furniture bel w the h b.
■ When assembling the c nnecting b x remember that it must be at least
300 mm fr m the fl r, as sh wn in the drawing.
■
The c nnecting b x must n t c me int c ntact with any h t appliance parts.
■ The c nnecting b x must n t be used as a v ltage distribut r f r ther
appliances.
■
The appliance is c nnected t the mains at the c nnecting b x as sh wn in
the wiring diagram. The c nnecti n may nly be made in the c nnect r b x.
■ The connector box must not be removed.
■ The fitted c nnecti n cable must be replaced by the KÜPPERSBUSCH Cus-
t mer Service if it bec mes damaged.
■ The green-yell w earth c nduct r must be l nger than the ther wires.
Connection diagram:
Caution:
Incorrect connection results in the total destruction of the power elec-
tronics.
[When assembling the c nnecting b x remember that it must be at least
300 mm fr m the fl r, as sh wn in the drawing.
Electrical
connection
Permanent c nnecti n by means f an ven c nnecti n
s cket.
C nnecti n
diagram
is depicted n the underside f the appliance, suitable f r
the vari us types f mains.
C nnecti n data Permanent c nnecti n 400 V 3 N ~ 50 Hz
(AC 230 V in UK)
V ltage f heating element: 230 V
T tal c nnecti n utput:
EKE 605.2F 6,7 kW
EKE 905.2F 9,2 kW
400 V 3 N ~ safety current 16 A
400 V 2 N ~ safety current 20 A
230 V 1 N ~ safety current 25 A
230 V 3 ~ safety current 16 A
C nnecti n cable
Use H 05 RR-F r H 07 RN-F. Length f cable as necessary.
Cable t
the h b
base
Single-phase connection 230 V phase against neutral conductor
Supply line fr m
c ker junkti n b x
The c nduct r c l urs may be different. The c nnecti n diagram
and the terminal numbers are the decisive fact rs.
T
hree-phase connection 400 V system with 230 V phase against neu-
t
ral conductor
T
hree-phase system 230 V phase against phase

Other manuals for EKE 605.2F

1

This manual suits for next models

4

Other Kuppersbusch Hob manuals

Kuppersbusch KI8520.0SF User manual

Kuppersbusch

Kuppersbusch KI8520.0SF User manual

Kuppersbusch EKEW 847 Quick setup guide

Kuppersbusch

Kuppersbusch EKEW 847 Quick setup guide

Kuppersbusch BEDIENUNGSANWEISUNG EKI 607.2 User manual

Kuppersbusch

Kuppersbusch BEDIENUNGSANWEISUNG EKI 607.2 User manual

Kuppersbusch EKI6642 1 Series Operation manual

Kuppersbusch

Kuppersbusch EKI6642 1 Series Operation manual

Kuppersbusch EKI User manual

Kuppersbusch

Kuppersbusch EKI User manual

Kuppersbusch EMG 457.0 Quick setup guide

Kuppersbusch

Kuppersbusch EMG 457.0 Quick setup guide

Kuppersbusch EKI6842.1F Operation manual

Kuppersbusch

Kuppersbusch EKI6842.1F Operation manual

Kuppersbusch EKI8340 2 Series Operation manual

Kuppersbusch

Kuppersbusch EKI8340 2 Series Operation manual

Kuppersbusch EKR 60.2F ZB Quick setup guide

Kuppersbusch

Kuppersbusch EKR 60.2F ZB Quick setup guide

Kuppersbusch EKE 606.4 Quick setup guide

Kuppersbusch

Kuppersbusch EKE 606.4 Quick setup guide

Kuppersbusch VKE3300.0SR User manual

Kuppersbusch

Kuppersbusch VKE3300.0SR User manual

Kuppersbusch EKRS 600.0 Quick setup guide

Kuppersbusch

Kuppersbusch EKRS 600.0 Quick setup guide

Kuppersbusch KI6870.0SR Operation manual

Kuppersbusch

Kuppersbusch KI6870.0SR Operation manual

Kuppersbusch EKIW 957.0 F Quick setup guide

Kuppersbusch

Kuppersbusch EKIW 957.0 F Quick setup guide

Kuppersbusch KI8120.0SR Operation manual

Kuppersbusch

Kuppersbusch KI8120.0SR Operation manual

Kuppersbusch GCM 642.1 Quick setup guide

Kuppersbusch

Kuppersbusch GCM 642.1 Quick setup guide

Kuppersbusch T1-88-05 Manual

Kuppersbusch

Kuppersbusch T1-88-05 Manual

Kuppersbusch KI9560.0SR User manual

Kuppersbusch

Kuppersbusch KI9560.0SR User manual

Kuppersbusch EKI 607.1 User manual

Kuppersbusch

Kuppersbusch EKI 607.1 User manual

Kuppersbusch EKE 9742.0-35F Quick setup guide

Kuppersbusch

Kuppersbusch EKE 9742.0-35F Quick setup guide

Kuppersbusch GKS 324.0 User manual

Kuppersbusch

Kuppersbusch GKS 324.0 User manual

Kuppersbusch VKIW3800.0 Operation manual

Kuppersbusch

Kuppersbusch VKIW3800.0 Operation manual

Kuppersbusch EK F Series User manual

Kuppersbusch

Kuppersbusch EK F Series User manual

Kuppersbusch EKE3721.1ED User manual

Kuppersbusch

Kuppersbusch EKE3721.1ED User manual

Popular Hob manuals by other brands

Siemens ED HSB Series INFORMATION FOR USE

Siemens

Siemens ED HSB Series INFORMATION FOR USE

Zanussi ZGG642C Instruction booklet

Zanussi

Zanussi ZGG642C Instruction booklet

Blaupunkt 5RG64360 Instructions for installation and use

Blaupunkt

Blaupunkt 5RG64360 Instructions for installation and use

Baumatic BHC310 30cm instruction manual

Baumatic

Baumatic BHC310 30cm instruction manual

Zanussi ZVT64X user manual

Zanussi

Zanussi ZVT64X user manual

Oceanic OCEATI2Z2B user manual

Oceanic

Oceanic OCEATI2Z2B user manual

Bosch PIE F Series instruction manual

Bosch

Bosch PIE F Series instruction manual

JUNO JKSI604F5 user manual

JUNO

JUNO JKSI604F5 user manual

WEILOR WIS 370 Instructions for use

WEILOR

WEILOR WIS 370 Instructions for use

SCHOLTES TEPPAN YAKI F operating instructions

SCHOLTES

SCHOLTES TEPPAN YAKI F operating instructions

Gaggenau VI 422 103 instruction manual

Gaggenau

Gaggenau VI 422 103 instruction manual

AEG HK634060XB user manual

AEG

AEG HK634060XB user manual

IKEA Lagan HGA4K instruction manual

IKEA

IKEA Lagan HGA4K instruction manual

Belion EKK604T10 instruction manual

Belion

Belion EKK604T10 instruction manual

Asko HIG1995AB Instructions for use

Asko

Asko HIG1995AB Instructions for use

Baumatic BTC2SS user manual

Baumatic

Baumatic BTC2SS user manual

AEG HK854210FB user manual

AEG

AEG HK854210FB user manual

Zanussi ZAF 42 Instruction booklet

Zanussi

Zanussi ZAF 42 Instruction booklet

manuals.online logo
manuals.online logoBrands
  • About & Mission
  • Contact us
  • Privacy Policy
  • Terms and Conditions

Copyright 2025 Manuals.Online. All Rights Reserved.