manuals.online logo
Brands
  1. Home
  2. •
  3. Brands
  4. •
  5. Kuppersbusch
  6. •
  7. Refrigerator
  8. •
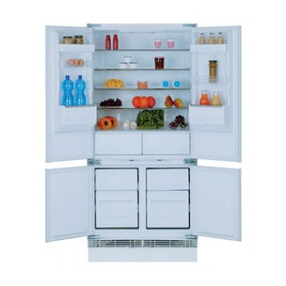
  9. Kuppersbusch IKE 309-5-2T User manual

Kuppersbusch IKE 309-5-2T User manual

2223 335-21
Gebrauchs- und Montageanleitung
Instructions for installation and use
Instructions de montage et d’emploi
Wichtig: Unbedingt lesen und aufbe ahren!
Important: Read these instructions carefully and then store them in a safe place
Important: Lire attentivement et ranger soigneusemnt ce mode d’emploi
Integrierte Kühl-Gefriergerät
Integrated Fridge -Freezers
Réfrigérateur - Congélateurs à intégrer
Modell: IKE 309-5-2T
p.: 17-30 31- 3
GB F
KÜPPERSBUSCH HAUSGERÄTE AG
Postfach 10 01 32, D-45 01 Gelsenkirchen, Küppersbuschstr. 16, D-45 3 Gelsenkirchen
Telefon: (02 09) 4 01-0, Telefax: (02 09) 4 01-3 03
www.kueppersbusch.de
Küppersbusch Ges. m. b. H.
Eitnergasse 13, 1231 Wien, Telefon: 01 / 66 0-0, Telefax: 01 / 66 0 72
www.kueppersbusch.at · e-Mail: [email protected]
15
Die Teile Ha, Hb, Hc, Hd abnehmen, ie in der Abb.
gezeigt ird.
In die Befestigungs- und Scharnierlöcher
beiliegende Abdeckkappen (C-D) eindrücken.
Belüttungsgitter (B) und Scharnierabdeckung (E)
aufstecken.
PR266
Ha Hb
Hc
Hd
B
E
C
D
21mm
21mm
ca. 50 mm
90°
90°
ca. 50 mm
Die Schiene (Ha) auf der Innenseite der Möbeltür
oben und unten auflegen (siehe Abb.) und die
Position der äußeren Bohrlöcher anzeichnen.
Nachdem die Löcher gebohrt urden, die Schiene
mit den mitgelieferten Schrauben befestigen.
Die Abdeckung (Hc) in die Schiene (Ha) eindrücken,
bis sie einrastet.
PR33
Hc
Ha
PR167
Ha
Hb
8mm
Gerätetür und Möbeltür auf ca. 90° öffnen. Den
Winkel (Hb) in der Schiene (Ha) einsetzen.
Gerätetür und Möbeltür zusammenhalten und die
Bohrlöcher anzeichnen (siehe Abb.).
30
PR168
Hb
PR167/1
Hd
Hb
Place the small square on the guide again and fix it
ith the scre s supplied.
Should the lining up of the furniture door be
necessary, use the clearance of slots.
At the end of operations, it is necessary to check if
the door of the furniture closes properly.
Fix cover (Hd) on guide (Hb) until it clips into place.
If the appliance is fixed to the side of the kitchen unit,
simply slacken the scre s in the fixing brackets (E), move
the brackets as sho n in the figure and re-tighten the
scre s.
D735
E
E
16
Die Winkeleisen entfernen und 8 mm vom äusseren
Rand der Tür mit dem Nagel (K) kennzeichnen.
Ha
8mm
K
PR168
Hb
PR167/1
Hd
Hb
Den Winkel ieder auf der Schiene anbringen und
mit den mitgelieferten Schrauben befestigen.
Für eine allfällig not endige Ausrichtung der
Möbeltür, den Spielraum der Langlöcher nutzen.
Nach Beendigung der Arbeiten den ein andfreien
Verschluß der Gerätetür überprüfen.
Die Abdeckung (Hd) in die Schiene (Hb) eindrücken,
bis sie einrastet.
D735
E
E
Das Gerät ist mit 2 Winkeln (E) ausgestattet. Diese
sind zur seitlichen Befestigung des Gerätes am
Möbel zu ver enden.
29
PR266
Ha Hb
Hc
Hd
Separate parts Ha, Hb, Hc, Hd as sho n in the
figure.
Place guide (Ha) on the inside part of the furniture
door, up and do n as sho n in the figure and mark
the position of external holes. After having drilled
holes, fix the guide ith the scre s supplied.
21mm
21mm
ca. 50 mm
90°
90°
ca. 50 mm
Fix cover (Hc) on guide (Ha) until it clips into place.
PR33
Hc
Ha
PR167
Ha
Hb
8mm
Open the appliance door and the furniture door at
90°. Insert the small square (Hb) into guide (Ha).
Put together the appliance door and the furniture
door and mark the holes as indicated in the figure.
Remove the brackets and mark a distance of 8 mm
from the outer edge of the door here the nail must
be fitted (K).
Ha
8mm
K
17
WARNINGS
It is most important that this instruction book should be retained with the appliance for future
reference. Should the appliance be sold or transferred to another owner, or should you move house
and leave the appliance, always ensure that the book is supplied with the appliance in order that the
new owner can be acquainted with the functioning of the appliance and the relevant warnings.
If this appliance featuring magnetic door seals is to replace an older appliance having a spring lock
(latch) on the door or lid, be sure to make that spring lock unusable before you discard the old
appliance. This will prevent it from becoming a death-trap for a child.
This must be done before the appliance is built intoThese warnings are provided in the interest of
safety.You must read them carefully before installing or using the appliance.
General Safety
• This appliance is designed to be operated by
adults. Children should not be allo ed to tamper
ith the controls or play ith the product.
• It is dangerous to alter the specifications or
modify this product in any ay.
• Care must be taken to ensure that the appliance
does not stand on the electrical supply cable.
Important: if the supply cord is damaged, it must
be replaced by the manufacturer, its service agent
or similarly qualified person in order to avoid a
hazard.
• Before any cleaning or maintenance ork is carried
out, be sure to s itch off and unplug the appliance.
• This appliance is heavy. Care should be taken
hen moving it
• Ice lollies can cause frost burns if consumed
straight from the appliance.
• Take utmost care when handling your
appliance so as not to cause any damages to
the cooling unit with consequent possible
fluid leakages.
• The appliance must not be located close to
radiators or gas cookers.
• Avoid prolonged exposure of the appliance to
direct sunlight.
• There must be adequate ventilation round the
back of the appliance and any damage to the
refrigerant circuit must be avoided.
• For freezers only (except built-in models): an
ideal location is the cellar or basement.
• Do not use other electrical appliances (such
as ice cream makers) inside of refrigerating
appliances, unless they are approved for this
purpose by the manufacturer.
Service/Repair
• Any electrical ork required to install this
appliance should be carried out by a qualified
electrician or competent person
• This product should be serviced by an authorized
Service Centre, and only genuine spare parts
should be used.
• Under no circumstances should you attempt to
repair the appliance yourself. Repairs carried out
by inexperienced persons may cause injury or
more serious malfunctioning. Refer to your local
Service Centre, and al ays
• This appliance contains hydrocarbons in its
cooling unit; maintenance and recharging must
therefore only be carried out by authorized
technicians.
Use
• The domestic refrigerators and freezers are
designed to be used specifically for the storage
of edible foodstuffs only.
• Best performance is obtained ith ambient
temperature bet een +18°C and +43°C (class T);
+18°C and +38°C (class ST); +16°C and +32°C
(class N); +10°C and +32°C (class SN). The
class of your appliance is sho n on its rating
plate.
Warning: hen the ambient temperature is not
included ithin the range indicated for the class
of this appliance, the follo ing instructions must
be observed: hen the ambient temperature
drops belo the minimum level, the storage
temperature in the freezer compartment cannot
be guaranteed; therefore it is advisable to use the
food stored as soon as possible.
• Frozen food must not be re-frozen once it has
been tha ed out.
• Manufacturers’ storage recommendations should
be strictly adhered to. Refer to relevant
instructions.
• The inner lining of the appliance consists of
channels through hich the refrigerant passes. If
these should be punctured this ould damage the
appliance beyond repair and cause food loss. DO
NOT USE SHARP INSTRUMENTS to scrape off
frost or ice. Frost may be removed by using the
scraper provided. Under no circumstances should
solid ice be forced off the liner. Solid ice should be
allo ed to tha hen defrosting the appliance.
28
Apply the sealing strip pushing it bet een the
refrigerator and the adjacent cabinet.
B
E
C
D
Apply covers (C-D) on joint cover lugs and into hinge
holes.
Snap vent grille (B) and hinge cover (E) into
position.
It is necessary that the niche is provided ith a
conduct of ventilation having the follo ing
dimensions:
Depth 50 mm
Width 540 mm
Fit the appliance in the niche by making sure that it
stands against the interior surface of the unit on the
side here the door hinges of the appliances are
fitted. Insert the appliance until the upper strip butts
up against the unit (1) and make sure that the lo er
hinge is in line ith the surface of the unit (2).
D023
1
2
PR01
540
50
B
TH
D724
I
P
Fasten the appliance ith 4 scre s provided in the
kit included ith the appliance. (I = short) (P = long)
18
Cleaning the interior
Before using the appliance for the first time, ash
the interior and all internal accessories ith luke-
arm ater and some neutral soap so as to remove
the typical smell of a brand-ne product, then dry
thoroughly.
Do not use detergents or abrasive
powders, as these will damage the finish.
USE
CONTENTS
Warnings . . . . . . . . . . . . . . . . . . . . . . . . . . . . . . . . . . . . . . . . . . . . . . . . . . . . . . . . . . . . . . . . . . . . . . . . . . .17
Use - Cleaning the interior . . . . . . . . . . . . . . . . . . . . . . . . . . . . . . . . . . . . . . . . . . . . . . . . . . . . . . . . . . . . . . . . .18
Use - Control panel - Display - Operation - Temperature indication . . . . . . . . . . . . . . . . . . . . . . . . . . . . . . . . . .19
Activation of funztions - S itching Off - Use of the fridge compartment - Temperature regulation - Fresh food
refrigeration - Shopping Function . . . . . . . . . . . . . . . . . . . . . . . . . . . . . . . . . . . . . . . . . . . . . . . . . . . . . . . . . . . . . .20
Use of the freezer compartment - Temperature regulation - Freezing fresh food - Storage of frozen food . . . . .21
Excessive temperature alarm - Tha ing - Ice-cube production - Performance optimization function . . . . . . . . .22
Use -Shelf holders - Movable shelves - Positioning the door shelves - Air circulation . . . . . . . . . . . . . . . . . . . . .23
Hints - Hints for refrigeration - Hints for freezing - Hints for storage of frozen food . . . . . . . . . . . . . . . . . . . . .24
Maintenance - Periods of no operation - Periodic cleaning Interior light - Defrosting . . . . . . . . . . . . . . . . . .25
Customer service and spare parts - Installation - Location - Electrical connection . . . . . . . . . . . . . . . . .26
Installation - Door reversibility - Building-in instructions . . . . . . . . . . . . . . . . . . . . . . . . . . . . . . . . . . . . . . . .27
• Do not place carbonated or fizzy drinks in the
freezer as it creates pressure on the container,
hich may cause it to explode, resulting in
damage to the appliance.
Installation
• During normal operation, the condenser and
compressor at the back of the appliance heat up
considerably. For safety reasons, minimum
ventilation must be as sho n in the relevant
Figure.
Attention: keep ventilation openings clear of
obstruction.
• If the appliance is transported horizontally, it is
possible that the oil contained in the compressor
flo s in the refrigerant circuit. It is advisable to
ait at least t o hours before connecting the
appliance to allo the oil to flo back in the
compressor.
• There are orking parts in this product hich
heat up. Al ays ensure that there is adequate
ventilation as a failure to do this ill result in
component failure and possible food loss. See
installation instructions.
• Parts hich heat up should not be exposed.
Wherever possible the back of the product should
be against a all.
• If the appliance has been transported
horizontally, it is possible that the oil contained in
the compressor ílo s in the refrigerant circuit. It
is advisable to ait at least t o hours before
connecting the appliance to allo tl¦e oil to flo
back in the compressor.
Environment Protection
This appliance does not contain gasses which
could damage the ozone layer, in either its
refrigerant circuit or insulation materials.The
appliance shall not be discarded together with
the urban refuse and rubbish. Avoid damaging
the cooling unit, especially at the rear near the
heat exchanger. Information on your local
disposal sites may be obtained from municipal
authorities.The materials used on this appliance
marked by the symbol are recyclable.
27
ATTENTION!
It must be possible to disconnect the appliance from
the mains po er supply; the plug must therefore be
easily accessible after installation.
Door reversibility
The appliance is supplied with the right
door opening.To change the opening
direction of the door proceed as in the
following instructions before installing it.
1. Unscre the upper pin and remove the spacer
2. Remove the upper door
3. Remove the hinge cover (A).
Unscre the pins (B) and the spacers (C) and refit
them on the middle hinge of the opposite side. Snap
the hinge cover (A).
4. Refit the upper door, the upper pin and the
spacer on the opposite side
5. Unscre the lo er pin and remove the spacer
and refit them on the opposite side
The Manufacturer declines all responsibility if
the above safety precautions are not observed.
This appliance complies ith the follo ing
E.E.C. Directives:
- 87/308 EEC of 2/6/87 relative to radio interference
suppression.
- 73/23 EEC of 19.2.73 (Lo Voltage Directive) and
subsequent modifications;
- 89/336 EEC of 3.5.89 (Electromagnetic
Compatibility Directive) and subsequent
modifications.
Instructions for totally built-in appliances
50 mm
min.
200 cm
2
200 cm
2
min.
D567
Building-in instructions
Dimensions of housing
Height 1780 mm
Depth 550 mm
Width 560 mm
For safety reasons, minimum ventilation must be as
sho n in Fig.
Attention: keep ventilation openings clear of
obstruction.
B
C
A
19
Control panel
ABCDEF
DISPLAY
3
12456
78
A - Applinace button ON/OFF
B - Freezer Thermostat control knob
C - Temperature indication button
Operation
After plugging the plug into the po er outlet, if the
display is not illuminated, press key (A), appliance on.
As soon as the appliance is turned on, the follo ing
signals ill appear on the control panel:
• symbol (3) ill be positive, indicating that the
temperature is positive.
• the temperature flashes, the background of the
display is red and you ill hear a buzzer. Press key
(E) and the buzzer ill go off (also see the section
on "excessive temperature alarm").
By turning the knob the display flashes and sho s
the desired temperature. For a correct storage of
the food the follo ing temperatures should be set:
+5°C in the fridge
-18°C in the freezer
Important
If the door remains ajar for more than 7 minutes, the
internal lighting ill turn off electronically; after this, the
lighting function ill be reset by opening and closing
the door itself.
Temperature indication
In normal conditions, the display indicates the freezer
temperature (symbol 2).
Each time key C is pressed, the display indicates in
sequence:
1. symbol 1 turns on and indicator 4 sho s the
temperature of the fridge compartment;
2.symbol 2 turns on and indicator 4 sho s the
temperature of the freezer compartment.
In any case, after 10 seconds normal display
conditions are restored.
D - Temperature and function indicator
E - Function button/ reset alarm
F - Fridge Thermostat knob
3. positiv and negativ Temperture indicator
4. Temperature indicator
5. If on the Performance optimization function is on
fast freeze funcion is on
6. If on the Performance optimization function is on
7. If on the minidac is on
8. If on the shopping function is on
1. If on, the indicated temperature is that of the
fridge compartment;
if it flashes, the alarm corresponds to the
relative compartment.
2. If on, the indicated temperature is that of the
freezer compartment;
if it flashes, the alarm corresponds to the
relative compartment.
26
can vary by ±6% of the rated voltage.
For operation ith different voltages, a suitably sized
auto-transformer must be used.
The appliance must be earthed.
The po er supply cable plug is provided ith a
contact for this purpose.
If the domestic po er supply socket is not earthed,
connect the appliance to a separate earth in
compliance ith current regulations, consulting a
specialist technician.
D068
The freezer compartment, ho ever, ill become
progressively covered ith frost. This should be
removed ith the special plastic scraper provided,
henever the thickness of the frost exceeds 4 mm.
During this operation it is not necessary to s itch off
the po er supply or to remove the foodstuffs.
Ho ever, hen the ice becomes very thick on the
inner liner, complete defrosting should be carried out
and it is advisable to carry out this operation hen
the appliance is empty.
To carry out complete defrosting of the freezer
compartment proceed as follo s:
1. pull out the plug from the all socket or turn the
thermostat knob to the «O» setting;
2. remove any stored food, rap it in several layers
of ne spaper and put it in a cool place;
3. leave the door open, insert the plastic scraper in
the appropriate seating at the bottom centre,
placing a basin underneath to collect the defrost
ater;
4. hen defrosting is completed, dry the interior
thoroughly and refit the plug; keep the scraper for
future use;
5. turn the thermostat knob back to the required
setting or replace the plug in the po er socket.
After letting the appliance run for at least half an
hour, replace the previously removed food into
the compartment.
CUSTOMER SERVICE AND SPARE PARTS
If the appliance is not functioning properly, check
that:
• the plug is firmly in the all socket and the mains
po er s itch is on;
• there is an electricity supply (find out by plugging
in another appliance);
• the thermostat knob is in the correct position.
• If there are ater drops on the bottom of the
cabinet, check that the defrost ater drain
opening is not obstructed (see “Defrosting”
section).
• If your appliance is still not orking properly after
making the above checks, contact the nearest
service centre.
To obtain fast service, it is essential that hen you
apply for it you specify the model and serial number
of your appliance hich can be found on the
guarantee certificate or on the rating plate located
inside the appliance, on the bottom left-hand side.
INSTALLATION
Location
The appliance should be installed ell a ay from
sources of heat such as radiators, boilers, direct
sunlight etc.
Electrical connection
Before plugging in, ensure that the voltage and
frequency sho n on the serial number plate
correspond to your domestic po er supply. Voltage
Important:
Never use sharp metal tools to scrape off frost
from the evaporator as you could damage it.
Do not use a maechanical device or any artificial
means to speed up the thawing process other
than those recommended by the manufacturer.
A temperature rise of the frozen food packs,
during defrosting, may shorten their safe storage
life.
20
Use of the fridge compartment
Temperature regulation
The temperature of this compartment may be
regulated by rotating the knob (F), and may vary
bet een more or less +2°C and +8°C.
When the knob is rotated, the display flashes and
indicates the set temperature. After having set the
desired temperature, if the knob is not rotated ithin
5 seconds, the temperature of the freezer
compartment ill be indicated.
The temperature is automatically regulated and can
be increased to achieve a higher temperature
( armer) by rotating the thermostat knob to ard ●
settings or reduced (colder) rotating the knob
to ards ● settings.
Ho ever, the exact setting should be chosen
keeping in mind that the temperature inside the
refrigerator depends on:
• room temperature;
• ho often the door is opened;
• the quantity of food stored;
• location of appliance.
To shut off the refrigerator compartment, rotate the
knob (F) anticlock ise till position "O". In this
position the ord "OF" is indicated for 5 seconds.
The freezer compartment ill keep on orking.
We suggest placing the knob in the middle position to
obtain an internal temperature of approximately +5° C.
Once the refrigerator compartment is shut off, the
only temperature hich is indicated is that of the
freezer compartment. In this condition, the functions
minidac and shopping cannot be activated, and the
lighting in the refrigerator compartment ill be
s itched off.
Shopping Function
If you need to insert a large amount of arm food, for
example after doing the grocery shopping, e suggest
activating the Shopping function to chill the products
more rapidly and to avoid arming the other food
hich is already in the refrigerator.
The shopping function is activated by pressing key E
(several times if necessary) until the corresponding
icon appears
The shopping function shuts off automatically after
approximately 6 hours.
During the shopping function also the fan inside the
refrigerator compartment is automatically activated.
Note: the fan inside the refrigerator compartment is
automatically activated also hen the room
temperature is high (over 38°C), even though the
shopping function is not activated.
It is possible to de-activate the function at any time by
pressing key E (see paragraph "Function Activation").
Fresh food refrigeration
To obtain the best performance:
• do not store arm food or evaporating liquids in
the refrigerator;
• cover or rap the food, particularly if it has a
strong flavour.
• Position food so that air can circulate freely
around it.
Switching off
The appliance is shut off by pressing key (A) for more
than 1 second. After this, a countdo n of the
temperature from -3 -2 -1 ill be sho n.
When the appliance is shut off, display (D) also goes
off.
Activation of functions
Each time key E is pressed, the follo ing functions are
activated in a clock ise direction:
Symbol 5 : fast freeze function
Symbol 6 : Performance Optimization function
Symbol 7 : minidac function
Symbol 8 : shopping function
Symbol 7 : minidac function
No Symbol: Normal operation
Not more than one function can be activated at a time;
to de-activate the functions, press the key several
times until no icon appears
Important
If the ambient temperature is high or the
appliance is fully loaded, and the appliance is
set to the lowest temperatures, it may run
continuously causing frost to form on the rear
wall. In this case the dial must be set to a higher
temperature to allow automatic defrosting and
therefore reduced energy consumption.
25
MAINTENANCE
Unplug the appliance before carrying out
any maintenance operation.
Warning
This appliance contains hydrocarbons in its cooling
unit; maintenance and recharging must therefore
only be carried out by authorized technicians.
Periodic cleaning
Clean the inside ith arm ater and bicarbonate of
soda. Rinse and dry thoroughly.
Clean the condenser (black grill) and the
compressor at the back of the appliance ith a
brush or a vacuum cleaner. This operstion ill
improve the performance of the appliance and save
electricity consumption.
Periods of non-operation
When the appliance is not in use for long periods,
take the follo ing precautions:
remove the plug from the all socket;
remove all food;
defrost and clean the interior and all accessories;
leave the door ajar to allo air to circulate to prevent
unpleasant smells.
Defrosting
Frost is automatically eliminated from the evaporator
of the refrigerator compartment every time the motor
compressor stops, during normal use. The defrost
ater drains out through a trough into a special
container at the back of the appliance, over the
motor compressor, here it evaporates.
It is important to periodically clean the defrost
water drain hole in the middle of the refrigerator
compartment channel to prevent the water
overflowing and dripping onto the food inside.
Use the special cleaner provided, which you will
find already inserted into the drain hole.
D037
Interior light
If it becomes necessary to replace the lamp, press
on the rear hook and at the same time slide the
cover in the direction indicated by the arro .
Replace the lamp with one of the same
power (the maximum power is shown on the
light diffuser).
21
Use of the freezer compartment
Temperature regulation
The temperature of this compartment may be
regulated by rotating the knob (B), and may vary
bet een more or less -15°C and -24°C.
When the knob is rotated, the display flashes and
indicates the set temperature. After having set the
desired temperature, if the knob is not rotated ithin
5 seconds, the temperature of the freezer
compartment ill be indicated.
The temperature is automatically regulated and can
be increased to achieve a higher temperature
( armer) by rotating the thermostat knob to ard ●
settings or reduced (colder) rotating the knob
to ards ● settings.
Ho ever, the exact setting should be chosen
keeping in mind that the temperature inside the
freezer depends on:
• room temperature;
• ho often the door is opened;
• the quantity of food stored;
• location of appliance.
We suggest setting the knob to the middle position
to obtain an internal temperature of approximately
-18°C, hich guarantees proper freezing and
conservation of the frozen foods.
Freezing fresh food
The freezer compartment is suitable for long term
storage of commercially frozen and deep-frezen
food, and for freezing fresh food.
The maximum quantity of foods to freeze in 24 hours
is sho n on the serial number plate.
To freeze the amount of food indicated on the serial
number plate, place the food directly in touch ith the
cooling surface (remove the dra er or basket).
In case the food is frozen inside the dra ers or
baskets, the maximum quantity is slightly reduced.
Place the food to be frozen in the upper part of the
freezer, as this is the coldest point.
To freeze fresh foods, you ill need to activate the
rapid freezing function. Press key E (several times if
necessary) until the corresponding icon appears
After a pre-cooling period of 24 hours, place the foods
in the freezer.
The freezing process takes 24 hours. During this
period do not put other foods in the freezer.
This function stops automatically after 54 hours.
The function can be de-activated at any time by
pressing key E (see paragraph "Activation of
Functions").
Storage of frozen food
When first starting-up or after a period out of use,
before putting the products in the compartment let
the appliance run at least 12 hours on the fast freeze
setting. To obtain the best performance from this
appliance, you should:
if large quantities of food are to be stored, remove all
dra ers and baskets from appliance and place food
on cooling shelves.
Pay careful attention not to exceed load limit stated
on the side of the upper section ( here applicable).
Important
In the event of accidental defrosting, for example
due to a power failure, if the power has been off
for longer that the value shown in the technical
characteristics chart under “rising time”, the
defrosted food must be consumed quickly or
cooked immediately and then refrozen (after
cooling).
The freezer is provided ith the symbol
hich means that it is suitable for freezing fresh food
and for long term storage of frozen and deep-frozen
food.
Ice packs
There are t o ice packs in one dra er of the freezer.
In the event of a po er failure or malfunction, the ice
pack ill lengthen the amount of time it takes for the
frozen food to become too arm by several hours. The
ice pack can only fulfil this task optimally if it is placed in
the uppermost dra er, at the front, above the frozen
food.You can use the ice pack for cooling cold bags.
24
Hints for storage of frozen food
To obtain the best performance from this appliance,
you should:
• make sure that the commercially frozen
foodstuffs ere adequately stored by the retailer;
• be sure that frozen foodstuffs are transferred
from the foodstore to the freezer in the shortest
possible time;
• not open the door frequently or leave it open
longer than absolutely necessary.
• Once defrosted, food deteriorates rapidly and
cannot be refrozen.
• Do not exceed the storage period indicated by
the food manufacturer.
ill find sketches of various animals and food
types together ith the recommended storage
time (in months) from the time of freezing;
• do not put carbonated liquids (fizzy drinks,
etc.) in the freezer compartment as they may
burst.
Hints for freezing
To help you make the most of the freezing process,
here are some important hints:
• the maximum quantity of food hich can be
frozen in 24 hrs. is sho n on the rating plate;
• the freezing process takes 24 hours. No further
food to be frozen should be added during this
period;
• only freeze top quality, fresh and thoroughly
cleaned, foodstuffs;
• prepare food in small portions to enable it to be
rapidly and completely frozen and to make it
possible subsequently to tha only the quantity
required;
• rap up the food in aluminium foil or polythene
and make sure that the packages are airtight;
• do not allo fresh, unfrozen food to touch food
hich is already frozen, thus avoiding a rise in
temperature of the latter;
• lean foods store better and longer than fatty
ones; salt reduces the storage life of food;
• ater ices, if consumed immediately after
removal from the freezer compartment, can
possibly cause the skin to be freeze burnt;
• it is advisable to sho the freezing-in date on
each individual pack to enable you to keep tab of
the storage time;
• on the inner door or special card (if supplied) you
HINTS
Hints for refrigeration
Useful hints:
Meat (all types): rap in polythene bags and place
on the glass shelf above the vegetable dra er.
For safety, store in this way only one or two days
at the most.
Cooked foods, cold dishes, etc..: these should be
covered and may be placed on any shelf.
Fruit and vegetables: these should be thoroughly
cleaned and placed in the special dra er(s)
provided.
Butter and cheese: these should be placed in
special airtight containers or rapped in aluminium
foil or polythene bags to exclude as much air as
possible.
Milk bottles: these should have a cap and should
be stored in the bottle rack on the door.
Bananas, potatoes, onions and garlic, if not
packed, must not be kept in the refrigerator.
22
Thawing
Deep-frozen or frozen food, prior to being used, can
be tha ed in the refrigerator compartment or at
room temperature, depending on the time available
for this operation.
Small pieces may even be cooked still frozen, directly
from the freezer: in this case, cooking ill take longer.
Ice-cube production
This appliance is equipped ith one or more trays
for the production of ice-cubes. Fill these trays ith
ater, then put them in the freezer compartment.
Do not use metallic instruments to remove the
trays from the freezer.
Excessive temperature alarm
An increase in the temperature in the freezer
compartment (for example due to an po er failure)
is indicated by:
- flashing temperature;
- freezer compartment flashing (symbol 2);
- red illumination of display;
- sounding of buzzer.
When normal conditions are restored:
- the acoustic signal shuts off;
- the temperature value continues to flash;
- the display illumination remains red.
When you press key "E" to de-activate the alarm, the
highest temperature reached in the compartment
appears on indicator 4 for approximately 5 seconds.
At this point the flashing stops and the display
illumination changes over from red to hite.
During the alarm phase, the buzzer can be s itched
off by pressing key E; the illumination of the display
remains red until normal storage conditions are
restored.
Performance optimization function
The performance optimization function is activated
by pressing key E (several times if necessary) until
the corresponding icon appears
and some moving horizontal lines appear on the
display.
In this condition the chosen temperatures are
automatically set, in the best conditions for storing
food and therefore any possible operation through
the keys does not cause any change as long as this
function is activated.
It is possible to de-activate the function at any time
by pressing key E (see paragraph "Function
Activation").
23
B
A
Shelf holders
Yourappliance is equipped ith shelf retainers that
make it possible to secure the shelves during
transportation.
To remove them proceed as follo s:
Raise the shelf from the back, push it in the direction
of the arro until it is freed and remove the retainers.
Movable shelves
The alls of the refrigerator are equipped ith a
series of runners so that the shelves can be
positioned as desired.
D338
PRXXX
Positioning the door shelves
To permit storage of food packages of various sizes,
the door shelves can be placed at different heights.
To make these adjustments proceed as follo s:
Gradually pull the shelf in the direction of the arro s
until it comes free, then reposition as required.
SWITCH
Air circulation
The refrigerator compartment is provided ith a
special fan D.A.C. (Dynamic Air Cooling) hich is
activated by pressing key E (several times if
necessary) until the corresponding icon appears ;
if the green arning light is on (fig.1), this means
that the fan is orking.
We suggest using the fan (D.A.C.) hen the room
temperature is higher than 28°C.
This device enables the food to cool quickly and
helps to keep a regular temperature inside the
refrigerator compartment.
The special fan D.A.C. (Dynamic Air Cooling) is
automatically activated hen the room temperature
is higher than 38°C or hen the Shopping function is
activated.
It is possible to de-activate the function at any time
by pressing key E (see paragraph "Function
Activation").
Fig. 1

Other manuals for IKE 309-5-2T

1

This manual suits for next models

1

Other Kuppersbusch Refrigerator manuals

Kuppersbusch FK4505.0i Operation manual

Kuppersbusch

Kuppersbusch FK4505.0i Operation manual

Kuppersbusch IKE269-5T2 User manual

Kuppersbusch

Kuppersbusch IKE269-5T2 User manual

Kuppersbusch KEL 580 series User manual

Kuppersbusch

Kuppersbusch KEL 580 series User manual

Kuppersbusch FKG8500.1I User manual

Kuppersbusch

Kuppersbusch FKG8500.1I User manual

Kuppersbusch IKE2360-1 User manual

Kuppersbusch

Kuppersbusch IKE2360-1 User manual

Kuppersbusch IKE238-7 User manual

Kuppersbusch

Kuppersbusch IKE238-7 User manual

Kuppersbusch IKF 209-4 User manual

Kuppersbusch

Kuppersbusch IKF 209-4 User manual

Kuppersbusch IKE 188-5 User manual

Kuppersbusch

Kuppersbusch IKE 188-5 User manual

Kuppersbusch IKEF30804Z3 User manual

Kuppersbusch

Kuppersbusch IKEF30804Z3 User manual

Kuppersbusch IKEF2380-0 User manual

Kuppersbusch

Kuppersbusch IKEF2380-0 User manual

Kuppersbusch FKF4800.0i User manual

Kuppersbusch

Kuppersbusch FKF4800.0i User manual

Kuppersbusch FK2545.0i Operation manual

Kuppersbusch

Kuppersbusch FK2545.0i Operation manual

Kuppersbusch IKE 240-2 User manual

Kuppersbusch

Kuppersbusch IKE 240-2 User manual

Kuppersbusch FKG8300.1i Operation manual

Kuppersbusch

Kuppersbusch FKG8300.1i Operation manual

Kuppersbusch KE3800-0-2T User manual

Kuppersbusch

Kuppersbusch KE3800-0-2T User manual

Kuppersbusch IKEF 238-5 User manual

Kuppersbusch

Kuppersbusch IKEF 238-5 User manual

Kuppersbusch IKE 1970-1 User manual

Kuppersbusch

Kuppersbusch IKE 1970-1 User manual

Kuppersbusch IK 164-4 Z User manual

Kuppersbusch

Kuppersbusch IK 164-4 Z User manual

Kuppersbusch FKF8800.0i Operation manual

Kuppersbusch

Kuppersbusch FKF8800.0i Operation manual

Kuppersbusch IKE1780-0E Operation manual

Kuppersbusch

Kuppersbusch IKE1780-0E Operation manual

Kuppersbusch IKE 2380-1 User manual

Kuppersbusch

Kuppersbusch IKE 2380-1 User manual

Kuppersbusch IKE3390-3 User manual

Kuppersbusch

Kuppersbusch IKE3390-3 User manual

Kuppersbusch KE 680-1-3T User manual

Kuppersbusch

Kuppersbusch KE 680-1-3T User manual

Kuppersbusch FK4500.0i Operation manual

Kuppersbusch

Kuppersbusch FK4500.0i Operation manual

Popular Refrigerator manuals by other brands

coldline Modi Maintenance handbook

coldline

coldline Modi Maintenance handbook

Brandt BFD4522SW instruction manual

Brandt

Brandt BFD4522SW instruction manual

Kenmore 2318604B Use & care guide

Kenmore

Kenmore 2318604B Use & care guide

KitchenAid KUIC15NHZS quick start guide

KitchenAid

KitchenAid KUIC15NHZS quick start guide

Frigidaire FGHC2334K parts catalog

Frigidaire

Frigidaire FGHC2334K parts catalog

LG LSC27935SB Manual de usuario

LG

LG LSC27935SB Manual de usuario

Galanz GLR76TBKE instruction manual

Galanz

Galanz GLR76TBKE instruction manual

Blomberg SSM 1540 instruction manual

Blomberg

Blomberg SSM 1540 instruction manual

Panasonic EverVolt Standard EVAC-105-4 Installation & service manual

Panasonic

Panasonic EverVolt Standard EVAC-105-4 Installation & service manual

Kenmore 240432307 Use & care guide

Kenmore

Kenmore 240432307 Use & care guide

NEFF K154 Series user manual

NEFF

NEFF K154 Series user manual

U-Line Origins Series Service and parts manual

U-Line

U-Line Origins Series Service and parts manual

Frigidaire FRS26LF8C parts catalog

Frigidaire

Frigidaire FRS26LF8C parts catalog

Frigidaire FSC23F7D parts catalog

Frigidaire

Frigidaire FSC23F7D parts catalog

Beko GN1416223ZX user manual

Beko

Beko GN1416223ZX user manual

GE TBX17 Use and care guide

GE

GE TBX17 Use and care guide

Sub-Zero UC-24B Specifications

Sub-Zero

Sub-Zero UC-24B Specifications

Helmer i.series Service manual

Helmer

Helmer i.series Service manual

manuals.online logo
manuals.online logoBrands
  • About & Mission
  • Contact us
  • Privacy Policy
  • Terms and Conditions

Copyright 2025 Manuals.Online. All Rights Reserved.