Assembly instructions
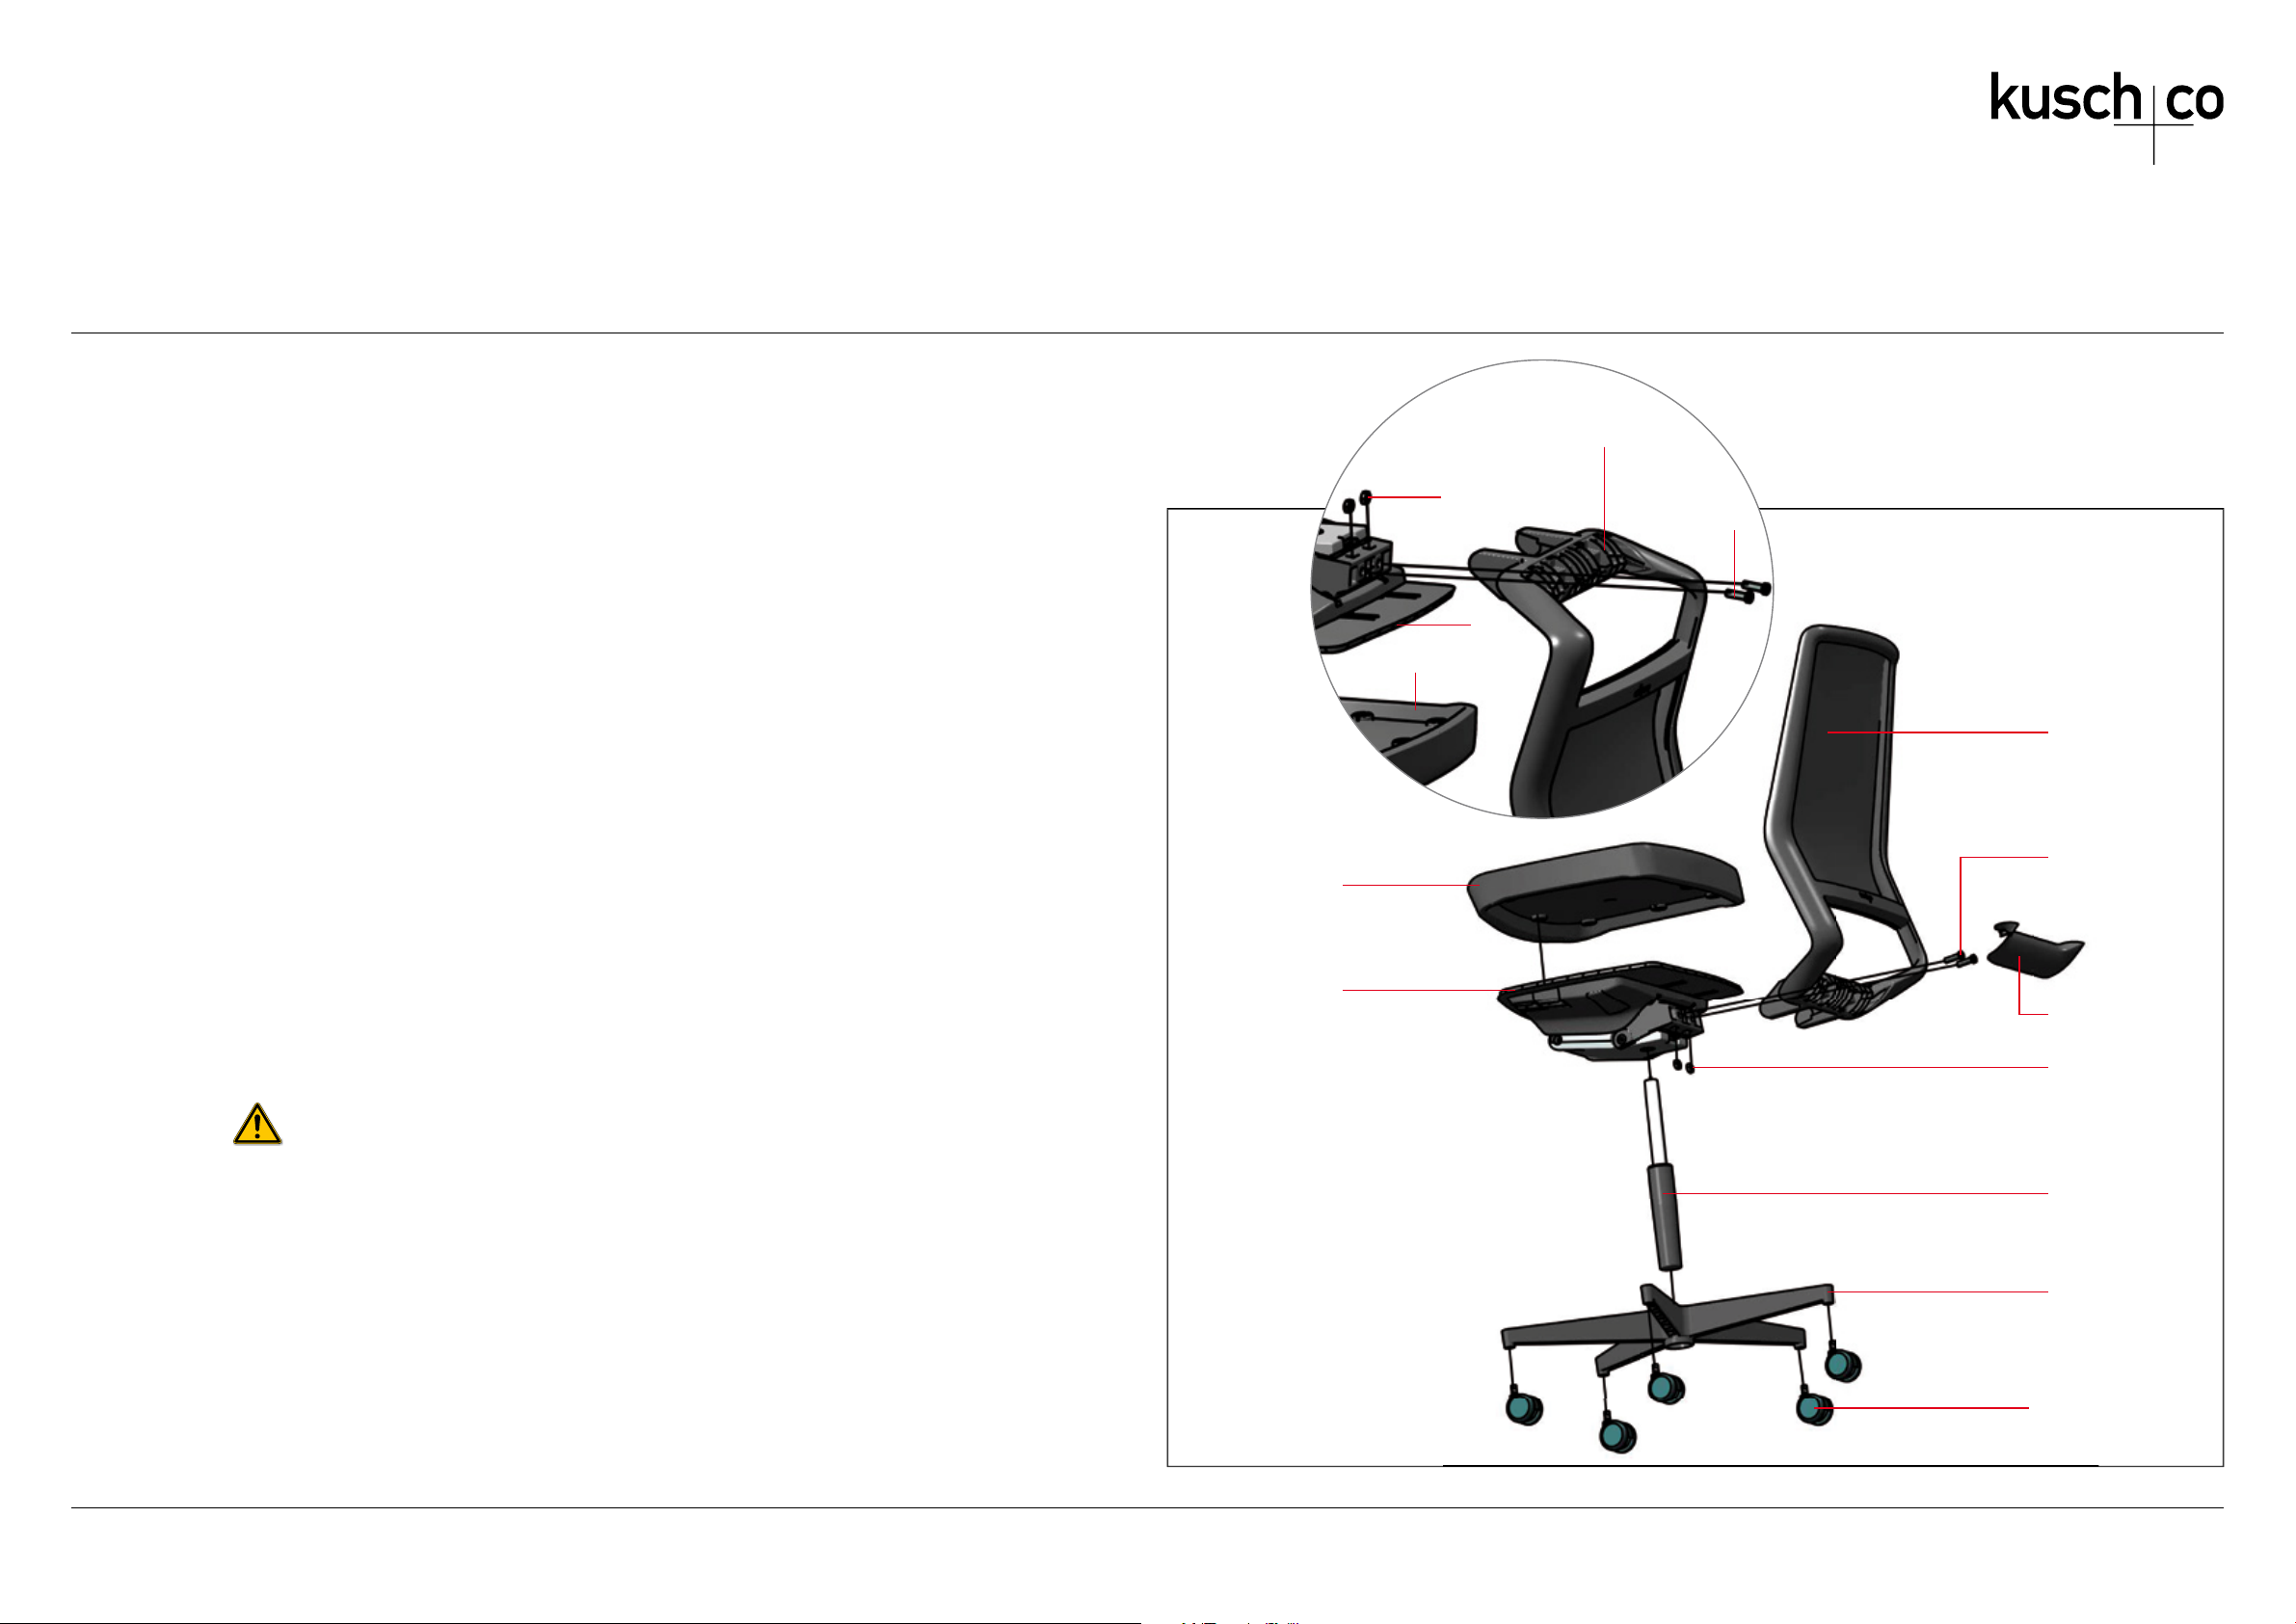
A Take the parts out of the cardboard packaging.
B Remove the plastic protective caps from the castors and insert the castors (3/4) into the base
(5) until they lock into place.
C Insert the thick bottom section of the gas spring (7) into the cylindrical opening in the middle of
the base as far as it will go without applying force.
D Fasten the upholstered seat (2a) to the pre-assembled seat unit via the intended clips. The seat
should click audibly into place. Lay the pre-assembled seat unit (2), either without or with arm-
rests) with the upholstered seat pad facing down onto a flat surface; insert the 2 nuts (8) into
the slots and let them drop to the bottom.
E Insert the backrest (1) into the openings, as seen in the drawing; then insert the 2 threaded
screws (9) through the holes in the backrest, and fasten them by means of the enclosed
hex key, AF 7 mm, until hand-tight (approx. 40 Nm). Clip on the cover profile (6) and press
until it clicks into place, if necessary use the back of the hand or a soft object to make the
cover click into place.
F Turn the seat and backrest unit right side up and attach it onto the head of the gas spring.
G Sit on the task chair and test all functions (especially height adjustability).
Safety advice!
Only qualified personnel are allowed to replace or service the gas spring. Do not heat the gas spring
nor open it with force.
If the flooring is replaced, we advise to have the castors replaced as well. (i.e. when a hard flooring
is replaced by a soft flooring, f.i. carpeting, or a soft flooring by a hard flooring, f.i. parquet, tiles, or
plastic flooring.)
Kusch+Co
GmbH
&
Co.
KG
P.O.
Box
1151
59965
Hallenberg
Germany
T
+49
2984
300-0
F
+49
2984
3004
-
1
00
[email protected] www.kusch.com
6000 SÃO PAULO
DESIGN BY NORBERT GEELEN
(1)
(3/4)
(5)
(7)
(8)
(9)
(6)
(2)
(2a)
(9)
(2a)
(1)
(8)
(2)
11/2014/0.25


