Kuuma Elite 2000 User manual

IMPORTANT SAFEGUARDS
Read all instruction and warnings before operating.
If this product is dealer installed, leave these instructions for end user for future reference.
Do not discard this manual – Keep in safe place
OWNER’S MANUAL
MARINE BBQ/GRILLS
Proudly imported by: Manufactured by:
Unit 11/65 Business Street
Yatala, QLD 4207
+61 (0)7 3807 6033
Camco Manufacturing, Inc.
121 Landmark Drive, Greensboro, NC
27409
001-336-688-7661
info@camco.net
www.camco.net
Read these instructions for use carefully. Familiarise yourself with the appliance before
connecting it to its gas container. Keep these instructions for future reference.
IMPORTANT

`
Page 1
IMPORTANT
THE INSTRUCTIONS PACKAGED WITH THIS APPLIANCE CONTAIN IMPORTANT INFORMATION
ABOUT INSTALLATION AND USE.
ONLY USE IN WELL-VENTILATED AREAS.
CARBON MONOXIDE HAZARD—USING THIS APPLIANCE IN AN ENCLOSED SPACE MAY CAUSE
DEATH. DO NOT USE IN CARAVANS, TENTS, MARINE CRAFT, CARS, MOBILE HOMES OR
SIMILAR LOCATIONS
PROPANE & BUTANE/PROPANE DISPOSABLE BOTTLE GAS ONLY
DO NOT USE OR STORE FLAMMABLE MATERIALS IN THE APPLIANCE STORAGE DRAWER OR
NEAR THIS APPLIANCE
DO NOT SPRAY AEROSOLS IN THE VICINITY OF THIS APPLIANCE WHILE IT IS IN OPERATION
DO NOT MODIFY THIS APPLIANCE
DO NOT USE THIS APPLIANCE AS A SPACE HEATER
If a gas leak is suspected due to the smell of gas or for any reason, remove the gas cylinder or
switch off the gas cylinder IMMEDIATELY. Extinguish all naked lights including cigarettes. Propane
and butane gases are heavier than air and will collect at a low level. Never check for l
eaks with a
naked flame.
LP (PROPANE) gas is heavier than air and any leakage will collect in low level unventilated areas.
Gas bottles shall be sited in a well-ventilated location as per Australian Standards.
CAUTION: accessible parts may be very hot. Keep young children away.
This appliance shall only be used in an above ground open air situation with natural ventilation,
without stagnant areas, where gas leakage and products of combustion are rapidly dispersed by
wind and natural convection.
Any enclosure in which the appliance is used shall comply with one of the following:
(A) An enclosure with walls on all sides, but with no overhead cover.
(B) Within a partial enclosure that includes an overhead cover and no more than two walls.
(C) Within a partial enclosure that includes an overhead cover and more than two walls, the
following shall apply:
(1) At least 25% of the total wall area is completely open.
(2) 30% or more in total of the remaining wall side, back and front wall areas is open and
unrestricted.
(3) In the case of balconies, 20% or more of the total wall area shall remain open and
unrestricted.’
Do not use this appliance if it is leaking, damaged or does not operate properly.
For your records
Model: __________________________ Serial No: _________________________

`
Page 2
INTRODUCTION
Thank you for selecting a Kuuma marine grill. Your unit was carefully inspected and tested at our factory.
Please take the time to read this manual carefully; many of its instructions are essential to the safe
operation of your new barbecue.
Because of the continuing refinement of our product designs, your barbecue may possess features not
discussed in the manual. We have tried to supply all the information you might need, so please take time
to read this manual before installing and using your barbecue.
USE OUTDOORS ONLY: Below are examples of outdoor areas (images D1, D2, D3, D4, D5)
IMPORTANT
This appliance must only be serviced by an authorized person.
Do not use this appliance if it is leaking, damaged or does not operate properly.
Store gas cylinders in cool, well-ventilated area out of reach of children. Any indoor storage shall
comply with AS/NZS 1596.

`
Page 3
Kuuma Products advises strongly against unauthorized modification of this product, but we do encourage
you to correct problems which may arise by undertaking the simple repairs and maintenance described in
this manual.
This manual covers the following models:
Elite 2000
Profile 1400
Each model Comes with:
1 x (this) Manual
1 x Quick release rail mount
1 x Gas Hose (For connecting to Propane gas bottle)
1 x Regulator (Works with disposable Coleman style gas bottles, and when fitted to the hose, propane bottles)
1 x BBQ Grill
Operation and Maintenance
A – IMPORTANT: ALWAYS BE CAREFUL WHEN USING GAS!
•This instruction manual contains important information necessary for safe use of this appliance.
•Read and follow all warnings and instructions before using this appliance.
•Keep this manual for future reference.
•These appliances must be used outdoors only and away from flammable materials.
•Do not touch hot surfaces. Use Handles or Knobs. This appliance will be hot during and after use. Use
insulated oven mitts or gloves for protection from hot surfaces.
•Keep children and pets away from the grill at all times.

`
Page 4
•Do not move the appliance when in use. Allow the grill to cool to less than 115oF[46oC] before moving or
storing.
•Do not use the appliance if damaged in any manner or has leaks, call Ocean Solutions International +61
•Any modification to this appliance may be dangerous and should not be performed.
•Do not operate grill on a combustible construction.
•NEVER leave cooking food unattended. Open lid frequently and cook with lid open as much as possible
when cooking at higher temperatures.
•Carbon monoxide (CO) is an odorless, clear gas that can cause flu-like symptoms, sickness, illness and
possibly death if produced inside an enclosed area without proper ventilation. NEVER use indoors.
oProfile 1400 only. Never cook with the lid closed.
B – UNPACKING & INSTALLATION:
Unpack your grill taking care to remove all packaging materials. The grill is completely assembled, no
assembly required. Inspect the grill for damage prior to use. If damage is found, do not attempt to operate
your grill. Contact Ocean Solutions International +61 (0)7 3807 6033 or e-mail at
C – GRILL INSTALLATION:
This appliance must be securely mounted when used on a boat or placed on a sturdy, level, non-
combustible surface when used on shore. Kuuma offers a full line of mounting kits and hardware (sold
separately). Visit http://www.kuumaproducts.com for mounting option details.
The mounting location must be outdoors in an area free of overhead combustible materials and provide a
minimum clearance of 60cm from the sides and back, and 1.5m below any combustible materials.
This appliance is not intended to be installed in or on recreational vehicles.
Installation must conform to AU/NZS 5601. Units are not designed to be permanently connected to gas
cylinders or gas supply. Gas supply must be disconnected upon storage. Gas must not be connected to the
device while travelling.
D – GAS SUPPLY:
D-1 INSTALLING THE GAS CONTROL:
• Position the control valve or regulator as shown in FIG. 1a & 1b, aligning the notch on the orifice fitting with the
dimple on the burner tube.
• Gently insert the orifice fitting into the burner tube until dimple aligns with groove on orifice fitting.
• Rotate180 degrees
• Pull back slightly on gas control to check that it is locked in place.

`
Page 5
D-2 – CONNECTING GAS SUPPLY:
Always connect or disconnect the gas supply outdoors in a well-ventilated area and never near an open flame, heat
source or spark.
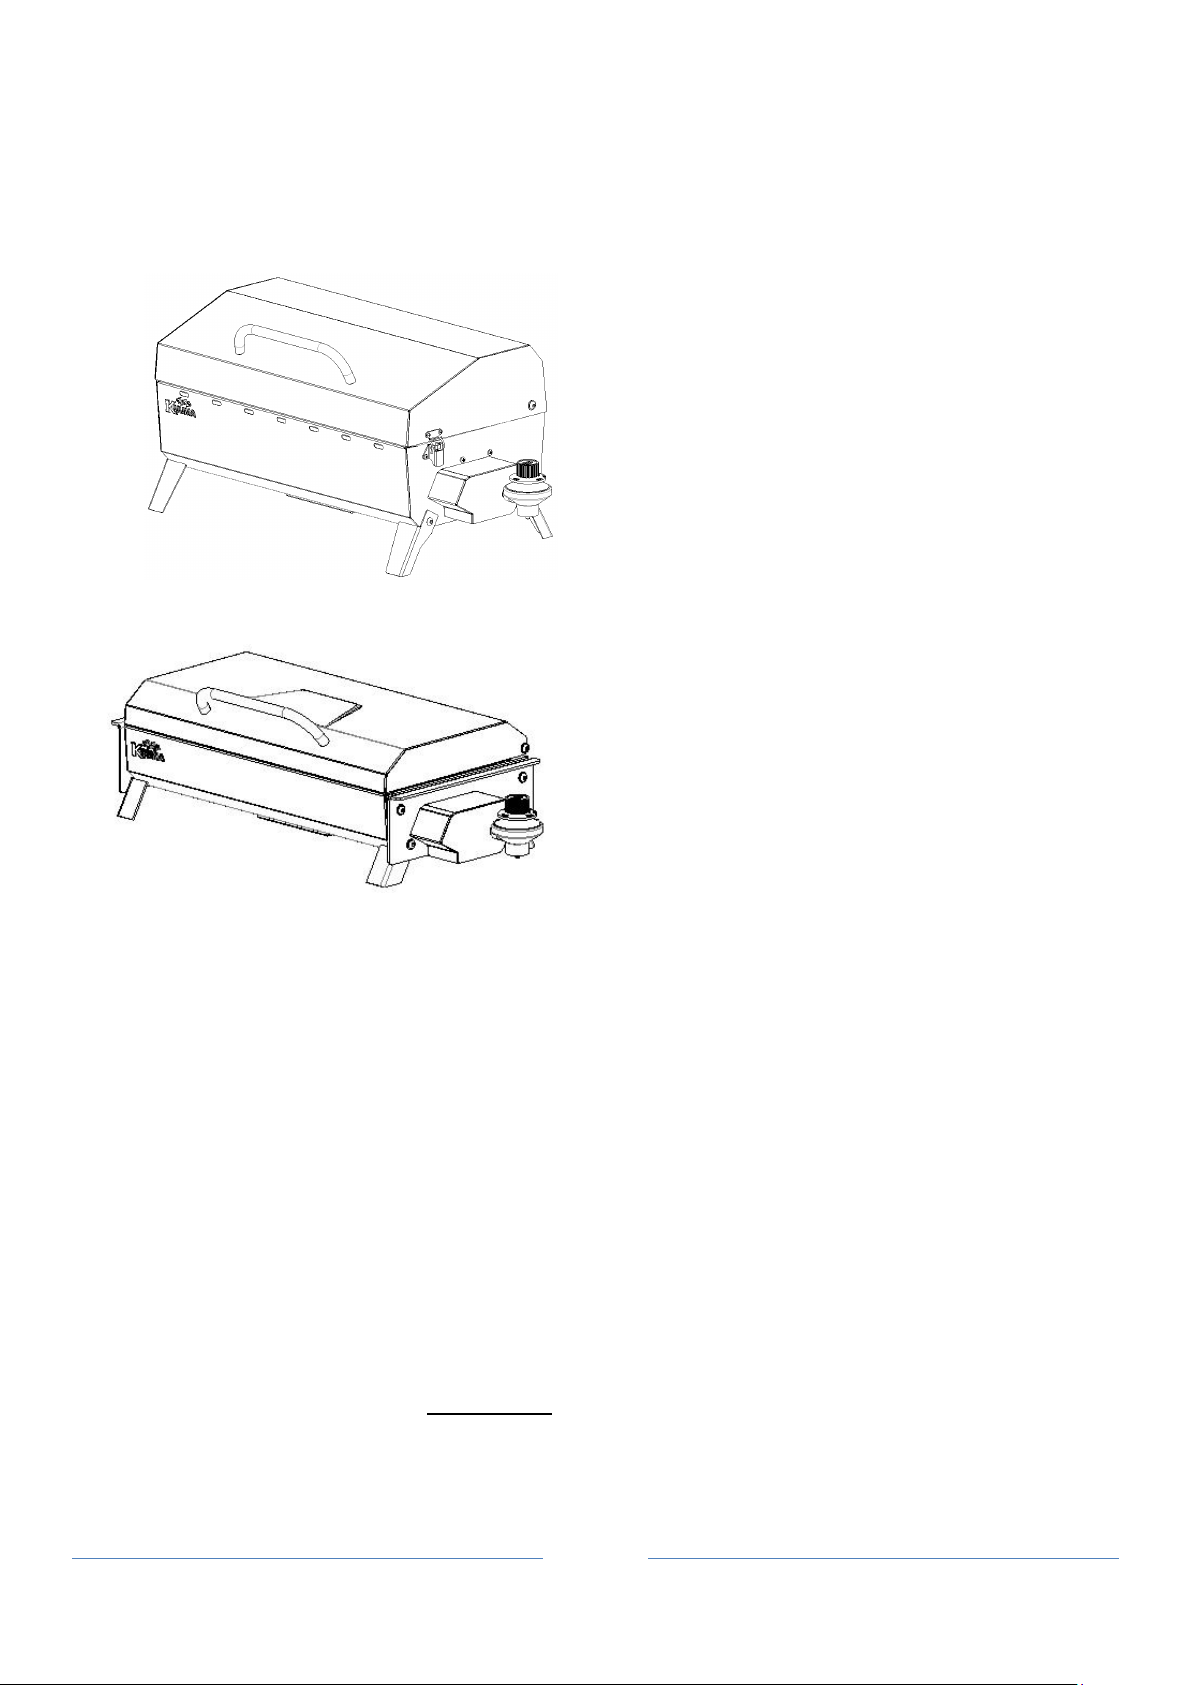
All models (FIG. 1a) have an integral regulated control valve and are intended to be used with a standard “Coleman
style” throwaway propane bottle or a propane connection hose that connects to larger LP gas cylinders. Hoses must
be compliant to Australian standards.
This appliance shall only be used with disposable Coleman propane 1lb cartridges certified to DOT-39
NRC 232/290 M1110.
IT MAY BE HAZARDOUS TO ATTEMPT TO FIT OTHER TYPES OF GAS CONTAINERS’
Standard “Coleman” style throwaway cylinders are valve
operated; they can be detached from the appliance for easy
storage or transportation (even when not empty).
IMPORTANT: Always check the bottle and seals before use.
Never use a bottle if damaged or any seals are missing from
the bottle or the appliance’s regulator. Discard bottles if
dust, dirt or rust particles are in the outlet valve area.
IMPORTANT: Review instruction and warnings on the
propane bottle as indicated by arrow in FIG. 1.
Remove cap from end of propane bottle. Cap should always
be kept on bottle when not in use to prevent dirt and debris
from entering regulator valve.
• Verify regulated control valve is in the “OFF” position,
turn to “OFF” if needed.
• Insert threaded end of the gas bottle into regulated
control valve and hand tighten. Do not use tools! Over-
tightening can damage threads on regulator.
• Perform a leak test, refer to “SECTION H – LEAK TESTING”
• When the existing canister is empty, refer to section “H – REMOVING GAS CANISTER”.
D-3 – Checking gas levels in gas bottles
1. Do NOT use boiling water, as you would risk scalding yourself. Filling a bucket or large jug with hot tap
water from your home should work fine.
2. Using care, SLOWLY pour the hot water down one side only of the gas bottle. QUICK TIP: More water is
better, as it will make it easier to feel the gas bottle level indicator difference in temperature to check gas
bottle level. I actually fill a cleaning bucket with hot tap water when I check gas bottle level.
3. A line of condensation may appear as your gas bottle level indicator to check gas bottle level. If not:
4. Wait a few seconds and then run your hand down the same side of the gas bottle, where you poured the
water to tell how much gas in gas bottle.
5. You should feel a change of temperature to tell how much gas is in gas bottle.
If you feel no difference, the gas bottle level may well be empty.
Be careful not to scald yourself with the hot water when you check gas bottle level!

`
Page 6
E – LIGHTING THE BURNER:
Read all instructions before attempting to light your grill and never use the grill until the instructions have
been read carefully and understood. Also, make sure that:
•The control valve and or regulator is in the “OFF” position
•The gas supply is connected
•There are no leaks
•The venturi is not blocked
•It is securely mounted to one of the available Kuuma grill mounting options.
WARNING:
•LID MUST BE OPEN WHEN LIGHTING APPLIANCE BURNER. Failure to open the appliances lid during
the lighting procedure could result in a fire or explosion that could cause serious bodily injury, death
or property damage.
•Do not lean over the grill when lighting. Always keep your face and body at least 18in (46cm) away
from the grill while lighting and in use.
•Do not obstruct flow of ventilation air. Maintain a minimum clearance of 3in (8cm) from the back of
the grill and noncombustible construction such as a concrete or brick wall.
E-1 MANUAL LIGHTING INSTRUCTIONS:
1. Verify gas supply is connected and control valve/regulator is in the “OFF” position.
2. Open the lid of the appliance.
3. Insert a lit match or utility lighter through the access hole; keep the flame adjacent to the burner,
refer to FIG. 2 below.
4. Depress the control knob and rotate to the “HIGH” position.
5. Remove match or utility lighter from access hole and visually confirm ignition has occurred.
6. Turn control knob to desired setting and grill is ready for use.
IMPORTANT: If burner fails to light after three attempts, turn
the control knob to the “OFF” position and check that the
burner outlet ports and the venturi tube are not blocked, refer
to FIG. 3.
It is possible that small insects and spiders could find their way
into the venturi tube and make nests or webs that could reduce or restrict the flow of gas. This typically
FIG. 2
FIG. 3

`
Page 7
causes a smoky, yellowish flame or prevents the burner from lighting. It could even cause gas to burn inside
the burner tube, which could seriously damage the grill.
If a flame-out occurs, turn control knob to the “OFF” position and wait 5 minutes before relighting.
F – TURNING OFF THE APPLIANCE:
1. Turn the control knob to the “OFF” position.
2. After flame has self-extinguished, remove the gas supply cylinder and allow unit to cool to 46oC (115oF)
before moving or storing.
IMPORTANT:
Cylinders must be stored outdoors out of the reach of children and must not be stored inside a building or
any other type of enclosed area.
Do not store appliance inside a building with a propane cylinder attached.
G – OPERATION:
•It’s recommended that protective gloves be worn to handle components which may be hot during
operation.
•Before start-up, verify legs are fully open and in place and grill is on a sturdy, level non-combustible
surface or securely mounted to one of the available Kuuma grill mounting options.
•When pre-heating or post-heating the appliance, never allow the grill to go above 260-290oC (500-550oF)
or there will be discoloration.
•If cooking at high temperatures, open lid frequently or cook with lid open as much as possible to avoid
discoloring the lid and reducing the anti-corrosion properties of the stainless steel.
•Any time fatty foods are being cooked over an open flame, flare-ups can occur. To help control flare-
ups, we suggest using leaner cuts of meat or trimming excess fat from the meats being cooked.
•Excess build-up of burned marinades absorbs grease and cause flare-ups. Always clean before use.
•Only use this appliance outdoors!
•Do not attempt to light the appliance if the odor of gas is present.
H – REMOVING GAS CYLINDER:
The gas cylinder may be removed even if it is not empty. Only replace, remove or install gas cylinders
outside and away from people and ignition sources.
•Verify control knob or valve is in the “OFF”
position.
•Firmly hold the regulator in one hand while
grasping the cylinder in the other hand and
then remove the cylinder by turning in the
clockwise direction until it is free and then
pull down, refer to FIG. 7.
Never discard a gas cylinder that is not
completely empty.

`
Page 8
I – LEAK TESTING:
•During Leak testing, keep grill away from open flames or sparks and do not smoke.
•Grill must be leak tested outdoors in a well-ventilated area. Leak test must be repeated each time
propane cylinder is replaced or after it is removed for storage.
•Never attempt to light a grill if odor of gas is present.
1. Verify control valve is in the “OFF” position and gas supply is connected.
2. Brush a soapy solution onto connection between cylinder and regulator.
3. Look for growing bubble to appear. If bubbles appear, re-tighten propane cylinder and repeat steps 1 &
2 until no leaks are found.
4. If no leaks are found proceed to lighting the grill.
If you can’t stop a leak, remove cylinder from the regulator and check for damaged threads, dirt and debris
on the regulator or the cylinder fitting. If threads are damaged on any item, DO NOT USE the item until it is
replaced. Also check to see if anything is obstructing the flow of gas at the regulator or cylinder connection.
Remove any obstruction that may be found and repeat leak test steps.
See “SECTION L – ACCESSORIES” for replacement parts.
J – CLEANING AND MAINTENANCE:
Never modify the grill, any modification may be dangerous and could cause injury or property damage.
To keep your new grill looking and operating properly, we recommend that the grill is thoroughly cleaned after
each use. By nature, stainless steel is rust resistant; however, the buildup of grease and food in and on the grill can
and will deteriorate the grill over time if not removed. A protective layer of “chromium-oxide” on the outer
surface is the reason stainless steels do not rust. Oxygen coming in contact with the Chromium in the metal
creates this protective layer. If food, grease, or moisture covers the outer surface, oxygen can’t react with the
Chromium and create the protective chromium-oxide layer and surface rusting will occur. To minimize this effect:
•Immediately after grilling, use a stainless steel or brass wire brush and rub the cooking grate clean.
•After grill has cooled:
oRemove cooking grate and rub back side with wire brush
oUsing the wire brush, rub and clean all build-up from “Heat Plate” or Lift and Clean Liner.
oEmpty any, and all grease from grease tray
oRemove any food particles or build up on or in the grill
oUse soap and water to thoroughly clean cooking area and adjacent surfaces and the cooking
grate. If needed to remove stubborn burnt-on buildups inside the grill or on the cooking grate,
use a commercial “oven” cleaner. If an oven cleaner is used, be sure to thoroughly clean with
soap and water afterwards.
oRinse with fresh water and then dry.
For technical assistance with disassembly or spare parts call Ocean Solutions International +61 (0)7 3807 6033 or
e-mail at [email protected]

`
Page 9
K – STORAGE AND TRANSPORT:
After use, wait until appliance is cool before preparing for storage and
transport.
Remove propane supply cylinder if not already done; make
sure control knob is in the “OFF” position before doing this.
Clean the grill
Closed the lid and latch shut to secure
Fold leg up to store position
Grill is ready to carry or store
L – Gas Usage & Specifications
Model
Gas Rates
Injector size
ELITE 2000
17 MJ/H
1.03 mm
PROFILE 1400
16.2 MJ/H
0.99 mm
Dimensions:
Elite 2000 – 68.6 (L) x 38.1 (D) x 33 (H) cm 11.4 kg
Profile 1400 – 65.9 (L) x 35.7 (D) x 19.8 (H) cm 6.4 kg
M – TROUBLE SHOOTING:
Problems
Probable Cause/Remedies
The burner does not light
-No gas flow: check that there is still gas in the cylinder
-Valve “OFF”; turn control valve is “ON”
-Obstructed gas flow: clean burner and orifice to remove
obstruction
-Contact your service agent
The burner does not
burn smoothly or goes
out
-No gas flow; check that there is still gas in the cylinder
-Obstructed gas flow; clean burner and orifice to remove
obstruction
-Contact your service agent
Large plume of flame on
the burner surface
-Obstructed gas flow; clean burner venturi, possible spider
webs or insects inside
-Contact your service agent
Insufficient heat
-Injector or venturi tube is obstructed; clean
-Contact your service agent

`
Page 10
Excessive flare-up
-Excessive cooking temperature: change cooking temp to
low, leave lid open
-Grease and/or residue build-up; clean components
-Excessive fatty meats; trim fat before grilling
-Excessive oils in marinades; use non-oil base
-Contact your service agent
Yellow sooty flame
-Obstructed gas flow; clean burner and valve orifice and
remove any debris/spider webs
-Contact your service agent
Hot spots
-Grill not level; level grill
-Grease or residue build-up; clean components
-Excessive fatty meats; trim fat before grilling
-Excessive oils in marinades; use non-oil base
-Contact your service agent
N – AVAILABLE ACCESSORIES
Camco only recommends using accessories and replacement parts from Camco Manufacturing. Camco
accepts no responsibility for damage or malfunction due to the use of accessories and/or replacement parts
from other brands. Please contact Ocean Solutions International +61 (0)7 3807 6033 or e-mail at
accessories may not be available in Australia, or will be special orders in Australia)
Kuuma Grill Cover/Tote Bag
•58300 – To suit Profile 1400
•58303 – To suit Elite 2000
•58410 – BBQ Protector
Cooking accessories
•58380 – Stainless steel fish tray
•58390 – Cast aluminium plate
•58384 – Stainless steel skewers
•58387 – Stainless steel fish basket
•58233 – Large food tray (With utensil hooks) (Fits Elite 2000 only)
•58371 – 10 piece stainless steel nesting cookware
•58376 – 10 piece ceramic/stainless steel nesting cookware
Mount Solutions
•58180 – 60 degree rod holder BBQ mount
•58196 – Adjustable rod holder BBQ mount – Ball & Socket design
•58182 – Inboard/Outboard rail BBQ Mount
•58181 – Direct above BBQ rail mount
•58183 – Universal rail BBQ mount
•58195 – Quick release rail BBQ mount (Type that comes with unit)
•58197 – Pontoon BBQ mount adaptor
•58090 – RV/Caravan/Camper BBQ mount

`
Page 11
NOTES
CUSTOMER SERVICE
In case of continued difficulty, issues or questions, please contact Ocean Solutions
International at:
Proudly imported by:
Ocean Solutions International
11/65 Business St
Yatala, QLD 4207
+61 (0)7 3807 6033
E-mail: sales@oceansolutions.com.au
Website: www.oceansolutions.com.au
Manufactured by:
Camco Manufacturing, Inc.
121 Landmark Drive
Greensboro, NC 27409 USA
001-336-688-7661
E-mail: info@camco.net.
Website: www.camco.net
This manual suits for next models
1
Table of contents
Other Kuuma Grill manuals
Popular Grill manuals by other brands

Campingaz
Campingaz Master 3 Classic Series Assembly instructions

Princess
Princess 112243 Instructions for use

Fisher & Paykel
Fisher & Paykel DCS BH136RGIL quick start guide

Axtschlag
Axtschlag Essential Flaming Salmon Board instruction manual

Star Manufacturing
Star Manufacturing 20 SERIES Installation and operating instructions

Westfalia
Westfalia 141838 instruction manual

Sure Heat
Sure Heat Wild Country Renaissance Tuscany 4 Operating and assembly instructions

White and Brown
White and Brown S 131 LAS TAPAS user manual

Weber
Weber Genesis E-330 owner's guide

Lynx
Lynx ASADO L30AGF Care & use/installation

tepro
tepro GrEEnDAlE instruction manual

Fagor
Fagor BBC-846 - 2008 manual