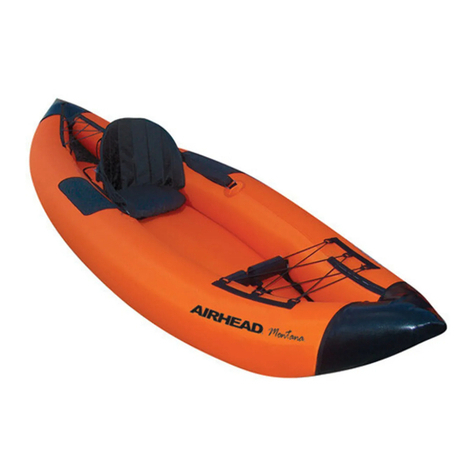
Kwik Tek Airhead AHTK-1 User manual

AIRHEAD TRAVEL KAYAK SPECIFICATIONS
Model # Maximum Capacity Length Beam Draft Dry Weight
AHTK-1 1 person / 300 lbs.
(136 kg) 9 ft. 9 in.
(2.97 m) 32"
(81cm) 2" (5cm) 27.7 lbs.
(12.6 kg)
AHTK-2 2 person / 500 lbs.
(227 kg) 12 ft.
(3.66 m) 32"
(81cm) 2" (5cm) 36.3 lbs.
(16.5 kg)
AHTK-3 2 person / 400 lbs.
(181 kg) 10 ft. 3 in.
(3.12 m) 32"
(81cm) 2" (5cm) 21.5 lbs.
(9.8 kg)
AHTK-5 2 person / 400 lbs.
(181 kg) 10 ft. 3 in.
(3.12 m) 32"
(81cm) 2" (5cm) 21.5 lbs.
(9.8 kg)
AHTK-6 1 person / 200 lbs.
(91 kg) 9 ft. 1 in.
(2.79 m) 41"
(104cm) 2" (5cm) 15 lbs.
(6.8 kg)
ESPECIFICACIONES DEL KAYAK DE VIAJE AIRHEAD
Modelo
# Capacidad máxima Longitud Manga Profundi
dad Peso Seco
AHTK-1 1 persona / 300 lbs. 9 ft. 9 in. 32" 2" (5cm) 27.7 lbs.
(136 kg) (2.97 m) (81cm) (12.6 kg)
AHTK-2 2 persona / 500 lbs. 12 ft. 32" 2" (5cm) 36.3 lbs.
(227 kg) (3.66 m) (81cm) (16.5 kg)
AHTK-3 2 persona / 400 lbs. 10 ft. 3 in. 32" 2" (5cm) 21.5 lbs.
(181 kg) (3.12 m) (81cm) (9.8 kg)
AHTK-5 2 persona / 400 lbs. 10 ft. 3 in. 32" 2" (5cm) 21.5 lbs.
(181 kg) (3.12 m) (81cm) (9.8 kg)
AHTK-6 1 persona / 200 lbs.
( 91 kg) 9 ft. 1 in.
(2.79 m) 41"
(104cm) 2" (5cm) 15 lbs.
(6.8 kg)
SPÉCIFICATIONS DU KAYAK DE VOYAGE AIRHEAD
N° de
modèle Capacité maximale Longueur Largeur Tirant
d’eau Poids à sec
AHTK-1 1 personne / 300 lbs.
(136 kg) 9 ft. 9 in.
(2.97 m) 32"
(81cm) 2"
(5cm) 27.7 lbs.
(12.6 kg)
AHTK-2 2 personne / 500 lbs.
(227 kg) 12 ft.
(3.66 m) 32"
(81cm) 2"
(5cm) 36.3 lbs.
(16.5 kg)
AHTK-3 2 personne / 400 lbs.
(181 kg) 10 ft. 3 in.
(3.12 m) 32"
(81cm) 2"
(5cm) 21.5 lbs.
(9.8 kg)
AHTK-5 2 personne / 400 lbs.
(181 kg) 10 ft. 3 in.
(3.12 m) 32"
(81cm) 2"
(5cm) 21.5 lbs.
(9.8 kg)
AHTK-6 1 personne / 200 lbs.
(91 kg) 9 ft. 1 in.
(2.79 m) 41"
(104cm) 2"
(5cm) 15 lbs.
(6.8 kg)
KAYAK OWNER’S MANUAL
MANUAL DEL USUARIO DEL KAYAK
MANUEL DE L’UTILISATEUR
DE KAYAK
SAVE THIS OWNER'S MANUAL!
CONSERVEZ CE GUIDE DE L’UTILISATEUR!
¡CONSERVE ESTE MANUAL DEL PROPIETARIO!
KEEP FOR FUTURE REFERENCE
CONSERVEZ-LE POUR RÉFÉRENCE FUTURE
GUÁRDELO PARA REFERENCIAS FUTURAS
12000 E. 45th Ave., Unit 104
Denver, CO 80239 USA
Tel: 303-733-3722, 800-624-1297
Fax: 303-733-8007, 800-436-9219
Website:
www.airhead.com

INTRODUCTION
Now that you are the proud owner of an AIRHEAD Inflatable Kayak, there are a
few things you should know about your responsibilities, safe usage, storage, and
maintenance. This will help you to properly enjoy your kayak for years to come.
WARNINGS
•IT IS THE OWNER’S RESPONSIBILITY TO CAREFULLY READ THE
MANUAL AND INSTRUCT ALL USERS HOW TO SAFELY OPERATE
THIS KAYAK.
•NEVER GO OUT ALONE. USE COMMON SENSE &
GOOD JUDGEMENT.
•NOT A LIFE SAVING DEVICE. ALWAYS USE COAST GUARD
APPROVED LIFE VESTS.
•DO NOT OVER-INFLATE ABOVE 2 psi. DEFLATE TO ALLOW FOR
EXPANSION IF LEFT IN DIRECT SUNLIGHT.
•ALWAYS CHECK WATER AND WEATHER CONDITIONS WITH
AUTHORITIES.
•OBSERVE ALL LOCAL AND FEDERAL LAWS.
•WEAR A HELMET & BE CAREFUL AROUND REEFS & RAPIDS.
•DO NOT PULL BEHIND A BOAT OR OTHER MOTORIZED VEHICLE.
•BEWARE OF WINDS, TIDES AND CURRENTS. DO NOT
UNDERESTIMATE THE FORCES OF NATURE.
•BEWARE OF ROCKS OR OTHER SHARP OBJECTS THAT COULD
DAMAGE KAYAK.
•DO NOT OVERESTIMATE YOUR STRENGTH, SKILL
OR ENDURANCE.
•DO NOT USE ALCOHOL OR DRUGS PRIOR TO & WHEN USING
THE KAYAK.
•DO NOT SQUEEZE FEET UNDER THE FOOT BRACE.
•DO NOT LEAVE THE KAYAK WITH ITS BLACK UNDERSIDE
EXPOSED TO DIRECT SUNLIGHT. INCREASED AIR PRESSURE
WILL CAUSE DAMAGE.
•DO NOT PADDLE IN HIGH WATER OR FLOOD CONDITIONS.
•CHECK EQUIPMENT PRIOR TO EACH USE. DO NOT USE IF YOU
NOTICE SIGNS OF WEAR OR FAILURE.
•THIS IS AN ACTION SPORT, THE POSSIBILITY OF INJURY OR
DEATH EXISTS.
REGISTRATION NUMBERS
Many localities require registration and to display a registration number on the
boat. Once you have been issued a number, it is best to affix it to the boat by
printing it directly on the material by the use of a permanent ink marker. A small
square registration sticker may also be issued. If so, this may be affixed to your
boat by placing the sticker on a mall board and securing to the kayak. Self
adhesive letters and numbers will not adhere directly to the kayak.
1
ASSEMBLY & INFLATION
AHTK-1 & 2 Nylon Covered Boats
1. Unfold your new kayak in an area that is free of sharp objects
and debris.
2. There are 3 air chambers, each with a Boston Valve. Lift the nylon flaps
to access. Make sure that the bases of the valves are screwed in tight.
3. Inflate the floor first, then the side chambers using a high volume / low
pressure pump meant for inflatables. Do not inflate above 2 psi. Use of
an air compressor may damage your product and void the warranties.
4. There are PVC bladders inside the nylon covers on both sides.
Occasionally, the bladders may shift, causing the kayak’s shape to
deform. To correct, deflate the bladders to about 30% full, and unzip
the zippers at both ends. Shift the bladder inside so that the seam is in
line with the zippers. Zip back up and re-inflate.
5. Inflate the seats with the stem valves found on the bottom, inside the
zipper. Then adjust seat straps and foot brace to a comfortable position.
AHTK-3, 5 & 6 PVC Boats
1. Unfold your new Kayak in an area that is free of sharp objects
and debris.
2. There are 3 main air chambers. The side chambers are equipped with
a Boston Valve. The center floor chamber is equipped with a Speed
Valve. Inflate in this order: Floor, Side Chambers, Spray Skirts, Seats.
3. Inflate using a high volume / low pressure pump meant for inflatables.
Do not inflate above 2 psi. Use of an air compressor may damage your
boat and void the warranties.
DEFLATION
To deflate a Boston valve, turn counter-clockwise to unscrew from the cup. The
bladder will deflate quickly. To deflate inflatables equipped with a stem valve,
either deflate with a deflating pump, or insert a small straw, or other small object
(no sharp objects) to hold the safety flap open. Remove and roll up towards the
valve to fully deflate. The Speed safety valve has three sections. To deflate a
Safety Speed Valve, pull tab until the first and second section have pulled out of
the third main valve section releasing the air.
STORING
1. To prevent mildew and foul odors, allow your kayak to completely dry
out before storing. Water will enter between the outer nylon cover and
the bladders. Open all zippers to allow it to air out and dry.
2. For long term storage in the sun, protect your boat with a breathable
cover.
3. Rodents chew on fabric including inflatable boat material. Store it away
from rodents.
4. If you choose to store your boat inflated, make sure you do not subject
it to deformations.
2

CARRYING
A convenient Shoulder Carrier is included with Models AHTK-1 and AHTK-2.
After you dry out the kayaks, spread the carrier out on the ground. Fold up the
kayak and place it on top of the carrier. Connect the 2 pair of side release
buckles. Adjust shoulder strap to a comfortable length.
REPAIRS
1. Clean the damaged area and the patch material with alcohol.
2. Humidity should be less than 60%.
3. Temperature should be between 65º F - 77º F (18º C - 25º C).
4. Do not repair in the rain or in direct sunlight.
5. Check that the tube is fully deflated and is flat.
6. Draw the shape of the patch exactly where it will be applied, cut out a
round patch at least 2” (5 cm) larger than the damaged area.
7. Apply 3 thin layers of glue on both the patch and the damaged area.
Allow it to dry for 5 minutes between layers until the glue feels tacky.
When the third layer of glue is dry, apply the patch without pressing and
adjust the positioning if required. Press out air bubbles by smoothing the
patch with a round object such as a spoon, starting at the center of the
patch, rolling towards the outside.
WARNING
PERFORM REPAIRS IN A WELL VENTILATED AREA. AVOID INHALING
GLUE VAPORS OR SWALLOWING. AVOID CONTACT WITH SKIN AND
EYES. KEEP REPAIR MATERIALS AWAY FROM CHILDREN.
WARRANTY REGISTRATION
Please fill out and mail the warranty registration card found on the back page of
this owner’s manual. Mail it to the Kwik Tek office listed on the cover of this
manual. The limited warranty is valid only if the registration card is completed
within ten (10) days of the date of purchase. You will void any warranty by not
sending the registration card to Kwik Tek. The warranty registration card requires
the kayak model and the HIN (Hull Identification Number):
Boat Model: AHTK-1, 2, 3, 5 or 6
HIN: 12 character ID number found on the right hand (starboard) side
of the rear of the boat, beginning with the letters XKW. The entire
number must be entered on the warranty registration card.
WARRANTY & GENERAL CONDITIONS
•The Kayak must NOT be modified and/or fitted with any
accessories not allowable by the manufacturer (Kwik Tek Inc.).
•The Kayak may NOT be used outside its normal
recommended activity. 3
•Maintenance and storage recommendations must be followed.
•This warranty does NOT cover parts and accessories not supplied
or recommended by the manufacturer or defects resulting from the
installation of such equipment on this product.
LIMITED WARRANTY
Kwik Tek Inc. Warrants, to the original purchaser only, when their products are
used for normal recreational purposes that all Kwik Tek kayaks are free from
defects in materials and workmanship for a period of 9 months from original
purchase date. Any implied warranties are also limited in duration to the 9 month
period from the original purchase date.
There are no warranties that extend beyond the description on the face hereof.
Kwik Tek should not be held liable for incidental or consequential damages.
Kwik Tek Inc. shall inspect all warranty claims and in the event of a defect, repair
or replace the defective part or entire item, at its option. A return authorization
number (RA#) must be obtained prior to return by calling or writing to the
telephone or address listed below. Merchandise must be returned, postage
prepaid along with proof of purchase to the address below with the RA# in bold
on the outside of the package.
This warranty does NOT cover: FAILURE CAUSED BY OVERINFLATION,
TEARS, CUTS, PUNCTURES OR SNAGS OBTAINED DURING NORMAL USE;
ITEMS INVOLVED IN ACCIDENTS, ITEMS FOR RENTAL OR HIRE AND
OTHER USES NOT CONSIDERED NORMAL RECREATIONAL USES OR
IMPROPER STORAGE. FADING from exposure to sunlight is also not covered
by this warranty.
THERE ARE NO WARRANTIES THAT EXTEND BEYOND THE DESCRIPTION
ON THIS CARD. KWIK TEK INC. SHALL NOT BE HELD RESPONSIBLE IN
ANY WAY FOR ANY INCIDENTAL AND/OR CONSEQUENTIAL DAMAGES.
THIS WARRANTY IS IN LEIU OF ALL OTHER WARRANTIES.
This warranty gives you specific legal rights. You may also have other rights that
vary from state to state.
KwikTek
12000 E. 45th Ave., Unit 104
Denver, CO 80239 USA
Tel: 303-733-3722, 800-624-1297
Fax: 303-733-8007, 800-436-9219
4

MANUAL DEL USUARIO DEL KAYAK
INTRODUCCIÓN
Ahora que se ha comprado un Kayak Inflable AIRHEAD, existen algunas cosas
que debe saber acerca de sus responsabilidades, seguridad de uso,
almacenamiento y mantenimiento. Esto le ayudará a disfrutar de su Kayak por
muchos años.
CUIDADO
•ES RESPONSABILIDAD DEL DUEÑO EL LEER CUIDADOSAMENTE
EL MANUAL Y ENSEÑARLE A TODOS LOS USUARIOS A OPERAR
ESTE KAYAK DE FORMA SEGURA.
•NUNCA SALGA A NAVEGAR SOLO.
•UTILICE EL SENTIDO COMÚN Y EL BUEN JUICIO.
•NO ES UN SALVAVIDAS. USE SIEMPRE CHALECOS SALVAVIDAS
APROBADOS POR LA GUARDIA COSTERA.
•NO INFLAR A MÁS DE 2 PSI. DESINFLAR UN POCO PARA
PERMITIR LA EXPANSIÓN AL DEJARLO AL SOL.
•VERIFIQUE SIEMPRE LAS CONDICIONES DEL AGUA Y DEL CLIMA
CON LAS AUTORIDADES.
•RESPETE TODAS LAS LEYES LOCALES Y FEDERALES.
•TENGA CUIDADO CON LOS VIENTOS, MAREAS Y CORRIENTES.
NO SUBESTIME LAS FUERZAS DE LA NATURALEZA.
•TENGA CUIDADO CON LAS ROCAS U OTROS OBJETOS FILOSOS
QUE PUDIERAN DAÑAR EL KAYAK.
•NO SOBREESTIME SU FORTALEZA FÍSICA, HABILIDAD
O RESISTENCIA.
•USE UN CASCO Y TENGA CUIDADO CERCA DE ARRECIFES
Y RÁPIDOS.
•NO LO REMOLQUE CON UN BOTE U OTRO
VEHÍCULO MOTORIZADO.
•NO CONSUMA ALCOHOL O DROGAS ANTES O DURANTE EL USO
DEL KAYAK.
•NO APRIETE LOS PIES DEBAJO DE LA ABRAZADERA
•PARA PIES.
•NO DEJE EL KAYAK EXPUESTO A RADIACIÓN DIRECTA DEL
SOL. EL AUMENTO EN LA PRESIÓN DE AIRE PODRÍA DAÑARLO.
•NO REME DURANTE MAREA ALTA O EN INUNDACIONES.
•VERIFIQUE EL EQUIPO ANTES DE USARLO. NO LO UTILICE SI
ENCUENTRA SIGNOS DE DESGASTE O FALLAS.
•ESTE ES UN DEPORTE DE ACCIÓN, EXISTE LA POSIBILIDAD DE
HERIDAS O MUERTE.
5
NÚMEROS DE REGISTRO
Muchos lugares requieren un registro y el exhibir el número de registro en la
embarcación. Una vez que le hayan otorgado un número, lo mejor es escribirlo
directamente sobre la embarcación con marcador permanente. También le
pueden otorgar una pequeña etiqueta rectangular de registro. Si ese es el caso,
la puede fijar a la embarcación colocándola sobre una pequeña placa y fijándola
al kayak. Las letras y números autoadhesivos no se pegan al kayak.
ARMADO E INFLADO
Botes con Cubierta de Nylon AHTK-1 & 2
1. Extienda su nuevo kayak en un área libre de objetos
filosos y escombros.
2. Tiene 3 cámaras de aire, cada una con una Válvula Boston. Levante las
solapas de nylon para acceder a ellas. Asegúrese de que la base de las
válvulas estén bien atornilladas.
3. Infle primero el piso, luego las cámaras de los costados usando una
bomba de alto volumen y baja presión especial para artículos inflables.
No la infle a más de 2psi. Si usa un compresor de aire puede dañar su
producto y anular la garantía.
4. Existen cámaras de PVC dentro de las cubiertas de nylon de los
costados. En algunos casos, estas cámaras se pueden descolocar
haciendo que el kayak se deforme. Para corregirlo, desinfle las
cámaras hasta el 30% y abra los cierres de ambos costados. Coloque
las cámaras interiores para que las costuras queden alineadas con los
cierres. Cierre los cierres y vuelva a inflarlas.
5. Infle los asientos con las válvulas de vástago que están en la parte de
abajo, dentro del cierre. Luego ajuste las correas del asiento y la
abrazadera de pie para que estén confortables.
Botes de PVC AHTK-3, 5 & 6
1. Extienda su nuevo kayak en un área libre de objetos
filosos y escombros.
2. Tiene 3 cámaras de aire principales. Las cámaras de los costados
están equipadas con Válvula Boston. La cámara central del piso está
equipada con una Válvula Rápida. Ínflelas en el siguiente orden: Piso,
Cámaras Laterales, Pollera, Asientos.
3. Inflela usando una bomba de alto volumen y baja presión especial
para artículos inflables. No la infle a más de 2psi. Si usa un
compresor de aire puede dañar su bote y anular la garantía.
6

DESINFLADO
Para desinflar la Válvula Boston, gírela en sentido anti-horario para
desenroscarla de la base. La cámara se desinflará rápidamente. Para desinflar
las partes equipadas con una válvula de vástago, puede desinflarlas con una
bomba de desinflado, o insertar una pequeña varilla u otro objeto pequeño (no
afilado) para mantener abierta la válvula. Remuévalo y enróllelo hacia la válvula
para desinflarlo completamente.
ALMACENAMIENTO
1. Para prevenir la acumulación de moho y malos olores, permita que el
kayak se seque completamente antes de guardarlo. Puede acumularse
agua entre la cubierta de nylon exterior y las cámaras. Abra todos los
cierres para permitir que se airee y se seque.
2. Si lo va a guardar por mucho tiempo bajo el sol, proteja su bote
con una cubierta de trama abierta.
3. Los roedores mastican telas incluyendo el material de botes inflables.
Guárdelo fuera del alcance de roedores.
4. Si prefiere guardarlo inflado, asegúrese de no someterlo a
deformaciones.
TRANSPORTE
Los modelos AHTK-1 y AHTK-2 incluyen un conveniente bolso para el hombro.
Luego de dejar que el kayak se seque, extienda el bolso sobre el piso. Pliegue
el kayak y colóquelo sobre el bolso. Conecte los 2 pares de hebillas. Ajuste la
correa del hombro a un largo confortable.
REPARACIONES
1. Limpie el área dañada y el material del parche con alcohol.
2. La humedad debe ser menor al 60%.
3. La temperatura debe estar entre 65º F - 77º F (18º C - 25º C).
4. No lo repare bajo la lluvia o bajo la luz directa del sol.
5. Verifique que las cámaras estén completamente desinfladas y planas.
6. Dibuje la forma del parche exactamente donde se lo colocará, corte un
parche redondo por lo menos 2” (5cm) más grande que el área dañada.
7. Coloque 3 capas finas de pegamento en el parche y en el área dañada.
Permita que se seque por 5 minutos entre cada capa, hasta que se
pueda tocar el pegamento sin que esté pegajoso. Cuando se seque la
tercera capa de pegamento, coloque el parche sin apretar y ajuste su
posición como sea necesario. Expulse las burbujas de aire presionando
el parche con un objeto redondeado como una cuchara, comenzando
por el centro del parche y deslizándose hace afuera.
8. Limpie el exceso de pegamento con solvente.
7
ADVERTENCIA
REALICE LAS REPARACIONES EN UN LUGAR BIEN VENTILADO.
EVITE INHALAR LOS VAPORES DEL PEGAMENTO O TRAGARLO.
EVITE EL CONTACTO CON LA PIEL Y LOS OJOS. MANTENGA LOS
MATERIALES DE REPARACIÓN FUERA DEL ALCANCE DE LOS
NIÑOS.
REGISTRO DE LA GARANTÍA
Por favor, complete y envíe la tarjeta de registro de garantía. Envíela a la oficina
de Kwik Tek indicada en la tapa de este manual. La garantía limitada es válida
únicamente si la tarjeta de registro de garantía se completa y envía dentro de los
diez (10) días posteriores a la fecha de compra. Si no envía la tarjeta de registro
a Kwik Tek anulará la garantía. La tarjeta de registro de garantía necesita tener
el modelo del kayak y el HIN (Número de Identificación de Casco):
Modelo de Bote: AHTK-1, 2, 3, 5 o 6
HIN: Número identificatorio de 12 caracteres que se encuentra
en el lado derecho (estribor) de la parte trasera del bote,
comenzando con las letras XKW.
GARANTÍA Y CONDICIONES GENERALES
•El Kayak no debe modificarse y/o colocarle ningún accesorio no
especificado por el fabricante (Kwik Tek Inc.).
•No debe usarse el Kayak para otras actividades distintas que las
normalmente recomendadas.
•Deben seguirse las recomendaciones de mantenimiento y
almacenamiento.
•Esta garantía no cubre partes y accesorios no suministrados o
recomendados por el fabricante o defectos resultantes de la
instalación de dicho equipo en este producto.
GARANTÍA LIMITADA
Kwik Tek Inc. garantiza al comprador original solamente, cuando sus productos
son utilizados para propósitos de recreación. Que todos los productos inflables
Kwik Tek se encuentran libres de defectos en sus materiales y mano de obra
durante un periodo de 9 meses a partir de su compra original. Cualquier otra
garantía implícita están también limitadas en duración, hasta el fin de los 9
meses a partir de la fecha original de su compra.
No existen garantías que se extiendan mas allá de la descripción expresada en
este documento. Kwik Tek no deberá ser considerada responsable por daños
emergentes o causales.
8

Kwik Tek Inc. inspeccionará todos los reclamos relacionados con la garantía y,
ante la eventualidad de un defecto, reparará o reemplazará la parte defectuosa o
el ítem completo, a su opción. Deberá ser preciso obtener un número de
autorización (RA#) antes de la devolución, llamando o escribiendo al teléfono o
la dirección indicada más abajo. La mercadería deberá ser devuelta con el
franqueo de su retorno prepago, mas la prueba de su compra, a la dirección
abajo indicada, junto al RA# escrito en letra de imprenta sobre del lado externo
del envoltorio.
Esta garantía NO cubre: DEFECTOS OCASIONADOS POR EL SOBRE
INFLADO, DESGARRADURAS, CORTES, PINCHADURAS NI ENGANCHES
ORIGINADOS DURANTE EL USO NORMAL; TAMPOCO AQUELLOS ÍTEMS
INVOLUCRADOS EN ACCIDENTES, IDENTIFICADOS COMO ÍTEMS PARA
RENTA O ALQUILER NI CUALQUIER OTRO USO QUE NO SEA
CONSIDERADO NORMAL PARA EL USO RECREATIVO, O SU ALMACENAJE
INADECUADO. LA DECOLORACIÓN debida a su exposición a la luz solar,
tampoco quedará cubierta por esta garantía.
NO EXISTEN GARANTÍAS QUE SE EXCEDAN MAS ALLÁ DE LA
DESCRIPCIÓN DADA EN ESTA TARJETA. KWIK TEC INC. NO DEBERÁ SER
CONSIDERADA RESPONSABLE EN MANERA ALGUNA POR CUALQUIER
DAÑO EMERGENTE O CAUSAL.
ESTA GARANTÍA SE EXTIENDE EN LUGAR DE CUALQUIER OTRA
GARANTÍA.
Esta garantía le otorga a usted derechos legales específicos. Aunque usted
podría tener otros derechos que podrían varias entre estados.
KwikTek
12000 E. 45th Ave., Unit 104
Denver, CO 80239 USA
Tel: 303-733-3722, 800-624-1297
Fax: 303-733-8007, 800-436-9219
9
MANUEL DE L’UTILISATEUR DE KAYAK
INTRODUCTION
Alors que vous êtes maintenant le fier propriétaire d’un kayak pneumatique
AIRHEAD, vous devez être conscient de certains faits concernant vos
responsabilités pour l’usage sécuritaire, le remisage et l’entretien de votre kayak.
Ceci vous aidera à profiter adéquatement de votre kayak pendant de
nombreuses années à venir.
AVERTISSEMENT
•IL DEMEURE LA RESPONSABILITÉ DU PROPRIÉTAIRE DE LIRE
ATTENTIVEMENT LE MANUEL ET D’INFORMER TOUS LES
UTILISATEURS SUR L’USAGE SÉCURITAIRE DE CE KAYAK.
•NE JAMAIS NAVIGUER SEUL.
•USER DE SENS COMMUN ET DE BON JUGEMENT.
•CECI N’EST PAS UN APPAREIL DE SAUVETAGE. TOUJOURS UTILISER
DES VESTES DE SAUVETAGE APPROUVÉES PAR LA GARDE CÔTIÈRE.
•NE PAS GONFLER EXCESSIVEMENT AU-DELÀ DE 2 LBF/PO² (0,138
BAR). DÉGONFLER POUR COMPENSER L’EXPANSION SI LAISSÉ SOUS
LES RAYONS DIRECTS DU SOLEIL.
•TOUJOURS VÉRIFIER LES CONDITIONS ATMOSPHÉRIQUES ET
MARITIMES AUPRÈS DES AUTORITÉS.
•RESPECTER TOUTES LES RÈGLEMENTATIONS LOCALES
ET FÉDÉRALES.
•PRENDRE GARDE AUX VENTS, AUX VAGUES ET AUX COURANTS. NE
PAS SOUS-ESTIMER LES FORCES DE LA NATURE.
•PRENDRE GARDE AUX ROCHES OU AUTRES OBJETS POINTUS QUI
POURRAIENT ENDOMMAGER LE KAYAK
•NE PAS SURESTIMER VOS FORCES, HABILITÉS OU ENDURANCE.
•PORTER UN CASQUE PROTECTEUR ET SOYEZ PRUDENT AUTOUR DES
RÉCIFS ET DES RAPIDES.
•NE PAS TRAÎNER DERRIÈRE UN BATEAU OU AUTRE
VÉHICULE MOTORISÉ.
•NE PAS UTILISER L’ALCOOL OU LES DROGUES AVANT ET DURANT
L’USAGE DU KAYAK.
•NE PAS COINCER VOS PIEDS SOUS L’APPUI-PIEDS.
•NE PAS LAISSER LE KAYAK EXPOSÉ AUX RAYONS DU SOLEIL. UNE
AUGMENTATION DE LA PRESSION D’AIR CAUSERA DES DOMMAGES.
•NE PAS PAGAYER EN HAUTES EAUX OU EN CONDITIONS
D’INONDATION.
•VÉRIFIER L’ÉQUIPEMENT AVANT CHAQUE USAGE. NE PAS L’UTILISER
SI DES SIGNES D’USURE OU DE DÉFECTUOSITÉ SONT OBSERVÉS.
•CECI EST UN SPORT ACTIF. LA POSSIBILITÉ DE BLESSURES
CORPORELLES OU D’ACCIDENT MORTEL EXISTE.
10

NUMÉROS D’ENREGISTREMENT
De nombreuses municipalités exigent l’enregistrement des bateaux avec le
numéro d’enregistrement visible sur le bateau. Quand un numéro vous est
assigné, la meilleure méthode d’affichage est de l’imprimer directement sur le
matériel en utilisant un marqueur à encre indélébile. Une petite étiquette
adhésive de l’enregistrement pourrait aussi être émise. Dans ce cas, cette
étiquette peut être apposée sur une planchette publicitaire qui sera alors installée
sur le kayak. Les lettres et numéros autocollants ne colleront pas directement
sur le kayak.
ASSEMBLAGE ET GONFLAGE
Bateaux recouverts de nylon AHTK-1 & 2
1. Déplier votre nouveau kayak dans un endroit libre d’objets pointus ou
coupants et de débris.
2. Il y a 3 chambres à air, chacune équipée d’une valve du type Boston.
Soulever les rabats en nylon pour y accéder. S’assurer que les bases
de valve soient vissées à fond.
3. Gonfler le plancher en premier, les chambres latérales ensuite en
utilisant une pompe à haut volume et/ou à basse pression appropriée
pour les pneumatiques. Ne pas gonfler au-delà de 2 lbf/po² (0,138 bar).
L’usage d’un compresseur d’air pourrait endommager votre produit et
annuler les garanties.
4. Il y a des tubes gonflables en PVC à l’intérieur du revêtement en nylon
sur les deux côtés. Occasionnellement, ces tubes pourraient se
déplacer causant une déformation du kayak. Pour rectifier, dégonfler
les tubes à environ 30% de leur capacité et ouvrir les fermetures éclair
aux deux extrémités. Déplacer le tube gonflable à l’intérieur de manière
telle que le joint soit aligné avec les fermetures éclair. Refermer les
fermetures éclair et gonfler de nouveau.
5. Gonfler les sièges en utilisant les valves à tige trouvées sur le fond, à
l’intérieur de la fermeture éclair. Régler ensuite les courroies de siège
et l’appui-pieds à la position la plus confortable.
Bateaux en PVC AHTK-3, 5 & 6
1. Déplier votre nouveau kayak dans un endroit libre d’objets pointus ou
coupants et de débris.
2. Il y a 3 principales chambres à air. Les chambres latérales sont
équipées d’une valve du type Boston. La chambre centrale du plancher
est équipée d’une valve rapide. Gonfler dans l’ordre suivent : le
plancher, les chambres latérales, les jupes de diffusion d’eau,
les sièges.
3. Gonfler en utilisant une pompe à haut volume et/ou à basse pression
appropriée pour les pneumatiques. Ne pas gonfler au-delà de 2 lbf/po²
(0,138 bar). L’usage d’un compresseur d’air pourrait endommager votre
produit et annuler les garanties.
11
DÉGONFLAGE
Pour dégonfler en utilisant la valve Boston, tourner dans le sens contraire des
aiguilles d’une montre pour la dévisser de la coupe. Le tube se dégonflera
rapidement. Pour dégonfler les pneumatiques équipés d’une valve à tige, utiliser
une pompe de dégonflage ou insérer une petite paille ou autre petit objet (non
pointu) pour tenir le rabat de sécurité en position ouverte. Retirer le tube et le
rouler vers la valve pour le dégonfler complètement.
REMISAGE
1. Pour prévenir le mildiou et les odeurs déplaisantes, laisser sécher votre
kayak entièrement avant de le remiser. L’eau pénétrera entre le
revêtement extérieur en nylon et les tubes gonflables. Ouvrir toutes les
fermetures éclair pour permettre l’aération et le séchage.
2. Pour le remisage de longue durée sous les rayons du soleil, protéger
votre bateau en utilisant une couverture aérée.
3. Les rongeurs peuvent déchiqueter le matériel incluant le matériau utilisé
pour la fabrication du bateau. Le remiser hors d’atteinte des rongeurs.
4. Si vous choisissez de remiser votre bateau sans le dégonfler, s’assurer
de ne pas causer de déformations.
TRANSPORT
Un porte-bateau à bandoulière pratique est inclus avec les modèles AHTK-1 et
AHTK-2. Après avoir sécher complètement votre kayak, déplier le porte-bateau
sur le sol. Replier le kayak et le placer sur le porte-bateau. Raccorder les 2
paires de boucles à déclenchement latéral. Régler la bandoulière à une
longueur appropriée pour le confort.
RÉPARATIONS
1. Nettoyer la section endommagée et le matériel de rustine à l’alcool.
2. L’humidité doit être à moins de 60%.
3. La température ambiante doit être entre 65º F et 77º F (18º C et 25º C).
4. Ne pas faire la réparation sous la pluie ou sous les rayons directs
du soleil.
5. Vérifier que le tube soit complètement dégonflé et à plat.
6. Dessiner la forme de la rustine précisément où elle sera appliquée,
découper une rustine ronde d’au moins 2 po (5 cm) plus large que la
section endommagée.
7. Appliquer 3 minces couches de colle sur la rustine et sur la section
endommagée. Allouer 5 minutes entre les couches successives jusqu’à
ce que la colle soit adhésive. Quand la troisième couche de colle est
sèche, appliquer la rustine sans pression et ajuster sa position si
nécessaire. Éliminer les bulles d’air en appliquant une pression sur la
rustine avec un objet rond telle qu’une cuillère, en débutant au centre
de la rustine et en roulant vers l’extérieur.
8. Nettoyer tout excès de colle en utilisant un solvant.
12

AVERTISSEMENT
COMPLÉTER LES RÉPARATIONS DANS UN ENDROIT BIEN AÉRÉ.
ÉVITER D’INHALER LES VAPEURS OU D’INGÉRER LA COLLE.
ÉVITER LE CONTACT AVEC LA PEAU ET LES YEUX. CONSERVER
LES MATÉRIAUX DE RÉPARATIONS HORS D’ATTEINTE DES
ENFANTS.
ENREGISTREMENT DE LA GARANTIE
S’il vous plaît, compléter et poster la carte d’enregistrement de la garantie.
Adressez-la au bureau Kwik Tek listé sur la page couverture de ce manuel. La
garantie limitée est valide seulement quand la carte d’enregistrement est
complétée en dedans des dix (10) jours suivant la date de l’achat. Vous
annulerez toute garantie par votre défaut d’expédier la carte d’enregistrement
chez Kwik Tek. La carte d’enregistrement de la garantie exige l’information de
modèle du kayak ainsi que le numéro HIN (numéro d’identification de la coque) :
Modèle de bateau : AHTK-1, 2, 3, 5 ou 6
HIN : Numéro d’identification à 12 caractères, trouvé sur le côté
droit (tribord) de l’arrière du bateau, débutant avec les lettres XKW.
GARANTIE ET MODALITÉS GÉNÉRALES
•Le kayak ne doit PAS être modifié et/ou équipé de tout accessoire
non autorisé par le fabricant (Kwik Tek Inc.).
•Le kayak ne doit PAS être utilisé hors des activités normales pour
lesquelles il est recommandé.
•Les recommandations pour l’entretien et le remisage doivent être
respectées.
•Cette garantie ne couvre PAS les pièces et accessoires qui ne sont
pas fournis ou recommandés par le fabricant ou les défectuosités
résultant de l’installation de tel équipement sur ce produit.
GARANTIE LIMITÉE
Kwik Tek Inc. garantit, à l’acheteur initial seulement, quand son produit est
utilisé à des fins récréatives normales.
Que tous les tubes gonflables Kwik Tek sont sans défaut de matériaux et de
main-d’œuvre pour une période de 9 mois à partir de la date d’achat originale.
Toute garantie implicite est aussi limitée à la durée de la période de 9 mois à
partir de la date d’achat originale.
Aucune garantie ne s’étend au-delà de la description faite ici. Kwik Tek ne
doit pas être tenu responsable de dommages indirects ou consécutifs.
Kwik Tek Inc. doit vérifier toutes les demandes de garantie et, s’il y a un
défaut, réparer ou remplacer la pièce défectueuse ou le produit en entier,
13
à son choix. Un numéro d’autorisation de retour (N° RA) doit être obtenu en
appelant au numéro ci-dessous ou en écrivant à l’adresse inscrite ci-dessous
avant le retour. La marchandise doit être retournée, port prépayé avec une
preuve d’achat à l’adresse ci-dessous avec le numéro d’autorisation de retour en
gros sur l’emballage externe.
Cette garantie NE couvre PAS : LES BRIS CAUSÉS PAR UN GONFLAGE
EXCESSIF, LES DÉCHIRURES, LES COUPURES, LES TROUS OU LES
ACCROCS QUI SURVIENNENT LORS D’UNE UTILISATION NORMALE; LES
ARTICLES IMPLIQUÉS DANS DES ACCIDENTS, EN LOCATION OU UTILISÉS
À TOUTE AUTRE FIN QUI N’EST PAS CONSIDÉRÉE COMME UNE
UTILISATION RÉCRÉATIVE NORMALE OU UN ENTREPOSAGE INCORRECT.
La DÉCOLORATION due à l’exposition au soleil n’est pas couverte non plus par
cette garantie.
AUCUNE GARANTIE NE S’ÉTEND AU-DELÀ DE LA DESCRIPTION SUR
CETTE CARTE. KWIK TEK INC. NE DOIT PAS ÊTRE TENU RESPONSABLE
EN AUCUN CAS POUR DES DOMMAGES INDIRECTS ET/OU
CONSÉCUTIFS.
CETTE GARANTIE EST AU LIEU ET PLACE DE TOUTE AUTRE GARANTIE.
Cette garantie vous donne des droits juridiques spécifiques. Vous pouvez aussi
avoir d’autres droits qui varient d’un état à l’autre et d’une province à l’autre.
KwikTek
12000 E. 45th Ave., Unit 104, Denver, CO 80239 USA
Tel: 303-733-3722, 800-624-1297 ·Fax: 303-733-8007, 800-436-9219
14

The following information should be filled out and kept for your records.
A remplir et a conserver par le proprieteire.
A cumplmentar y conservar por el propietario.
Model No. :
Modèle :
Modelo :
Date of Purchase :
Date d’achat :
Fecha de compra :
Dealer’s Name & Address :
Nom et Adresse du Revenduer :
Nombre y Dirreccion de vendedor :
To validate your warranty, cut here & mail card below to Kwik Tek.
Afin de valider la garantie, couper selon les pointillés et renvoyer cette
carte à Kwik Tek.
Para validar la garantía. Cortar por la linea y enviar a Kwik Tek.
Warranty Registration Card Carte d’enregistrement de la garantie
Tarjeta de registro de la garantía
Purchaser’s Name :
Nom et Prénom :
Nombre e Apellido :
Address :
Adresse Complete :
Dirrección
Zip : Model No. :
Code Postal : Modele
Código Postal : Modelo
Dealer’s Name & Address :
Nom et Adresse du Revenduer :
Nombre y Dirreccion de vendedor :
Date of purchase:
Date d’achat:
Fecha de compra:
Purchaser’s Signature · Signature du Client · Firma de Comprador
15
MANUFACTURER'S CERTIFICATE OF ORIGIN
1. Vessel Data
HIN (Hull ID Number):
Model Name:
Length: Beam: Draft:
Place of Construction: Peoples Republic of China
Hull Material
___Wood ___Steel ___Aluminum ___Fiberglass
___Other
2. Certification:
I, Aaron Kramer Do Hereby Certify that the facts recited herein
are true and that I have personal knowledge of these facts
because I:
_____A. Personally performed the construction.
_____B. Supervised the construction at or on behalf of
Kwik Tek, Inc.
Signature:
__________________________________________
Date:
______________________________________________
16

FIRST ASSIGNMENT
I. 100% of the vessel identified herein is sold (transferred) by the
party(ies) named in Section V to the following person(s) (names
and addresses):
II. If sold to more than one person, the purchaser(s) (transferee(s))
are tenants in common, each owning an equal undivided interest,
unless indicated otherwise herein. Check only one of the following
to show another form of ownership:
_____Joint Tenancy with Right of Survivorship
_____Community Property _____Tenancy by the entireties
_____Other (describe)___________________________
III. Signature of Seller(s) (Transferor(s)) or persons signing on
behalf of seller(s) (transferor(s))
IV. Name of person(s) signing above, and legal capacity in which
signed (e.g. Owner, Agent, Trustee, Executor)
V. Acknowledgement to be completed by Notary Republic (or
other official authorized by a state or the USA to take oaths).
ON______________________ THE PERSON(S) NAMED IN
SECTION IV ABOVE ACKNOWLEDGED EXECUTION OF THE
FOREGOOING INSTRUMENT IN THEIR STATED
CAPACITY(IES) FOR THE PURPOSES THEREIN CONTAINED.
STATE:
COUNTY:
_________________________________________(SEAL)
NOTARY PUBLIC
MY COMMISSION EXPIRES:
17
18
Other manuals for Airhead AHTK-1
1
This manual suits for next models
4
Table of contents
Languages:
Other Kwik Tek Boat manuals