La Marzocco SUPER JOLLY User manual

1
ENGLISH
CONTENTS
1) Foreword . . . . . . . . . . . . . . . . . . . . . . . . . . . . . . . . . . . . . . . . . . . .page 2
2) Dimensions . . . . . . . . . . . . . . . . . . . . . . . . . . . . . . . . . . . . . . . . . . . . . . .2
3) General description . . . . . . . . . . . . . . . . . . . . . . . . . . . . . . . . . . . . . . . . 3
4) Packaging . . . . . . . . . . . . . . . . . . . . . . . . . . . . . . . . . . . . . . . . . . . . . . . . 3
5) Disposal . . . . . . . . . . . . . . . . . . . . . . . . . . . . . . . . . . . . . . . . . . . . . . . . . 3
6) Use . . . . . . . . . . . . . . . . . . . . . . . . . . . . . . . . . . . . . . . . . . . . . . . . . . . . . 4
7) Installation and wiring . . . . . . . . . . . . . . . . . . . . . . . . . . . . . . . . . . . . . . 4
8) Operation of the appliance . . . . . . . . . . . . . . . . . . . . . . . . . . . . . . . . . . 5
9) Warnings regarding operation . . . . . . . . . . . . . . . . . . . . . . . . . . . . . . . . 8
10) Safety devices . . . . . . . . . . . . . . . . . . . . . . . . . . . . . . . . . . . . . . . . . . . . . 8
11) Warnings regarding safety . . . . . . . . . . . . . . . . . . . . . . . . . . . . . . . . . . . 9
12) Noise levels . . . . . . . . . . . . . . . . . . . . . . . . . . . . . . . . . . . . . . . . . . . . . 10
13) Maintenance . . . . . . . . . . . . . . . . . . . . . . . . . . . . . . . . . . . . . . . . . . . . . 11
14) Cleaning the appliance . . . . . . . . . . . . . . . . . . . . . . . . . . . . . . . . . . . . . 11

2
1) FOREWORD
Read this manual from cover to cover before using the appliance as it contains
important instructions for the safety, operation and maintenance of the appliance.
Look after this manual and keep it in a safe place.
The manufacturer reserves the right to make changes to the product and to the
manual.
2) DIMENSIONS
ØØ
Ø
Ø
Ø
H
A
H
B
CABC
H
BD
A
C
H
BDA
C
H
BD
A
C
A
B
C
D
H
Ø
mm
195
263
240
420
610
212
inches
73/4
101/2
91/2
161/2
24
81/4
SUPER JOLLY
GRINDER-DOSER
MAJOR
GRINDER-DOSER
ROBUR-ROYAL
GRINDER-DOSER
KONY
GRINDER-DOSER
STARK
GRINDER-DOSER
A
B
C
D
H
Ø
mm
212
292
240
455
635
212
inches
81/4
111/2
91/2
18
25
81/4
A
B
C
D
H
Ø
mm
206
263
240
420
650
212
inches
8
101/4
91/2
161/2
251/2
81/4
A
B
C
H
Ø
mm
285
240
400
687
212
inches
111/4
91/2
153/4
27
81/4
A
B
C
H
Ø
mm
240
310
475
720
212
inches
91/2
121/4
183/4
281/4
81/4

3
ENGLISH
3) GENERAL DESCRIPTION
4) PACKAGING
On opening the packaging, check carefully to make sure the appliance is intact and
that there are no signs of damage. If in any doubt, do not use the unit and contact
personnel with the appropriate professional skills.
The packaging materials must be kept out of the reach of children as they repre-
sent a potential source of danger.
Keep the packaging until the warranty has expired.
5) DISPOSAL
Do not litter: dispose of the packaging materials according to the laws in force.
Should you decide not to use the appliance any more, remember to unplug it so
that it cannot be used, and then cut the cable in the point where it comes out of
the appliance.
Contact specialized firms for information on the disposal of the components of the
appliance.
SUPER JOLLY MAJOR - KONY
ROBUR - ROYAL - STARK
HOPPER COVER
HOPPER (coffee bean container)
GRINDING ADJUSTMENT DISK
HANDLE
LOCKING SLIDE
HOPPER SAFETY SCREW
HOPPER FIXING PIN
COFFEE GRINDING ADJUSTMENT
DISK
PUSH BUTTON PANEL
FUNNEL (DOSER)
FILTER HOLDER FORK
SERIAL NUMBER LABEL
SWITCH
DRIP TRAY
1
2
3
4
5a
5b
6
7
8
9
10
11
12

4
6) USE
This appliance has been designed solely for grinding coffee beans.Any other use is
understood to be improper, and consequently hazardous.The manufacturer cannot
be held responsible for any damage as a result of improper or incorrect use.
Do not use the appliance for grinding other types of food, or anything else.
THE COFFEE GRINDERS AND COFFEE GRINDER-DOSERS MANUFACTURED
BY OUR COMPANY ARE INTENDED FOR SKILLED PERSONNEL ONLY FOR
PROFESSIONAL USE AND NOT FOR HOUSEHOLD USE.The user must be
an adult. Do not allow children or incapable persons to use the appliance.
7) INSTALLATION AND WIRING
The appliance must be installed by skilled technical personnel in conformity with
the safety rules in force. Incorrect installation may result in injury of persons or
animals, or damage to property, for which the manufacturer cannot be held
responsible.
•The appliance must be placed on a stable, flat surface.
•Before plugging in the appliance, make sure the voltage and frequency values of
the supply mains correspond to the ratings indicated on the label featuring the
appliance’s technical data.
•The wall socket must be fitted with an efficient earth contact. Consequently, it
is essential to make sure the earth system is efficient and in conformity with
current safety rules. If in any doubt, have the system thoroughly checked by per-
sonnel with the appropriate professional skills.
IT IS COMPULSORY TO EARTH THE APPLIANCE.
The manufacturer cannot be held responsible in the event this regulation is not
complied with.
•It is essential to make sure the ratings of the system are suitable for the power
absorbed by the appliance - as indicated on the label featuring the technical data
- and that the wall socket is protected against overcurrents.
•Do not use extension cables, plug adapters for multiple sockets or makeshift
connections.
•
In EEC member countries, the regulation in force calls for the external equipoten-
tial terminal on the outer part of the appliance’s base plate to be connected
to a equipotential node if the installation is to be correct.
•
THE HOPPER MUST BE PLACED ON THE APPLIANCE AND

5
ENGLISH
PROPERLY FIXED WITH THE APPROPRIATE SCREW OR WITH
THE APPROPRIATE LINCHPIN, ACCORDING TO GRINDER
MODEL.
8) OPERATION OF THE APPLIANCE
PRELIMINARIES
Verify that the hopper is correctly
placed on the appliance and fixed
to the casing with the appropriate
linchpin placed on the collar or to
the top blade container with the
appropriate screw, according to
the grinder model.
Close the locking slide and fill the
hopper with coffee beans. Open the locking slide so that the beans are allowed to
drop into the grinding system.
SWITCHING THE APPLIANCE ON AND OFF
In order to power up the appliance, set the on-off knob to I.
The display located on the lid of the push button
panel will show a counter with the incremental
number of doses ground by the appliance.
After having placed the filter holder on the filter
holder fork push :
- the push-button on the left (indicating one cup)
to grind and dispense a single dose;
- the push-button on the right (indicating two
cups) to grind and dispense a double dose.
The counter adds one for each single dose (one cup sign) and adds two for each
double dose (two cup sign).
One can manually activate the appliance keeping pushed the push button for man-
ual grinding (indicating ) located in the centre of push-panel. Hold down the
push button for manual grinding and the grinder will grind until you lift the finger.
By using the push button for manual grinding no dose is added in the counter.
We suggest to use the push button for manual grinding to adjust the grinding of
the appliance.
In order to switch off the appliance turn the knob of the switch to O
DISPLAY
MENU BUTTON
PUSH BUTTON FOR
MANUAL GRINDING
SINGLE DOSE SWITCH
DOUBLE DOSE
SWITCH
SUPER JOLLY MAJOR - KONY
ROBUR - ROYAL - STARK
HOPPER
FIXING PIN
HOPPER
SAFETY
SCREW
OPEN
HOPPER
OPEN

6
ADJUSTING GRINDING
In order to achieve finer or coarser grinding,the adjustment disk located under the hop-
per must be adjusted using the relevant handle.
In order to increase the coarseness of the ground coffee,the disk must be rotated clock-
wise; to decrease, turn the disk anticlockwise.
The disk remains in the chosen position without having to be locked in place.
The adjustment must be performed with the motor on, and preferably without any
coffee between the grinding blades.
Grind small amounts of coffee in order to determine the optimal degree of fineness.
Before checking the fineness of the ground coffee, grind some doses of coffee to
fill the duct between the grinding area and the outlet. This operation must be done
whenever the grinding setting has been changed in order to empty the duct of the
previous ground coffee.
The change of the grinding setting might vary the weight of the doses.Therefore
adjust the doses only after the grinding setting.
In the grinder-doser version, if the coffee comes out of the espresso coffee
machine very quickly, it means the coffee is ground too coarse. Viceversa, if it
comes out too slowly, it means the coffee is ground too fine. Nonetheless, bear in
mind that there are many conditions liable to influence the correct supply, such as
the weight of the portions, the compacting, the espresso machine settings, and the
cleaning of the filters.
COFFEE DOSE ADJUSTMENT
In order to adjust the size of the portion dispensed, use the push button controls
located on the lid of the funnel.
After having set the optimal degree of fineness, check the weight of the dose with
a digital precision scale. In order to adjust the dose press the push button “MENU”
for 3 seconds; the display will blink.
COARSER GRINDING FINER GRINDING

7
ENGLISH
Select the dose you wish to adjust : either the single dose (indicating one cup) or
the double dose (indicating two cups).The display will show the grinding time (in
seconds) of the selected dose. By pressing the push buttons “+” and “-“ the grind-
ing time can be increased or decreased and consequently the selected dose can be
increased or decreased.
Approximately, a change of 0.10 seconds is equivalent to a change of dose of 0.3
grams (0.01 onces).
To set the desired amount of grinding time press the push button “MENU” for 3
seconds.
A blinking of the display will confirm the data have been saved and the exit from
the adjusting program.
Use a digital precision scale to check again the weight of the dose and, if necessary,
repeat above mentioned operation.
WHEN YOU ARE INSIDE THE AJUSTING PROGRAM IT IS NOT POSSIBLE TO
OPERATE THE APPLIANCE.
IF THE APPLIANCE GETS SWITCHED OFF (SWITCH IN THE POSITION O)
BEFORE EXITING FROM THE AJUSTING PROGRAM THE CHANGES ARE NOT
SAVED.
In order to collect the portions of ground coffee, insert the filter holder all the way
onto the fork-shaped support under the ground coffee outlet.
MENU
PUSH BUTTON PANEL
MENU BUTTON
SINGLE DOSE BUTTON DOUBLE DOSE BUTTON
GRINDING TIME
ADJUSTMENT BUTTONS
DISPLAY
PUSH BOTTON FOR
MANUAL GRINDING

8
9) WARNINGS REGARDING OPERATION
•OPERATING RANGE OF THE MOTOR
INTHEVERSIONS WITH SINGLE-PHASE MOTORS, OBSERVE THE DUTY CYCLE
ON / OFF STATED IN THE LABEL LOCATED ON THE LEFT SIDE OF THE APPLI-
ANCE.
E.g.: a data on the label 20s ON / 30s OFF point out an allowed duty cicle of 20 sec-
onds switched on and 30 seconds switched off.
•FIRST INSTALLATION
For the correct use of the grinding blades, at the first installation or whenever
the grinding blades have been replaced, grind some doses of coffee. Do not use
those first doses.
For the appliance to function at its best, on its first installation and every
time the hopper is cleaned, after having ground a few coffee doses, clean the
inner surface of the funnel (dosing unit) with a dry brush.
10) SAFETY DEVICES
•THERMAL OVERLOAD PROTECTION
The appliance’s motor is protected against overheating resulting from overcurrents
by a thermal overload protection which, when tripped, cuts off the power supply
to the motor. Should the protection trip as a result of anomalous operation, such
as the grinding blades jamming, the appliance must be turned off using the on-off
switch, UNPLUGGED FROM THE MAINS, AND SKILLED TECHNICAL PER-
SONNEL CONTACTED. NEVER PERFORM ANY WORK ON THE APPLIANCE
WHILE IT IS ATTACHED TO THE MAINS, TO AVOID THE RISK THAT MOTOR
TURNS ON SUDDENLY.
If the appliance overheats as a result of the motor stopping, allow the appliance
to cool down before performing any repair work.
•MOTOR LOCKING MICROSWITCH
(MAJOR, KONY, ROBUR, ROYAL, STARK)
The system that protects
against accidental contact
with the rotating parts of
the grinding system con-
sists of a microswitch, situ-
ated under the body of
the appliance, that cuts the
electricity to the motor.
COFFEE OUTLET
GUARD
TONGUE
HOPPER
MICROSWITCH
HOPPER
MICROSWITCH

9
ENGLISH
The push button that controls this device is operated by a tongue in the collar of
the hopper. If the hopper is removed or not properly in place, the microswitch
prevents the appliance from working.To ensure the hopper is positioned correct-
ly it must be fixed to the casing using the relevant pin on the collar.
•SAFETY SCREWS
(SUPER JOLLY)
The hopper must
always be attached to
the upper grinding
blade holder using the
relevant screw, which
must not be removed
by the user under any
circumstances.
In order to prevent the adjustment disk from being removed - which would make
the rotating parts accessible - there is a safety screw on the actual disk: said
screw must be positioned in whichever of the two holes on the disk enables the
wider and most suitable range of grinding adjustment, and must not be removed
by the user under any circumstances.
•COFFEE OUTLET GUARD
The coffee outlet guard must always be fixed to the doser using the relevant
screws, which must never be removed by the user.
The removal of the coffee outlet guard can be done by skilled technical person-
nel only after disconnecting the appliance from the power supply by unplugging.
Before reconnecting the appliance to the power supply, fix the safety device to
the doser by the relevant screws.
11) WARNINGS REGARDING SAFETY
This electrical appliance must be used in conformity with the rules in force gov-
erning safe operation.
•WHEN OPERATING THE APPLIANCE, BEWARE OF THE MOVING
MECHANICAL PARTS’ IN THE AREA OF THE GRINDING BLADES AND OF
THE GROUND COFFEE OUTLET.
BEFORE REMOVING THE HOPPER FROM THE GRINDING SYSTEM, DIS-
CONNECT THE POWER SUPPLY.
AVOID REMOVING FOREIGN BODIES FROM THE GRINDING SYSTEM OR
HOPPER
SAFETY
SCREW
ALTERNATIVE
TAPPED HOLE
DISCK SAFETY SCREW
COFFEE OUTLET
GUARD

10
HOPPER WITHOUT FIRST UNPLUGGING THE APPLIANCE FROM THE
MAINS.
•Take care, as the grinding blades may continue rotating for a short while even
after the appliance is switched off.
•THE USER IS NOT AUTHORIZED TO REMOVE SCREWS OR ANY PARTS
SCREWED ONTO THE APPLIANCE.
•In the event the appliance is not working properly or is faulty, contact skilled
technical personnel, and do not attempt to make repairs yourself.
•BEFORE PERFORMING ANY WORK ON THE APPLIANCE, INCLUDING
CLEANING AND/OR MAINTENANCE, DISCONNECT IT FROM THE
POWER SUPPLY BY UNPLUGGING.TURNING OFF THE APPLIANCE USING
ITS MASTER SWITCH DOES NOT ASSURE THE SAME CONDITIONS OF
SAFETY.
•When the appliance is left unattended,the appliance’s power supply must be dis-
connected using its master switch (for example, at night, during work breaks,
midweek closing or holidays).
•Do not let liquids of any kind come into contact with the internal or external
parts of the appliance.
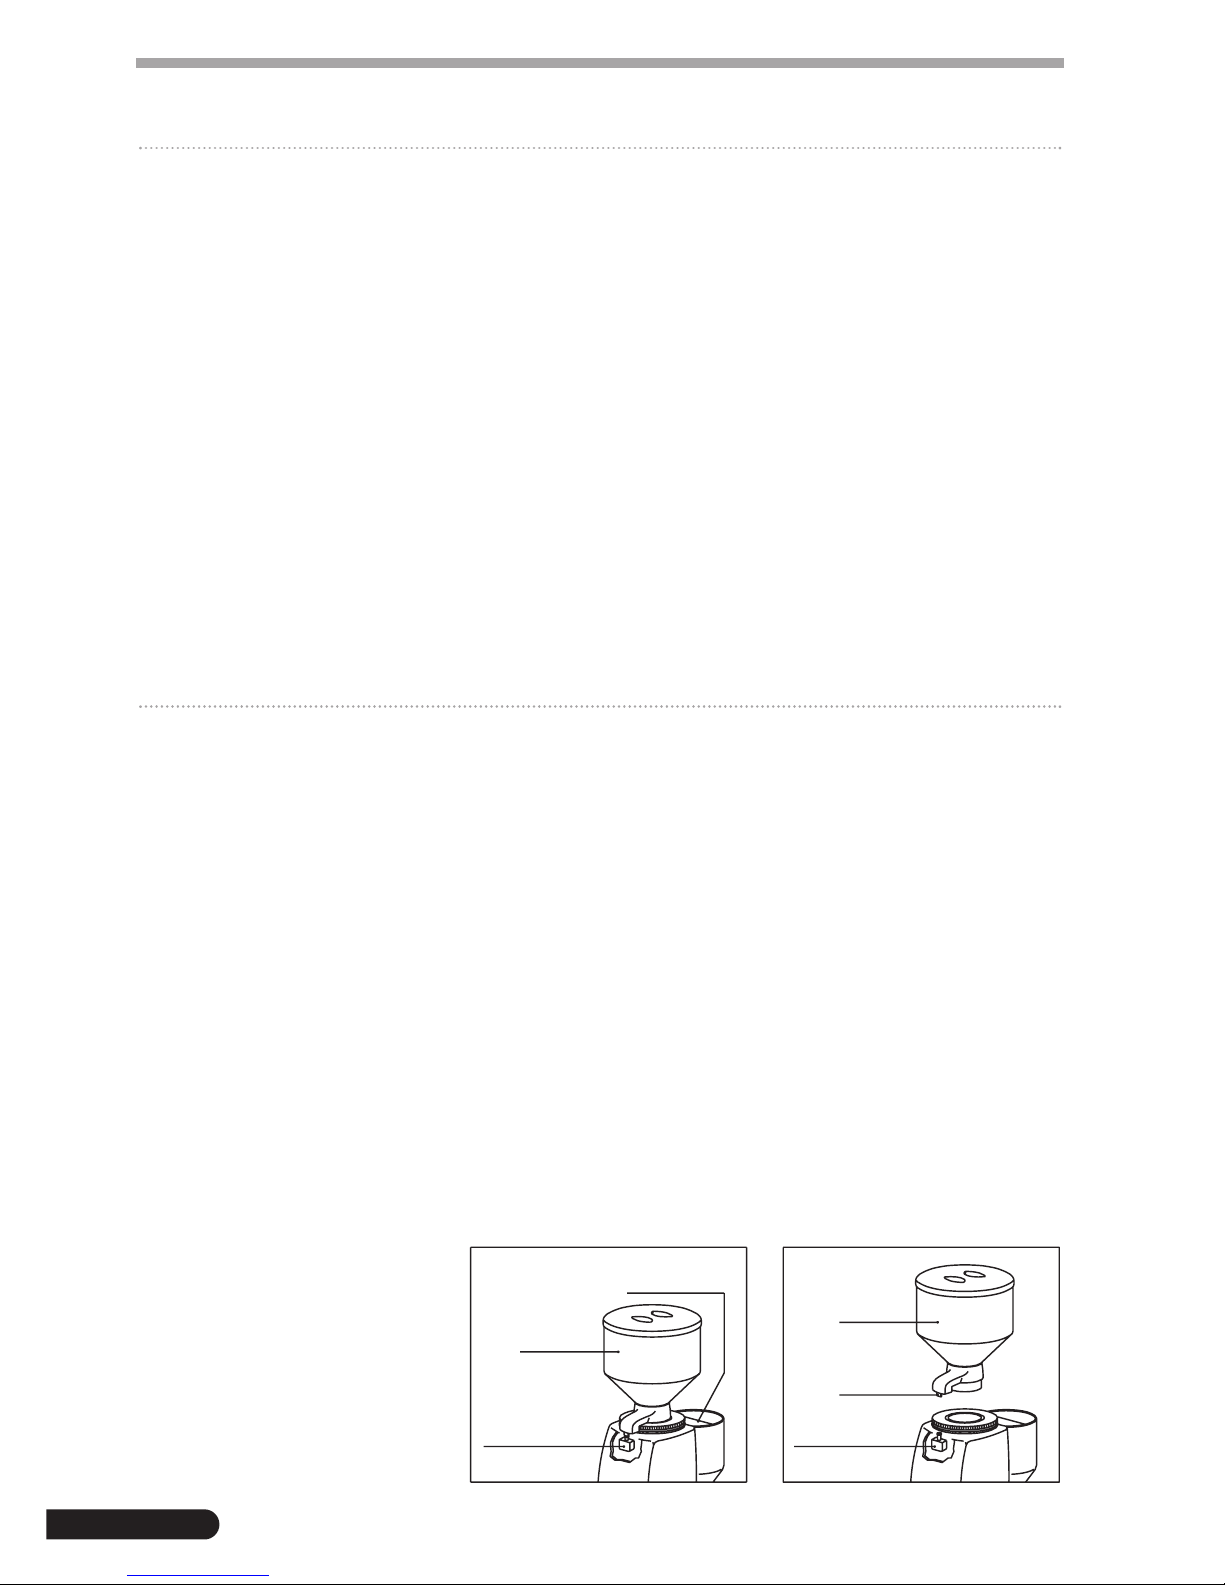
•Never put ground coffee in the hopper intended only for coffee beans.
•Do not tamper with the appliance.
•Do not tug on the supply cable to unplug the appliance from the mains.
•Do not touch the appliance with damp or wet hands or feet.
•Do not use the appliance barefoot.
The manufacturer cannot be held responsible for bodily injury or damage to prop-
erty if these regulations are not complied with.
12) NOISE LEVEL
EEC Countries:
The maximal noise emission of our coffee-grinders or grinder-dosers (valued as
acoustic power) is 81 dB(A), measured in ISO 3741 reverberating chamber,
according to EN 60704-1:1998 and EN 60704-3:1996.
The daily personal noise exposure of a worker, due only to an appliance’s limit
operation of 240 min. per eight hours, is 78 dB(A), according to ED 86/188/EEC
and ED 2003/10/EEC.Therefore during he appliance’s normal operation, no pro-
visions are to be taken in order to prevent such risks arising or likely to arise
from noise exposure at work (articles 3-8 of ED 2003/10/EEC).

11
ENGLISH
USA & CANADA:
The noise level of our appliances is included within the limits stated in U.S. reg-
ulation 29 CFR 1910.95 (‘Occupatinal Health and Environment Control -
Occupational noise exposure’) for eight hours continuosly in a day.
Said noise level has been determined on identical news appliances.
13) MAINTENANCE
It is essential to check the state of the supply cable and plug periodically.
IN THE EVENT THE SUPPLY CABLE OR PLUG ARE DAMAGED, CALL IN
SKILLED TECHNICAL PERSONNEL TO REPLACE THEM, THIS TO PREVENT
ANY RISK.
IN - CERTIFIED APPLIANCES, A SPECIAL TOOL IS REQUIRED TO OPEN
THE BASE PLATE TO GET AT THE CABLE.
It is recommended to use original spare parts only.
In order to assure the lasting efficiency of the appliance, skilled technical person-
nel must be called in to perform periodical maintenance, including detailed checks
of the state of those components subject to wear.
The state of the grinding blades must be checked periodically. Keeping the grind-
ing blades in an excellent state assures high-quality grinding, resulting in greater
productivity and limited overheating.
14) CLEANING THE APPLIANCE
DISCONNECT THE APPLIANCE’S POWER SUPPLY BY UNPLUGGING IT
BEFORE CLEANING.
THE APPLIANCE MUST NOT BE CLEANED USING WATER JETS.
Do not install the appliance in rooms where water jets are used for cleaning.
THE APPLIANCE MUST BE CLEANED PERIODICALLY BY SKILLED TECHNI-
CAL PERSONNEL ONLY.
Use perfectly clean, disinfected cloths or brushes for cleaning.
Do not use abrasive products as these are liable to take the sheen off shiny parts.
Hopper
Wash the hopper after having removed it from the appliance, with water and
neutral soap, rinse it accurately with warm water and dry perfectly well.

12
It is advisable to regularly clean the hopper.
After cleaning operations, the hopper must be correctly fixed to the appliance
with the appropriate linchpin or appropriate screw.
Grinding system
After having removed the safety screw, if the appliance is fitted with one, pre-
venting removal of the grinding adjustment ring, remove the ring by rotating it
clockwise. Remove the top blade container and clean the blades, the threads
and the entire grinding system with a brush and a dry cloth.
After having placed the top blade container back into place, screw the adjust-
ment ring and insert, in models fitted with one, the tamper-proof screw in the
hole allowing most adjustment. Place the hopper back into place and then set
the grind adjustment.
Funnel
After having removed the lid with the operating switches, clean the funnel and its
lid with a dry and disinfected brush.
Mazzer Luigi srl
All right reserved. It is prohibited to reproduce, adapt or translate this document
witout prior written authorization.
First Edition: March 2007
Last revised: EL02 07/2010
This manual suits for next models
4
Table of contents
Other La Marzocco Grinder manuals
Popular Grinder manuals by other brands

Bosch
Bosch 8-125 CE Original instructions

Parkside
Parkside PWSA 20-Li F4 Translation of the original instructions

Hobart
Hobart 770730 owner's manual

Chicago Electric
Chicago Electric 60373 Owner's manual & safety instructions

Hitachi
Hitachi G 18SS Handling instructions

Ozito
Ozito PXC PXAGS-115 instruction manual