La Marzocco pico User manual

pico grinder
manual manuel

EN
pico grinder
certications available:
Operating Manual V1.0 - 06/2023
La Marzocco S.r.l.
Via La Torre 14/H
Località La Torre
50038 Scarperia e San Piero
(Firenze) - ITALIA
www.lamarzocco.com
T: +39 055 849 191
F: +39 055 849 1990
Original instructions veried by the
manufacturer.
Scan QR Code to view the complete
Software Programming Guide available on
the techcenter website.
Printed on recycled paper.
Chapters
1. Foreword
2. Common Dimensions
3. Denition of Available Model
4. Packaging
5. Decommissioning and Demolition
6. Use
7. Installation
8. Machine Operation
9. General Warnings Operation
10. Safety devices
11. General Warnings and Safety Specications
12. Maintenance and Periodic Cleaning Operations
MAN.33.05.1
page 5
page 5
page 5
page 6
page 6
page 6
page 6
page 7
page 9
page 9
page 9
page 9
13. Software Programming Guide page 12

EN
3
When using electrical
appliances, basic safety
precautions should always
be observed, including the
following:
1. Read all the instructions.
2. For protection against
electrical shock hazards,
do not place this
appliance (except coffee
hopper, portalter fork
and the drip tray) in
water or other liquids.
3. This appliance is not
intended for use by
persons with reduced
physical, sensory, or
mental capabilities, or
with lack of experience
and knowledge, unless
they are closely supervised
and instructed concerning
the use of the appliance
by a person responsible
for their safety. Children
should be supervised to
ensure that they do not
play with the appliance.
4. Turn the appliance OFF,
then unplug it from the
outlet when not in use,
before assembling or
disassembling parts and
before cleaning. To unplug,
grasp the plug and pull
from the outlet. Never pull
from the power cord.
If permanently installed -
Make sure the appliance
is OFF when not in
use, before putting
on or taking off parts,
and before cleaning.
5. Avoid contact with moving
parts. Do not attempt to
circumvent any safety
interlock mechanisms.
6. Do not operate any
appliance with a damaged
cord or plug or in case of
appliance malfunctions, or
if it is dropped or damaged
in any manner. For
information on examination,
repair or adjustment,
contact the manufacturer
at their customer service
IMPORTANT SAFEGUARDS
WARNING
SAVE THESE INSTRUCTIONS

EN
4
telephone number. (Only
for US: phone number
(206) 258-2532 x3
email: homesolutions.
Only for Canada: phone
number +1 604) 294-
9890 email: service@
stealthcoffeesystems.com).
7. The use of attachments
not recommended or
sold by the manufacturer
may cause re, electric
shock or injury.
8. This appliance is not
designed for use outdoors.
9. Do not let cord hang over
edge of table or counter.
10.Always disconnect
the appliance from
power supply if it is
left unattended and
before assembling,
disassembling or cleaning.
11.This appliance must not
be used by children.
12. The appliance is designed
to be used with a cycle 20
seconds ON 420 seconds
OFF. More intense use
may cause the protection
device to be triggered.
13. This appliance should not be
used in a professional kitchen.
14. Minimum room
temperature: 5°C/41°F;
Maximum room
temperature: 32°C/89°F.
15. SAVE THESE INSTRUCTIONS.
IMPORTANT SAFEGUARDS
WARNING
SAVE THESE INSTRUCTIONS

EN
5
1. Foreword
This operating guide is an integral and
essential part of the product and must be
supplied to users. Users are asked to read
the enclosed warnings and cautions
carefully, as they provide valuable
information concerning safety during
installation, operation, and maintenance.
This manual must be kept in a safe place
and be available for reference to new and
experienced users alike.
2. Common Dimensions, Weights, and Features
3. Denition of Available Model
WEIGHT [kg]
A
B
C
pico
A [mm] 285
7.8
290
400
B [mm]
C [mm]
D
E
155E [mm]
140D [mm]
1Power Socket
2Power Cord
3Main Switch
4Drip Tray
5Portalter Support
6Dosing Push Button
7Digital Display
8Coffee Grinding Adjustment Disk
9Bean Hopper
(300 grams of coffee)
10 Hopper Cover
11 Locking Slide
5
Key
4
6
7
9
10
3
11
8
1
2

EN
6
4. Packaging
1) Ensure product’s integrity by inspecting
the packaging, making sure it presents
no signs of damage which might have
affected the enclosed machine.
2) Check the machine’s integrity after
having carefully removed the packaging.
Packaging (boxes, plastic bags, foam parts
and whatever else) must not be left within
easy reach of children, due to the potential
danger it represents, nor be discarded in
the environment.
5. Decommissioning and Demolition
Start by setting the main switch to the “0”
or OFF position.
5.1 Disconnecting from the power outlet
Disconnect the appliance from the
electrical network by switching off the
associated circuit breaker or circuit
protection device. Remove the power
supply cord from the power connection.
5.2 Recycling notice: Warning for the protection of
the environment.
Used Electrical and electronic
waste contains hazardous
but also valuable and scarce
materials which should be
recovered and recycled properly.
We kindly ask that you contribute
to the protection of the environment
and natural resources by delivering used
equipment to relevant recycling locations if
such locations are available in your country.
6. Use
7. Installation
- The equipment must be installed to com-
ply with the applicable federal, state or local
electrical and plumbing codes. The instal-
lation also must comply with the manufac-
WARNING
This appliance must be placed in
a horizontal position on a counter
higher than 115 cm from the
ground.
WARNING
This appliance is not suitable
for outdoor use. Jets of water
should not be used to clean the
machine, nor should it be placed
where water jets are used.
WARNING
This aplliance is designed only for
grinding roasted coffee beans.
Any other use is understood to
be improper, and consequently
hazardous. The manufacturer
shall not be liable for any damage
as a result of improper or
incorrect use.
Do not use the appliance for
grinding other types of food, or
other items.
WARNING
The manufacturer declines
any responsibility for any
event leading to liability suits
whenever grounding has not
been completed according to
current local, national, and
international regulations and
electrical codes, or other
electrical parts have been
connected improperly.
WARNING
The warranty will be void in case of:
• Incorrect use, not in accordance
with the design purpose;
• Use of non-genuine spare parts;
• Power cord tampered with;
• Components tampered with;
• Repairs made by unauthorized
personnel.

EN
7
turer’s instructions, and must be performed
by qualied and authorized personnel.
- Check to see that data on the rating plate
corresponds to that of the main electrical
supply which the machine will be connected.
- Incorrect installation may cause injury/dam-
age to persons, animals or objects, for which
the manufacturer shall not be held responsible.
- Safe electrical operation of this device
is achieved only when the connection to
the power outlet has been completed cor-
rectly and in observance of all local, na-
tional, and international electrical codes
and safety regulations, and particularly by
grounding the unit. Make sure grounding
has been carried out properly as this is a
fundamental safety requirement. Ensure
qualied personnel check the connection.
- Furthermore, ensure that the rating of
the available electrical system is suitable
for the maximum power consumption
indicated on the appliance.
- We do not recommend using adapters,
multiple plugs and/or extension cords. If
you cannot avoid using them, make sure
that they are exclusively of the kind which
conforms to local, national, and interna-
tional electrical codes and safety regula-
tions, being careful not to exceed the pow-
er and current ratings indicated on such
adapters and extension cords.
- For grinding, the hopper must be secured
to the appliance in the right position.
- Thoroughly clean the appliance on rst
installation; follow the instructions con-
tained in this manual.
8. Machine Operation
8.1. Preliminaries
8.1.1.
Connect the power cord to a power
supply capable of supplying: 230VAC and
1.5 Amps (for the 230V version) or 120VAC
and 3 Amps (for the 115 V version).
• CE plate:
• ETL plate:
• KC plate:
8.1.2.
For the correct use of the grinding
blades, on rst installation or whenever
the grinding burrs have been replaced,
grind 300 grams of coffee. Do not use the
rst doses.
8.1.3.
Make sure the hopper is positioned
correctly on the appliance. If the hopper is
not in the correct position, grinding cannot
begin.
Open the hopper cover and ll the hopper
with coffee beans.
Open the locking slide so that the beans
are allowed to drop into the grinding
system.
8.1.4.
When the grinder is switched on, the
indicator on the display also lights up.
Turn on the power by pressing the main
power switch. The power switch is located
next to the grinding adjuster knob.
The power switch has two functions: 0
(OFF) I (ON).
0 (OFF): In this position, the device is
switched off.
Hopper
Locking Slide
Hopper Cover
PICO GRINDER
220-240
PR000569
350
05/23
IPX0
20s ON / 300s OFF
1.5
50-60
Etichetta adesiva stampata su ZEBRA:
- dimensioni: 76x25mm;
- materiale: rotolo adesivo;
- colori: stampa a vernice a forno ad 1 colore (nero negativo).
25 mm
76 mm
etichetta scalata a 60mm come da richiesta di Alessandro M. via webex del 29/05/2023
per PICO che va in certificazione CCC
PICO GRINDER
220-240
XY000000
350
05/23
IPX0
20s ON / 300s OFF
1.5
50-60
PICO GRINDER US
120
XY000000
350
05/23
20s ON / 420s OFF
3
60
76 mm
Etichetta adesiva stampata su ZEBRA:
- dimensioni: 76x26mm;
- materiale: rotolo adesivo;
- colori: stampa a vernice a forno ad 1 colore (nero negativo).
25 mm
Etichetta adesiva stampata su ZEBRA:
- dimensioni: 76x26mm;
- materiale: rotolo adesivo;
- colori: sfondo argentato, grafica colore nero.
76 mm
25 mm
제조사:
La Marzocco S.r.l.
수입원:㈜라마르조코코리아
02-3444-1177
A/S 센터:
XY000000
일련번호:
05/23
제조년월:
220V, 60Hz
정격 전압:300
소비 전력:
PICO GRINDER KR
모델명:
인증번호:XY00000-00000 Italy
제조국:

EN
8
I (ON): In this position, the device is ready
for normal use.
8.2. Engaging the Portalter
Place the portalter directly on the appliance
on the support.
Start grinding by pressing the microswitch
button directly with the portalter.
8.3. Fork insertion and adjustment
Insert the portalter fork by turning as show
in the gure. Unlock the two knobs to adjust
the upper portalter holder.
8.4. Adjusting the Coffee Grind
To achieve your desired brew time and
coffee consistency, a manual adjustment
can be made to the grinder to modify the
grind of the coffee.
Rotate the adjustor knob as described
below.
Grinding the coffee more nely will result
in a slower extraction (pour).
This is achieved by turning the adjuster
knob towards the smaller numbers.
Conversely, turning it towards the larger
numbers will result in a coarser grind and
thus a faster extraction.
Before checking the neness of the ground
coffee, grind some doses of coffee to ll
the duct between the grinding area and
the outlet.
Note:
There are many variables that can
affect the quality of coffee, including
temperature, humidity, espresso machine
settings, cleaning of the lters and
freshness of the roast. All of these can
cause slight variations in dose times.
The size of the coffee particles is
extremely important in preparing a good
cup of coffee, along with the type of
coffee blend used. The ideal grind can
be determined by making various coffees
using the amount of ground coffee that
you would normally use for each cup (we
recommend at least 6g). The best grind is
that which allows coffee to ow out from
the portalter spouts neither too slowly,
drop by drop, nor too quickly. A general
rule is that a double dose should dispense
approximately 50ml/ 2 uid oz about. of
espresso in approximately 25 seconds.
This time may be adjusted by varying the
coarseness of the grind.
8.5. Adjusting Dose Quantity
The dose quantity can be set in terms of
time (sec.).
Please refer to Software Programming
Manual for detailed instructions in the full
manual available online.
8.6. Adjusting the fork
Adjust the height of the fork used to
support the portalter using the two side
knobs.
Adjuster Knob
WARNING
Be careful not to close, even
partially, the outlet chute while
brewing ground coffee.
WARNING
Be careful to position the
portalter correctly. Getting too
close to the coffee outlet duct
may cause it to clog.
Microswitch
button
Portalter
Fork
Adjuster Knob

EN
9
9. General Warnings Operation
- Do not insert foreign objects when lling
the hopper with coffee beans. Handle with
clean, dry hands.
- After any hopper lling and under normal
use of the appliance, the hopper lid must
be positioned correctly.
For the appliance to function optimally,
on its rst installation and every time the
hopper is cleaned, after having ground a
few coffee doses, clean the inner surface
of the funnel with a soft dry brush.
- In the versions with single-phase grinder,
observe the duty cycle stated on the label
located on the side of the appliance.
10. Safety devices
The appliance is equipped with a
protection device that disconnects the
motor in the event of overheating. In the
event that this protection is tripped, wait
for the motor to cool down.
Should the protection trip as a result of
anomalous operation, such as the grinding
blades jamming. If the appliance does not
start after the motor has cooled, turn off
using the on-off switch, unplug from the
mains, and contact a qualied technician.
Never perform any work on the appliance
while it is attached to the mains, to avoid
the risk that motor turns on suddenly.
If the appliance overheats as a result of
the motor stopping, allow the appliance
to cool down before performing any repair
work.
Motor locking sensor: the system that
protects against accidental contact with
the rotating parts of the grinding system
consists of two sensor, situated inside
the body of the appliance, that cut the
electricity to the motor.
If the hopper or the funnel are removed or
not properly in place, the sensor prevents
the appliance from working.
11. Noise level
EEC Countries:
The weighted sound pressure level of the
machine is lower than 70dBA.
12. Maintenance and Periodic Cleaning Operations
12.1. Maintenance
- It is essential to check the state of the
power supply cable and plug periodically.
- In the event the power supply cable or
plug are damaged, contact a qualied
technician to replace them.
- It is recommended to use original spare
parts only.
- In order to ensure the lasting efciency
of the appliance, a qualied technician
must be called in to perform periodical
maintenance, including detailed checks of
the state of components subject to wear.
- The state of the grinding blades must be
checked periodically. Keeping the grinding
blades in an excellent state ensures high
quality grinding, resulting in greater
productivity and limited overheating.
12.2. Cleaning
Use perfectly clean, disinfected cloths or
brushes for cleaning.
Do not use abrasive products as these are
liable to take the sheen off shiny parts.
12.2.1. Clean the Hopper (General cleaning)
Wash the hopper once it has been removed
from the appliance, using neutral soap
and water, rinse abundantly with lukewarm
water and dry thoroughly. It is advisable
to clean the hopper periodically. Once
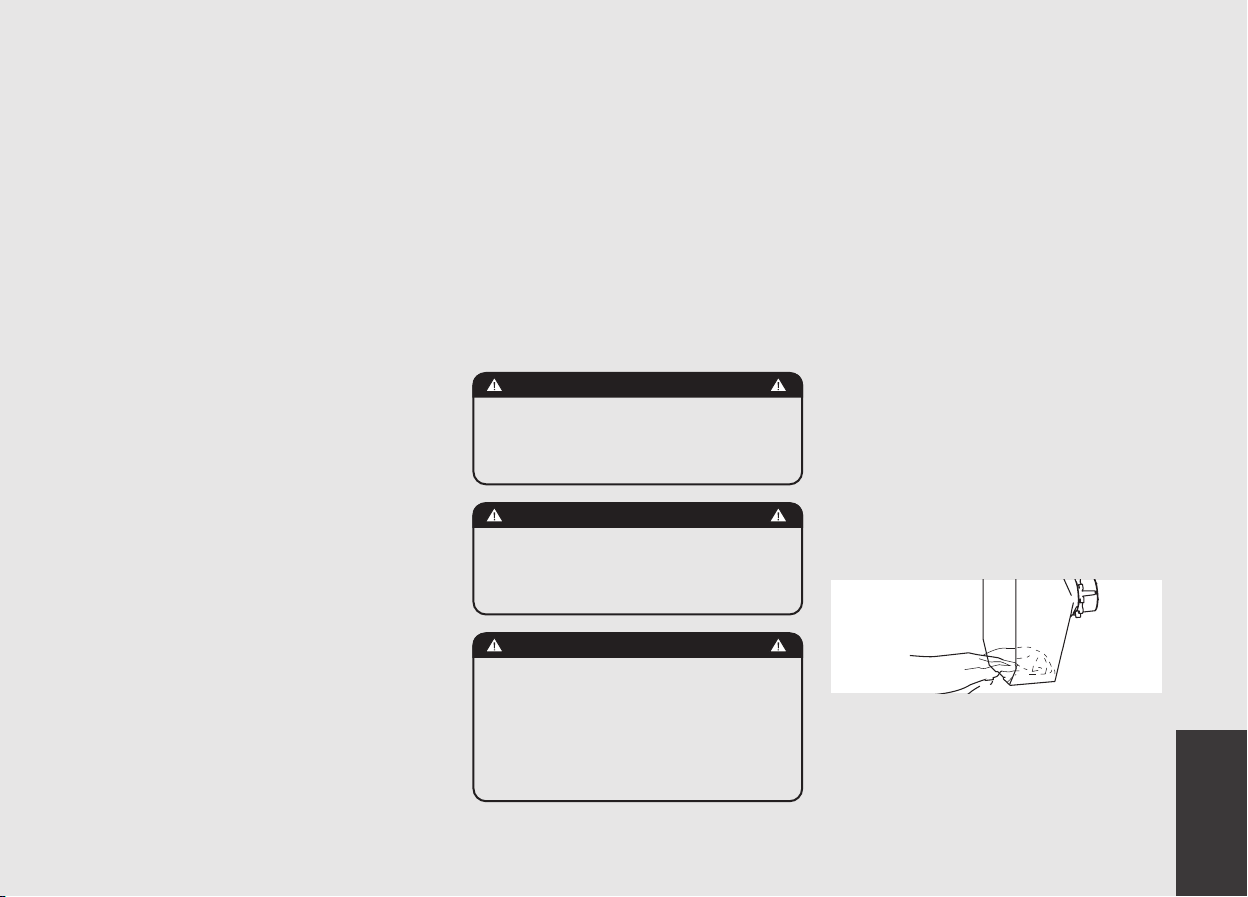
WARNING
Disconnect the appliance’s power
supply by unplugging it before
cleaning.
WARNING
Do not use wet or damp cloths
to clean inside the grinding
chamber, funnel and burrs.
WARNING
The machine must not be dipped
in, nor splashed with water in
order to clean it. For cleaning
operations, please follow the
instructions very carefully.

EN
10
the hopper has been cleaned, it must be
positioned correctly on the appliance.
If the hopper is not correctly positioned
grinding cannot begin.
12.2.2. Cleaning Grinding System
To access the grinding system, remove
components in this order:
- Close the hopper;
- Grind the coffee residue left in the
grinding chamber;
- Unscrew the adjuster knob in the direc-
tion of the larger numbers and continue
unscrewing it until it is completely re-
moved.
With a small brush, clean the burrs.
Vacuum the coffee fragments and ground
residues from the grinding chamber, taking
care to clean all components thoroughly.
- Replace the adjuster knob as shown in
the following image
Periodic cleaning is recommended to
ensure correct operation of the appliance.
12.3. Replacement of the Grinding Blades
The state of the grinding blades must be
checked periodically. Keeping the grinding
burrs in an excellent state ensures high
quality grinding, resulting in greater
productivity and limited overheating.
After removing the adjuster knob as
explained in the previous section, replace
the internal burr.
To replace the external grinder, lift the
tab shown in the image and insert a
screwdriver from above. Using the tool
provided, remove the external grinder as
shown in the following image.
Proceed with the replacement with a new
pair of burrs.
WARNING
The following maintenance
and inspection tasks should
be carried out by a qualied
technician.
Remove
Adjuster Knob
Remove
Adjuster Knob
Tab to lift

EN
11

EN
12
13. Software Programming Guide “Barista” Programming
Press and hold the T1 button for 3 seconds.
page 16
PUSH
page 22
OK
+
+OK
Press and hold the T1 button for 3 seconds.
page 16
PUSH
page 22
OK
+
+OK
page 17
PUSH

EN
13
“Technical” Programming
Press and hold the T1+T2 button for 3 seconds.
page 21
PUSH
PUSH
page 23
PUSH
page 23
PUSH
page 23
PUSH
page 24

EN
14
Programming Introduction
Description
• This appliance has a CPU and many congurable settings.
• Additionally, there are many feedback controls employed in this appliance to troubleshoot problems should they occur.
• The following is a brief introduction to the controls and display and how they interact with the operator.
The backlit digital display can display 4 digits, each with a point. 3 icons to identify the type of dose that is set. 3 icons related to +
- and ok. The display allows the operator to interact with the device to visually edit parameter values. The display also provides useful
information for the operator.
A number of alarms can be displayed to alert the operator to a fault or malfunction. Simple messages are also displayed to alert the
operator to the start of an operation or the necessity to initiate a procedure.
Digital Display
The keypad has two functions. The rst is for grinding control. The second is for programming individual software parameters.
OK
+
Microswitch
button

EN
15
Button Description
This button is used to manage the dispensing of dose 1. It is also used when programming individual parameters
such as the “-” button in the menu.
In the interest of simplicity, it is referred to in this manual as T1.
This button is used to manage the dispensing of dose 2. It is also used when programming individual parameters
such as the “+” button in the menu.
In the interest of simplicity, it is referred to in this manual as T2.
This button is used for continuous control of dose dispensing. It is also used when programming individual
parameters such as the “OK” button in the menu.
In the interest of simplicity, it is referred to in this manual as T3.
Press and hold the button combination for 3 seconds to enable the technical menu.
PUSH
PUSH
PUSH
PUSH
PUSH

EN
16
4
1
1 Digital display
2 Single dose mode
3 Coffee single dose
4 Button to select a single dose
Interface No. 1 - First dose selection
1 Digital display
2 Double dose mode
3 Coffee double dose
4 Button to select a double dose
Interface No. 2 - Second dose selection
PUSH
2 3
4
1
PUSH
2 3

EN
17
4
1
PUSH
23
1 Digital display
2 Continuos dose mode
3 Coffee continuos dose
4 Button to select a continuous dose
Interface No. 3 - Continuos mode selection
1 Digital display
2 Single dosing mode
3 Coffee continuos dose
4 Press and hold for 10 seconds to
activate single dosing mode.
Interface No. 4 - Single dosing activation
In this mode, press key 4to start the
grinding for 20 seconds, press it again to
stop it prematurely.
To exit this mode, press and hold key 4 for
10 seconds.
4
1 3 2
PUSH

EN
18
Display Operating Procedure
Description
Programming Mode
Accessing Programming Mode
• To change the values of any parameter
the operator must rst enter
programming mode.
• There are two levels within the pro-
gramming mode that allow the pro-
gramming of specic parameters.
• The two programming levels are as
follows:
• Barista level - The parameters contained
in this level are those that the operator
may edit to adjust the dose of ground
coffee. A password is not required for
access.
Programming Mode
PUSH
1
“Barista” Programming Level
When the appliance is switched on, press and hold the T1 or T2 buttons. After approx. 3 seconds, the following
display appears.
OK
+2This is the “Barista” programming level. To programme the dose for each button.
3To exit programming mode, press
the grind start button. (see image)
PUSH
Microswitch
button

EN
19
Display Operating Procedure
Description
Programming Mode
PUSH
4
“Technical” Programming Level
When the appliance is switched on, press and hold the T1 + T2 buttons. After approx. 3 seconds, the following
display appears.
5
This is the “Technical” programming level. The display shows the machine serial number, rmware version and
number of doses.
Note: To exit programming mode, press the grind start button.
• Technical Level - The parameters contained
in this level are those that the technician
can view such as rmware version and
dose counter.
Accessing Programming Mode
Programming Mode
PUSH

EN
20
Display Operating Procedure
Description
Programming Mode
Program Dose
• This parameter allows the operator to
programme the dose of ground coffee
for each button.
• The dose is set in seconds.
PUSH
1When the appliance is switched on, press and hold the T1 button. After approx. 3 seconds, the following
display appears.
OK
+
+OK
2Use buttons T1 and T2 to set the desired value, press button T3 to conrm the desired value and return
the appliance to normal operation.
PUSH
3When the appliance is switched on, press and hold the T2 button. After approx. 3 seconds, the following
display appears.
OK
+
+OK
4Use buttons T1 and T2 to set the desired value, press button T3 to conrm the desired value and return
the appliance to normal operation.
“Barista” Programming
PUSH
Table of contents
Languages:
Other La Marzocco Grinder manuals
Popular Grinder manuals by other brands

Power Fist
Power Fist 8002797 Assembly and operating instructions

E-one
E-one Extreme Squat WH231 Typical Installation Instructions & Warranty Information

Power Fist
Power Fist 8843534 manual

PROPOINT
PROPOINT 8712127 user manual

PROPOINT
PROPOINT 9029893 manual

Far Tools
Far Tools BGB 150 Original manual translation

CO/Tech
CO/Tech MD3212M-UK Original instructions

Delta
Delta 23-592 instruction manual

Henry Tools
Henry Tools 45 Series General safety and maintenance manual

Delta
Delta 23-198 instruction manual

Far Tools
Far Tools TM 05E Original manual translation

Central Pneumatic
Central Pneumatic 93727 Assembly and operating instructions