LACTEA Smart User manual

USER MANUAL
LACTEA Smart
LACTEA Smart Lite
LACTEA Smart Plus
LACTEA Smart Pro
www.lactea.ru

CONTENTS
When do you need a breast pump .3
Advantages of LACTEA
Smart Breastpumps ..............................4
Product description
and controls ...............................................8
Assembling the pump .......................... 11
Cleaning and sanitizing ..................... 12
Operating the pump ............................14
Function controls and LED
signal description................................... 17
Troubleshooting .....................................18
Technical data ........................................19
Storage and transportation .............19
Safety measures ...................................20
Warranty ..................................................20
2

By buying the LACTEA Smart
breast pump you made the right
choice! Nothing can be better
than Mother’s milk and breast-
feeding your child is one of the
greatest gifts you could give.
LACTEA Smart will prove indis-
pensable for this process making
your breastfeeding experience
comfortable for as long as you
wish to continue.
WHEN DO YOU NEED A BREAST PUMP
• Relieving breast engorgement
• Storing expressed breast milk
• Excess lactation
• Inadequate milk supply
• Flat or retracted nipples
• Temporary separation of the mother from the baby
• Certain maternal medical conditions
• The mother’s need to skip a feeding
• The inability of the baby to latch
• Weakened baby unable to nurse eectively
The LACTEA Smart, Smart Lite and Smart Plus are designed
specifically for individual home use. LACTEA Smart Pro is
designed for hospital use. All of them are perfect for both
occasional and regular pumping.
IMPORTANT! Read this manual carefully before
using the device.
3

TWOPHASE PRINCIPLE
Healthy infants are naturally great at suckling. They
instinctively understand how to express milk as fast
and as eectively as possible by adjusting the way
they nurse during the feeding. The research has
demonstrated that babies begin feeding with quick
jerky movements to stimulate the letdown. Once the
milk starts coming, babies slow down and continue
at their own pace.
First, there is the stimulation phase (fig.1) - a fast-
paced rhythm, about 120 cycles per minute, which
stimulates the letdown. Next, comes the expression
phase-a slower rhythm, about 60 cycles per minute,
that ensures a gentle and eective milk expression.
ADVANTAGES OF
LACTEA SMART
BREASTPUMPS
The unique adaptive Intelligent
Vacuum Control ® technology
allows the LACTEA Smart breast
pump to simulate the natural
suckling process thus making milk
expression highly eective and
comfortable at the same time.
The LACTEA Smart breast pump
is a two-phase device that oers
3 dierent modes of expression.
LACTEA Smart can be used as a
single or a double pump.
4

THREE MODES OF EXPRESSION
1. Physiological mode (fig.2)
The natural one. The highest ecacy with
the least vacuum. Most mothers report it
to be the most comfortable mode. This
mechanism is used in the latest clinical
(professional) breast pumps.
2. Classic mode (fig.3)
Helps express more milk in the first minutes
of pumping. Applies a little more vacuum.
This mechanism is used in conventional
clinical (professional) breast pumps.
3.Gentle mode (fig.4)
Perfect for special occasions. A slow rise
and fall of the vacuum is indispensable
for highly sensitive breasts
or damaged nipples
THE ADVANTAGES OF TWOPHASE PUMPING
• Mimics natural nursing rhythm
• More milk in a shorter time
• Rapid letdown stimulation
Figure 1
Stimulation Pumping
5

LACTEA Smart gives
you a chance to choose
just the perfect mode for
you. Try all three of them
and see which one is the
right fit.
Figure 3. Classic mode.
Figure 2. Physiological mode. Figure 4. Gentle mode.
6

Up to 8,3 % more calories (fats)
in milk **
Up to 18% more milk expressed
from each breast
Up to 2 hours less time spent
pumping daily
DOUBLE PUMPING*
(simultaneous expression from
both breasts)
Double pumping allows you to
save time while simultaneously
increasing milk production: it
stimulates additional letdown,
expresses more milk, and
increases the nutritional
value of milk.
*requires an additional pumping kit
**a higher milk fat content is beneficial for infants with failure to thrive
BENEFITS OF
DOUBLE PUMPING
7

PRODUCT DESCRIPTION
AND CONTROLS
Power
adaptor
inlet
Membrane
lid
Tubing port
Power
adaptor
Pump
motor
block
Breast shield
size M (24 mm)
Bottle
Bottle lid
Connecting tubing
Assembled
milk valve
Connector cap
8

Display (Lactea Smart Plus/ Pro
models
LED indicator
START/STOP
One touch letdown
and expression
mode switch я
Vacuum level
increase/
decrease
Vacuum outlet
Membrane lid
removal tag
9
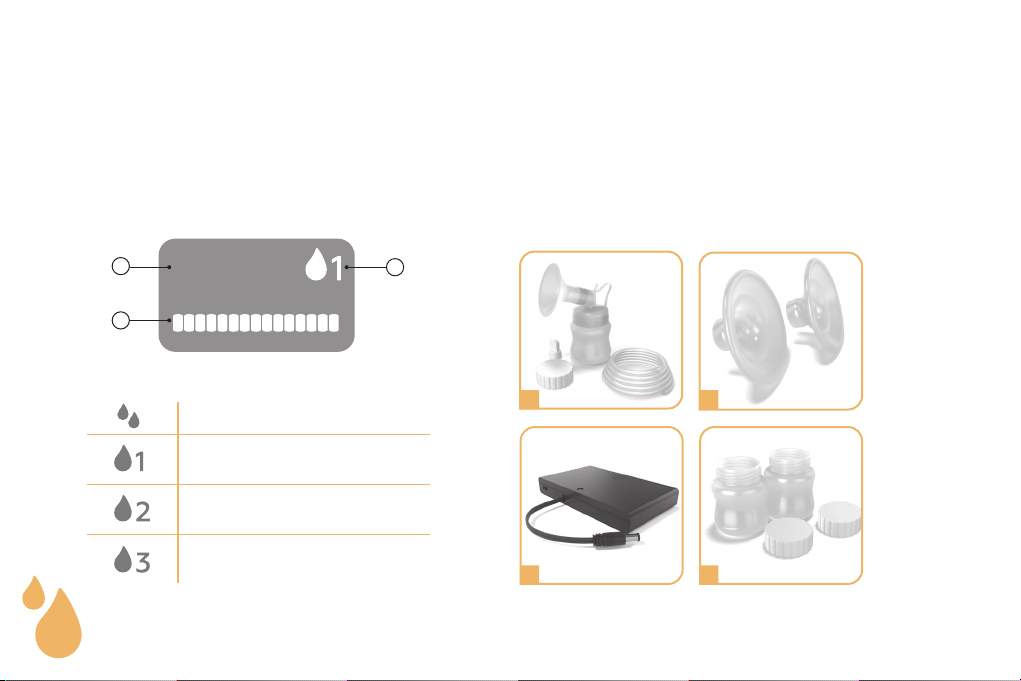
ADDITIONAL PARTS
1. Extra suction kit
2. Silicone shield
3. 8 AA battery block
4. 120 ml bottles
2
4
1
3
LACTEA SMART PLUS/ PRO
DISPLAY ICONS
1. Timer - duration of an
expression session
2. Vacuum indicator
3. Phase/mode indicator
00:00
Stimulation phase
Expression phase:
physiological mode
Expression phase:
classic mode
Expression phase:
gentle mode
1
2
3
10
This manual suits for next models
3
Table of contents


