Lakeland 16906 User manual

INSTRUCTION
BOOKLET
Griddle & Grill
MODEL 16906/17849

2 3
LAKELAND INSTRUCTION BOOKLET
Thank you for choosing the Lakeland Griddle and Grill (16906)
We are sure you will be delighted with the performance and will enjoy many years of your electric
griddle. An award winning family- owned business we have the same strong values of excellent
quality, value for money and exceptional customer care as we did when we first set up the Lakeland
Company in the 1960’s.
Our products are carefully selected by our highly experienced team of experts and are thoroughly
and rigorously tested to meet our consistently high standards so you can be assured that any
product you purchase will be functional, durable and easy to use. It is this level of commitment to
our customers that sets us apart.
Please take a little time to read this booklet before you use your griddle and then keep it in a safe
place for future reference.
This electric griddle will comfortably cook for a family of 4. It comes complete with interchangeable
grill (ridged) and griddle (flat) plates making it extremely versatile for cooking meats, fish, Panini’s,
toasties and even pancakes and drop scones too.
CONTENTS
Product features and cooking positions 4
Safety Cautions 6
The Control Panel and Programmes 8
How to assemble the Griddle and using for the very first time 9
Instructions for use 11
A guide to ingredients 12
A guide to cooking times 13
Adapting your own recipes 13
Hints and tips 14
Recipes 15
Troubleshooting 21
Care and cleaning 22
After sales service 22
Recycling your electricals 22
Electrical connections 23

4 5
PRODUCT FEATURES
Your Lakeland Griddle explained
1. Handle
2. Upper and lower grill plates (Ribbed)
3. Drip Tray
4. Upper plate angle button
5. Bottom housing
6. Grill plates release buttons
7. Lower grill plate power button
8. Lower grill plate timer button
9. LCD screen
10. Upper grill plate timer button
11. Upper grill plate power button
12. Upper grill plate temperature button
13. Lower grill plate temperature button
14. Flat grill plates
COOKING POSITIONS
Your griddle has 3 cooking positions that you can use which are explained below.
Closed position
This is as the name suggests, when the griddle is closed and the upper grill plates rest on the lower
grill plates. This is the position always used for preheating the griddle and cooking foods such as
chicken breasts, kebabs, fish fillets, paninis and toasted sandwiches. This can be adjusted using the
upper grill plate angle button to allow for cooking foods which are thicker.
Open position
To use the griddle in this position simply open up the griddle using the handle until the upper grill
plate locks into an upright position. This is also the position to use when adding or removing foods
to be cooked.
Flat position
To open it out into the flat position, as shown below, for either fitting the grill plates or for cooking
on both grill plates, simply open the griddle up to the open position and then press the upper grill
plate angle button which allows you to open the upper grill plate out completely flat. This allows
you to cook different foods on the separate grill plates at the same time, or to cook large amounts
of the same food.

6 7
SAFETY CAUTIONS
Carefully read all the instructions before using the appliance and keep in a safe place for future
reference. Always follow these safety cautions when using the appliance to avoid personal injury or
damage to the appliance. This appliance should be used only as described in this instruction book.
• Makesureyourelectricitysupplymatchesthevoltageshownontheappliance.
• Toavoidapotentialcircuitoverloadwhenusingthegriddle,donotoperateanyotherhigh
wattage product on the same electrical circuit at the same time.
• Ensureallpackagingmaterialsandanypromotionallabelsorstickersareremovedfromthe
appliance before the first use.
• Alwaysinspecttheappliancebeforeusefornoticeablesignsofdamage.Donotuseifdamaged
or has been dropped. In the event of damage, or if the appliance develops a fault contact the
Lakeland Customer Care Team on 015394 88100.
• Donotusethisapplianceiftheleadisdamaged.Iftheleadisdamageditmustbereplacedby
the manufacturer or a service agent as recommended by the manufacturer.
• Alwaysusetheapplianceonadry,level,heatresistantsurface.
• Thisapplianceisnotintendedforusebypersons(includingchildren)withreducedphysical,
sensory or mental capabilities, or lack of experience and knowledge, unless they have been
given supervision or instruction concerning the use of the appliance by a person responsible
for their safety.
• Childrenshouldalwaysbesupervisedtoensuretheydonotplaywiththisproduct.
• Donotuseanyaccessoriesorattachmentswiththisapplianceotherthanthoserecommended
by Lakeland.
• Toprotectagainstre,electricshockorpersonalinjury,donotimmersecord,plugorunitin
water or other liquids. If the griddle should happen to fall into water, unplug it immediately
from the mains socket and do not touch or reach into the water.
• Donot leavethe leadhanging overthe edgeof akitchen tableor worktop.Avoid contact
between the lead and hot surfaces.
• Forindooruseonly.
• Fordomesticuseonly.
• Thisapplianceshouldbeusedforpreparationoffoodasdescribedwithintheinstructionsfor
use that accompany it.
• Toavoidinjuryorpossiblere,donotcovertheappliancewheninuse.
• Donotconnectthisappliancetoanexternaltimerorremotecontrolsystem.
• Anextensioncablemaybeusedwithcare.Theelectricalratingofthecableshouldbeatleast
as great as the appliance. Do not allow the cable to hang over the edge of the worktop or
touch any hot surfaces.
• ThisappliancecomplieswiththebasicrequirementsofDirectives04/108/EC(Electromagnetic
Compatibility) and 06/95/EC (Safety of Domestic Electrical Appliances)
• WARNING; A cut off plug inserted into a 13amp socket is a serious safety (shock) hazard.
Ensure the cut off plug is disposed of safely before using the griddle.
• The temperature of all surfaces marked with this symbol will be very hot when the
applianceisinuse.DONOTTOUCHthesesurfacesaspossibleinjurycouldoccur.Allowtocool
completely before handling this appliance.
• CAUTION; the plastic bags used to wrap this appliance or the packaging may be
dangerous. To avoid risk of suffocation, keep these bags out of reach of babies and children.
These bags are not toys.
• Donotusethegriddleanditscordonornearagasorelectrichob,orinsideorontopofa
heated oven or any other heat source.
• Usethegriddleinawellventilatedarea,ensuringyoukeepatleast10cmofspacearoundeach
side of the griddle to allow for sufficient air circulation.
• Donotallowthegriddletocomeintocontactwithanycurtains,teatowels,itemsofclothing
or any other flammable materials whilst in use.
• Donotusethegriddleunlessbothgrillplatesareproperlyinstalled.
• Neverlinethedriptraywithfoiloranyothermaterials.
• Donotleaveunattendedduringpreheatingorcookingatanytime.
• Alwaysensurethegriddleispreheatedaccordingtomanufacturer’sguidelinespriortouse.
• Donottouchthehotsurfacesofthegriddlewheninuse.
• Dotakecarewhenopeningthepreheatedgriddleasthegrillplateswillbeveryhot.Forsafety
use heat resistant gloves when handling the griddle.
• Donotliftormovethegriddlewhilstinuse.
• Donotleaveanywoodenorplasticcookingutensilsinorincontactwiththegriddleduring
cooking.
• Alwaysensurethatyourhandsaredrybeforeremovingtheplugfromthemainssocket.Never
pull the plug out of the mains socket by its lead, as this could cause damage to the lead
rendering it unsafe to use.
• Unplugfromthemainswhennotinuseandbeforecleaning.Allowtocoolbeforecleaning
the appliance. To disconnect, turn the upper and lower grill plate power switches to “off “and
remove the plug from the mains socket.

8 9
THE CONTROL PANEL AND PROGRAMMES
Your Lakeland Griddle Control Panel Explained
1. Upper grill plate power button
2. Upper grill plate temperature control
3. Upper grill timer power button
4. Lower grill plate temperature control
5. Lower grill plate power button
6. Lower grill plate timer button
7. LCD Screen
Your Lakeland griddle has both upper and lower cooking grill plates which can be used together or
on their own. The control panel is very straightforward to use and consists of a large LCD screen in
the centre, which will display the cooking temperatures clearly for both grill plates. On either side
of this are identical controls for which the left side controls the upper grill plates and the right side
control the lower grill plates. Once the griddle is plugged in at the mains socket, you will see the
LCD screen flash blue once and beep once, both of which are a sign that the griddle is plugged in.
Upper and Lower Grill Plate Power Button
The upper and lower grill plate power buttons simply turn the upper or lower grill plates on. Once
they are turned on the LCD screen will turn blue and constantly display a flashing 150 which is the
default heat setting and so this will show every time you turn the griddle on.
Upper and Lower Grill Plate Temperature Control
The upper and lower grill plate temperature control buttons allow you to choose a heat setting
from 150c to 180c, 200c, or 220c. You can use either upper and lower grills at the same
temperature, or if cooking different foods, you can select different temperatures for the upper and
lower grill plates. Simply press the button until you reach the desired temperature and the chosen
temperature will flash constantly whilst preheating. The screen will then stop flashing and beep
once when the grill plates have reached the desired temperature.
Upper and Lower Grill Plate Timer Button
The upper and lower grill plate timer buttons allow you to set the timer for either or both of
the upper and lower grill plates from 1 minute to 30 minutes and at the end of that time, the
griddle will automatically turn itself off. The griddle can also be used without the timer being set if
preferred. Simply press the button until you have the number of minutes displayed that you want
to cook for and the griddle will do the rest.
OTHER FEATURES
Automatic Power Off
Your griddle will automatically power itself off at the end of cooking if using the timer setting and
also, after 2 hours if accidentally left turned on.
Warning Buzzer
Shouldaproblemoccurwithinthegriddle,thebuzzerwillsoundconstantly.Shouldthishappen,
simply turn off the griddle from the mains socket and do not use it until it has been checked over
by the manufacturer or a service agent as recommended by the manufacturer.
HOW TO ASSEMBLE THE LAKELAND GRIDDLE AND USING FOR THE VERY FIRST TIME
Fitting the drip tray
• Withthegriddleclosed,carefullylineupthedriptrayatthebackofthegriddleensuringitis
sitting snuggly in its runners. Part of the drip tray will protrude from the back of the griddle
but this is normal. See pic 1.
Fitting the grill or griddle plates
• Totthegrillplatesensureyourgriddleisintheatandopenpositionbyusingtheupper
grill plate angle button to open out the griddle so it is completely flat. See pic 2.
• Eachgrillplate is clearlylabelledunderneathwith ‘upper plate’and‘lowerplate’. Starting
with the upper grill plate, position it with the grease spout pointing towards the drip tray.
Line up the 2 notches on the base of the grill plate with the catches on the griddle base and
then press the plate securely into position. When fitted properly the grill plate will not be able
to be removed unless the grill plate release button is pressed.
• Repeatwiththelowergrillplateasabove.
Removing the grill or griddle plates
Always ensure the griddle is completely cold before removing the grill plates.
• To remove the grill plates ensure your griddle is in the flat and open position.
• Press the upper grill plate release button and the plate will pop out. See pic 3.
• Repeat by pressing the lower grill plate release button and the lower grill plate will pop out.
• Then wash and dry the grill plates before reattaching to the griddle.
Pic 1. Pic 2. Pic 3.

10 11
Preheating the griddle empty before use.
Once you have familiarised yourself with your griddle it is advisable to prepare the griddle and heat
the griddle up empty for the very first use. This is because it is common for the griddle to produce
some smoke on its first use which then disappears with future use.
To do this;
1. Open the griddle up by pulling the handle upwards. Remove and then wash the grill plates and
drip tray thoroughly in hot soapy water, either by hand or on the top rack of the dishwasher.
2. Ensure grill plates and drip tray are totally dry before refitting to the griddle.
3. Wipe over the outside of the griddle using a soft dry and clean cloth.
4. Close the griddle shut and turn it on by plugging it into a mains socket. You will then hear
the griddle beep once and see the LCD screen flash blue once, both of which indicate that the
griddle is plugged in. Then the LCD screen will go out.
5. Press the upper grill plate and lower grill plate power buttons on (see control panel diagram)
and the LCD screen will light up blue and automatically flash 150, which is the default heat
setting.
6. Adjust the heat levels on both the upper and lower grill plates to 220 and leave the griddle to
preheat, during which time the number 220 will flash constantly on either side to indicate it
is preheating.
7. NOTE:During theinitialuse ofthisgriddle itmay producesomesmoke whichisperfectly
normal. There is nothing to worry about and this will disappear with future use.
8. Leave the griddle to preheat for approximately 3- 4 minutes and once it has reached 220 the
LCD screen will beep and the number 220 will stop flashing and remain fixed on the screen
for both upper and lower grill plates. Your preheating of the griddle empty is now complete.
9. Press the upper and lower grill plate power buttons off and unplug the griddle from the
mains socket and leave to cool completely before using.
You are now ready to use your griddle.
INSTRUCTIONS FOR USE
Here are some important points to remember before using your griddle.
• Thisgriddlewillcomfortablycookforafamilyof4.
• Ifgrillingsmallerportionsthanyourrecipesuggests,alwayspositionthefoodinthecentreof
the grill plates for best results.
• Alwaysensureyourfoodstobecookedareofaneventhickness.Ifcookingmeatssuchas
chicken breasts, you can flatten the meat slightly with a meat mallet to ensure even cooking
throughout.
• Whencookingonthefullsizeofthegriddle,ensureyouspacethefoodoutevenlyleavinga
small gap in between foods to allow for uniform cooking.
• When grilling more than one type of food, choose foods of an even thickness, wherever
possible, for an even cook.
• Tryto usetendermeat cutsforgrilling andifyou havetouse toughercuts,always tryto
marinate them first.
• Alwaysusethecookingtimesgivenasaguideandifthefoodisthickerthansuggestedyou
will need to allow a little extra cooking time to ensure it is cooked through properly.
• Alwayspreheatthegriddleaccordingtoguidelinesbeforebeginningtocook.
• WhenusingthegriddleasaPaninimaker,alwaysusethegrillplatesforthoseauthenticgrill
marks.
How to use the Griddle
1. Make sure the griddle is shut and then connect it to the electricity supply by plugging it into
a mains socket. You will then see the LCD screen flash blue once and also beep once before
going out, both of which indicate that the griddle is plugged in.
2. Press the upper grill plate or lower grill plate (or both) power buttons on (see control panel
diagram) and the LCD screen will light up blue and flash 150. This indicates that the grill
plates are switched on and they will begin to heat up to 150C automatically.
3. To vary the cooking temperature, which ranges from 150c, 180c, 200c to 220C, and then
back down again, simply adjust the upper and lower grill plate’s temperature control button
accordingly (see control panel diagram). Whilst preheating, the temperature selected will
constantly flash on the LCD screen until it is reached.
4. When the correct temperature is reached, the flashing will stop and that temperature will
appear as a fixed number on the LCD screen to indicate that the griddle is preheated and
ready for use.

12 13
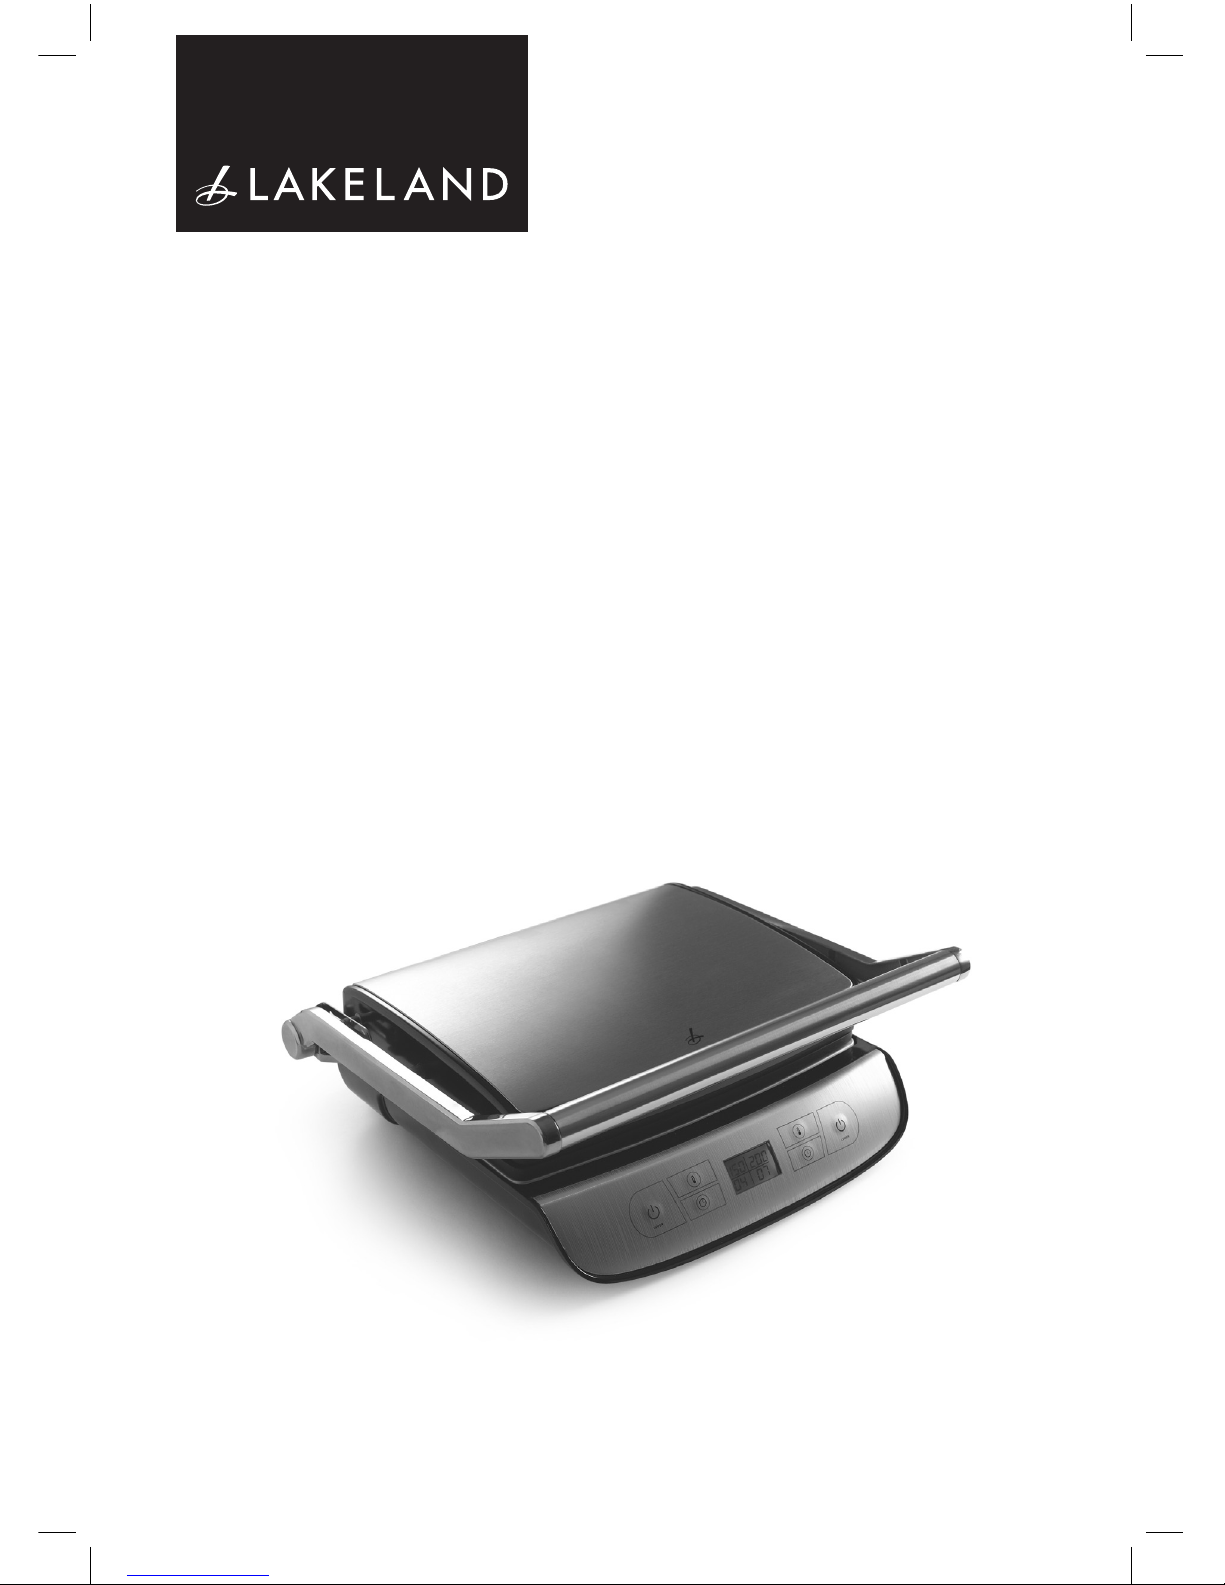
5. If you do not want to use the timer facility your griddle is now ready for cooking on.
6. If you want to use the timer, once the griddle has reached the desired temperature, the timer
can be set on both the upper and lower plates. Set the timer from 1-30 minutes, as required,
and after cooking, the griddle will automatically power itself off.
7. Use the handle to carefully lift up the upper grill plate to the open position, remembering that
they will become very hot and place your food to be cooked on the grill plate using wooden
or plastic heat resistant cooking utensils. Alternatively, open the griddle up to the flat position
andplacefoodtobecookedonbothgrillplates.CAUTION:Neverusemetalcookingutensils
with your griddle as they will damage the non-stick coating of the griddle.
8. Lower the upper grill plates over the food using the handle or alternatively, keep the griddle
opentocookonbothgrillplatesandcookaccordingtorecipe.NOTE:Neverusethegriddle
tocookordefrostfrozenfood.Allfoodmustbecompletelydefrostedbeforecooking.NOTE:
All cooking times are given as a guide only and will vary depending upon thickness and cut
ofmeat,vegetableorsandwichcooked.NOTE:Alwaysensurefoodsarethoroughlycooked
before serving.
9. If cooking in the closed position, carefully lift the handle to open up the griddle, taking care
of the hot grill plates and also of any steam that may be released. Heat resistant gloves are
recommended for safety at this stage.
10. Carefully remove the cooked food using the recommended cooking utensils and if cooking is
complete, unplug the power cord from the mains socket and leave the griddle until completely
cool before cleaning.
A GUIDE TO INGREDIENTS
Your Lakeland griddle is the perfect piece of kitchen equipment to cook a huge selection of foods
on. Because it comes with grill and griddle plates, the variety of foods that the griddle can cook
isvast. You cancook anyof the following on yourgriddle: chickenbreasts, sausages,burgers,
steaks, bacon, gammon steaks, pork fillet or chops, meat kebabs, fish fillets, grilled vegetables,
eggs, Panini’s, toasted sandwiches, quesadillas, grilled fruits and even French toast, waffles, drop
scones or pancakes to name but a few. Below is a guide to preparing ingredients prior to cooking
on the griddle.
• Always ensure foods to be cooked on the griddle are of an even thickness for consistent
cooking.
• Don’t worry about the overall thickness of a food to be cooked, as the griddle has an
adjustable upper grill plate angle button which means the griddle can cook foods that are
also quite thick. Just remember to keep the thickness of the food to be cooked, constant
throughout.
• Meatscanbeattenedslightlyusingameatmalletorrollingpintoensuretheyareofaneven
thickness.
• Whenpreparingvegetablesensurethesearealsoofaneventhickness.
• Whenpreparingvegetablestobegriddledinslices,donotslicethemtoothinly.
• Youdonotneedtoaddadditionaloiltoanyfoodsunlessyouwanttoorifthefoodtobe
cooked is in a marinade.
A GUIDE TO COOKING TIMES
Do note that these will vary depending upon the thickness of food to be cooked and in the
instance of the steak, will vary depending upon your cooking preference.
Sausages -
pricked with a fork first Closed position 6-8 minutes
Burgers–rawnotfrozenquarter
pounder weight Closed position 6-8 minutes
Boneless Chicken Breast – flattened
to an even thickness Closed position 5-6 minutes
Boneless Pork Loin Steak approx 2cm
thickness Closed position 6-8 minutes
Sirloin Steak approx 2cm thickness
Rare
Medium
Well done
Closed position
Closed position
Closed position
2-3 minutes
3-4 minutes
5-6 minutes
Salmon Fillet Closed Position 8-10 minutes
Bacon Closed position 3-4 minutes
Fried Egg Open position 3-4 minutes
ADAPTING YOUR OWN RECIPES
After you have made some of the recipes supplied you may wish to adapt a few of your own
recipes. Start by selecting one of the recipes in this booklet, which is similar to your own and use
this as a guide. Below are a few pointers that will help you when adapting your own recipes.
• Thisgriddlewillcomfortablycookfor4peoplesoifyouareusingarecipetoserve6orabove
you will need to scale down the recipe.
• Foralotofrecipesthefoodiscookedwiththeliddown.Themainexceptionstothisarewhen
wanting to cook on both grill plates and also when using the griddle plates to cook foods
such as eggs, drop scones, pancakes etc.
• Alwaysensurethefoodtobecookedisofaneventhickness,whereverpossible.
• It is not necessary to add any extra oil to meats , sh, vegetables or sandwiches prior to
cooking because of the non-stick grill plates, unless you choose to do so or your food is being
marinated.
• Ifyoudochoosetogreasethegrillplatesdososparinglyotherwisethegriddlemaysmoke.
• Dorememberthatifcookingintheclosedposition,oncepreheated,yourgriddlewillcook
foods such as chicken, burgers and other meats and fish quicker than they would cook under
a standard grill because they are being cooked from both sides at once. Therefore, do keep
an eye on the food cooking at all times, until you are confidant of cooking times.
• Youwillnotneedtoliftthelidduringcookingunlessarecipeadvisesyouotherwise.
• Ifyouarecookingfoodsthathavebeeninamarinade,makesurethatmostoftheexcess
marinade is shaken from the food before cooking to prevent a build - up of burnt marinade
from accumulating on the grill plates.

14 15
HINTS AND TIPS
• Doensure yourgrill platesare xedsecurely in position before preheatingotherwise they
won’t heat up properly and the temperature you are trying to preheat to, will remain as a
flashing number on the LCD screen. If this happens, press the upper and lower grill plate
power buttons off, leave the griddle to cool completely and then reattach the grill plate so it
is firmly in position before preheating again.
• If extra greasing is required, it is advisable to wash the grill plates and ensure they are
completely dry before brushing or wiping over very lightly with a brush or piece of clean
kitchen towel coated with a little butter or oil.
• Whenpreheatingthegriddleitisadvisabletodosowiththelidshut.
• Alwaysensureyourgriddleispreheatedproperlybeforecookingonitotherwiseyourfood
may stick and not cook through properly.
• Whencookingcutsofmeatsuchaschickenbreasts,porklletorevensteaks,atteneach
slightly to ensure they are of the same thickness before cooking.
• Ifpreparingarecipewherebyyouneedtocookmorethanonefoodonthegriddlebefore
cleaning it, it may be helpful to lightly brush any residue from the cooked foods from the
grill plates by using a pastry style brush which has heat resistant bristles or a sheet of kitchen
towel.
• Domakesureyouemptyandwashoutthedriptrayaftereachuseofthegriddle.
• Dokeepaneyeonthedriptrayduringcookingfoodssuchasmarinatedchickenandmeats
to make sure it does not overflow with drained juices.
• Ifcookingintheat/openposition,dorememberthatyouwillneedtoturnthefoodover
during cooking.
• Whencookingintheclosedposition,youwillnotneedtoturnfoodsduringcookingbecause
they are being cooked on both sides already.
• However,ifyouarecookingmeatswhicharecutintostrips,themeatwillbenetfrombeing
moved around halfway during cooking to ensure the slices don’t stick together.
RECIPES
All recipes serve 4 unless otherwise stated. Do not attempt to cook more than advised in the recipe
on your griddle at one time.
CHAR GRILLED CHICKEN AND BACON CLUB SANDWICH
Serves 4
Ingredient Quantity
Boneless and skinless chicken breasts 2
Olive oil 2 teaspoon
Lemon juice 2 teaspoon
Salt and freshly ground black pepper
Rindless rashers smoked back bacon 8
White bread, crusts removed 12 Slices
Tomatoes 2 sliced
Little gem lettuce, roughly torn 8 leaves
Mayonnaise 8 tablespoons
Cocktail sticks to serve
1. Flatteneachchickenbreastslightlybyusingameattenderizerorrollingpintoensureitisan
even thickness. Arrange chicken in a shallow dish, whisk the oil, lemon juice and seasoning
together then brush over the chicken breasts.
2. Preheat the griddle fitted with the grill plates to 220. Open up the griddle, add the chicken
and cook in the closed position for 5 minutes or until cooked through. Carefully remove the
chicken from the griddle and when cool enough to handle, cut into slices. Wipe over the grill
plates with some kitchen towel.
3. Add the bacon rashers to the griddle and cook in the closed position for 3-4 minutes or until
crisp. Carefully remove from the griddle and keep warm. Wipe over the grill plates with some
kitchen towel.
4. Place 4 of the bread slices on the griddle and toast in the closed position for 3-4 minutes or
until lightly browned. Carefully remove the toast slices and keep warm wrapped in a clean tea
towel, whilst repeating with other bread slices.
5. Place 4 slices of toast on a chopping board and lightly spread each with a little of the
mayonnaise then top with some tomato slices, a little torn lettuce and the grilled chicken
slices.
6. Top each with another slice of toast spread with a little more mayonnaise, a little more lettuce,
tomato and crispy bacon and a final layer of toast which has been spread with remaining
mayonnaise and placed mayonnaise side down.
7. Then cut the sandwiches diagonally in half and then in half again to form triangles, inserting
a cocktail stick in the centre of each sandwich quarter to keep in place and serve immediately.

16 17
TANDOORI CHICKEN KEBABS WITH MANGO CHILLI AND LIME SALSA
Serves 4
Ingredient Quantity
Naturalyogurt 200g
Lemon juice 1 tablespoon
Fresh root ginger, peeled and finely grated 1”
Clove garlic, peeled and crushed 1
Garam masala 1 teaspoon
Sweet paprika 2 teaspoon
Generous pinch sea salt
Skinless and boneless chicken breasts, diced into
1” pieces 450g
Cocktail sticks to serve
For the mango chilli and lime salsa:
Ingredient Quantity
Medium ripe mangoes, stones removed and
finely diced 2
Spring onions, trimmed and finely sliced 4
Finely chopped red chilli, optional 1
Freshly chopped coriander 3 tablespoons
Juice of a lime 1
Salt and freshly ground black pepper 2 teaspoon
Wooden skewers 8
Skinless and boneless chicken breasts, diced into
1” pieces 450g
Cocktail sticks to serve
1. In a bowl mix together the yogurt, lemon juice, ginger, garlic, garam masala, paprika and salt.
Add the diced chicken to the bowl and stir until well coated. Cover and leave to marinate for
at least 2 hours, or ideally overnight for best results, in a fridge.
2. In a bowl combine all of the salsa ingredients until well mixed, then season to taste and set
aside.
3. Preheat the griddle fitted with the grill plates to 220c. Thread the marinated chicken onto
8 wooden skewers. When the griddle is preheated, open up the griddle, add the chicken
skewers to the grill plates and cook in the closed position for 8-10 or until cooked through.
4. Serve the tandoori chicken kebabs in pitta breads or wraps with the mango chilli and lime
salsa to accompany them.
Cooks tip – For an even quicker marinade, why not stir 2 tbsp readymade tandoori paste into the
natural yogurt.

18 19
FAMILY FUN FAJITAS
Serves 4
Ingredient Quantity
skinless and boneless chicken breasts, cut into
strips 450g
Olive oil 2 tablespoons
Small clove garlic, peeled and crushed 1
Freshlysqueezedjuiceofalime 1
Smoked paprika 2 teaspoons
Generous pinch of ground cumin
Pinch of mild chilli powder
Onion, peeled, halved and sliced 1mediumsize
Red pepper, cored, deseeded and cut into slices 1
Yellow pepper, cored, deseeded and cut into
slices 1
8 flour tortillas
To serve
Guacamole, soured cream and salsa
1. Placethestripsofchickeninafreezerbag,addtheoil,garlic,limejuice,paprika,cuminand
chilli and mix together until well coated. Leave to marinate for at least 1 hour, or ideally
overnight for best results, in a fridge.
2. Preheat the griddle fitted with the grill plates to 220c. Open the griddle up to the upright
position and then using the upper plate angle button, open the griddle out completely flat.
3. Add the onion to one half of the griddle and spread out to ensure they are in an even layer
then add the pepper slices to the other half, also spreading out to an even layer. Grill the
onions for approximately 6-8 minutes and the pepper slices for approximately 10-12 minutes,
turning both over halfway through cooking until softened and char grilled. Carefully remove
the cooked onions and then the pepper slices and keep warm whilst cooking the chicken.
4. Divide the chicken between both sides of the griddle, ensuring you spread it out to an even
layer. Cook the chicken for 10 minutes, carefully turning the chicken strips over about half
way through and cook until char grilled and cooked through.
5. Toss together the cooked chicken and onion and pepper mix with the remaining lime juice and
serve wrapped in warmed tortillas with guacamole, soured cream and salsa to accompany.
Cooks tip – instead of chicken why not try using turkey or beef strips.
ASIAN STYLE SALMON FILLETS WITH STIR FRIED VEGETABLES
Serves 4
Ingredient Quantity
Sesame oil 2 teaspoons
Olive oil 1 tablespoon
Soy sauce 2 tablespoons
Juice of ½a lime
Runny honey 1 tablespoon
Finely grated fresh ginger 1 teaspoon
Clove garlic, peeled and crushed 1
Finely chopped fresh red chilli, optional 1 teaspoon
Salmon fillets, skin on 4
Large carrot, peeled and cut into thin strips 1
Yellow pepper, cored, deseeded and cut into
slices 1
Fine asparagus spears, trimmed 125g
1. Combine the sesame and olive oil, soy sauce, lime juice, honey, ginger, garlic and chilli, if
using, and pour into a shallow dish large enough to hold the salmon fillets in one layer. Add
the salmon fillets, skin side uppermost, cover and leave to marinate for at least 1 hour, or
ideally overnight for best results, in a fridge.
2. Preheat the griddle fitted with the grill plates to 220c. Open up the griddle, arrange the
carrot strips in one even layer on the griddle and cook in the closed position for 4-5 minutes
until tender and char grilled. Carefully remove to a serving dish to keep warm.
3. Add the pepper slices to the griddle in one even layer and cook in the closed position for 4-5
minutes or until softened and char grilled. Carefully remove the pepper strips to the serving
dish and keep warm with the carrot.
4. Add the asparagus to the griddle in one even layer and cook in the closed position for 4-5
minutes or until softened and char grilled. Carefully remove the asparagus from the griddle
and add to the carrots and peppers and keep warm whilst cooking the salmon.
5. Shake off any excess marinade and add the marinated salmon to the griddle. Cook in the
closed position for 8-10 minutes, or until cooked through. Serve the salmon on a bed of the
stir fried vegetables immediately.

20 21
DROP SCONES WITH STRAWBERRIES
Serves 4/makes 8
Ingredient Quantity
Ripe strawberries, hulled 225g
Icing sugar 1 tablespoon
Self-raising flour 75g
Pinch salt
Caster sugar 1 tablespoon
Egg 1
Milk 75g
Butter, melted 15g
Dash of vanilla extract
Caster sugar for sprinkling 1
1. Cut half of the strawberries into slices and set aside. Transfer the remaining strawberries to
a jug and using a handheld blender, blend until you have a puree. Stir in icing sugar to taste
then sieve to remove the pips and set aside.
2. Sift the flour into a bowl with the salt and sugar and make a well in the centre. Mix together
the egg, milk, melted butter and vanilla then slowly add this to the well in the bowl, gradually
whisking the flour into the milk mixture to form a smooth slightly thick batter.
3. Using the griddle fitted with the griddle plates, preheat the griddle to 220c. Open the griddle
to the upright position and then using the upper plate angle button, open griddle out
completely flat.
4. Drop tablespoons of the batter onto the preheated griddle plates, carefully spreading each
out into a round measuring approx 10cm and cook for 1-2 minutes or until bubbles appear
on the top surface of the drop scones. Then flip over and cook for a further 1-2 minutes until
golden.
5. Carefully remove the drop scones from the griddle and keep warm in a clean serviette or tea
towel whilst cooking the remaining batter to make 8 drop scones.
6. Servethedropsconesdrizzledwithalittlestrawberrypuree,toppedwithstrawberryslices
and a final dusting of caster sugar.
Cooks tip – If preferred, apple slices could be cooked on the griddle and sprinkled with a pinch of
ground cinnamon for an alternative topping.
TROUBLESHOOTING
Following are some common problems that can occur when using the griddle. Please revue the
problems, their possible cause and any corrective action that should be taken to ensure successful
cooking.
Problem Possible cause Solution
Fat or cooking juices are
spilling out onto the work
surface.
Incorrect assembly of the drip
tray.
Or, drip tray not emptied
from last use.
Remove drip tray and ensure
it is properly fitted into the
back of the griddle.
Remember to empty and
wash the drip tray after each
use of the griddle.
Severe smoking from griddle.
Too much extra greasing
applied to grill plates.
Or, grill plates have not been
cleaned after last use.
Nexttimereduceamountof
butter or oil used or try using
without greasing.
Ensure you wash or wipe the
grill plates after EVERY use.
Food sticking to the grill
plates.
Insufficient preheating of the
griddle.
Or, grill plates have not been
cleaned after last use.
Always ensure you preheat
the griddle according to
manufacturer’s guidelines
before beginning to cook
on it.
Ensure you wash or wipe the
grill plates after EVERY use.
Food taking too long to cook
and char grill.
The temperature you have
selected may not be hot
enough.
Nexttimecookatahigher
temperature.
Food is getting burnt on the
outside before being cooked
through in the centre.
The temperature you have
selected may be too hot.
Nexttimecookatalower
temperature.
Constantbuzzingemitted
from griddle The griddle has developed a
serious electrical fault.
Turn griddle off at the mains
immediately and contact
Lakeland Customer Services
for assistance.

22 23
CARE AND CLEANING
Here are some care and cleaning hints to help you look after your griddle.
• Beforetherstuseandaftereveryuse,cleaneachpartthoroughly.
• Periodicallycheckallpartsbeforereassembly.
• Unplugthegriddleandallowtocoolcompletelybeforecleaning.
• Alwaysuseplastic,nylonorsiliconespatulasetc.–metaltoolswilldamagenon-stickcoatings.
• Neverimmersetheunitinwateroranyotherliquid.
• Ifthereareanylargefooddepositsorresiduefromcookedfoodonthegrillplates,carefully
scrape these off using a plastic or wooden scraper before soaking and washing.
• To clean the unit and control panel, wipe with a clean, soft, damp cloth and dry before
storing.
• Donotuseabrasivecleaners,steelwoolorabrasivematerialsorcleanserseitherontheinside
or outside of the griddle.
• Thegrillplatesanddriptrayaretopshelfdishwashersafe.However,topreservethelifeofthe
non-stick coating on the grill plates, it is advisable to wash these in hot soapy water by hand.
• Forverystubborndepositsonthegrillplatesitisadvisabletosoakthegrillplatesinhotsoapy
water before cleaning.
• Alwaysensurethecleanedgrillplatesanddriptrayarecompletelydrybeforereattachingto
the griddle.
• Storethegriddlewiththepowercablelooselycoiled.Neverwrapittightlyaroundthegriddle.
AFTER SALES SERVICE
For any problems or advise on repairs for the griddle please contact Lakeland Customer Services
on 015394 88100.
RECYCLING YOUR ELECTRICALS
Along with many other high street retailers, Lakeland has joined a scheme whereby customers can
take their unwanted electrical s to recycling points set up around the country.
Visit www.recycle-more.co.uk to find your nearest recycling point.
ELECTRICAL CONNECTIONS
THIS APPLIANCE MUST BE EARTHED
This appliance is fitted with a fused three-pin plug to BS1363 which is suitable for use in all homes
fitted with sockets to current specifications. If the fitted plug is not suitable for your socket outlets,
it should be cut off and carefully disposed of. To avoid an electric shock, do not insert the discarded
plug into a socket.
Fitting a new plug
If for any reason you need to fit a new plug, the flexible mains lead must be connected as shown
here. The wires in the mains lead fitted to this appliance are coloured in accordance with the
followingcode:
E
Earth(green/yellow)
L
N
Neutral(blue)
13amp FUSE
13amp fuse
Live(brown)
ConnectBLUEtoNeutral(N)
ConnectGREEN&YELLOWtoEarth(E)
ConnectBROWNtoLive(L)
13 amp fuse to be used
If the colours of the wires in the mains lead of this appliance do not correspond with the coloured
markings identifying the terminals in your plug, proceed as follows. The wire which is coloured
green and yellow MUST be connected to the terminal which is marked with the letter E (Earth)
or coloured green. The wire which is coloured blue MUST be connected to the terminal which is
markedwiththeletterN(Neutral)orcolouredblack.ThewirewhichiscolouredbrownMUSTbe
connected to the terminal which is marked with the letter L (Live) or coloured red.
Before refitting the plug cover, check that there are no cut or stray strands of wire inside the plug.
Use a 13 amp BS1362 fuse. Only BSI or ASTA approved fuses should be used. If you are at all unsure
which plug or fuse to use, always refer to a qualified electrician.
Note:afterreplacingorchangingafuseonamouldedplugwhichhasafusecover,thecovermust
berettedtotheplug;theappliancemustnotbeusedwithoutafusecover.Iflost,replacement
fuse covers can be obtained from an electrical shop. This appliance complies with the following EC
Directives:2006/95/EC(LowVoltageDirective)and2004/108/EC(EMCDirective)

Lakeland
Alexandra Buildings, Windermere, Cumbria LA23 1BQ
Tel:01539488100Web:www.lakeland.co.uk
Other manuals for 16906
1
This manual suits for next models
1
Table of contents
Other Lakeland Grill manuals
Popular Grill manuals by other brands

George Foreman
George Foreman GRP3180 use and care manual

Napoleon
Napoleon PRO285E-BK-CE manual

Razor
Razor GGC2244M owner's manual

Williams-Sonoma
Williams-Sonoma SBD-411BY Assembly & user manual

DCS
DCS PROFESSIONAL LIBERTY BFGC Series INSTALLATION GUIDE/USER GUIDE

Char-Broil
Char-Broil Grill 2 Go X200 owner's guide