Lakeland Timeless 13658 User manual

Lakeland
Alexandra Buildings, Windermere, Cumbria A23 1BQ
Tel: 015394 88100 Web: www.lakeland.co.uk
The Lakeland Guarantee....
is probably the simplest guarantee in the world!
If you are not satisfied at any time, you receive your money back!
This is our promise.
USER MANUAL
C R E AM 2 - S L I CE TOA S TE R
Model: 13658
Helpline No: 015394 88100
Cream Toaster IB 03_11:Layout 1 16/3/11 10:29 Page 1

INTRODUCTION
Thank you for choosing this akeland toaster, and we hope you enjoy using it. Please take a few moments to
read these instructions before using the toaster for the first time, and keep them in a safe place for future
reference.
FEATURES
1. Slide-out crumb tray
2. Cord storage
3. Browning control
4. Hi-rise lever
5. Defrost button with indicator light
6. Reheat button with indicator light
7. Bagel button with indicator light
8. Cancel button with indicator light
Operating voltage: 220-240V~50/60Hz
Power: 750W-900W
IMPORTANT SAFEGUARDS
When using this toaster, please follow these basic safety precautions.
1. Please read all instructions before using.
2. Make sure your electricity supply matches the voltage shown on the appliance.
3. This toaster is for household use only. It is not suitable for commercial use, or for use outdoors. The toaster
must only be used for toasting bread products.
4. Keep the toaster on a level surface that is clean and dry. We recommend that the toaster is not placed
directly beneath wall cupboards. Do not let the power cord touch any hot surfaces or hang over the edge,
where a child could grab it.
5. Burnt toast can catch fire, so never leave your toaster unattended during use. Place the toaster away from
anything that could catch fire e.g. curtains. Never heat food with a topping or filling, such as pizza or
pastries; any drips could catch fire. Crumbs can also smoke or burn, so please clean the crumb tray
regularly.
6. To prevent electric shock, never let the toaster, cord or plug get wet. Never put your fingers or anything
metal into the toaster slots e.g. knives and forks.
7. Never cover the toaster; it could overheat and catch fire.
8. Do not place the toaster on or near a hot gas or electric burner, or in or near a heated oven.
9. Do not move the toaster whilst switched on, and take care not to touch the hot surfaces, particularly the
metal on top.
10. Always unplug the toaster when not in use, before cleaning or attempting to remove stuck pieces of bread.
Grasp the plug, not the power cord. et the toaster cool down completely before cleaning.
11. The toaster must not be used with any accessories that are not supplied by the manufacturer.
12. This appliance can be used by children aged from 8 years and above and persons with reduced physical,
sensory or mental capabilities or lack of experience and knowledge if they have been given supervision or
instruction concerning use of the appliance in a safe way and understand the hazards involved. Children
shall not play with the appliance. Cleaning and user maintenance shall not be made by children unless they
are older than 8 and supervised.
Keep the appliance and its cord out of reach of children less than 8 years.
13. Do not use the toaster if the power cord or plug show any signs of damage, or if the appliance is dropped,
damaged or working incorrectly. Call the helpline on 015394 88100 to arrange a repair by an authorised
repairer, or a replacement. Never try to repair the toaster yourself as this may cause electric shock.
Cream Toaster IB 03_11:Layout 1 16/3/11 10:29 Page 3

BEFORE USING YOUR TOASTER FOR THE FIRST TIME
1. Carefully unpack the toaster and remove any packaging. Wrap any excess cord around the cleats on the
underside of the toaster.
2. Plug in the toaster and operate once, without any bread, on a medium setting. You may notice a slight
burning smell when the toaster is first switched on; this is completely normal with new heating elements.
USING YOUR TOASTER
1. Plug the toaster into the mains socket.
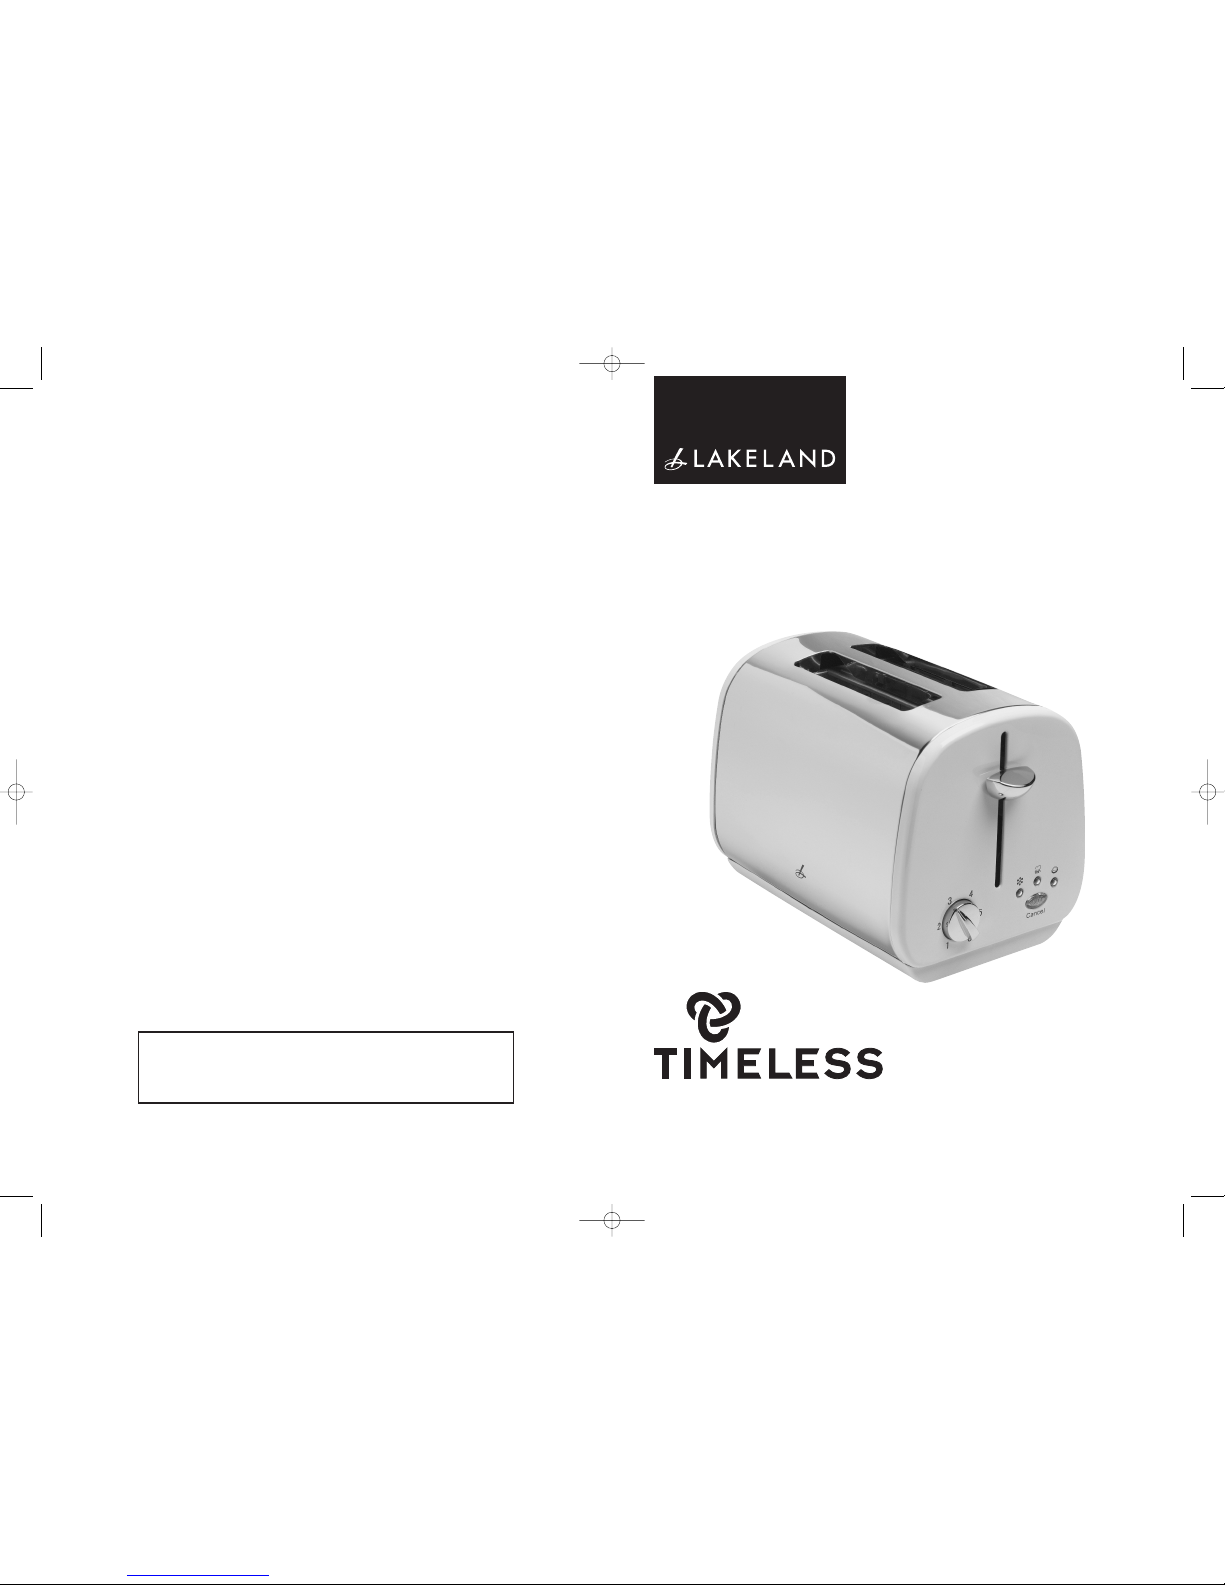
2. Turn the browning control to your preferred setting. The higher the setting, the darker the toast will be.
3. Insert bread, muffins, bagels etc.
4. ower the lever until it locks. The lever will only stay down if the toaster is plugged in. The cancel button
will light up.
• To toast frozen bread, press the defrost button after lowering the lever. The defrost button will light up.
• To toast bagels, cut in half and place the bagel with its cut side innermost. Press the bagel button after
lowering the lever. The bagel button will light up. This setting reduces the heat to the outside of the bagel,
so it does not burn.
• To warm toast that has already popped up, but has gone cold, press the reheat button after lowering the
lever. The reheat button will light up.
5. Your toast will automatically pop up when it’s ready. To raise it higher, lift the lever. To stop the toasting
cycle earlier, simply press the cancel button. Never lift the lever to stop the toasting.
6. After use, unplug the toaster.
TOASTING TIPS
• For lightly browned toast, or to toast one slice only, select a lower setting.
• A single slice of toast may vary in colour from one side to the other. This is perfectly normal.
• Dry or stale bread toasts more quickly than fresh bread. ikewise, thinly sliced bread is quicker to toast
than thick slices. In both cases we recommend selecting a lower browning setting than usual.
• For the best results, ensure your bread slices are of even thickness, freshness and size.
• To avoid over-browning, it is best to wait at least 30 seconds between toasting cycles. Alternatively, select
a lower setting when making your next round of toast.
CARE AND CLEANING
1. Always unplug the toaster and let it cool down completely before cleaning.
2. Slide out the crumb tray. Wipe it and replace. We recommend doing this regularly as crumbs can smoke
or even burn.
3. If any bread is stuck in the toaster, unplug it, turn it upside down and shake gently. Never put your fingers
or any metal utensils into the toaster slots. This could damage the toaster and lead to an electric shock.
4. Wipe the outside of the toaster with a damp cloth, then dry with a soft cloth. Do not use abrasive cleaners
or scourers as they will damage the finish.
CAUTION: never immerse the toaster, cord or plug in water or any other liquid.
RECYCLING YOUR ELECTRICALS
Along with many other high street retailers, akeland has joined a scheme whereby customers can take their
unwanted electricals to recycling points set up around the country. Visit www.re y le-more. o.uk to find your
nearest recycling point.
Cream Toaster IB 03_11:Layout 1 16/3/11 10:29 Page 5

ELECTRICAL CONNECTIONS
THIS APPLIANCE MUST BE EARTHED
This appliance is fitted with a fused three-pin plug to BS1363 which is suitable for use in all homes fitted with
sockets to current specifications. If the fitted plug is not suitable for your socket outlets, it should be cut off and
carefully disposed of. To avoid an electric shock, do not insert the discarded plug into a socket.
Fitting a new plug
If for any reason you need to fit a new plug, the flexible mains lead must be connected as shown here. The wires
in the mains lead fitted to this appliance are coloured in accordance with the following code:
Conne t BLUE to Neutral (N)
Conne t GREEN & YELLOW to Earth (E)
Conne t BROWN to Live (L)
13 amp fuse to be used
If the colours of the wires in the mains lead of this appliance do not correspond with the coloured markings
identifying the terminals in your plug, proceed as follows. The wire which is coloured green and yellow MUST
be connected to the terminal which is marked with the letter E (Earth) or coloured green. The wire which is
coloured blue MUST be connected to the terminal which is marked with the letter N (Neutral) or coloured black.
The wire which is coloured brown MUST be connected to the terminal which is marked with the letter ( ive)
or coloured red.
Before refitting the plug cover, check that there are no cut or stray strands of wire inside the plug. Use a 13 amp
BS1362 fuse. Only BSI or ASTA approved fuses should be used. If you are at all unsure which plug or fuse to
use, always refer to a qualified electrician.
Note: after replacing or changing a fuse on a moulded plug which has a fuse cover, the cover must be refitted
to the plug; the appliance must not be used without a fuse cover. If lost, replacement fuse covers can be
obtained from an electrical shop. This appliance complies with the following EEC Directives: 73/23 EEC ( ow
Voltage Directive) and 89/336 EEC (EMC Directive).
This appliance is not intended to be operated by means of an external timer or separate remote-control system.
0003
E
Earth(green/yellow)
L
N
Neutral(blue)
13amp FUSE
13amp fuse
Live(brown)
Cream Toaster IB 03_11:Layout 1 16/3/11 10:29 Page 7
Other Lakeland Toaster manuals