lauson CP442 User manual

PORTABLE STEREO CD/MP3 RADIO PLAYER
WITH USB PORT
MODEL NO.: CP442 – RED CP446 – BLUE
CP443 – WHITE CP447 – ORANGE
CP444 – GREEN CP448 – PINK
CP44 – BLACK
INSTRUCTION MANUAL
WARNING
Dear Customer,
Thank you for purchasing our Boombox Lauson. Please read and follow these instructions, in order to avoid
damaging the item. We do not cover any damage that may arise from improper use of the item of the disregard
of the safety instructions.
TO PREVENT FIRE OR SHOCK HAZARD DO NOT EXPOSE THIS APPLIANCE TO RAIN OR MOISTURE.
CAUTION
RISK OF ELECTRIC
SHOCK
DO NOT
OPEN
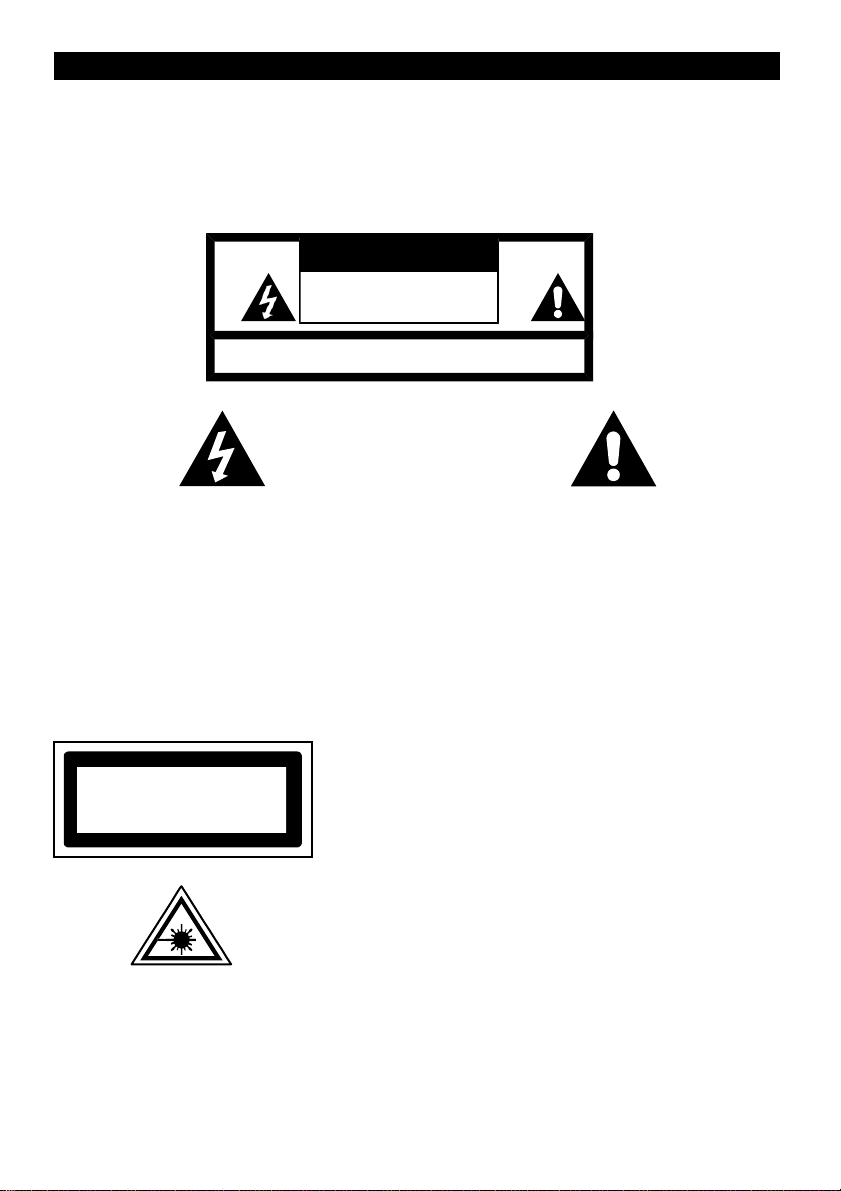
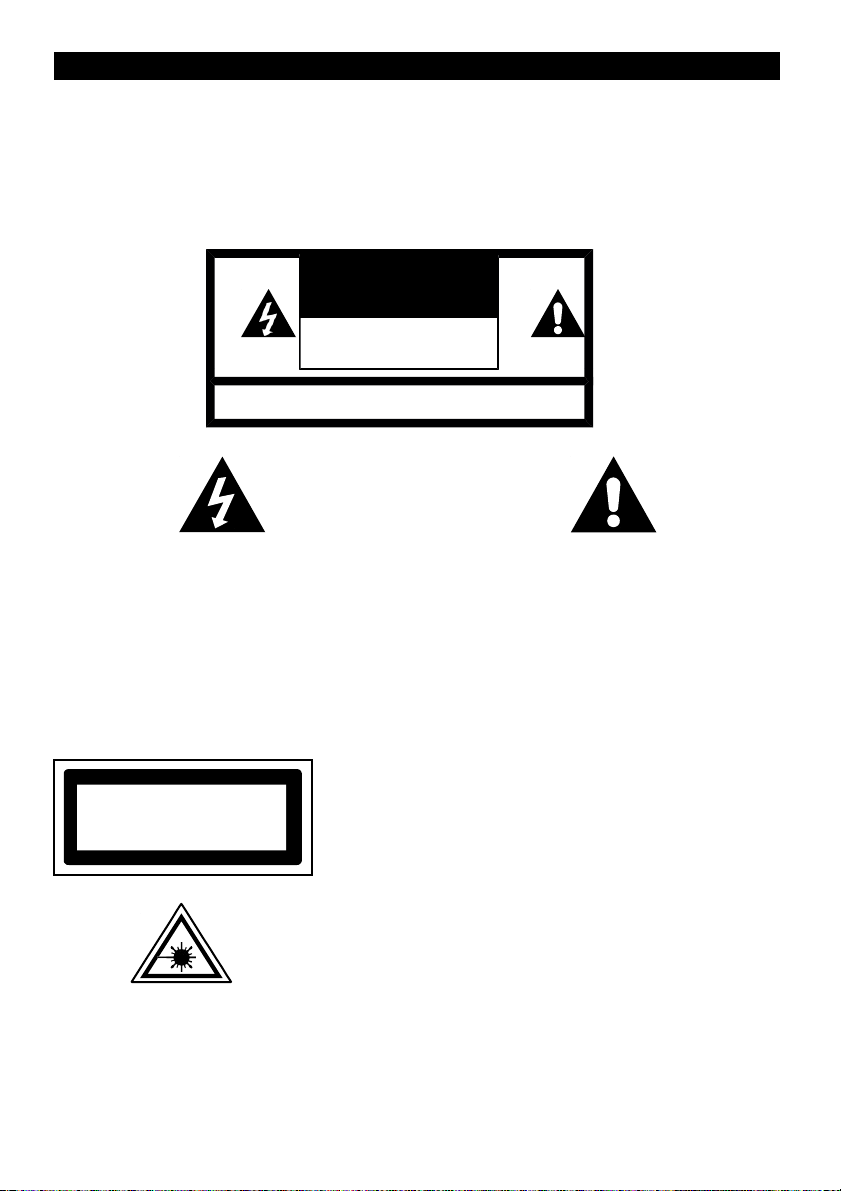
WARNING : SHOCK HAZARD-DO NOT OPEN
LIGHTNING FLASH WITH ARROWHEAD SYMBOL
-
within an equilateral triangle, is intended to alert the
user to the presence of uninsulated dangerous
voltage within the products enclosure that may be of
sufficient magnitude to constitute a risk of electric
shock to persons.
EXCLAMATION POINT - within an equilateral triangle,
is used to indicate that a specific component shall be
replaced only by the component specified in that
documentation for safety reason.
The following label has been affixed to the unit, listing the proper procedure for working with the laser beam:
CLASS 1 LASER PRODUCT LABEL -
This label is attached to the place as illustrated to inform that the
apparatus contains a laser component.
WARNING LABEL INFORMING OF RADIATION -
This label is placed inside the unit. As sh own in the illus tration. To
warn against further measures on the unit. The equipment contai
ns a laser radiating laser rays according to the limit of laser pr
oduct of
class 1.
CLASS 1 LASER PRODUCT KLASS 1 LASER
APPARAT LUOKEN 1 LAISERLAITE KLASSE
1 LASER PRODUKT
EN 1

SAFETY INSTRUCTIONS
1. READ INSTRUCTIONS All the safety and operating instructions should be read before the appliance is operated.
2. RETAIN INSTRUCTIONS The safety and operating instruction should be retained for future reference.
3. HEED WARNINGS All warnings on the appliance and in the operating instructions should be adhered to.
4. FOLLOW INSTRUCTIONS All operating instructions should be followed.
. WATER AND MOISTURE The appliance should not be used near water, for example, near a bathtub, washbowl,
kitchen sink, laundry tub, swimming pool or in a wet basement.
6. VENTILATION The appliance should be situated so that its location or position does not interfere with its proper
ventilation. Do not place on bed, sofa, rug or similar surface that may block the ventilation openings, in a built in
installation, such as a bookcase or cabinet that may impede the flow of air through the ventilation openings.
7. HEAT The appliance should be situated away from heat sources such as radiators, stoves, or other appliances
(including amplifiers) that produce heat.
8. POWER SOURCE The appliance should be connected to power supply only of the type described in the
operating instructions or as marked on the appliance.
9. POWER CORD PROTECTION Power supply cords should be routed so that they are not likely to be walked on
or pinched by items placed upon or against them.
10. POWER LINES An outdoor antenna should be located away from power lines.
11. OBJECT and LIQUID ENTRY Care should be taken so that objects do not fall and liquids are not spilled into
the enclosure through openings.
12. ESD WARNING The display does not function properly or no reaction to operation of any the control may due
to the electrostatic discharge. Switch off and unplug the set. Reconnect after a few seconds.
13. DAMAGE REQUIRING SERVICE The appliance should be serviced by qualified service personnel when:
a. The power supply cord or plug has been damaged.
b. Objects have fallen into, or liquid has been spilled into the appliance enclosure.
c. The appliance has been exposed to rain.
d. The appliance has been dropped, or the enclosure damaged.
e. The appliance does not appear to operate normally.
14. SERVICING The user should not attempt to service the appliance beyond that described in the user operating
instructions. All other servicing should be referred to qualified service personnel.
1 . CAUTION Danger of explosion if battery is incorrectly replaced. Replace only with the same or equivalent type.
16. A warning that batteries (battery pack or batteries installed) shall not be exposed to excessive heat such as
sunshine, fire or the like.
17. WARNING To reduce the risk of fire or electric shock, do not expose this apparatus to rain or moisture. The
apparatus shall not be exposed to dripping or splashing and that no objects filled with liquids, such as vases, shall
be placed on apparatus.
18. WARNING The mains plug is used as disconnect device, the disconnect device shall remain readily operable.
19. Correct Disposal of this product. This marking indicates that this product should not be disposed with
other household wastes throughout the EU. To prevent possible harm to the environment or human
health from uncontrolled waste disposal, recycle it responsibly to promote the sustainable reuse of
material resources. To return your used device, please use the return and collection systems or
contact the retailer where the product was purchased. They can take this product for environmental
safe recycling.
Notes:
a. Dirty or scratched CD may cause a skipping problem. Clean or replace the CD.
b. If an error display or malfunction occurs, disconnect the AC cord and remove all the batteries. Then turn the power
back on.
BEFORE OPERATION
Notes: CONCERNING COMPACT DISCS.
Since dirty, damaged or warped discs may damage the appliance, care should be taken of the followings items:
a. Usable compact discs. Use only compact disc with the mark shown below.
b. CD compact disc only with digital audio signals.
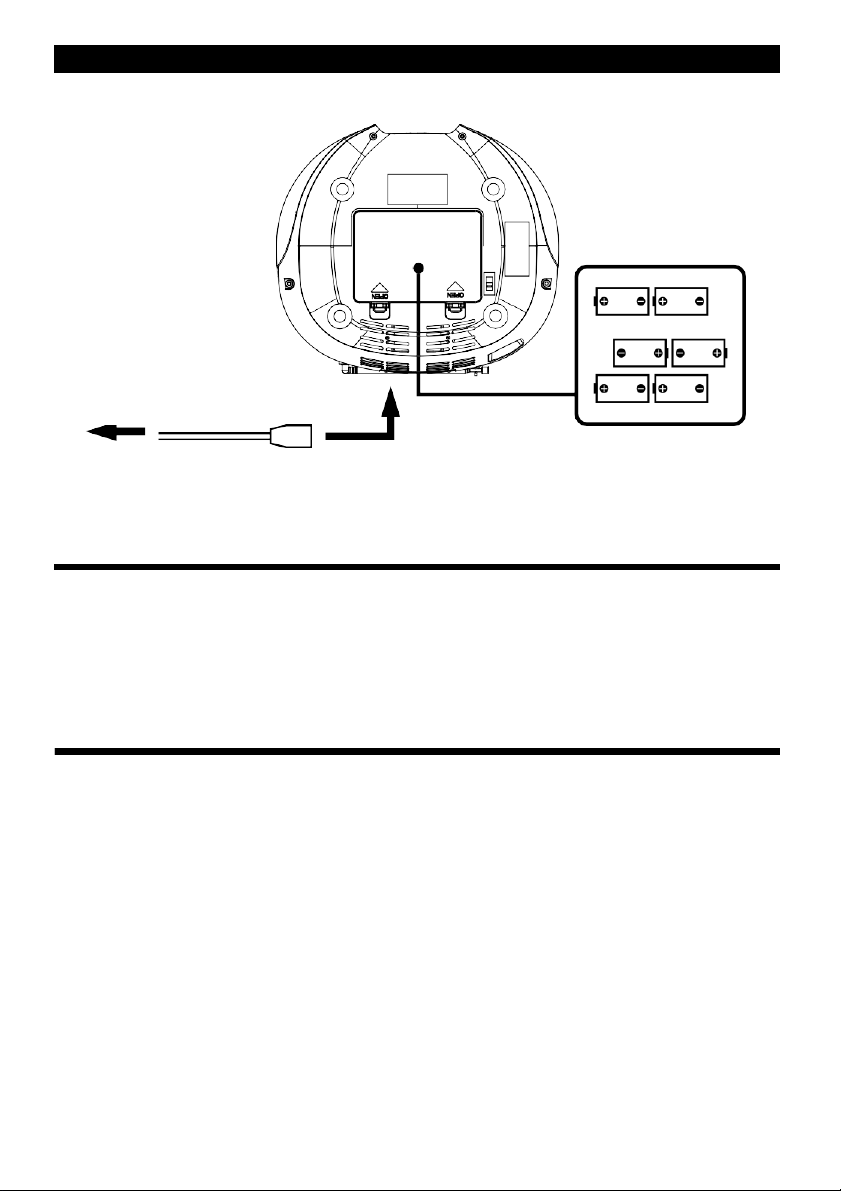
POWER SOURCES
to a wall
outlet
to AC
IN
Insert 6 x “C” size batteries
into the battery compartment
AC POWER
You can power your portable system by plugging the detachable AC power cord into the AC inlet at
the back of the unit and into a wall AC power outlet. Check that the rated voltage of your appliance
matches your local voltage. Make sure that the AC power cord is fully inserted into the appliance.
BATTERY POWER
Insert 6 x “C” size batteries into the battery compartment. Be sure that the batteries are inserted
correctly to avoid damage to the appliance. Always remove the batteries when appliance will not be
used for a long period, as this will cause leakage to the batteries and subsequently damage to your
set.
Notes:
Use batteries of the same type. Never use different types of batteries together.
To use the appliance with batteries, disconnect the AC power cord from it.
EN 3

LOCATION OF CONTROL
FM ANTENNA
HANDLE
LCD DISPLAY
STANDBY / FUNC
VOL
+
VOL
STO
P
SKIP / TUN
USB JACK
CD DOOR
OPEN / CLOSE
MODE / AMS
PRE + / FOLDER +
PRE / FOLDER
PLAY / PAUSE / CLOCK
SKIP+ / TUN+
AC
CORD
AUX IN JACK
HEADPHONE JACK

RADIO OPERATION
AUTOMATIC TUNING
1. Press the “STANDBY / FUNC.” button to select “RADIO” mode.
2. Press and hold the “SKIP + / Tun +” or “SKIP / Tun ” button over 3 seconds to start
automatic tuning process.
3. When a station is tuned in the tuning process, it will stop automatically and you can listen to
your desired station.
AUTOMATIC MEMORY STATIONS (AMS)
1. Press and hold the "MODE / AMS" button on unit for about 2 3 seconds to start the
automatic preset process.
2. Display will show the memory sequence number and radio stations will be automatically
preset into the sequence number (Note: Each sequence number means 1 preset station while
during automatic preset process.)
3. Once all the stations were automatic preset, press the “Pre +” or “Pre “button to choose
preset stations.
MANUAL TUNING
It is for selecting stations, which cannot be tuned automatically. (manual selection)
To tune a channel manually.
Skip step 4 in the above “AUTOMATIC TUNING” procedures.
In step 3, each time the “SKIP + / Tun +” or “SKIP / Tun ” button is pressed momentarily
(0.5 second or less), the frequency changes by a fixed step:
FM: 0.1 MHz steps
MANUAL MEMORY PRESET
1. Choose the desired station by following "AUTOMATIC TUNING" or “MANUAL TUNING” step
1 to 3 procedure.
2. Press "MODE / AMS" button to enter manual preset station setting.
3. Display will show “P01” flashing.
4. Press “SKIP + / Tun +” or “SKIP / Tun ” button to choose preset station number.
5. Press "MODE / AMS" button to confirm chosen preset station number.
6. Once all the stations were preset, press the “PRE / FOLDER ” or “PRE + / FOLDER
+“button to choose your desired station.
.
FOR BETTER RECEPTION
Reorient the antenna for better reception

CD / MP3 OPERATION
GENERAL OPERATION
PLAY / PAUSE Press to start playing CD / MP3 disc.
Press again to stop playing CD / MP3 operation temporarily.
Press again to resume playback.
SKIP + & Press to go to the next track or back to the previous track.
SKIP Press and hold while playing until you find the point of the sound.
STOP Press to stop all CD / MP3 operation.
PLAYBACK
1. Set the “STANDBY / FUNC.” selector to “CD” mode.
2. Open the CD door and place a CD / MP3 disc with the label up in the CD
compartment.
3. Close the CD door.
4. Focus search is performed if disc is inside.
For CD disc Total number of tracks is read and appears on the display.
For MP3 disc “MP3” appears on the display.
5. Press the “PLAY / PAUSE” button to start playing CD / MP3 disc.
6. Press the “VOL +” or “VOL “to adjust the VOLUME control to the desired level.
7. Press the “PLAY / PAUSE” button again when you want to stop playback
temporarily.
8. Press the "STOP" button when finished.
ALBUM
When unit is under operation in MP3. Press “PRE / FOLDER ” or “PRE + / FOLDER +
“button to choose ALBUM folder.

USB OPERATION
GENERAL OPERATION
PLAY / PAUSE Press to start playing tracks from the USB.
Press again to stop playing USB operation temporarily.
Press again to resume playback.
SKIP + & Press to go to the next track or back to the previous track.
SKIP Press and hold while playing until you find the point of the sound.
STOP Press to stop all USB operation.
PLAYBACK
1. Plug or slot in USB device to the port.
2. Press the “STANDBY / FUNC.” button to select “USB” mode.
3. The LCD will display “READING” while the stereo scans for MP3 from the USB device.
The LCD will display the total number of the folders of MP3 files and start the playback
automatically.
4. Press the “PLAY / PAUSE” button again, when you want to stop playback temporarily.
5. Press the “STOP” button when finished.
STOP Press to stop all USB / SD operation.
6. Press the "STOP" button again to stop all USB / SD operation.
REPEAT
Press the “MODE” button during playing USB,
1 REPEAT 1 (FLASHING)
2 REPEAT FOLDER ( *MP3 ONLY “ALBUM” )
3 REPEAT ALL
4 RANDOM
5 NORMAL PLAYBACK
REPEAT 1 REPEAT
ALBUM
REPEAT
ALL
NORMAL
PLAYBACK RANDOM
REP REP
ALBUM
REP
ALL
RAND

OTHER OPERATION
AUX IN
Via this socket you can also hear the sound of other playback devices such as MP3
players, CD players etc. through the loudspeakers.
1. Please connect the external device with a 3.5 mm stereo jack plug to the AUX IN socket.
2. Repeatedly press the STANDBY / FUNC. button, until “AUX” is shown in the display.
3. You will hear the sound playback from the external device through the loudspeakers.
You may adjust the volume with VOL + / VOL . The CD buttons are not functional.
4. For the remaining procedure, please see the operating instructions of the external
sound source.
HEADPHONE JACK
For headphone operation, use headphones with a 3.5 mm jack plug, which you
insert into the PHONES headphone jack. The speakers are turned off.
CLOCK SETTING
1. Press the “STANDBY / FUNC.” button for 3 4 seconds to switch unit at standby mode.
2. Press and hold the “PLAY / PAUSE / CLOCK” button for 3 4 seconds to entry clock
set mode.
3. Adjust time format by pressing the “SKIP + / Tun +” or “SKIP / Tun ” button.
4. Press the “PLAY / PAUSE / CLOCK” button to confirm time format
Notes:
Because clock setting is at standby mode, the display is dim.
Clock set will always be “24hr” time format.
While unit is under operation, press and hold the “PLAY / PAUSE / CLOCK” button for
3 4 seconds to see the time.
STANDBY MODE
Press the “STANDBY / FUNC.” button for 0.1 second to switch unit to operation.
Press the “STANDBY / FUNC.” button for 3 4 seconds during operation to switch unit
to standby.
REPRODUCTOR PORTÁTIL ESTÉREO CON
CD/MP3, RADIO Y PUERTO USB
MODEL NO.: CP442 – RED CP446 – BLUE
CP443 – WHITE CP447 – ORAN E
CP444 – REEN CP448 – PINK
CP445 – BLACK
MANUAL DE INSTRUCCIONES
ADVERTENCIA
Estimado cliente:
racias por adquirir nuestro reproductor Lauson. Por favor, lea y guarde estas instrucciones para evitar dañar
este producto. La garantía no cubre ningún daño que pueda surgir del mal uso del producto si no se cumplen
las instrucciones de seguridad.
PARA EVITAR RIES O DE INCENDIO O DE DESCAR AS ELÉCTRICAS NO EXPON A ESTE APARATO A
LLUVIA O HUMEDAD.
ADVERTENCI
A
RIES O DE DESCAR A
ELÉCTRICA, NO
ABRIR
ADVERTENCIA : RIES O DE DESCAR A, NO ABRIR
SÍMBOLO DEL RELÁMPA O CON PUNTA DE
FLECHA - dentro de un triángulo equilátero pretende
advertir al usuario de la presencia de voltaje peligroso
sin aislar dentro de la carcasa del producto que
podría tener suficiente magnitud como para suponer
riesgo de electrocución a personas.
SI NO DE EXCLAMACIÓN - dentro de un triángulo
equilátero pretende indicar al usuario que un
componente específico debe sustituirse sólo por el
componente que se especifique en la documentación
por motivos de seguridad.
En la unidad se pueden encontrar las siguientes etiquetas para el correcto funcionamiento del láser:
ETIQUETA DE PRODUCTO LÁSER DE CLASE 1 -
Esta etiqueta está colocada para informar de que el aparato contiene
un componente láser.
INFORMACIÓN DEL NIVEL DE ALERTA DE RADIACIÓN
-
Esta etiqueta está colocada dentro de la unidad, del modo en que
se muestra en la ilustración, para advertir de medidas adicionales
en la unidad. El equipo contiene rayos láser con radiación de
acuerdo con el límite establecido para productos láser de clase 1
.
CLASS 1 LASER PRODUCT KLASS 1 LASER
APPARAT LUOKEN 1 LAISERLAITE KLASSE
1 LASER PRODUKT
ES-1

INSTRUCCIONES DE SE URIDAD
1. LEA LAS INSTRUCCIONES - ea todas las instrucciones de seguridad y uso antes de utilizar el aparato.
2. UARDE LAS INSTRUCCIONES - Guarde las instrucciones de seguridad y uso para futuras referencias.
3. SI A TODAS LAS ADVERTENCIAS - Siga todas las advertencias que aparecen en el producto y en las
instrucciones de uso.
4. SI A TODAS LAS INSTRUCCIONES – Se deben seguir todas las instrucciones de funcionamiento.
5. A UA Y HUMEDAD - No utilice este aparato cerca del agua, por ejemplo, cerca de la bañera, fregadero, lavabo,
pilón, piscina o sobre una base mojada.
6. VENTILACIÓN - Este aparato debe colocarse de forma que no interfiera en su ventilación adecuada. No colocar
sobre una cama, sofá, alfombra o superficie similar, que pueda bloquear las aberturas de ventilación; tampoco en
lugares empotrado, como estanterías o armarios, que puedan impedir que el aire fluya por las aberturas de
ventilación
7. CALOR - Este aparato debe situarse lejos de fuentes de calor, como radiadores, estufas o demás aparatos
(incluidos amplificadores) que produzcan calor.
8. FUENTE DE ENER ÍA - Este aparato debe conectarse sólo a la corriente descrita en las instrucciones de
funcionamiento o la que se describe en el propio aparato.
9. PROTECCIÓN DEL CABLE DE CORRIENTE – os cables de corriente deben colocarse de forma que no se
pisen con facilidad ni queden doblados al colocar objetos sobre ellos.
10. LÍNEAS DE ALTA TENSIÓN - a antena exterior debe estar alejada de cables de alta tensión.
11. ENTRADA DE OBJETOS Y LÍQUIDO - Tenga cuidado de que no caigan objetos ni líquidos a través de las
aberturas de la carcasa.
12. ADVERTENCIA ESD - Es posible que la pantalla no funcione correctamente o no reaccione a algún control
debido a descargas electrostáticas.
13. DAÑOS QUE PRECISAN REPARACIONES – Este aparato debe llevarse al servicio técnico cuando:
a. El cable de corriente o la toma están dañados.
b. Se han caído objetos o se ha derramado líquido dentro de la carcasa del aparato.
c. El aparato ha sido expuesto a la lluvia.
d. El aparato se ha caído o la carcasa presenta daños.
e. El aparato no funciona con normalidad.
14. REPARACIONES — El usuario no debe intentar reparar el aparato más allá de lo descrito en este manual.
Todo lo demás debe realizarlo personal de mantenimiento cualificado.
15. ADVERTENCIA – Peligro de explosión si las pilas se colocan de una forma incorrecta. Utilice solamente pilas del mismo
tipo o equivalentes.
16. as pilas (paquete de baterías o baterías instaladas) no deben exponerse a un exceso de calor, como la
luz directa del sol, fuego o situaciones similares.
17. ADVERTENCIA - El aparato no debe exponerse a mojaduras o salpicaduras y no se deben colocar objetos con
agua en su interior, como jarrones, sobre el producto.
18. ADVERTENCIA - a clavija del enchufe se usa para desconectar el dispositivo, el dispositivo de desconexión
permanecerá operativo.
19. Reciclaje del producto. Esta marca indica que este producto no debe desecharse junto con el resto
de basura del hogar en toda la UE. Para evitar posibles daños en el medio ambiente o en la salud
humana a causa de residuos vertidos sin control, recicle de manera responsable para fomentar la
reutilización sostenible de los recursos materiales. Para devolver un dispositivo usado, use los
sistemas de recogida o póngase en contacto con el distribuidor donde adquirió el producto. Pueden
hacer que este producto se recicle de forma segura para el medio ambiente.
Notas:
a. os CD sucios o rayados pueden resultar difíciles de reproducir. impie o cambie el CD.
b. Si se produce un error o mal funcionamiento, desenchufe el cable de corriente y saque las pilas. Vuelva a activar
la corriente.
ANTES DEL FUNCIONAMIENTO
Notas: EN RELACIÓN CON LOS DISCOS COMPACTOS.
Como los discos combados, sucios o dañados pueden dañar el aparato, tenga cuidado con los siguientes aspectos:
a. Discos compactos que se pueden utilizar. Use solamente los que tienen la marca abajo indicada.
b. Discos compactos CD con señal de audio digital.

FUENTES DE CORRIENTE
al enchufe
a la
entrada
AC
Coloque 6 x pilas tipo “C”
en el compartimento de las
pilas
FUNCIONAMIENTO CON CORRIENTE AC
Puede utilizar su sistema portátil con enchufando un cable de corriente alterna en un enchufe y en la
parte posterior de su unidad. Compruebe que el voltaje de su aparato coincide con el de su zona.
Asegúrese de que el cable de corriente AC está bien conectado en el aparato.
FUNCIONAMIENTO CON PILAS
Introduzca 6 pilas tipo “C” dentro del compartimento de las pilas. Asegúrese de colocar
correctamente las pilas para evitar que el aparato se dañe. Retire siempre las pilas cuando no vaya
a utilizar el aparato durante un largo periodo de tiempo ya que se podrían sulfatar las pilas y, por
tanto, se podría dañar el aparato.
Notas:
- Use pilas del mismo tipo. Nunca mezcle diferentes tipos de pilas.
- Para utilizar el aparato con pilas, desenchufe el cable de la corriente.
ES-3

UBICACIÓN DE CONTROLES
ANTENA FM
ASA
PANTA A CD
STANDBY / FUNC
VO
+
VO -
STO
P
SKIP- / TUN-
PUERTO USB
PUERTA DE CD
ABRIR /CERRAR
MODE / AMS
PRE + / FO DER +
PRE - / FO DER -
P AY / PAUSE / C OCK
SKIP+ / TUN+
CAB E AC
CONECTOR AUX-IN
TOMA DE AURICU ARES

FUNCIONAMIENTO DE LA RADIO
SINTONIZACIÓN AUTOMÁTICA
1. Pulse el botón “STANDBY / FUNC.” Para seleccionar el modo “RADIO”.
2. Mantenga pulsado el botón “SKIP + / Tun +” o “SKIP - / Tun -” más de 3 segundos
para comenzar el proceso de sintonización automática.
3. Cuando una emisora se sintoniza en el proceso, se detiene automáticamente y puede
escuchar la emisora que desea.
MEMORIZACIÓN AUTOMÁTICA DE EMISORAS (AMS)
1. Mantenga pulsado el botón "MODE / AMS" en la unidad durante 2-3 segundos para
comenzar el proceso de preselección automática.
2. En la pantalla aparecerá el número de secuencia de la memoria y las emisoras de radio se
memorizarán automáticamente en un número en secuencia. (Nota: cada número de secuencia
hace referencia a una emisora preseleccionada durante el proceso de memorización
automática).
3. Cuando todas las emisoras se hayan memorizado automáticamente, pulse el botón “Pre
+” o “Pre -“ para seleccionar emisoras memorizadas.
SINTONIZACIÓN MANUAL
Sirve para seleccionar las emisoras que no se pueden seleccionar
automáticamente (selección manual). Para sintonizar manualmente una emisora:
- Salta al paso 4 en el procedimiento anterior de “SINTONIZACIÓN AUTOMÁTICA”
- En el paso 3, cada vez que pulsa un momento el botón “SKIP + / Tun +” o “SKIP - / Tun -”
(0,5 segundos o menos) la frecuencia cambia un tramo fijo:
FM: 0.1 MHz pasos
MEMORIZACIÓN MANUAL DE EMISORAS
1. Seleccione la emisora que desee mediante la “SINTONIZACIÓN AUTOMÁTICA” o
“SINTONIZACIÓN MANUA ”, pasos de 1 a 3.
2. Pulse el botón "MODE / AMS" para introducir los ajustes de la emisora memorizada.
3. En la pantalla aparecerá “P01” parpadeando.
4. Pulse el botón “SKIP + / Tun +” o “SKIP - / Tun -” para seleccionar el número de emisora
memorizada.
5. Pulse el botón "MODE / AMS" para confirmar el número de emisora elegido.
6. Una vez memorizada todas las emisoras, pulse el botón “PRE - / FO DER -” o “PRE + /
FO DER +“ para seleccionar la emisora que desee.
.
PARA UNA MEJOR RECEPCIÓN

- Reoriente la antena para una mejor recepción

FUNCIONAMIENTO DE CD / MP3
FUNCIONAMIENTO ENERAL
P AY / PAUSE Pulse para comenzar la reproducción del disco de CD / MP3.
Pulse de nuevo para detener la reproducción del CD / MP3
temporalmente. Pulse de nuevo para reanudar la reproducción.
SKIP + & Pulse para ir a la siguiente o anterior pista.
SKIP - Mantenga pulsado hasta llegar al punto que desee.
STOP Pulse para detener el funcionamiento del CD / MP3.
REPRODUCCIÓN
1. Ajuste el selector “STANDBY / FUNC.” En modo “CD”.
2. Abra la puerta del CD y coloque un disco CD / MP3 disc con la etiqueta
hacia arriba dentro del compartimento.
3. Cierre la puerta del CD.
4. Se realiza una búsqueda si hay un disco dentro.
En discos CD: el número total de pistas se lee y se ve en la pantalla.
En discos de MP3: aparece “MP3” en la pantalla.
5. Pulse el botón “P AY / PAUSE” para comenzar la reproducción del disco de CD / MP3.
6. Pulse “VO +” o “VO -“ para ajustar el control del VO UMEN en el nivel que desees.
7. Pulse el botón “P AY / PAUSE” de Nuevo cuando quiera detener
temporalmente la reproducción.
8. Pulse “STOP” cuando termine.
ÁLBUM
Cuando la unidad esté en modo MP3, pulse “PRE - / FO DER -” o “PRE + / FO DER + “
para seleccionar la carpeta Á BUM.

FUNCIONAMIENTO DE USB
FUNCIONAMIENTO ENERAL
P AY / PAUSE Pulse para comenzar la reproducción de USB.
Pulse de nuevo para detener la reproducción de USB temporalmente.
Pulse de nuevo para reanudar la reproducción.
SKIP + & Pulse para ir a la pista siguiente o anterior.
SKIP - Mantenga pulsado durante la reproducción para encontrar un lugar.
STOP Pulse para detener el funcionamiento de USB.
REPRODUCCIÓN
1. Conecte el dispositivo USB en el puerto.
2. Pulse el botón “STANDBY / FUNC.” Para seleccionar el modo “USB”.
3. En la pantalla CD aparecerá “READING” mientras el reproductor busca archivos MP3
en el dispositivo USB. En la pantalla aparecerá el número de carpetas con archivos en
MP3 y la reproducción se iniciará automáticamente.
4. Pulse de nuevo “P AY / PAUSE” cuando desee detener temporalmente la reproducción.
5. Pulse el botón “STOP” cuando finalice. El botón STOP detiene el funcionamiento del
USB/SD.
6. Pulse de nuevo "STOP" para detener el funcionamiento del USB/SD.
REPETIR
Pulse el botón “MODE” durante la reproducción USB,
1 - REPETIR 1 (PARPADEANDO)
2 – REPETIR CARPETA ( *SO O “A BUM” MP3)
3 – REPETIR TODO
4 - A EATORIO
5 – REPRODUCCIÓN NORMA
REPETIR 1 REPETIR
Á BUM
REPETIR
TODO
REPRO.
NORMA A EATORIO
REP REP
ALBUM REP
ALL
RAND

OTRAS FUNCIONES
AUX IN
A través de esta toma también puede escuchar la reproducción de otros dispositivos,
como reproductores MP3, reproductores de CD, a través de los altavoces.
1. Conecte el dispositivo externo con una toma de 3,5 mm en la toma AUX-IN.
2. Pulse varias veces el botón STANDBY / FUNC. hasta que aparezca “AUX” en la pantalla.
3. Oirá la reproducción del dispositivo externo a través de los altavoces. Puede ajustar
el volumen con VO + / VO -. os botones del CD no funcionan.
4. Para el procedimiento restante, consulte las instrucciones de funcionamiento del
dispositivo externo.
CONECTOR DE AURICULARES
Para el empleo de auriculares, utilice unos con conector de 3,5 mm que puede
conectar en la toma PHONES. os altavoces se desactivarán.
AJUSTES DEL RELOJ
1. Pulse el botón “STANDBY / FUNC.” durante 3-4 segundos para cambiar la unidad a
standby.
2. Mantenga pulsado el botón “P AY / PAUSE / C OCK” durante 3-4 segundos para
entrar en el modo de ajuste del reloj.
3. Ajuste el formato de la hora pulsando el botón “SKIP + / Tun +” o “SKIP - / Tun -”.
4. Pulse el botón “P AY / PAUSE / C OCK” para confirmar el formato
Notas:
- Como el ajuste del reloj se realiza en modo Standby, la pantalla se ve tenue.
- El reloj siempre estará en formato “24hr”.
- Cuando la unidad esté en funcionamiento, mantenga pulsado el botón “P AY /
PAUSE / C OCK” 3-4 segundos para ver la hora.
MODO STANDBY
- Pulse el botón “STANDBY / FUNC.” durante 0,1 segundos para cambiar la unidad a
funcionamiento.
- Pulse el botón “STANDBY / FUNC.” durante 3-4 segundos para cambiar la unidad a
Standby.

RÁDIO PORTÁTIL ESTÉREO CD/MP3 COM
ENTRADA USB
MODEL NO.: CP442 – RED CP446 – BLUE
CP443 – WHITE CP447 – ORANGE
CP444 – GREEN CP448 – PINK
CP44 – BLACK
MANUAL DE INSTRUÇÕES
This manual suits for next models
6
Table of contents
Languages:


