Lava Heat Italia OPUS User manual


Questions, problems, missing / replacement parts? Before returning to your retailer,
call our customer service department at 1.888.779.5282, 10 a.m.- 6:00 p.m., PST,
OPUS
1
US
R
C
RR
Owner’s
Manual
DANGER
If you smell gas:
1. Shut off gas to the appliance.
2. Extinguish any open flame.
3. If odor continues, keep away from the appliance and
immediately call you gas supplier or fire department.
WARNING
Do not store or use gasoline or other flammable vapors
and liquids in the vicinity of this or any other appliance.
An LP-cylinder not connected for use shall not be
stored in the vicinity of this or any other appliance.
WARNING
Improper installation, adjustment, alteration, service or
maintenance can cause property damage, injury or death.
Read the installation, operation and maintenance
instructions thoroughly before installing or servicing this
equipment.
WARNING: For Outdoor Use Only
WARNING
WARNING indicates an imminently hazardous situation
which, if not avoided, will result in death or serious injury.


CAUTION
PLEASE READ
CAREFULLY
THE
FOLLOWING
SAFETY
GUIDELINES
BEFORE
OPERATION
.
This round flame heater is for outdoor use only (see attached
diagrammatical representations
of
outdoor areas).
This outdoor heater is not intended to be installed on
recreational
vehicles and/or boats.
Do not use the heater for the heating of domestic premises.
Do not use the heater in the
basements
or below ground level.
Gas heater without atmospheric sensing device should only be used for heating
well-ventilated
buildings
used for animal rearing or for outdoor use.
This appliance must be installed and the gas cylinder stored in accordance with the regulations in force.
Installation and repair should be done by a qualified service person.
Improper installation, adjustment, alteration can cause personal injury or property damage.
Do not attempt to alter the unit in any manner.
Never replace or substitute the regulator with any regulator other than the factory-suggested
replacement.
Remove transit protection before use.
Do not store or use petrol or other flammable vapors or liquids in the heater unit.
The whole gas system, hose, regulator, pilot or burner should be inspected for leaks or damage before
use, and at least annually by a qualified service person.
The
recommended
frequency of checking the tubing or the flexible hose is at least once per month and
each time the cylinder is changed. If it shows signs of cracking, splitting or other
deterioration
it shall be
exchanged for new hose of the same length and off the equivalent quality.
The tubing or the flexible hose must be change within the prescribed intervals.
All leak tests should be done with a soapy water solution. Never use an open flame to check for leaks.
Do not use the heater until all
connections
have been leak tested.
Turn off the gas valve
immediately
if smell of gas is detected.
Do not transport the heater while it’s operating.
Do not move the heater after it has been turned off until the
temperature
has cooled down.
Shut off the valve at the gas cylinder or the regulator before moving the appliance.
Use only the type of gas and the type of cylinder specified by the manufacturer.
In case of violent wind particular attention must be taken against tilting of the appliance.
Keep the ventilation opening of the cylinder enclosure free and clear of debris.
Do not paint the flue screen, windshield or reflector.
Control
compartment,
burner and circulation air
passageways
of the heater must be kept clean.
Frequent cleaning may be required as
necessary.
Protect the heater from bumps to avoid delicate parts like the glass tube from getting damage.
Protect the hot glass tube from rain, water splash, or anything that will cause a sudden change in
temperature
which may lead to cracking or shattering.
Do not try to clean the glass tube in any way to avoid causing damage to the glass, and personal injury.
The gas cylinder should be turned off when the heater is not in use.
Avoid twisting the flexible tubes and hoses.
Any guard or other protective device removed for servicing the heater must be replaced before
operating the heater.
Adults and children should stay away from high
temperature
surfaces to avoid burns.
Children should be carefully supervised when they are in the area of the heater.
Clothing or other flammable materials should not be hung on the heater or placed on or near the heater.
-2-

HEATER LOCATION
The heater is primarily for outdoor use only (see
diagrammatical representations
of outdoor areas). Do
not use it for indoors or in an enclosed area. Always ensure that adequate fresh air ventilation is
provided.
Do not use the heater for the heating of domestic premises.
Do not use the heater in the
basements
or below ground level.
This appliance shall only be used in an above ground open-air situation with natural ventilation, without
stagnant areas, where gas leakage and products of combustion are rapidly dispersed by wind and
natural convection.
Any enclosure in which the appliance is used shall comply with one of the following:
- An enclosure with walls on all sides, but at least one permanent opening at ground level and no
overhead cover.
- Within a partial enclosure that includes an over head cover and no more than two walls.
- Within a partial enclosure that includes an overhead cover and more than two walls, the following
shall apply:
--- At least 25% of the total wall area is completely open, and
--- At least 30% of the remaining wall area is open and unrestricted.
--- In the case of balconies, at least 20% of the total wall area shall be and remain open and
unrestricted.
This appliance shall be used only in an outdoor area and shall not be used in a building, garage or any
other enclosed area.
Always maintain clearance from
combustible
materials; from the top 60 cm, and sides 120cm
Heater must be placed on level firm ground.
Never operate heater in an explosive atmosphere like in areas where gasoline or other flammable
liquids or vapors are stored.
-3-


- 6 -
GAS REQUIREMENTS
Use propane or LPG only.
The heater is designed for use with 11-15kg cylinder. Maximum size of cylinder suitable for the
appliance, w/ regulator attached, is 42 cm x 73 cm. Inner dimension of stand within the side panels is
42 cm x 73 cm.
The appliance requires approved gas hose in 60 cm length and a regulator
Regulator maximum inlet pressure must not exceed 690 kPa (100 PSI).
Regulator outlet pressure must be 28-30 mbar.
The hose and regulator assembly must conform to local standard codes.
The installation must conform to local codes, or in the absence of local codes, to the standard for the
storage and handling of liquid petroleum gases.
A dented, rusted or damaged gas cylinder may be hazardous and should be checked by your gas
supplier. Never use a gas cylinder with a damaged valve
connection.
The gas cylinder must be arranged to provide for vapor withdrawal from the operating cylinder.
Avoid twisting the flexible tubes and hoses.
Never connect an
unregulated
gas cylinder to the heater.
Disconnect the gas cylinder when the heater is not use.
LEAKAGE TEST
Gas
connections
on the heater are leak tested at the factory prior to shipment. A complete gas tightness
check must be performed at the installation site due to possible
mishandling
in shipment or excessive
pressure being applied to the heater. The heater must be checked with a full cylinder.
1. Make sure that the appliance is switched off.
2. Make a soapy water solution of one part liquid detergent and one
part water. The soapy water solution can be applied with a spray
bottle, brush or rag to all gas
connections.
Soap bubbles will appear
in case of a leak.
3. Switch on the gas supply.
4. In case of a leak, switch off the gas supply. Tighten any leaking fittings, then turn the gas supply ON and
recheck. Contact your dealer or gas supplier for assistance if bubbles continue to appear.
WARNING
Never leak test while smoking.

- 7 -
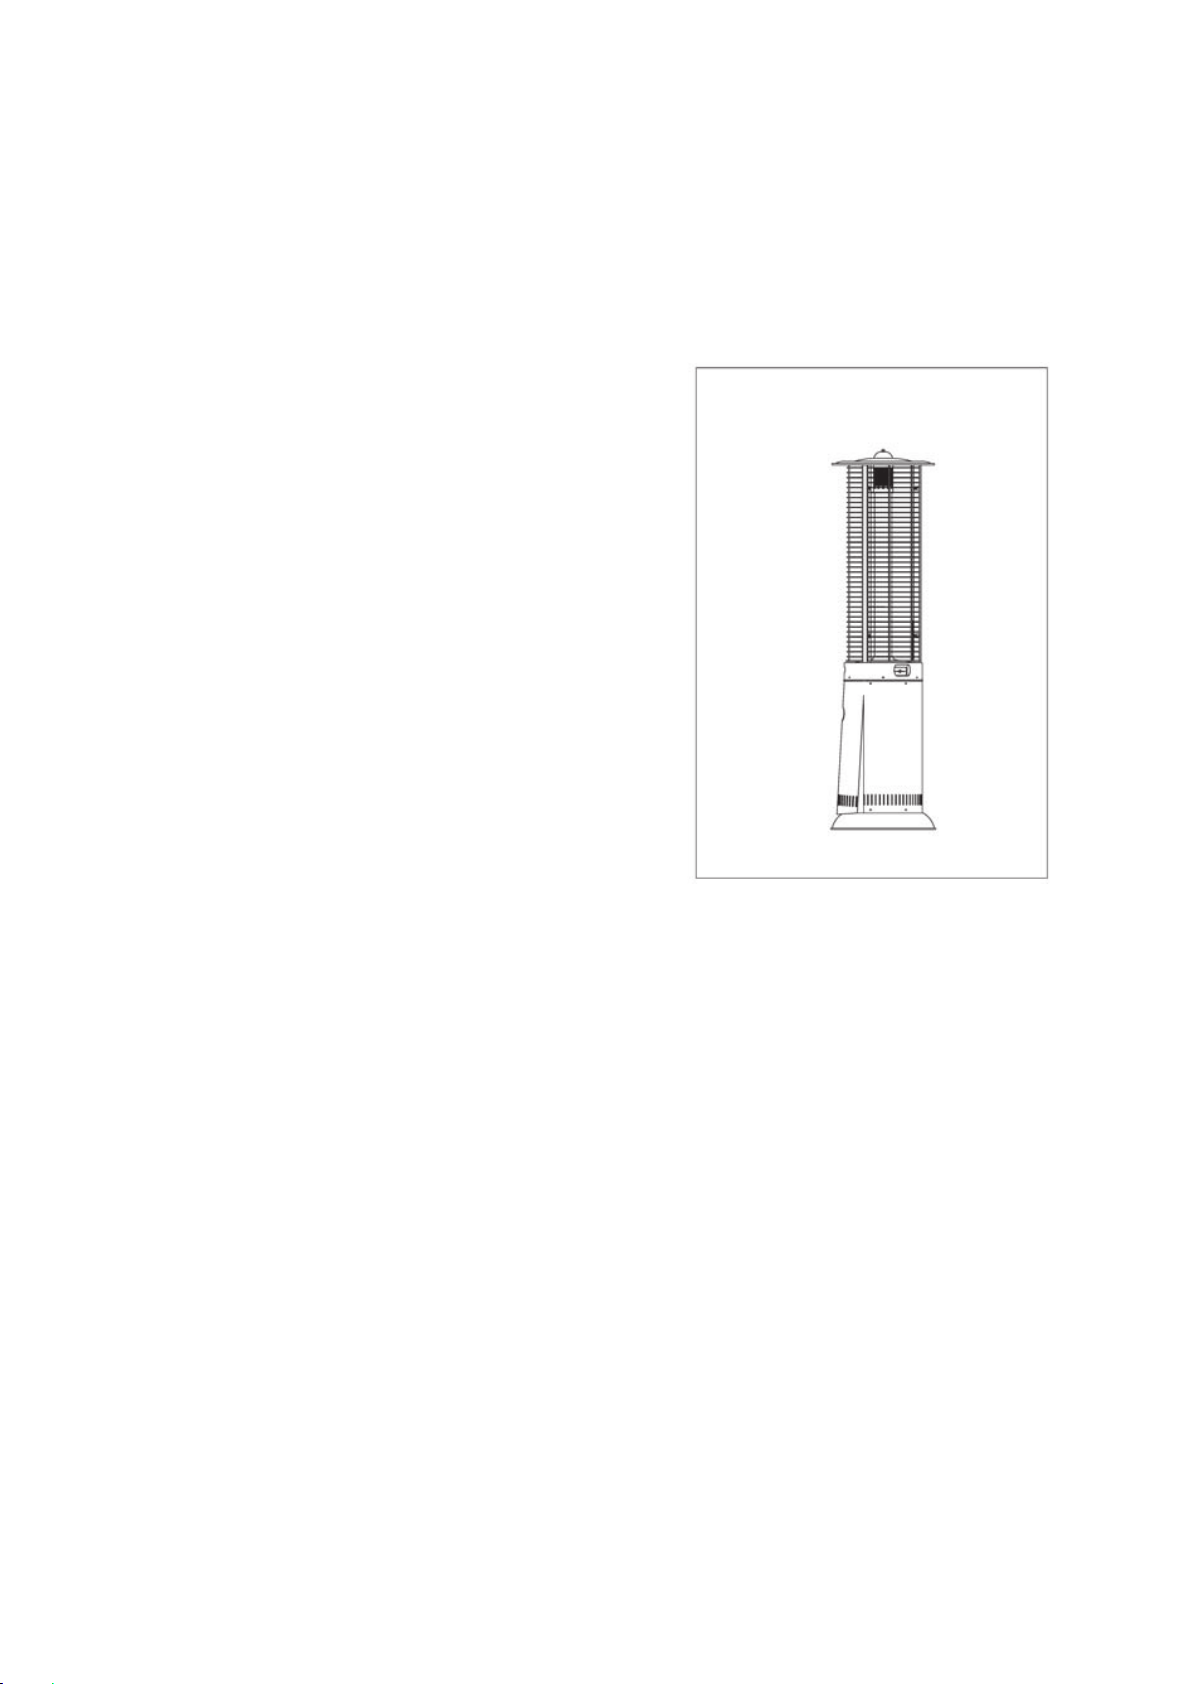
PARTS AND SPECIFICATIONS

- 8 -
A.
Construction
and characteristics
Heater with dancing flame enclosed in transparent glass tube
Heat emission from the reflector
Infrared remote control w/ reception of 25 angle and 6meters.uniquely designed with 2 seconds
ignition delay to prevent accidental ignition.
Heat resistant infrared mesh provides more warmth.
Tilt switch shuts off heater
automatically
when appliance is
accidentally
knocked down
Optional wheels for mobility
USD1,000,000
Product Liability Insurance worldwide coverage
B. Specifications
For outdoor use only
Use propane only
Burner pressure: 28-30/37 mbar
Pilot injector: 0.20 mm
Burner injector: 1.7 mm
Nominal heat input: 51 000Btu
Consumption:
450 g/hr – 870 g/hr
Weight: 30.2kg
Height: 2062mm
C. Countries of
destination,
pressure, and injector openings
Countries of Destination
AT-BE-BG-CH-CZ-CY-DE-DK-EE-ES-F
I
-FR-GB-GR-HU-IE-IS-IT-L
I
-LU-LT-LV-
MT-NL-NO-PL-PT-RO-SE-SI-SK-USA
Category
I3+
I3
P
I3
B/P
I3
B/P
Pressure (mbar) 28-30/37
37
30 50
Pilot Injector 0.20 mm 0.20 mm 0.20 mm 0.20 mm
Burner Injector 1.7 mm 1.7mm 1.7mm 1.5 mm
Nominal Heat Input 12 kW

- 9 -
Tools needed:
ASSEMBLY PART
Adjustable opening wrench (2) 20 cm long
Slip joint pliers 23 cm long
Philips
screwdriver
w/ medium blade
Spray bottle of soap solution for leakage test
Parts supplied:
Preassembled round
flame heater
Cover with 1 pcs bolts Ø10 15mm, 10 pcs bolts Ø8 15 mm
60 cm gas hose conforming to local standard codes (pressure
regulator not included)
Remote control (2 pcs Type AAA alkaline battery DC 1.5v for
remote control, and 2 pcs Type D alkaline battery DC 1.5v for pilot
ignition are not included)
Wheels (optional)
W
A
RNING
This appliance required regulator
that is defined under the GAS
REQUIREMENTS. Use only the
type of gas and the type of cylinder
specified by the manufacturer.

HEATER ASSEMBLY PROCEDURES
Flame Heater Round is
preassembled
at the factory. User needs to complete a couple of assembly procedures
to make the appliance operational.
Step1
Step2
-10-

Step3
3-1.Put the barrel body on the ground which was installed in
the first step,and then put the heater on it, 3-2.aimed at
the bolt hole;
3-2.Connect the support bar to the heater chassis on the
top with five M8 15 mm screws
Step4
3-1. Connect the rubber hose which was on the gas
pressure reducing valve to the heater air intake, and
also be tighen.
3-2.Turning the pressure reducing valve (counterclockwise)
and connect in a gas bottle, and also be tighen with an
adjustable wrench;
-11-
- 12-
Step5
5-1.Put the upper door first into the internal heater;
5-2.Lift it up to the bottom of the heater upper chassis,
and then push the barrel untill its closed.

- 13 -
OPERATION
The Flame Heater Triangle can be operated by infrared remote control, or directly on the control unit.
A. OPERATION BY INFRARED REMOTE
CONTROL
TO TURN ON THE HEATER
1. Turn on the valve of the gas supply cylinder.
2. Hold the remote control in your hand and point it toward the control
unit (angle of reception is 25o and 6 meters max.).
3. Press the POWER button for 2 seconds, release and press again to
start ignition.
Note:
If a new tank has just been connected, please allow at least one
minute for the air in the gas line to purge out through the pilot
hole.
The 2 seconds delay ignition is not a flaw. It has been
intentionally
designed to prevent accidental ignition. Holding the
POWER button for 2 seconds releases the safety lock and starts
the ignition.
4. Press the DOWN button to switch to lower
temperature
setting and
UP button to switch to higher
temperature
setting.
TO TURN OFF THE HEATER
1. Press the POWER button.
2. Turn off the valve of the gas cylinder and disconnect the cylinder.
Basic IR control
ON/OFF
Temperature UP
Temperature DOWN
Battery type: 2 pcs AAA alkaline battery DC1.5v
WARNING
1. The whole gas system,
hose, regulator, pilot or
burner should be inspected
for leak before use.
2. Check the hose assembly
for sign of extreme abrasion,
cuts or wears. Suspected
areas should be leak tested.
If the hose leaks, it must be
replaced with a new one
that conforms to local
standard codes.
3. Avoid twisting the flexible
tubes and hoses.
4. Make sure the ventilation
opening of the cylinder
enclosure, control
compartment,
burner and
circulation air
passageways
of the heater
are free and clear of
debris. If debris, spider or
insect nests are found,
clean the holes with heavy-
duty pipe cleaner or
compressed
air.
5. Always keep a dry
chemical fire extinguisher
readily available.
6. For safety, always allow a
5-minute complete shut off
period before re-lighting a
hot heater.
7. Avoid repeated ignition
attempts if ignition doesn’t
starts. Please check
whether assembly and
operation are correct.

B. DIRECT OPERATION ON THE CONTROL
UNIT
TO TURN ON THE HEATER
1. Turn on the valve of the gas supply cylinder.
2. Press the POWER button for 2 seconds, release and press again to
start ignition.
3. Press the POWER button to switch to the
temperature
heat setting.
Every time the POWER button is pressed it will switch from MAX –
MED – LOW - OFF.
TO TURN OFF THE HEATER
1. Press the POWER button (until it switches to OFF).
2. Turn off the valve of the gas cylinder and disconnect the cylinder.
WARNING
1. Close the valve of the gas
cylinder or the regulator
after use.
2. Do not move the heater, or
cover it with protective
cover after it has been
turned off until the
temperature
has cooled
down.
IMPORTANT:
ON
MAX
MED
LOW
OFF
Power indicator (ignition batteries)
AUTO SET indicator (for more advanced remote control only)
IR remote control receiver
When the appliance is operating, the control unit can
automatically
detect any breakdown in 1 second and
automatically
cuts off both power and gas supplies.
Gas supply will
automatically
cut off in 25 seconds 5 seconds if pilot flame goes out accidentally.
If the pilot flame does not ignites within the ignition period of 25 seconds 5 seconds the power and gas
supplies will
automatically
be cut off.
When ignition batteries are exhausted pilot and burner flame will extinguish
automatically
and gas supply
will be cut off.
REPLACING THE GAS CYLINDER
1. Close the valve of the gas cylinder.
2. Disconnect the regulator from the cylinder following the instructions
that came with your regulator.
3. Replace the cylinder.
4. In the absence of any flame, remove the plug or seal cap from the
cylinder valve.
5. Check for the presence and good state of the gasket before
connecting the regulator.
6. Check that the regulator seal is correctly fitted and able to fulfil its
function.
7. Perform leak test using soapy water solution.
WARNING
1. Change the gas cylinder in
a amply ventilated area,
away from any ignition
source (candle, cigarettes,
other flame producing
appliances, ...)
2. Make sure that all taps on
the consuming appliance
are in closed position.
- 14
-

STORAGE
Always close the valve of the gas cylinder after use or in case of a disturbance.
Remove the pressure regulator and the hose
attachment,
the batteries in the battery
compartment
of
pilot ignition and remote control if the heater is not to be used for a period of time.
Cylinder must be stored outdoors in a
well-ventilated
area out of the reach of children.
Disconnected
cylinder must have threaded valve plugs tightly installed and must not be stored in garage
or any other enclosed area.
Storage of heater indoors is permissible only if the cylinder is
disconnected
and removed from the
heater.
Check the tightness of the gas valve and for damage. If you suspect you have a damaged gas valve,
have it changed by your gas dealer.
Never store liquid gas cylinder in a sub-terrain, or at places without adequate air ventilation.
CLEANING AND CARE
Wipe off powder coated surfaces with soft, moist rag and soap
water. Do not clean heater with cleaners that are
combustible
or
corrosive.
Remove debris, spider and insect nests from ventilation opening
of the cylinder enclosure, control
compartment,
burner and
circulation air
passageways
of the heater with heavy-duty pipe
cleaner or
compressed
air to keep appliance clean and safe for
use. Never clear ports or other openings with toothpicks or other
article that will break and block the ports.
WARNING
1. Do not perform
maintenance
after heater
has been turned off until
the
temperature
has
cooled down.
2. Do not expose the pilot,
controllers and parts
underneath the burner to
If carbon deposits develop, remove the reflector and flue screen
and clean them with soap water. Do not paint the flue screen,
windshield or reflector.
Cover the heater with the supplied protective cover when the
heater is not in use. Wait until the heater is cool before covering.
In a salt-air
environment,
such as near an ocean, corrosion occurs
more quickly than normal. Check frequently for corroded
areas
and
repair them promptly.
Protect the heater from bumps to avoid delicate parts like the
glass tube from getting damage.
water. Do not use the
heater if any of these parts
are exposed to water until
the appliance is inspected
or repaired by a qualified
service person.
3. Do not try to clean the
glass tube in any way to
avoid causing damage to
the glass, and personal
injury.
Protect the hot glass tube from rain, water splash, or anything that will cause a sudden change in
temperature.
Heat resistant glass tube like most glasses, except heat & thermal shock resistant glass, is
very vulnerable to rapid increases or decreases of
temperature
across its area. The external surface of
glass expanding or contracting more rapidly than the interior surface as a result of heating or cooling may
lead to cracking or shattering.
- 15 -

GENERAL SAFETY
Equip your home with a least one smoke detector on each floor.
Keep at least one dry-powder
operative
ABC-type fire
extinguisher
in the home at all times.
Keep areas around heat sources free of papers and trash.
Store paints, solvents, and flammable liquids away from all heat and ignition sources.
Develop a fire-escape plan before a fire occurs. Be certain every person
understands
the plan and is
able to carry out the plan in case of emergency.
If your clothing does catch fire don't run. Drop down
immediately
and roll to smother the flames.
FIRST AID FOR A BURN
EYES
Seek medical attention
IMMEDIATELY.
Do not put ointments or liquids in eye.
ELSEWHERE
Consult a doctor if the burn is not healed in 24 hours, or the burn is larger than the size of a palm.
If serious, send promptly for an ambulance or a doctor.
If possible, run affected area under cold water, not ice or ice water, for 10-15 minutes if the skin is intact.
Cut and gently lift away any clothing covering the burned area, without pulling clothing over the burns.
Leave in place any clothing that is stuck to the burns. Do not put any creams or greases on the burned
area.
If the casualty's hands or wrists have been burned remove jewelry if possible without causing further
injury (rings, watches, and so forth) and place in his pockets. This prevents the necessity to cut off
jewelry since swelling usually occurs as a result of a burn.
Do not pop any blisters. Cover the burn with a light gauze dressing.
If blisters pop, apply a light antibiotic ointment and dress as above.
ABNORMAL OPERATION AND TROUBLE SHOOTING
For abnormal operations see problems checklist for problem and solution.
If service is required, contact an authorized or qualified service person to service the appliance.
- 16
-

SERVICING
It is
recommended
that before using the heater after a period of 3 months or before the start of the heating
season the owner should:
Check the condition of the gas cylinder.
Check the hose assembly for any wear or damage. If the hose and regulator assembly is damaged or
more than 5 years old replace with an approved hose and regulator assembly.
The
recommended
frequency of checking the tubing or the flexible hose is at least once per month and
each time the cylinder is changed. If it shows signs of cracking, splitting or other
deterioration
it shall be
exchanged for new hose of the same length and off the equivalent quality.
The tubing or the flexible hose must be change within the prescribed intervals.
Check for leaks.
WARNING
Servicing shall be carried out by an authorized or qualified service person
only.
If service is required, remove the entire burner unit (together with the control unit) to access the ignition
system.
Replace the faulty item with correct approved component. Any
replacement
or
accessories
are available
from your local distributors/dealer.
SOLVING COMMON PROBLEMS
The 3 most common problems associated with any gas heater are gas leaks, wrong gas pressure and dirt.
DO NOT USE YOUR HEATER WITHOUT
CHECKING
FOR LEAKS. Leaks can occur during shipment
and installation. A simple solution of soap and water dabbed on the fittings will bubble if a gas leak is
present.
WRONG GAS PRESSURE. Too much gas pressure may severely damage your heater. Too little gas
pressure and your heater will not burn correctly. If your installer cannot check gas pressure, call your
gas supplier.
DUST AND DIRT. This heater requires some cleaning. If the pilot light will not stay, your heater is
probably due for a good cleaning.
Replacement
of
thermocouple
or pilot assembly is generally not
needed. Review
CLEANING
AND CARE in this manual.
- 17 -

PROBLEMS CHECK LIST
PROBLEM
PROBABLE
CAUSE SOLUTION
There is no spark at pilot when the
heater is started
Igniter electrode positioned
wrong.
Adjust the distance of the
electrode and ignition device to
Igniter electrode broken.
5
mm
Replace.
Igniter cable pinched or broken. Free electrode cable. Replace
if
damaged.
Burner ceramic plate is broken
of faulty.
There is spark but no ignition when Gas supply turned off.
Replace ceramic plate.
Turn on the gas supply.
the heater is started Pilot is clogged.
Air in gas lines.
Cables faulty or loose.
Replace, or call a qualified
person.
If a new tank has just been
connected, allow at least one
minute for the air in the gas line
to purge out through the pilot
hole.
Repair or replace.
Burner does not light after pilot is lit Burner injector clogged.
“M” (medium fire) and “L” (low
fire) valves in the control unit
are faulty.
Low gas supply pressure.
Clean burner injector or
replace.
Call a qualified person to do the
replacement.
Replace gas cylinder.
Ignition assembly faulty.
Faulty remote control.
Repair or replace.
Replace remote control.
Cables faulty or loose.
No flame Low gas pressure or not
enough gas supply
Blockage in gas circuit.
Gas leakage.
Repair or replace.
Replace gas cylinder.
Clean blockage.
Locate and correct leaks.
Min. flame doesn’t ignite Cables faulty or loose
Repair or replace.
“L” (low fire) valve in the control Call a qualified person to do the
unit is faulty or “L” valve nozzle
is blocked.
Faulty remote control.
replacement.
Replace.
MED. flame doesn’t ignite Cables faulty or loose
“M” (med. fire) valve in the
control unit is faulty or “M” valve
nozzle is
blocked.
Faulty remote
control.
Repair or replace.
Call a qualified person to do the
replacement.
Replace.
Burner does not light after pilot is lit
Thermocouple
faulty.
Replace.
and sparks continue without stop Pilot flame burns inside pilot
pipe.
Replace.
The heater does not work and the
POWER indicator does not light
when the heater is started
Ignition batteries low or faulty.
The POWER button has not
been pressed for 2 seconds.
Remote control faulty or
batteries low.
Cables faulty or loosen.
Replace batteries.
Press POWER button for 2
seconds, release and press
again to start ignition
Replace remote control or
batteries.
Repair or replace.
- 18
-
Table of contents
Other Lava Heat Italia Patio Heater manuals


