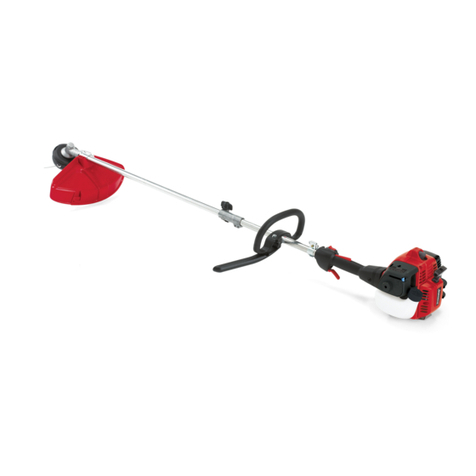
LAWN STAR LS 2617 CS User manual

OPERATING
INSTRUCTIONS
PETROL TRIMMER
MODEL: LS 2617 CS
LS 3317 CS

Thank you for purchasing a Lawn Star Petrol Trimmer which is one of the finest and most advanced products
today’s technology can produce. Before you begin using it, please read this manual carefully and familiarise
yourself with the control and the proper use of this product to ensure you get the best possible performance
from it.
SAFETY PRECAUTIONS
Inspect your trimmer and all its parts before each operation. If any part is damaged or worn, repair or replace
before operation. Use only genuine Lawn Star (Pty) Ltd. replacement parts when servicing or repairing the unit.
These parts are available from your supplying dealer or service agent. Have the trimmer repaired only by an
authorised repairer. Use only genuine Lawn Star replacement nylon cutting line 2.40 mm ( Part No. 80-24000 ),
never metal.
WARNING: Petrol and its vapours are highly flammable. Always stop the engine before refuelling. Do not
smoke or light any flames while refuelling. Wipe off any fuel that may have spilled. Start the engine away from
the place where it was refuelled. Ensure the tank cap is tightened properly. Return the trimmer to its normal
operating position before starting.
CAUTION: Exhaust fumes are toxic and asphyxiating. Inhalation may be lethal. Do not start the engine in
closed or poorly ventilated environments.
It is essential that the operator wears safety goggles, face shield, gloves, ear muffs, shoulder harness,
protective clothing and sturdy, non-slip footwear with toe-protector.
Do not use your trimmer for any jobs other than to cut grass and weeds. Do not use unless adequately guarded.
Do not force your trimmer. If the engine labours, pull away from grass.
Do not operate trimmer without a line-trimming blade as over-extended line is dangerous and will damage
engine and invalidate warranty.
Use care in picking up or holding the unit. Always hold the trimmer with both hands. Do not grasp the line-
trimming blade located at the edge of the underneath side of safety guard.
Inspect the area to be cut and remove all debris that could be entangled in the cutting head. Also remove any
object that the unit may sling during cutting.
Avoid dangerous environments. Do not use the unit in poor light or in damp or wet locations. Do not use in the
rain. Do not use on steep slopes, especially if damp. Work across slope faces, not up and down. Do not over-
reach. Ensure good footing and balance is maintained.
Do not operate trimmer when tired, ill, or under the influence of alcohol, drugs or medication.
Keep hands and feet clear of the rotating cutting head while unit is in use. Cutting elements continue to rotate
for a few seconds after switch-off.
Do not allow children under 16, nor anyone who is not familiar with these instructions to use the trimmer.
Children, pets and onlookers should be kept at least 15 meters away from the work area, unless shielded by an
effective solid barrier.
Before storage allow the engine to cool. Store the unit indoors in a dry, ventilated and locked place, out of reach
of children.
PREPARATIONS FOR USE
Mount the guard from the side by inserting the guard around the guard mount (Fig 1). Secure with screw,
flat washer and spring washer supplied.
Attach “C”-shaped assist-handle to upper tube “A” by clipping over the shaft (Fig.2-1). Adjust to the most
comfortable position for trimming, fit and tighten the bolt and knob provided (Fig.2-2).
Align drive shaft square inside tube “B” with drive shaft coupling inside tube “A”. Insert tube “B” into
coupling on the end of tube “A” ensuring that the button engages with the hole in the coupling (Fig.3-1).
Rotate tube or cutting head slightly to ease assembly. Tighten knob to lock tubes (Fig.3-2).
FUELLING: This product is equipped with a 2-stroke engine which requires 2-stroke lubricating oil to be pre-
mixed with petrol. Use only genuine Lawn Star 2-stroke engine oil (Part No. 90-20000) and use lead-free petrol
(Octane 95). Mix both thoroughly (as per fuel-mix ratio) in a separate container. Always prepare the fuel-
mixture and refuel the trimmer outside in a well ventilated environment (Fig.4). Do not smoke! Do not use
marine or automotive 2-stroke oil.
Fuel-mix ratio for normal 2-stroke engine oil - 1:25 (4%) e.g. 40 ml of oil per 1 litre of petrol
Always stop the engine before refuelling. Do not smoke or light any flames while refuelling. Wipe off any fuel
that may have spilled. Start the engine away from the place where it was refuelled. Ensure the tank cap is
tightened properly. Return trimmer to its normal operating position before starting.

Fig. 3
2
1
Tube B
Tube A
Fig. 4
Fig. 2
2
1
Fig. 1
Attention! Observe the following safety warnings
Read operating instructions
Wear approved safety goggles or face shield
Wear approved safety ear protection
Wear approved safety helmet
Keep bystanders at least 15 meters away from
trimmer
Wear approved safety gloves
Wear approved non-slip safety boots / shoes
Beware of thrown objects by the cutting-head

STARTING COLD ENGINE AND STOPPING
1. Switch the ON/OFF switch (Fig 5) to the “ON” position.
2. Lift the choke lever located to the right of the carburettor cover (Fig.6) and place it in the Hposition.
3. Repeatedly press the primer bulb (Fig.7) until the fuel is pumped back to the tank through the second
transparent pipe (Fig.8).
4. Grip the throttle control handle by pressing the trigger lock-off lever (Fig.9-No1) with the palm of the hand,
then fully depress the throttle trigger (Fig.9–No2) with your fingers and simultaneously push in the throttle
lock-on button (Fig.9-No3) with your other hand.
5. While holding the throttle lock-on button down, release the throttle trigger. This will lock-on the throttle
trigger so that both hands are free to start the engine.
6. Pull the starter cord three times fully (Fig.10).
7. Set the carburettor lever to run lll (Fig.11)
8. Pull the starter cord (Fig.10) repeatedly until the engine starts and allow to run for a few seconds.
9. Depress the throttle trigger (Fig.9-No2) and the throttle lock-off button will release automatically. The
engine will idle and the clutch will disengage causing the cutting head to remain stationary.
10.To stop the engine switch the ON/OFF switch to the “OFF” position (Fig.12)
STARTING WARM ENGINE
Proceed as with cold engine start but with the choke lever in the run position lll (Fig.11)
OPERATING INSTRUCTIONS
When properly assembled with safety-guard and cutting-head, your unit will cut unsightly weeds and grass in
those hard-to-reach areas along fences, walls, foundations and around trees.
NOTE: Even with care, trimming around foundations, brick or stone walls, kerbs etc. will result in above
normal line wear.
TRIMMING
For normal trimming, the trimmer cutting-head should be inclined at about 30 degrees to the lawn, while
cutting towards the left in a sweeping motion. Always cut away from the operator. Do not pull trimmer in
towards operator.
FENCE / FOUNDATION TRIMMING WITH LINE CUTTING-HEAD
Approach trimming around chain link fences, picket fences, rock walls and foundations slowly to cut close
without whipping line against the barrier. If the line comes into contact with rock, brick walls, or foundations, it
may fray as it wears. If line snags fencing, it may snap off.
TRIMMING AROUND TREES
Trim around tree trunks with a slow approach so the line does not contact bark. Walk around the tree trimming
from the right to the left. Approach grass or weeds with the tip of the line and tilt cutting-head forward.
CUTTING-HEAD LINE FEED
As the cutting line wears and shortens the cutting performance is reduced. In order to maintain optimum
performance ensure that the cutting lines are fully extended. To extend additional line, tap the centre of the
cutting head lightly on the ground WHILE THE UNIT IS RUNNUNG AT MAX RPM. The line will
automatically lengthen. Excess line will be clipped off by the blade on the safety guard. Note: Cutting line
wears more rapidly if trimming against hard surfaces such as bricks, concrete or asphalt. Extend line regularly
to ensure optimum performance at all times.


CARE, MAINTAINANCE, STORAGE AND TRANSPORT
Spark plug: Check every 12 months or if starting problems are experienced. When the engine is
cold, remove the plug cap and unscrew the spark plug with a suitable spark plug socket (Fig.13). If
the electrodes are excessively soiled or worn then replace with an equivalent new spark plug
(eg.LDL7RTF).
Excessive soiling may be due to a) too high ratio/poor quality 2-stroke oil or b) clogged air filter.
Replace spark plug and screw in by hand to avoid stripping of thread, then tighten with socket.
Air filter: Clean air filter regularly. Unscrew cover (Fig.14) and remove foam filter (Fig.15). Wash
filter with soap and water and allow to dry before replacing. Fit new filter if damaged.
Fuel intake filter: Replace every 12 months. Remove with hook through tank refilling inlet.
Silencer spark arrester screen: The spark arrester screen fitted at the exhaust opening (Fig.16)
becomes blocked by deposits over a period of time and must be removed with pliers to be cleaned
or replaced.
Transport and storage: If trimmer is unused for more than 2 months or being transported, then
empty the fuel tank. Before storage allow the engine to cool. Store the unit indoors in a dry,
ventilated and locked place, out of reach of children.
CAUTION
Allow engine to reach maximum RPM before cutting brush or trimming grass.
For the most effective cutting, cut approximately 25 mm into grass, allowing the tip of the line
(teeth on the bade disc) to cut. Do not force the trimmer into the work.
Periodically remove weed wrap from beneath the cutting-head / blade to prevent overheating the
engine. Weed wrap occurs when strands of weeds become entangled around the shaft beneath the
cutting-head / blade. Remove weed wrap, with a screwdriver or similar device and ensure cutting-
head / blade rotates freely.
RENEWING THE CUTTING LINE
Hold the cutting-head with one hand and unclip the cap with the other hand by pressing in the tabs
on either side of the cutting head and simultaneously lifting the cap (Fig.17). Take out the spool
(Fig.18). Remove any old bits of line. The new nylon line should not exceed 8,0 metres in length.
(Use only genuine Lawn Star 2.40 mm replacement line). Uncoil the new line completely. Double
over in the middle so that you have two equal lengths. Insert the doubled-over loop into the slot
provided in the spool divider and push to the bottom (Fig.19). Wind the two lengths onto the spool
(one length on each side of the spool divider) in the direction shown on the spool flange. When each
of the spool compartments is full, the centre divider rim should still be visible. Ensure the line is
wound neatly and tightly. This is important. Clip the ends of the line into the holding slots provided,
leaving enough free length to facilitate threading through the eyelets (Fig.20). Pass the line ends
through the eyelets in the spool housing and replace spool into housing (Fig.21). Make sure the
spring and washer are still in place inside the housing shaft. Replace the cap together with the
washer ensuring that it is firmly clipped in place (Fig.22). Pull on the line ends to release the spool
from the “ locked “ position to the operating position. Trim off excess trimming line that extends
beyond the line-trimming blade before starting engine. ENSURE CAP IS PROPERLY LOCKED
IN PLACE BEFORE STARTING ENGINE.


TROUBLE SHOOTING GUIDE
PROBLEM
PROBABLE CAUSE
CORRECTIVE ACTION
Engine won’t start
No spark
Check spark by removing spark plug
and re-attaching cap and pulling
starter cord. If no spark replace with
new spark plug.
No fuel
Pump primer bulb, if no fuel flows then
pipes blocked. Have serviced. If primer
bulb fills then engine may be flooded
Flooded engine
Remove spark plug, turn engine upside
down, set choke to run, pull starter cord
10 times, clean spark plug and refit.
Engine will not rev
Carburettor needs tuning
Have serviced
Blocked exhaust spark
arrestor
Remove spark arrestor, clean & refit
Engine will not rev and
emits smoke
Check fuel/oil mix
Use fresh and correct fuel mix
Dirty air filter
Clean per instruction
Line won’t feed
Line is tangled inside
cutting-head or trapped
under tabs on Spool
Remove spool from unit, untangle line
and wind correctly in direction of arrow
on spool
Upon removing spool,
line appears to be melted
together
Trim off damaged line and rewind spool
Line wound in the wrong
direction
Rewind line ensuring that both lines are
wound in the same direction as the arrow
on the spool
Insufficient line on spool
Remove spool and fit new line
Internal damage to
cutting-head
Disassemble cutting-head and examine
parts for damage. Replace parts or entire
cutting-head
Line snaps off or frays
Improper trimming
procedures or poor
quality line
See general operating instructions or
replace line
Metal eyelet damaged
Replace spool housing
Engine slows down
while cutting
Weed wrap
Remove weed wrap between cutting-head
and motor
Trimmer being forced
into grass
Pull away from cutting area, see
operating instructions in manual

Before starting
work
After finishing
work or daily
After each
refuelling stop
Weekly or
20 hours
Monthly or
40 hours
If faulty If damaged As required
Visual inspection (Condition, leaks,
engine cover, safety guard)
User User
Clean, retighten User User
Throttle Lever Check operation User
Clean User
Replace element Service Agent
Fuel tank Clean User
Clean User
Replace User
Cylinder fins Clean User
Carburettor
Check idle adjustment, cutting tool
must not turn
Service Agent
Spark plug Replace User
All accessible screws and
nuts (not adjusting screws)
Retighten User
Inspect User
Clean or replace User / Service Agent
Visual inspection User User
Replace User User
Check Service Agent
Grease Service Agent
Exhaust Decoke / decarbonize Service Agent
Warranty claims following a repair will be accepted only if the repair has been carried out by an authorised Lawn Star service agent using original Lawn Star parts.
Nylon cutting head
Driveshaft lubrication
The user of the petrol trimmer may perform only the maintenance operations described in this manual.
Other repair and maintenance work may be performed only by an authorised Lawn Star service agent.
Maintenance Chart: Petrol Trimmer
Complete machine
Filter in fuel tank
Air filter
Spark arrestor screen in
muffler

LAWN STAR ( PTY ) LTD.
WARRANTY CARD
LS 2617 CS & LS 3317 CS
Please read carefully
This card is required for warranty repair claims. Please fill in this card and keep it in a safe place,
stapled to the original proof of purchase. The original proof of purchase (i.e. receipt, invoice, docket,
etc.) must show the original date of purchase and clearly identify the product.
WITHOUT THIS CARD AND ORIGINAL PROOF OF PURCHASE, ANY WARRANTY
BECOMES NULL AND VOID.
Make:……………………..Serial No:………..……………….Date of Purchase:………………….
Model:………………………………
PURCHASER PURCHASED FROM
NAME: NAME :
ADDRESS: ADDRESS:
PHONE : PHONE:
LIMITED DOMESTIC USE WARRANTY
Lawn Star (Pty) Ltd. guarantees this unit to be free from defects in material and workmanship. If any
such defect should become apparent during a period of
12 MONTHS
from the date of the original purchase, we undertake to repair this unit free of charge or replace this unit
with a factory reconditioned unit at our discretion. This does not prejudice your rights in terms of the
Consumer Protection Act.
Transport costs to our service centre and back to the owner, should such costs occur, will be carried by
the owner of the unit.
The repaired or replaced unit will be covered by this warranty for the remainder of the original warranty
period.
This warranty covers only the original purchaser of this unit.
This warranty becomes invalid if :
- the unit has been used commercially or for rental purposes;
- damage has been caused by misuse, abuse, accident or normal wear and tear;
- spares and accessories other than specified by us are used with this unit;
- the unit has been opened, altered or otherwise tampered with;
- the unit has been used without safety-guard and line-trimming blade in place.
- the engine has been run without 2-stroke engine oil pre-mixed as per instruction
- marine or automotive 2-stroke oil is used
Line trimming blade, cutting head and line are wearing parts and are not covered by Warranty.
PLEASE READ AND UNDERSTAND THE INSTRUCTION MANUAL BEFORE YOU
OPERATE THIS UNIT.

LAWN STAR ( PTY ) LTD.
For service and warranty repairs please contact your nearest Service Agent
listed below:
CUSTOMER CARE : 0860-LAWNSTAR
HEAD OFFICE : 98 Bofors Circle, Epping 2 South, Cape Town
PO Box 496, Parow, 7499
Tel: 021-535-5249 Fax: 021-535-4624
EASTERN CAPE: Tel: 041-364-2415 Fax: 041-364-2178
FREE STATE : Tel: 082-556-6325 Fax: 086-691-6297
GAUTENG : Tel: 011-979-0162 Fax: 011-979-0174
KZN : Tel: 031-579-4390 Fax: 031-579-4400
WEST COAST : 082-826-0316
NORTHERN CAPE: 082-826-0316
OVERBERG : 084-609-7341
NAMIBIA : Tel: 061- 232-475 Fax: 061- 242-139
BOTSWANA : +267-318-6851
ZIMBABWE : +263-4-486 192/646
For more information visit: www.lawnstar.co.za
This manual suits for next models
1
Table of contents
Other LAWN STAR Trimmer manuals


