laxihub O2 User manual

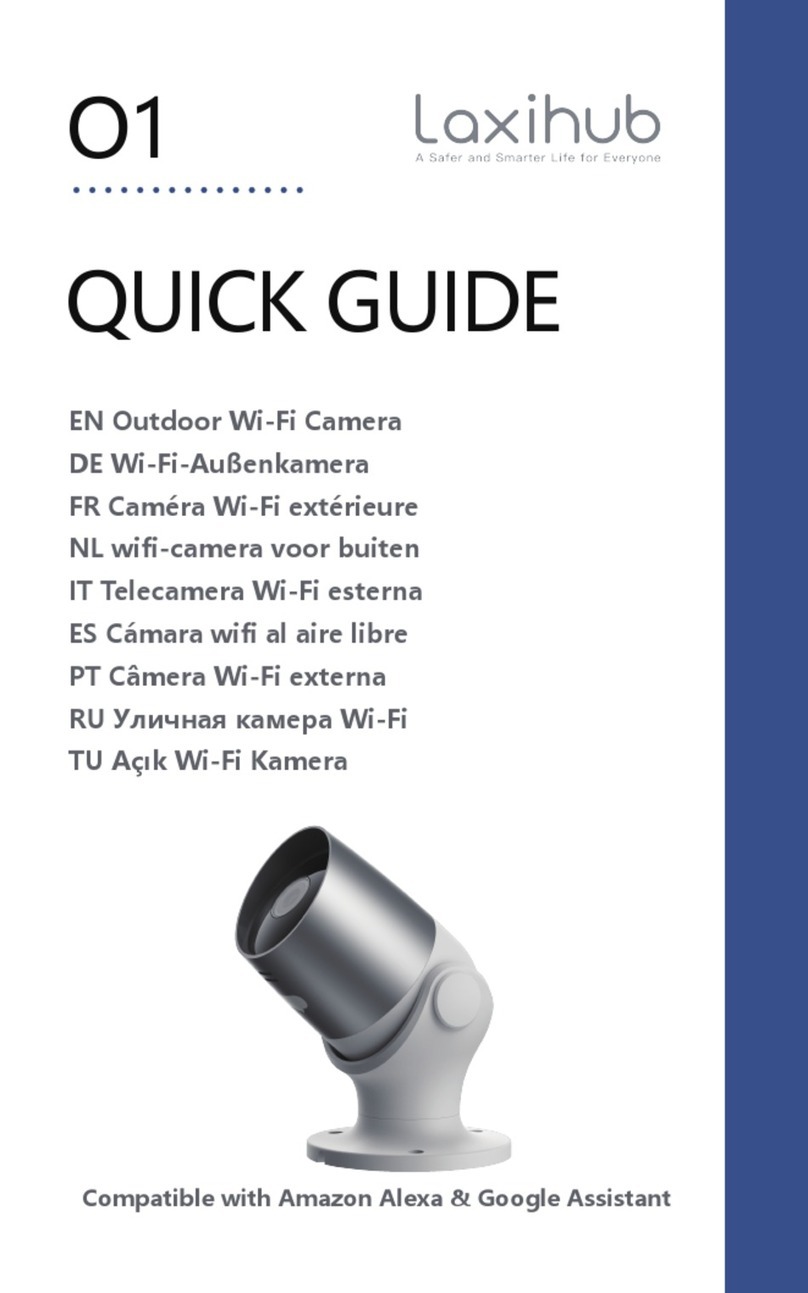
Outdoor Smart WiFi Camera
Quick Guide
O2
EN
FR
NL
ES
PT
DE
IT
RU
TU
Outdoor Wi-Fi Camera
Caméra Wi-Fi extérieure
wifi-camera voor buiten
Cámara wifi al aire libre
Câmera Wi-Fi externa
Wi-Fi-Außenkamera
Telecamera Wi-Fi esterna
Уличная камера Wi-Fi
Açık Wi-Fi Kamera


EN
Product description
EN
Constant blue
Blue slow flashing
Red flashing slowly
Red flashing fast
Connection succeeded
Manual configuration mode
Waiting to connect
Network abnormal
LED Indicator:
Set up Camera
• What you'll need:
1. Wi-Fi and a working broadband internet connection
with at least 2 Mbps upload speed.
2. A phone or tablet with iOS 9/Android 5.0 or later.
3. A power outlet.
4. A Phillips screwdriver or power drill with Phillips driver bit.
• Power on
Plug the power cable into the Micro-USB power port on
the back of the camera, the camera will automatically turn
on, wait for 30s, the indicator light will flash red slowly
means boot up is finished.
Please read this manual carefully before using the product
and keep it properly. Label information is located on the
side of the camera.
Packing list:
Camera, Power adaptor, Power cable, Mounting accessory
bag, Quick guide.
1. Microphone
2. LED indicator
3. SD card slot
4. Reset
5. Micro USB
6. Speaker
1
2
3
4
5
6

EN
EN
• Connect Arenti APP
Scan QR code to download and install the Arenti APP.
Also, you can search "Arenti" on App Store (IOS) or Play
Store (Android). Download and install Arenti APP. Open
APP home page, Click "+" at the right top page. Follow the
guide on the APP to add the camera step by step.
After connection is successful, the indicator is solid blue.
Troubleshooting
• Camera is not powering on:
1. Try to use another outlet.
2. Try to use another 5V power adapter/cable to power up.
• Failed to scan the QR code from Arenti APP:
1. Remove the film from the Camera Lens.
2. Keep distance 10-15 cm (4-6 inch) between the camera
and mobile phone.
3. Confirm the camera indicator is red flashing slowly.
• Failed to connect WiFi:
1. Confirm that scan QR code is successful: After scanning,
the camera has the prompt sound, and network indicator
turns to red fast flashing.
2. Make sure input correct WiFi password, the WiFi password
you set not contain special characters such as =\';.
3. Make sure the WiFi band meets the network requirement
of camera that camera only supports 2.4GHz.
4. Confirm camera is near the WiFi router.
If there doesn’t work please share the wifi router setting
screenshot and camera SN (Find on camera body) to

1m
2m
3m
2m 10m
Installation
EN
EN
Find a position where you can get the desired field of view.
Consider the below factors:
1. Avoid direct sunlight.
2. Keep it in range of your router WiFi.
3. Avoid the front of the lens facing the plant or porch
light; Avoid facing a busy road.
4. Place it 2-3 meters (79-118 inch) above the ground -
close enough to see someone's face and talk to them
through the camera. Make sure that the camera can see
what you want to see.
• Screw Bracket Installation
1. Fix the screw bracket on the wall with screws.
2. Install the device in the bracket and lock it with the
bottom screw.

EN
EN
Camera Using tips
• Live video viewing:
In the camera control interface of APP, you can view the
camera monitoring in real-time, adjust the resolution,
capture images, record video, and make 2-way talking.
• Infrared night vision:
The camera can automatically switch to night vision mode
(black&white) at night according to the degree of change
in surrounding light. With built-in red Infrared LED lights,
the night vision distance can reach 10 meters, and it can
be viewed super clearly in the dark.
• Motion detection:
The camera can detect the movement changes in the
camera's view, and push the notification of the movement
changes to the APP.
Set from: APP >> Device (tap device to live video page)
>> Settings >> Alert Settings >> Motion Detection.
Basic Parameter
Product name
Image sensor
Angle of view
Security
Working temp
Local storage
O2
1/2.8'' 3MP CMOS
110°
AES-128
−20 °C to 50 °C
Micro SD card
(up to 128GB)
Size
Resolution
Power
Waterproof
Supported
phone OS
Wireless
connection
137x65x75mm
2304(H)*1296(V)
DC 5V, 1A
IP65
iOS 9 / Android 5.0
and above version
IEEE802.11b/g/n
2.4GHz

ENEN
EN
• How to disable the LED indicator/blue light with my
camera?
Arenti APP >> Device (tap device to live video page) >>
Settings >> Basic Function >>Network Indicator: Disable it.
• How to change WiFi or update WiFi password for device?
Please delete the camera on APP, tap "Add" follow the steps
to use the new WIFI network to add the camera again.
•How to share Arenti devices with friends and family?
Arenti APP >> Device (Tap device to live video page) >>
Settings >> Device Share >> Add, follow the guide to share
your device.
•Failed to access the Live video, prompts offline?
1. Please ensure the camera is in the power-on state: camera
network indicator will on.
2. Check the WiFi network is in good condition and restart
the router.
3. Try to move the camera near the router, and check again.
4. Delete the camera from Arenti APP ad add it again.
Confirm the APP and camera firmware are the latest
versions.
If there doesn't work please share the camera indicator
status and camera SN (Find on camera body) to
FAQ
Precautions
•The applicable working temperature of this product is -20
℃~50℃, please do not use it in an environment where the
temperature is too high or too low use this product.
• To use this product better, avoid the front and side of the
lens close to the glass, white walls, etc. light objects, so as
not to cause the picture to be bright near, dark, or whitish
in the distance.

EN
EN
After-Sale Service and Technical Support
• Please make sure that the camera is installed within the
range covered by Wi-Fi signal, and placed as far as
possible on the location where the signal is better, and try
to install it away from metal and microwave ovens that
may affect the signal.
• Access Support Articles, Videos, and Documentation.
www.arenti.com/support/
• Access Support from the Arenti App, Simply login your
Arenti App tap to get support.
the camera issue, inform us the camera model and SN
from the camera body. We will reply to you in 24h.
Legal notice
Symbols: Direct current (DC)
Don't throw batteries or out of order products with
the household waste (garbage). The dangerous
substances that they are likely to include may harm
health or the environment. Make your retailer take
back these products or use the selective collect of
garbage proposed by your city.
Hereby, Laxihub, declares the radio equipment type
'O2' is in compliance with the Directive 2014/53/EU
The full test of the EU declaration of conformity is
available at the Internet address: www.laxihub.com

EN
Description du produit
FR
1. Micro
2. Indicateur LED
3. Fente pour carte SD
4. Réinitialiser
5. Micro-USB
6. Haut-parleur
Bleu constant
Bleu clignotant lentement
Rouge clignotant lentement
Rouge clignotant rapidement
Connexion réussie
Mode de configuration manuelle
En attente de connexion
Réseau anormal
Indicateur de réseau :
Configurer la caméra
• Ce dont vous aurez besoin:
1. Wi-Fi et une connexion Internet haut débit fonctionnelle
avec une vitesse de téléchargement d'au moins 2 Mbps.
2. Un téléphone ou une tablette avec iOS 9/Android 5.0 ou
version ultérieure.
3. Une prise de courant.
4. Un tournevis Phillips ou une perceuse électrique avec
embout Phillips.
• Allumer
Branchez le câble d'alimentation dans le port d'alimentation
micro-USB à l'arrière de l'appareil photo, l'appareil photo
s'allumera automatiquement, attendez 30 secondes, le
voyant clignotera lentement en rouge, ce qui signifie que le
démarrage est terminé.
Veuillez lire attentivement ce manuel avant d'utiliser le
produit et conservez-le correctement. Les informations sur
l'étiquette se trouvent sur le côté de la caméra.
Indicateur LED :
Caméra, adaptateur secteur, câble d'alimentation, sac
d'accessoires de montage, guide rapide.
1
2
3
4
5
6

EN
FR
• Connectez l'application Arenti
Scannez le code QR pour télécharger et installer l'application
Arenti. Vous pouvez également rechercher "Arenti" sur App
Store (IOS) ou Play Store (Android). Téléchargez et installez
l'application Arenti. Ouvrez la page d'accueil de l'application,
cliquez sur "+" sur la page supérieure droite. Suivez le guide
sur l'APP pour ajouter la caméra étape par étape.
Une fois la connexion réussie, le voyant est bleu fixe.
Dépannage
• La caméra ne s'allume pas :
1. Essayez d'utiliser une autre prise.
2. Essayez d'utiliser un autre adaptateur/câble d'alimenta-
tion 5 V pour mettre sous tension.
• Impossible de scanner le code QR depuis l'application Arenti :
1. Retirez le film de l'objectif de la caméra.
2. Gardez une distance de 10 à 15 cm (4 à 6 pouces) entre
l'appareil photo et le téléphone portable.
3. Confirmez que le voyant de l'appareil photo est rouge et
clignote lentement.
• Échec de la connexion Wi-Fi :
1. Confirmez que la numérisation du code QR a réussi : après
la numérisation, l'appareil photo émet un son d'invite et
l'indicateur de réseau devient rouge clignotant rapidement.
2. Assurez-vous d'entrer le mot de passe WiFi correct, le mot
de passe WiFi que vous définissez ne contient pas de
caractères spéciaux tels que =\';.
3. Assurez-vous que la bande WiFi répond aux exigences du
réseau de la caméra qui ne prend en charge que 2,4 GHz.
4. Confirmez que la caméra se trouve à proximité du routeur WiFi.
Si cela ne fonctionne pas, veuillez partager la capture d'écran
des paramètres du routeur Wi-Fi et le SN de la caméra
(Recherché sur le corps de la caméra) à support@aren-
ti.com pour obtenir de l'aide.

1m
2m
3m
2m 10m
Installation
EN
FR
Trouvez une position où vous pouvez obtenir le champ de
vision souhaité.
Tenez compte des facteurs ci-dessous :
1. Évitez la lumière directe du soleil.
2. Gardez-le à portée de votre routeur WiFi.
3. Évitez l'avant de la lentille face à la lumière de la plante ou
du porche; Évitez de faire face à une route très fréquentée.
4. Placez-le à 2-3 mètres (79-118 pouces) au-dessus du sol -
suffisamment près pour voir le visage de quelqu'un et lui
parler via la caméra. Assurez-vous que la caméra peut voir ce
que vous voulez voir.
• Installation du support à vis
1. Fixez le support à vis sur le mur avec des vis.
2. Installez l'appareil dans le support et verrouillez-le avec la
vis inférieure.

EN
FR
Conseils d'utilisation de l'appareil photo
• Visualisation vidéo en direct :
Dans l'interface de contrôle de la caméra de l'APP, vous
pouvez visualiser la surveillance de la caméra en temps réel,
ajuster la résolution, capturer des images, enregistrer des
vidéos et faire une conversation bidirectionnelle.
• Vision nocturne infrarouge :
La caméra peut passer automatiquement en mode vision
nocturne (noir et blanc) la nuit en fonction du degré de
changement de la lumière environnante. Avec les lumières
LED infrarouges rouges intégrées, la distance de vision
nocturne peut atteindre 10 mètres et elle peut être vue très
clairement dans l'obscurité.
• Détection de mouvement:
La caméra peut détecter les changements de mouvement
dans la vue de la caméra et envoyer la notification des
changements de mouvement à l'APP.
Réglez à partir de : APP >> Appareil (appuyez sur l'appareil
pour accéder à la page vidéo en direct) >> Paramètres >>
Paramètres d'alerte >> Détection de mouvement.
Paramètre de base
Nom du produit
Capteur d'images
Angle de vue
Sécurité
Température de travail
Stockage local
Taille
Résolution
Du pouvoir
Imperméable
Système d'Exploitation
pris en charge
Connexion sans fil
O2
CMOS 1/2.8'' 3MP
110°
AES-128
−20 °C à 50 °C
Carte Micro SD (jusqu'à 128 Go)
137x65x75mm
2304(H)*1296(V)
CC 5V, 1A
IP65
iOS 9/Android 5.0 et versions supérieures
IEEE802.11b/g/n 2,4 GHz

ENEN
FR
• Comment désactiver l'indicateur LED avec ma caméra ?
Application Arenti >> Appareil (appuyez sur l'appareil pour
accéder à la page vidéo en direct) >> Paramètres >>
Fonction de base >> Indicateur de réseau : désactivez-le.
• Comment changer le WiFi ou mettre à jour le mot de passe
WiFi pour l'appareil ?
Veuillez supprimer la caméra sur l'APP, appuyez sur
"Ajouter", suivez les étapes pour utiliser le nouveau réseau
WIFI pour ajouter à nouveau la caméra.
• Comment partager des appareils avec d'autres ?
APP >> Appareil (appuyez sur l'appareil pour accéder à la
page vidéo en direct) >> Paramètres >> Partage d'appareil
>> Ajouter, suivez le guide pour partager votre appareil.
• Échec de l'accès à la vidéo en direct ou aux invites hors
ligne ?
1. Vérifiez que l'indicateur de réseau de la caméra est allumé.
2. Vérifiez que le réseau WiFi est en bon état et redémarrez le
routeur.
3. Essayez de déplacer la caméra près du routeur et vérifiez à
nouveau.
4. Supprimez la caméra de l'application Arenti et ajoutez-la à
nouveau. Confirmez que l'APP et le firmware de l'appareil
photo sont les dernières versions.
Si cela ne fonctionne pas, veuillez partager l'état de l'indicateur
de caméra et le SN de la caméra (trouver sur le corps de la
FAQ
Précautions
• La température de fonctionnement applicable de ce
produit est de -20℃~50℃, veuillez ne pas l'utiliser dans un
environnement où la température est trop élevée ou trop
basse, utilisez ce produit.
• Pour mieux utiliser ce produit, évitez que l'avant et le côté
de l'objectif soient proches du verre, des murs blancs, etc.
d'objets lumineux, afin que l'image ne soit pas claire à
proximité, sombre ou blanchâtre à distance.

EN
FR
Service après-vente et support technique
• Assurez-vous que la caméra est installée dans la plage
couverte par le signal Wi-Fi et placée le plus loin possible à
l'endroit où le signal est meilleur, et essayez de l'installer à
l'écart des fours métalliques et à micro-ondes susceptibles
d'affecter le signa.
• Accédez aux articles d'assistance, aux vidéos et à la
documentation. www.arenti.com/support/
• Accédez au support à partir de l'application Arenti,
connectez-vous simplement à votre robinet d'application
Arenti pour obtenir de l'aide.
Décrivez le problème de l'appareil photo, informez-nous du
modèle de l'appareil photo et du SN du boîtier de l'appareil
photo. Nous vous répondrons dans les 24h.
Mention légale
Symboles: Courant continu (DC)
Ne jetez pas les piles ou les produits hors d'usage
avec les ordures ménagères (ordures ménagères).
Les substances dangereuses qu'ils sont susceptibles
de contenir peuvent nuire à la santé ou à
l'environnement. Faites reprendre ces produits par
votre commerçant ou utilisez la collecte sélective
des ordures ménagères proposée par votre ville.
Par la présente, Laxihub déclare que l'équipement
radio de type 'O2' est conforme à la directive
2014/53/UE
Le test complet de la déclaration UE de conformité
est disponible à l'adresse Internet : www.laxihub.com

EN
Product beschrijving
NL
1. Microfoon
2. LED-indicator
3. SD-kaartsleuf
4. Resetten
5. Micro-USB
6. Spreker
Constant blauw
Blauw langzaam knipperend
Rood langzaam knipperend
Rood knipperend snel
Verbinding geslaagd
Handmatige configuratiemodus
Wachten om verbinding te maken
Netwerk abnormaal
Netwerkindicator:
Camera instellen
• Wat je nodig hebt:
1. Wifi en een werkende breedband internetverbinding met
een uploadsnelheid van minimaal 2 Mbps.
2. Een telefoon of tablet met iOS 9/Android 5.0 of hoger.
3. Een stopcontact.
4. Een kruiskopschroevendraaier of boormachine met
kruiskopschroevendraaier.
• Inschakelen
Sluit de voedingskabel aan op de Micro-USB-voedingspoort
aan de achterkant van de camera, de camera wordt automa-
tisch ingeschakeld, wacht 30 seconden, het indicatielampje
knippert langzaam rood, wat betekent dat het opstarten is
voltooid.
Lees deze handleiding zorgvuldig door voordat u het
product gebruikt en bewaar deze op de juiste manier.
Labelinformatie bevindt zich aan de zijkant van de camera.
LED-indicator:
Camera, Stroomadapter, Stroomkabel, Tas voor montageac-
cessoires, Beknopte handleiding.
1
2
3
4
5
6

EN
NL
• Verbind de Arenti APP
Scan de QR-code om de Arenti-app te downloaden en te
installeren. U kunt ook zoeken op "Arenti" in de App Store
(IOS) of Play Store (Android). Download en installeer de
Arenti-app. Open de startpagina van de APP, klik op "+"
rechts bovenaan. Volg de handleiding op de APP om de
camera stap voor stap toe te voegen.
Nadat de verbinding tot stand is gebracht, brandt de
indicator continu blauw.
Probleemoplossen
• Camera gaat niet aan:
1. Probeer een ander stopcontact te gebruiken.
2. Probeer een andere 5V voedingsadapter/kabel te gebruik-
en om op te starten.
• Kan de QR-code van de Arenti APP niet scannen:
1. Verwijder de film van de cameralens.
2. Houd een afstand van 10-15 cm (4-6 inch) tussen de
camera en de mobiele telefoon.
3. Controleer of de camera-indicator langzaam rood knippert.
• Kan wifi niet verbinden:
1. Bevestig dat het scannen van de QR-code is gelukt: na het
scannen laat de camera een prompt geluid horen en de
netwerkindicator wordt snel rood en knippert.
2. Zorg ervoor dat u het juiste wifi-wachtwoord invoert, het
wifi-wachtwoord dat u instelt, bevat geen speciale tekens zoals =\';.
3. Zorg ervoor dat de wifi-band voldoet aan de netwerkv-
ereiste van de camera, die camera ondersteunt alleen 2,4 GHz.
4. Controleer of de camera zich in de buurt van de wifi-router
bevindt.
Als het niet werkt, deel dan de schermafbeelding van de
wifi-routerinstelling en het camera-SN (vinden op camera-

1m
2m
3m
2m 10m
Installatie
EN
NL
Zoek een positie waar u het gewenste gezichtsveld kunt
krijgen.
Houd rekening met de onderstaande factoren:
1. Vermijd direct zonlicht.
2. Houd het binnen het bereik van uw router WiFi.
3. Vermijd dat de voorkant van de lens naar de plant of
veranda gericht is; Vermijd tegenover een drukke weg.
4. Plaats het 2-3 meter (79-118 inch) boven de grond -
dichtbij genoeg om iemands gezicht te zien en met hem of
haar te praten via de camera. Zorg ervoor dat de camera kan
zien wat u wilt zien.
• Installatie met schroefbeugel
1. Bevestig de schroefbeugel aan de muur met schroeven.
2. Installeer het apparaat in de beugel en vergrendel het met
de onderste schroef.

Productnaam
Beeldsensor
Kijkhoek
Veiligheid
Werktemperatuur
Lokale opslag
Maat
Oplossing
Stroom
Waterbestendig
Ondersteund
besturingssysteem
Draadloze verbinding
O2
1/2,8'' 3MP CMOS
110°
AES-128
-20 °C tot 50 °C
Micro SD kaart (tot 128 GB)
137x65x75mm
2304(H)*1296(V)
Gelijkstroom 5V, 1A
IP65
iOS 9 / Android 5.0 en hoger versie
IEEE802.11b/g/n 2,4 GHz
EN
NL
Camera Tips gebruikenphoto
• Live video bekijken:
In de camerabesturingsinterface van APP kunt u de camera-
bewaking in realtime bekijken, de resolutie aanpassen,
afbeeldingen vastleggen, video opnemen en 2-weg praten.
• Infrarood nachtzicht:
De camera kan 's nachts automatisch overschakelen naar de
nachtzichtmodus (zwart-wit), afhankelijk van de mate van
verandering in het omgevingslicht. Met ingebouwde rode
infrarood LED-verlichting kan de nachtzichtafstand 10 meter
bereiken en kan deze in het donker super duidelijk worden
bekeken.
• Bewegingsdetectie:
De camera kan de bewegingsveranderingen in het camera-
beeld detecteren en de melding van de bewegingsveran-
deringen naar de APP pushen.
Instellen van: APP >> Apparaat (tik op apparaat om de live
videopagina te bekijken) >> Instellingen >> Waarschuwing-
sinstellingen >> Bewegingsdetectie.
Basisparameter

ENEN
NL
• Hoe kan ik de LED-indicator uitschakelen met mijn camera?
APP >> Apparaat (tik op apparaat om videopagina live te
zien) >> Instellingen >> Basisfunctie >> Netwerkindicator:
schakel het uit.
• Hoe kan ik WiFi wijzigen of WiFi-wachtwoord bijwerken
voor het apparaat?
Verwijder de camera op de APP, tik op "Toevoegen" en volg
de stappen om het nieuwe WIFI-netwerk te gebruiken om de
camera opnieuw toe te voegen.
•Hoe apparaten delen met anderen?
APP >> Apparaat (Tik op apparaat om videopagina live te
zien) >> Instellingen >> Apparaat delen >> Toevoegen, volg
de gids om uw apparaat te delen.
•Kan de live video of prompts niet offline worden geopend?
1. Controleer of de netwerkindicator van de camera brandt.
2. Controleer of het wifi-netwerk in goede staat is en start de
router opnieuw op.
3. Plaats de camera in de buurt van de router en controleer
opnieuw.
4. Verwijder de camera uit de Arenti APP en voeg hem
opnieuw toe. Controleer of de APP en camerafirmware de
nieuwste versies zijn.
Als het niet werkt, deel dan de status van de camera-indica-
tor en het camera-SN (vinden op camerabody) met
FAQ
Preventieve maatregelen
• De toepasselijke werktemperatuur van dit product is -20
℃~50℃. Gebruik dit product niet in een omgeving waar de
temperatuur te hoog of te laag is.
• Om dit product beter te gebruiken, vermijdt u de voorkant
en zijkant van de lens dicht bij het glas, witte muren, enz.
lichte voorwerpen, om te voorkomen dat het beeld dichtbij,
donker of witachtig in de verte wordt.

EN
NL
• Zorg ervoor dat de camera binnen het bereik van het
Wi-Fi-signaal wordt geïnstalleerd en zo ver mogelijk op de
locatie wordt geplaatst waar het signaal beter is, en probeer
de camera uit de buurt van metalen en magnetrons te
installeren die het signaal kunnen beïnvloeden.
After-sales service en technische ondersteuning
• Toegang tot ondersteuningsartikelen, video's en documen-
tatie. www.arenti.com/support/
• Krijg toegang tot ondersteuning vanuit de Arenti-app, log
gewoon in op uw Arenti-app tik om ondersteuning te
krijgen.
Beschrijf het cameraprobleem, informeer ons over het
cameramodel en de SN van de camerabody. We zullen u
binnen 24 uur antwoorden.
Juridische mededeling
Symbolen: Gelijkstroom (DC)
Gooi batterijen of defecte producten niet bij het
huisvuil (vuilnis). De gevaarlijke stoffen die ze
kunnen bevatten, kunnen schadelijk zijn voor de
gezondheid of het milieu. Laat uw winkelier deze
producten terugnemen of gebruik de selectieve
afvalinzameling die door uw stad wordt voorgesteld.
Hierbij verklaart Laxihub dat het type radioapparatuur
'O2' in overeenstemming is met Richtlijn 2014/53/EU
De volledige test van de EU-conformiteitsverklaring is
beschikbaar op het internetadres: www.laxihub.com
Other manuals for O2
1
Table of contents
Languages:
Other laxihub Security Camera manuals

